Saturday, November 26, 2016

Second-Stab Saturday: Cucumber Boats

Today, we at A Book of Cookrye are venturing into territory we so rarely bother with: little appetizer things!

Cucumber Boats

First, decide how many of these you want to make and therefore how many cucumbers you'll be getting. You can get 8 of these from the average-sized cucumber.
Wash cucumbers and cut off stems. You don't need to cut off either of the rounded ends of the cucumber, just nick off the stem. Cut the cucumbers into 1½"-2" lengths. Then cut each cucumber piece in half lengthwise (or, you know, what would have been lengthwise were the cucumber still intact). If the cucumbers are straight, you can cut them in half lengthwise and then cut them into pieces, but that can be annoyingly tricky if they're curved.
Then cut or scoop out the inside of each piece, leaving a hollow space. You can use a small sharp knife for this, but it's easier with a small metal spoon (even for cutting out the firmer flesh instead of just scooping out the seeds). One of the smaller teaspoons from a set of measuring spoons will do nicely. Don't worry if you accidentally slit or puncture the cucumber skin- unless it's a wide hole, it won't matter.
Fill them however you like. I used shredded extra-sharp Cheddar seasoned with salt and cayenne, with just enough mayonnaise to hold the shreds together.
They will keep overnight in the refrigerator if tightly covered, but the cucumbers will exude a lot of juice as they reach room temperature. If you're going to leave them out on a table for a while, you should find a way to keep them cold- like putting the container in a larger one filled with ice.

As aforementioned, we brought these to Thanksgiving. Being the extremely organized people who plan ahead when provoked, we were getting ingredients less than two days before the big day. It was a strange experience seeing so many people crowded in the baking aisle. Many of them were staring at the flour and sugar sacks like they'd never seen such arcane things in a grocery store. However,  one section of the supermarket that even in the pre-Thanksgiving rush remained as ignored as ever: the vegetables!

Remember the cucumber baskets from when we fed people the cuisine of Depression-era Britain? They had been surprisingly well-liked, so we thought to ourselves: What if we skipped the damn basket handles? As aforementioned, making them into little baskets had resulted in an awful lot of wasted cucumber. Furthermore, cutting vegetables into cutesy baskets gives them a certain air of "I HOPE YOU APPRECIATE ALL THE TIME I SPENT CUTTING ALL OF THESE INTO CUTE SHAPES FOR YOU" which we would rather the food not possess. And so, instead of making theoretically adorable cut them in half and gouged out the insides. Here we must note that while we were at first trying to carefully cut them out with a paring knife, it turns out one of these demitasse spoons Our Mom of Cookrye got works a lot better.

It was so much easier to just have at them with a spoon than it was to use a knife at all- and it worked better, too.
On the left, hacking at the cucumber with a spoon. On the right, carefully using a knife to cut out the inside. You'd think the knife would work better, but it doesn't.

And so, we at A Book of Cookrye were ready to bring these lovely, healthy vegetables to Thanksgiving! However, Our Familye of Cookrye, though most of us are on diets the rest of the year, don't bother with this low-calorie business on Thanksgiving day. Look at the way we do the corn.

 And so, we are going to replace most of the cucumbers with.... this!

In the name of looking out for everyone's health,  we are using light mayonnaise. Having spent about two minutes stirring the cheese with just enough mayo to glue it together, see how simple these things are when you don't care about basket handles?

I'm not going to lie, it was still tedious to hollow out all those cucumber pieces. If you're doing more than two cucumbers, you might want to sit down at a table when you hollow them out instead of standing at a counter. But at least it was easy and there was far less waste of cucumber. Also, it was something to do while waiting out the long baking times on other things- and while very deliberately ignoring the utter mess in the kitchen.

As for how people liked them: They were indeed very popular! I was honestly kind of surprised, since most of the "take your food stuff and glue it together with mayo" type things tend to be these sticky things that taste like mayonnaise. Maybe the trick here is that you don't just put huge amounts of mayo in there, but just enough to make the cheese hold together.
 In the name of not subjecting everyone to dissertations about the food I brought, I didn't bother mentioning that they were tasting the British Depression.
However, while these can be made the night before, it turns out that cucumbers exude a lot of juice when they get warm. Since I just them in a container with only waxed paper between the layers, the ones lower down in the tub got soggy. So, if you are going to stack them in a container (instead of, say, laying them out flat on a platter), you want to be sure that each layer is sitting in a cozy nest of paper towels to soak up whatever juices the cucumbers exude. Also, keep them cold.
Er... yum?

This wateriness kind of surprised me since the cucumber baskets from when we made an entire picnic didn't have this problem. Someone suggested the salt in the filling drew out the cucumber juice, but the picnic ones were also salted and didn't leak like these did. But, when thinking about it, the ones made for the picnic were barely out of the refrigerator for 30 minutes before serving, while these sat out on the table all day.
In addition to packing them with lots of paper towels, you might consider putting whatever container you packed them in in a larger container full of ice. Or, you might salt the cucumbers a few hours beforehand and let them do all their dripping before you put these together.
As a postscript, when faced with the last bits of cheese and also a little bowl of scooped-out cucumber insides, we avoided waste by making a pretty good ham sandwich.

Friday, November 25, 2016

Butterscotch Pie!

Happy day after Thanksgiving! We at A Book of Cookrye had a wonderful time, and hope you did too.
This year's Thanksgiving brought to you by the makers of tinfoil.

This year, among many other pies we made, we were especially pleased to make this one because it looked so, so good.
Great-Grandma P's Butterscotch Pie
3 tbsp butter
1 c brown sugar
3 scalded milk
½ c flour
1 egg yolk
½ cold milk
1 tsp vanilla
1 baked pie shell or graham cracker crust

First, scald the milk by pouring the 3 cups into a pan and place on the stove at medium or medium–low heat. You will need to stir this the entire time so it does not scorch. You are looking for those tiny bubbles that form just before it boils. Do not let it boil because it will ruin the consistency. When those million tiny bubbles form around the edges of the pan (while you are still whisking) take off the burner immediately and set it down to cool. It must cool about 10 minutes before you start the rest.
Melt the butter in a different saucepan. Once it is melted, add in the brown sugar and stir and stir until the sugar has melted and is liquid like. This will take a long time. You will think this is pointless, and that the sugar is going to stay solid no matter what you do to it on the stove. Keep going, stirring constantly and scraping the pot as you go, and it will eventually melt.
Add the scalded milk and incorporate well leaving the heat at medium low. The sugar will be insanely hot, and if you just dump the milk in at once, you will lose all of it in a burst of steam while the sugar all cools down on the spot into shards that never dissolve again. What you want to do is start stirring the sugar really fast, being sure to get both the edges of the pot and the middle of it moving. Then add a splash of milk without slowing down your spoon. Be ready for a lot of steam. Thoroughly stir the sugar for a few seconds and add another splash in the same way. Be sure to scrape the edge of the pot each time. Add the rest of the milk in the same way- after enough has been added, the filling will be thin enough that you can just dump the rest of it in.
Meantime, in a small bowl mix flour, egg yolks, and the cold milk together into a smooth paste – get all those little lumps out or the pudding will be lumpy! Take the pot off the burner so it doesn't scorch while you're doing this.*
Gradually add the mixture to the saucepan, stirring constantly. Once the pudding has thickened, cook for a few minutes more and then take off the stove and add the vanilla. Now, if you have lumps, don’t worry – just use a fine mesh strainer on top of a clean bowl and strain the pudding through! Works every time. Or, put it all through a blender. Press plastic wrap down on the surface, being sure it makes contact with the pudding. This will prevent a skin forming. Then, leave it to cool.
When it's cooled off, stir it to see if there are any lumps you didn't notice when it was hot. If there are lumps and you don't feel like hearing people whine about them, just use a blender. Then, pour the pudding into the pie crust. Refrigerate until you serve it.
You can either eat it plain, grab a tub of Cool Whip and spread it around or, you can make some homemade whipped cream to put on top.
It won't really set to slicing consistency, so A Book of Cookrye recommends doing as Kelli's Kitchen did- put it in individual pie shells instead of a big one.

*If you're better at planning ahead than I am, you might make the flour paste before starting anything else (or while you were waiting 10 minutes for the scalded milk to cool off), so it's ready when you need it. 

Made by Kelli's Kitchen, recipe from Ginger Lemon Girl's great-grandmother

I'd thought this recipe looked divoon ever since the first Pieathlon- and had been meaning to make it for some time. You know how whatever your interest is, you always have some project you've been meaning to get around to? Carpenters have plans waiting to be made, painters have sketches and ideas they keep intending to turn into a finished picture, and we at A Book of Cookrye have recipes that we've been meaning to actually get out and make. And so, we decided to make it for Thanksgiving this year! An aunt and uncle graciously agreed to watch the dog while we were gone all day, and so a pie was in order to leave at their house with her.
We took issue with the first instruction after scalding the milk. You see, we read in one of the cookbooks Our Mom of Cookrye had when she bravely gave us a kitchen education that in order to make butterscotch taste like butterscotch, you have to melt the two together. Otherwise, whatever you create will just taste like buttery brown sugar- which is good, but it's not quite butterscotch. I forget what cookbook it was, but whoever wrote it was almost religious in their insistence on the subject. However, although this goes against what some cookbook writer bashed into my head about butterscotch, this isn't some random recipe fished out of a book. This is from someone's great-grandmother who must have known what she was doing. Therefore, we decided to trust the recipe and see what happened.
If this doesn't work, I will be sad.

Not five minutes into making this, we at A Book of Cookrye were wondering why we let this recipe sit unmade for so long.

Already the kitchen smelled tantalizing and amazing. However, we once again doubted Great-Grandma P's recipe. Every other butterscotch thing we've made, the butter and sugar mix to make some kind of oozy sludge of sweet divinity. This, however, was barely enough melted butter to make the sugar damp.

An inordinate amount of time passed, and the brown sugar clumps went from slightly damp to dried out and tooth-breakingly hard. The recipe clearly said the contents of the pot should be melting, and they were going in exactly the wrong direction. We were about to just move on with the recipe and hope the sugar rocks dissolved in the milk if we stirred it long enough. However, when we stopped stirring to pick up the pot of scalded-and-cooled milk, what should we see but... this!

It's hard to see in the above picture, but if you look closely, you can see some of the sugar looks kind of wet, just to the right of the center. Realizing we should always have faith in great-grandmotherly recipes, we put the pot of milk back down and kept stirring as the brown sugar melted surprisingly fast.

See the puddles starting to form? This made us once again stare at the pot, asking a question that comes up so often in the kitchen:

We had such passionately conflicting feelings over this pot of brown stuff. On the one hand, the kitchen smelled heavenly. The brown sugar had melted into this lovely, velvety-looking stuff that proved we should always have faith in people's great-grandmothers' recipes. On the other hand, the butter slick covering the whole mess made us fear that this would be a really greasy pie.

However, we decided that we had already gotten this far without the recipe telling us a single lie. If we could melt a bunch of dried-out brown sugar rocks into a beautifully smooth sauce, surely we could turn it into a pie that wouldn't make anyone ask "Why all the butter?" And so, we started to pour in the milk that had been waiting on the stove, and suddenly the pot of velvety smooth butterscotch goodness turned into a saucepan of angry spatters and hissing steam.
That milk is definitely scalded now.

It turns out that cooking something for a long time over a hot stove will make it really fricken hot. I've actually seen recipes like this before, and there's a trick to actually getting this to work. If you add all of the liquid to your way-hotter-than-boiling pot of sugar stuff, you'll have sugar shards floating in it that never dissolve. Instead, you have to beat the crap out of the pot's contents while adding the liquid in tiny splashes. If your spoon has a short handle, you may well burn your arm. This pie was one of the last ones we got around to making and therefore we were getting really tired, but nearly scalding a forearm is a great way to snap out of sleepiness.
Eventually, the sugar stuff stops putting up a steam fight, leaving the milk ready to easily stir in. By this point, you may possibly have also saved a lot of money on waxing your arms.

Now that we had successfully added the milk to the pot of superheated sugar sludge with only minor burns, we sampled the pot of stuff and..... yes. If you were to ask how this tasted, the answer is yes.

At this point, the recipe has us thickening the pot of butterscotch stuff in the same way we would gravy. Getting one of those flour pastes to be smooth and lumpless is one of the most tedious things that comes up in cooking. Once again, we had to do a lot of adding one thing in very small amounts to a bowl of stuff. It seems like half of this recipe is stirring a pot of sugar waiting for it to do something, and the other half is gradually adding things in tiny splashes to bowls of stuff.

Yep, the flour really doesn't want to mix with the milk. If you just dump the milk in all at once, the flour gets defensive and forms groups to better defend itself against the onslaught. Instead, like we did when we made the blueberry boy bait, As you can see, we beat in just enough milk to make a sticky paste. Like, just barely enough that we wouldn't have a bowl of crumbly things. It was tough, and more elastic than liquid. Now, we're adding a teeny splash more...

It looks uneven and lumpy, but we beat and flogged this until it had no more clumps of dried flour in it. And it's starting to look like it might actually work all right. It's gone from this really sticky, almost clay-like stuff to... er... this.
Incidentally, we would like to thank whoever put a cocktail whisk into a gift basket Our Mom of Cookrye got as a teacher gift some time ago.

It's still gummy and still has really weird elastic properties, but believe it or not, we can keep incrementally adding the rest of the milk and... tada!

And so, after we finally got to the point of gradually stirring the flour paste into the pot of butterscotch, we had... this!

Look at it! It's so thick and creamy! And... you just have no idea how good this is unless you happen to have also made this recipe yourself. And so, we pressed on the plastic wrap to prevent a leathery skin ruining the butterscotch pot of divine goodness as it cooled.

Had we obsessively removed every little air bubble in there, it would have worked perfectly. See those bubbles under the plastic wrap? Somehow, the pudding got little skin spots under every one.

We actually didn't notice the skin specks until we stirred the pudding up, at which point they manifested themselves as weird semi-gelatinous lumps.

Fortunately, there was a very easy fix to this problem.

Muttering to myself that beating the crap out of that flour paste to make sure it was as smooth as I could get it was a waste of time if I was going to have to get out the blender anyway, I turned the lumpy pudding into the velvety butterscotch goodness it had been before I tried to cool it off.

It never set to the point that you could slice it. Rather than being a pie, it was more of a pudding that happened to be in a pie crust. Apparently, we should have put it in the refrigerator rather than just leaving it out. But you know what? It's really good. Like, really good.

Wednesday, November 23, 2016

Happy Thanksgiving from A Book of Cookrye!

'Tis that glorious day here in Glorious America, where we eat massive amounts of food so we can have energy for the Black Friday stampedes! Every year, Our Familye of Cookrye convenes (and there are a lot of us) and it is wonderful. We got assigned to bring desserts, and boy did we deliver!
The cucumbers were in the refrigerator when the group photo was taken.

Unbeknownst to any of my relatives, they get to try two recipes I've been meaning to foist on someone! First, they are going to, without prior warning, eat British foods from the Depression!  Did you recognize those cucumbers when they're stripped of their basket handles?  After that, seen in the above photo at the top right, we have brought our second attempt at cinnamon pie! We don't know how anyone will like it, but at least unlike last time, the pie contains no scrambled eggs.
Rounding out all that we bring this year: chess pie at the bottom right (my grandmother likes it a lot), and lemon squares lurking way in the back (as previously mentioned, lemony things are very popular in my family).
The leftmost pie with the kind of unfortunate shade of brown (it looks a bit too close to the world's ugliest color for my liking) is to be presented to my aunt who's babysitting the dog while we are gone all day. Despite the unfortunate color, it's actually butterscotch. I don't know how they'll like it, but the pot was very thoroughly spit-polished before washing.
This year, we at A Book of Cookrye are thankful for many things- employment (even if it is sporadic), friends, family, and the commuter rail that lets us avoid being trapped in traffic every time we want to go to work 30 miles away. As you can see below, we would like to be grateful for a working dishwasher, but that will have to wait until at least next year.

Happy Thanksgiving, everyone!

Wednesday, November 16, 2016

Pumpkin Spice Latte Brownies: or, The birth of a recipe

It's after Halloween, and Christmas has actually gotten a delayed start this year. The traditional American Christmas shopping season starts in August and has since before both the world wars. But in 2016, the fake pine, fake snow, and aggressive cinnamon fumes didn't appear in stores near me until November. It appears the absurdity of this year's election upstaged Christmas (which is astonishing given how many companies depend on holly jolly spending). Truly, every cloud has a silver lining- or at least a smoky gray one. Christmas is just a little more than two months away, and no one has managed to get enough airtime on any major network to shout about The War On ChristmasTM this year. Only one angry pamphlet about how some organization needs a six-figure donation to "Keep Christ In Christmas" has arrived in the mail. All of America's outrage seems aimed at the two blondes still fighting over who gets to spend the next four years at a lectern saying "My Fellow Americans," and no one has any left to dump on retail workers who utter "Happy Holidays" instead of "Merry Christmas."
We at A Book of Cookrye are celebrating this unexpected extension of autumn with what marketers have made into the defining fall flavor: pumpkin spice!
I so wanted to dress as Pumpkin Spice for Halloween, but don't have any Uggs, couldn't borrow them from anyone, and was not about to spend that kind of money for a one-night costume.

Yes indeed, we are making pumpkin spice brownies.
Pumpkin Spice Latte Brownies
¼ c margarine
1½ c sugar
6 tbsp pumpkin
1 tsp mace
½ tsp salt
¾ tsp baking powder
1¼ c flour
1½ tsp cinnamon
1 tsp allspice
¾ tsp nutmeg
2 heaping tbsp instant coffee or espresso

Heat oven to 350°. Line a 9" round or 8" square pan with foil, then grease it.
If the coffee is in crystals rather than powder, pulverize it. You can just put it in a little bowl or cup and press it with your finger. Stir together the flour and baking powder.
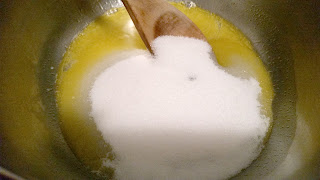
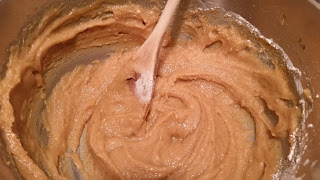
Melt the margarine. Stir in the sugar, then the mace and salt. Add the pumpkin, beat thoroughly. Lastly, stir in the flour.
Spoon half of the batter in random places all over the pan. Stir the coffee, nutmeg, allspice, and cinnamon into the remaining batter. Spoon it into the gaps and voids that remain in the pan. Even out the batter and close any gaps without mixing the two colors. Using a knife (or the spoon handle), swirl the batter, smoothing as you go.
Bake 25-30 minutes depending on how firm you want them, and cut while hot.


This actually took a lot of effort as we couldn't find any pumpkin spice brownie recipes online. There are a lot of recipes for chocolate brownies that contain canned pumpkin, and a lot of "pumpkin spice swirl" brownie recipes in which you basically make pumpkin pie filling and swirl it into chocolate brownie batter. Yet it seems no one has put in a recipe for pumpkin-spice flavored brownies. This surprised me almost as much as when I found out two of the biggest Internet food crazes have not collided to give us pumpkin-spice bacon (seriously, no one makes or sells it). And so, we decided to dig out a recipe for blondies and see if we couldn't twist it into pumpkin spice brownies. We were going to make pumpkin spice brownies or go through many cans of pumpkin while failing at it.
Our first attempt was based on some rumor making its way through Facebook right now. Apparently, if you dump a can of pumpkin and a box of brownie mix into a bowl, you end up with pumpkin brownies. Further research found this website of health nuts claiming you can can substitute canned pumpkin for the eggs and whatever fat went into a dessert recipe. Attempting that went exactly as expected.
We might have overdone it on the molasses here...

They don't look bad, but they were really gummy and rubbery. They actually tasted all right, but brownies should not bounce. However, we will note that they refused to go stale, not even after being left out on the counter for three days. Instead, they turned almost bread-like. So if for some reason you want to make dessert three days ahead and just leave it out, do try this substitution.

All right, this brings us to trial #2. With one exception, every good brownie recipe we've ever made contains a lot of butter. So, we reasoned, why not put the butter back in and only use pumpkin in place of the eggs? I mean, clearly removing the eggs didn't turn these brownies into inedible ruins- they were nearly something I'd actually admit to having made. Also, we decided to change out the brown sugar for white.
Take your healthy substitutes and shove them.

In the name of experimentation, we carefully considered butter vs. margarine vs. shortening instead of just picking one at random. Our first choice was butter because that is the default in all that we bake. However, the original recipe we are dickering with calls for shortening which does tend to make for more soft and gooey brownies. But shortening is just... well, it tastes like nothing but solid grease when you melt it. And I always feel kind of guilty whenever I put a huge glob of it in anything. The next choice was butter. We were about to melt the butter to begin the recipe when we remembered what happened when we accidentally ran out of butter, made a batch of brownies with margarine, and inadvertently ended up experimenting and finding out the difference between the two.

Therefore, margarine looked like the best choice.
This being pumpkin spice brownies, we then needed to add the spices. This is not the time to be shy with shakers; no one has ever said how much they like pumpkin-light-amount-of-seasonings.

And now, we're getting in touch with white girls across America. Bring forth the pumpkin!

That's... not a lot of pumpkin. If one is making banana bread, one tends to put a lot of banana in it. If one is making zucchini bread, one pulverizes as much zucchinis as one can get away with. But this is barely any pumpkin. It barely turned the batter orange.

Is it really pumpkin spice if it's not that trademarked shade of orange? All we have is a bowl of... brown. Maybe the flour would lighten it into a more correct color.
Well that's a little better.

At this point, we had the epiphany that led put the latte in the pumpkin spice latte brownies. Why make pumpkin spice brownies when we can make pumpkin spice latte brownies? It'd be as easy as adding instant coffee! However, we thought on further consideration, if we dump in coffee to make them into pumpkin spice latte brownies, we will never know how the pumpkin spice not-latte brownies would have turned out. We decided to do like we did with the maraschino party cake and split the difference. That way, we could try both without having to make two batches of brownies.

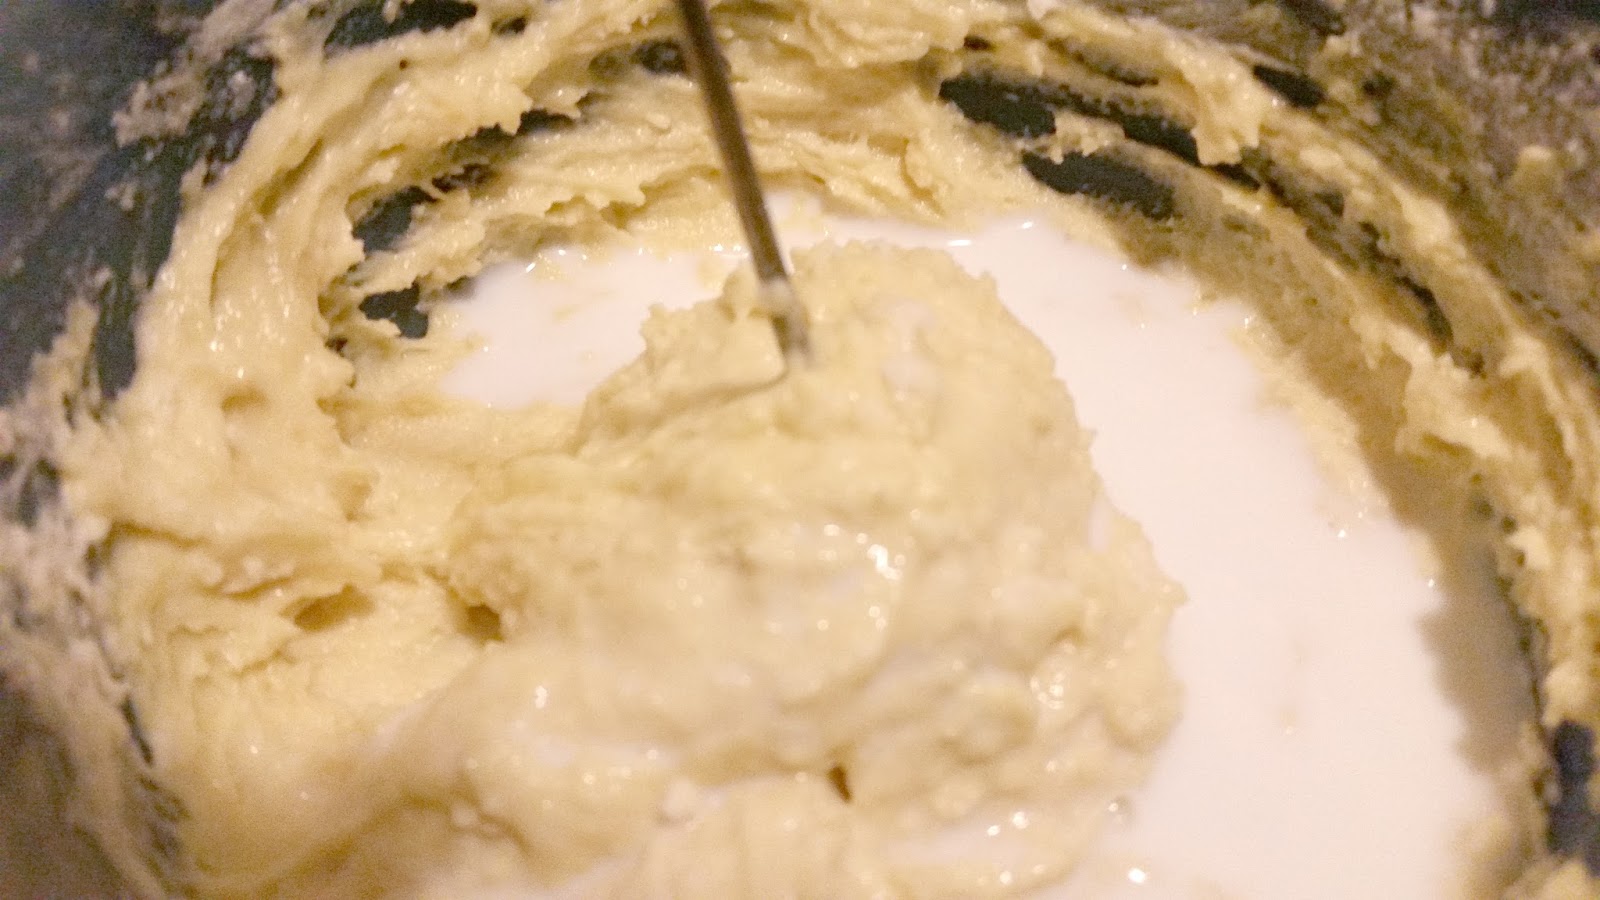
Dividing up the batter was easier than we thought it would be. The batter was thick enough we didn't even need to get out a second bowl (which we would then have to wash) to split it in half. And so, with a couple spoonfuls of pulverized coffee granules, we prepared to put the latte in pumpkin spice latte.

I can't lie, this tasted insanely good. And look how tantalizingly oozy and thick the batter is! However, adding the coffee powder ruined the correct pumpkin spice shade of orange. Worse, it didn't at least turn it a pretty shade of brown.

Seeing the stripe running down the center of the pan made us think- do we really have to do one or the other? Since we didn't have to do any extra work or get out any more dishes to make both pumpkin spice and pumpkin spice latte, it'd be the easiest thing in the world to just swirl the two together.

Well, we got the brownies into the oven, and they looked promising indeed. Both batters had tasted insanely good, and both of them looked like a batter should when we got it into the oven. Then, what should we see patiently waiting to go into the mixing bowl but this?
GAAAAAAAAH!

Well, we said to ourselves, it was too late to add eggs now. The batter was already baking. Furthermore, it had at least looked like brownie batter and not somehow wrong. Lastly, even if this did fail, we at least had cut the recipe down and therefore would not end up wasting a lot of ingredients.

We tentatively removed them from the oven and waited for them to cool. They looked all right, if slightly greasy. But the heck would we find when cutting them?

Brownies! Delicious, gooey, crackly-topped brownies! We were ecstatic as we ate one as soon as it had cooled enough not to cause burns. Sure, they were almost a soft paste than actual baked goods, but they would surely firm up as they cooled.
...or so we thought. As they cooled off, they proved not to be baked goods so much as a semi-set paste rather like most of our carrot cake failures and the still-regretted Diet Coke cake. We could have mashed the contents of the pan into a paste ball like this:
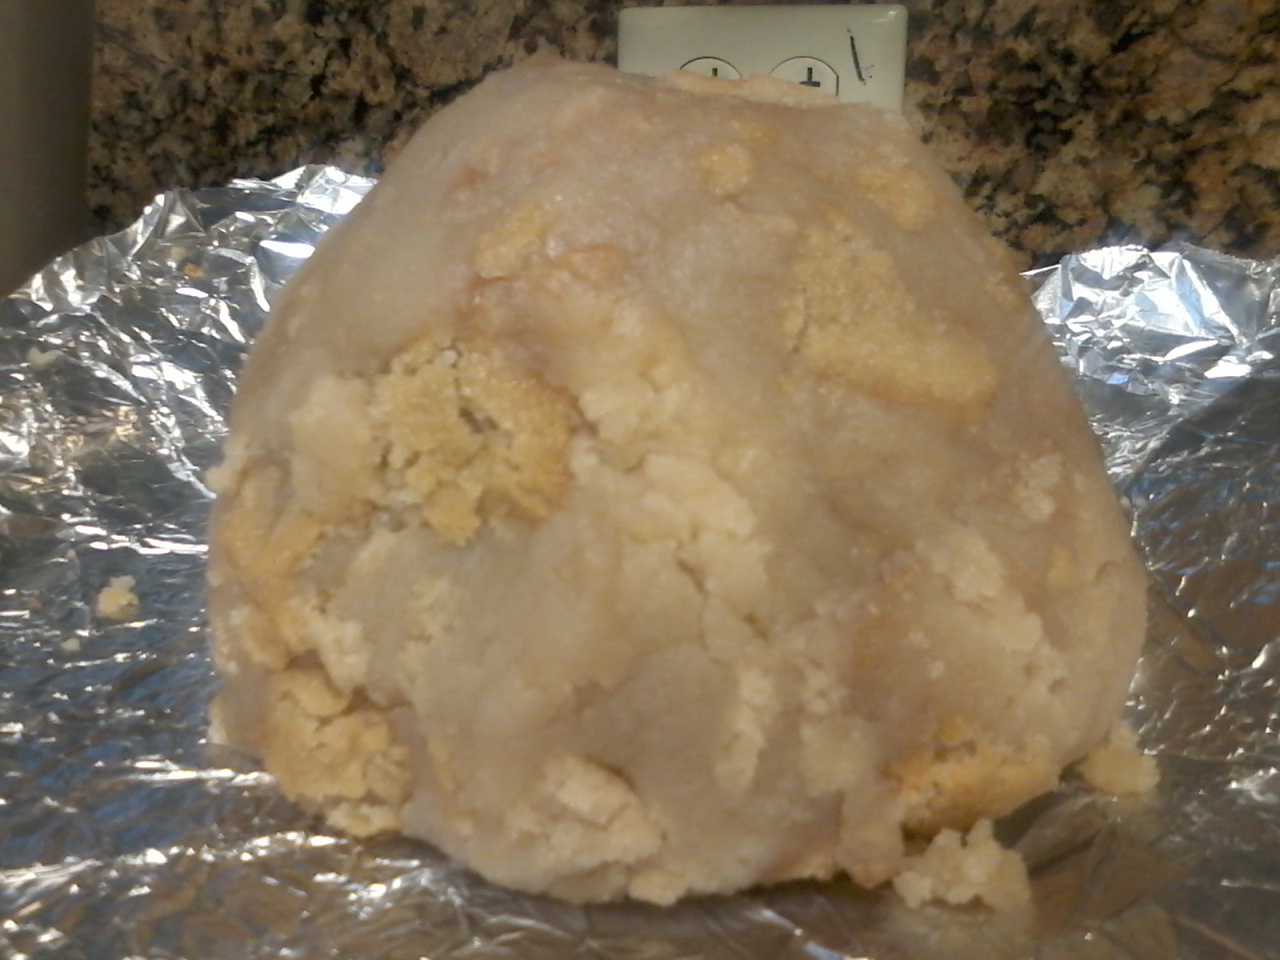
It actually makes better Play-Doh than those recipes for homemade Play-Doh.

The problem, we concluded, must be an excess of butter. It's not that we object to buttery desserts, but these were really greasy. They had failed in exactly the same way as many abysmal carrot cakes, and all of those had so much oil in them that they were more fat-flour paste than cakes. And so, we reduced the margarine.
While we were at attempting to fix the recipe, we increased all the ingredients because the last batch of brownies had been pathetically thin- and that was just one dinky round pan, so we couldn't even get out a smaller one. Doubling the recipe would have been too much for one pan, so we one-and-a-half'ed it instead. Also, because the idea had seemed so tantalizing, we decided to make them swirly! As aforementioned, the batter was very easy to divide in half. We didn't have to get out a second bowl which would need washing.

And so, having brought out the instant coffee, we produced swirly brownies!

That's a real letdown of a swirly pattern. You can barely tell it's there. It was even less visible when they were done. Seriously, you have to closely examine it to see that these are in fact supposed to be swirly brownies.

Well, they may not look pretty and swirly, but that wouldn't matter if they actually tasted good. They certainly looked delicious.

However, they were just as paste-like as the batch before. They weren't greasy like the previous attempt, but they were pumpkin-spice modeling clay nonetheless. And I know it wasn't from underbaking as they were in the oven until the edges burned. That said, they tasted amazing, so we deemed this endeavor worth pursuing into...
...Attempt four! If they were too paste-like and the problem was no longer excess grease, perhaps more flour is needed? Also, while we were at it, we really didn't like how invisible the marbling had been. I mean, what's the point of spending all that time (like, an entire two minutes) doing swirly patterns if baking renders them invisible? And so, we stole a page from RetroRuth of Mid-Century Menu, who made a pumpkin pie with mace instead of cinnamon which was apparently extremely orange instead of an orange-ish brown. Mace is expensive, but we already had a shaker of it which has followed us ever since we made snow muffins. If it has gathered dust and roach droppings this long, no one would miss it if we used the entire shaker in successive batches of pumpkin-spice experimentation. Instead of adding all the spices at once, we would add only mace to the batter. Then, once half of it was spooned into the pan, we would add all the other, browner spices with the coffee. 

We should have known this wouldn't be the batch that sent us running into the street shouting Eureka when the batter was thick enough that swirling it made holes.

However, our spice-splitting efforts paid off in the form of visible marbliness! Granted, it's the same color as the sides of the '70s TV lurking in the back so many people's old photos, but at least you can see it.

However, while we had fixed the pastiness in this batch, the greasiness in the batch before, and the gumminess in the batch before that, these were bland. You couldn't taste the pumpkin or the coffee. We had taken a promising recipe and turned it into a pain-in-the-ass spice cake.
By now, this was a challenge, which brings us to... attempt #5!
If the most recent batch had too much flour in it, and the batch before too little, we changed the amount of flour to be halfway between the two. Also, we added a lot more coffee granules so the dark stripes would be really dark- besides, you could barely taste the coffee in the previous batch.

We hadn't tasted them yet, but at least they looked pretty.
As someone said when I told him what I was making, "You're making white girl chow?"
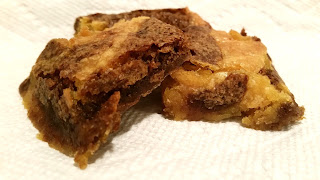
And.. heck yes! We have success! They taste like lovely swirls of coffee and pumpkin. They're chewy, but not like paste. Sometimes experimentation pays off. Happy Fall, everyone! You can contact all of us at A Book of Cookrye using the address below: