Saturday, February 5, 2022

Jacket Potatoes: or, Baked potatoes when you want to run your oven for a very long time

 It's cold out here, which means that we at A Book of Cookrye are getting excited about baked potatoes! I've seen a lot of people rhapsodize about "jacket potatoes," which I had not heard of. I imagined it to be a cute dish of miniature-sized potatoes served in their skins with herbs all over them. I looked them up and found out that the term is simply Britspeak for baked potatoes. However, people across the Atlantic they seem to get a lot more excited about baked potatoes than we do here. This prompted us to ask: do they bake their potatoes differently over there? 

Turns out, they do!

Jacket Potatoes

Heat oven to 400°.
Cut a cross into the top of each potato. Set directly on the oven rack. Bake for about 1½-2 hours. When the potatoes are baked soft and the skin is crackly, remove from the oven and re-cut the slits on top. Bake 10 minutes more. Serve with whatever you like on your baked potatoes.
If desired, rub the skins with cooking oil and salt before baking to make them even crispier.

Source: Cup of Jo

For obvious reasons, we would not ordinarily fire up the oven to 400 degrees (that's around 205° for all our Celsius friends) for two hours just for some potatoes. It's an energy extravagance that perhaps makes more sense in the UK, where it's apparently chilly enough that trophy kitchens often display a half-ton cast iron stove that's always turned on and heating up the place. 

However, the temperature outside recently dropped to well below freezing, and it seemed like the perfect time to run the oven to unnecessarily high temperatures for far too long a time. Instead of putting the oven in battle against the air conditioning, we would cozy up the kitchen. Also, in Texas you just never know if you'll still have electricity when it snows, so you have to enjoy it while it lasts.

The instructions are very short, but they are a few sentences longer than my customary method of perforating the spud with a fork and then microwaving it. The baked potato is truly one of the simplest foods in existence. Therefore, people can get hilariously religious about the One True Way to make them. 

If you think people get snobby about the correct preparation of things like with extravagantly long French names and corresponding prices, you need to read the surprisingly angry arguments about the correct way to make cheap and easy foods. For example, people get passionate the right and wrong way to make a grilled cheese. The cheddar vs. processed cheese fights can go on for pages, and that's before we get to the bitter dispute on whether an errant slice of tomato turns it into a melt or if it's still grilled cheese. Where I live, people will say they're above such bickering.... and then launch into sermons about proper barbecue techniques. It's almost as fun to read as the everlasting debate on whether a hot dog is a sandwich. 

Bringing this back to today's venture, people can have very passionate feelings about the correct way to insert a potato in the oven. The "floury vs waxy" dispute can go on longer than it takes to actually bake a potato. Indeed, people can argue about correct versus blasphemous spud-baking methods for longer than it takes to bake a potato in a woodstove, and that includes the time required to build the fire yourself.

We are instructed to first cut a cross on top of the potatoes. A paring knife would of course be perfect for this, but I left mine in my other purse. 

We started keeping it in the silverware drawer because it's surprisingly convenient.


Well, that was quick enough! I guess now we merely put them into the oven. Normally I wouldn't heat up an entire oven for a few spuds, but I've been wanting to try this method ever since I read a lot of improbably enthusiastic prose about them. I don't know anyone who gets that excited about a baked potato around here, so perhaps we are doing it wrong. Also if you realize that you're actually excited about a new (to you) way to bake potatoes, you just embrace the fact that your entertainment doesn't cost much sometimes.

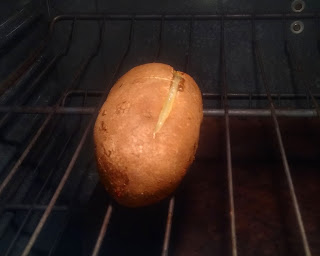
If you look very closely, you can see the cuts.

After a very short time, the cuts began to widen as the spuds shrank.

Ever since we found the baking stone and put pita bread on it, we decided to just leave it there.

Don't the potatoes look lonely in such a big, empty oven? It seems foolish to heat up an entire oven for spuds. Even if you have a smaller oven in the wall, it's a lot of empty space to heat up. Baking your potatoes in a more moderate oven, as we generally do on this side of the Atlantic, allows you to put the rest of dinner in there with them. 

One of the spuds started foaming a little. I do find it strange that the others did not.


We are instructed to remove them from the oven when they're practically done, re-cut them, and return them. Which I did, but I don't know if it made any difference. I thought that maybe the starchy interior of the potato melts back shut under the skin or something, but that didn't happen. Nevertheless, the hot cross spuds were crispy and done.


If you're going to do these for yourself, I suggest you cut them from end to end instead of just in the middle like I did with these. However, if we carefully lift up the flaps and pull these open, we are first struck by how the potato skin nearly isn't crispy and crackly but crunchy. Second, I've heard people wax poetic about fluffy baked potatoes, but this is the first time I've seen one.

You can better see the inner fluffiness when you really split the spud open. 

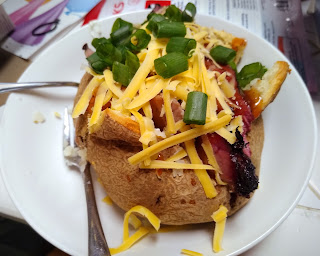
Apparently it's customary to serve these with a lot of butter and suchlike on top. However, on this side of the Atlantic we have invented the loaded baked potato.

There's meat somewhere under all that cheese.

I would only make these in the winter when the oven heat would improve the house. But with that said, I definitely recommend making these! It's so simple but so, so good. We made them again with a bit of oil and salt rubbed on them before baking, and they were even better.

Monday, January 17, 2022

Pecan Rolls: or, Baking with Elizabeth Dole

Today's recipe begins with a request. 

Usually in the weeks after Christmas, I'm in the mood for nothing but green salads and light vegetables until I recover from the delicious onslaught. Other people in the house disagree, and there was an overall droop in household mood after the last of the Christmas cookies vanished. (I don't even know where the cookies came from, they just appeared on the counter in the days leading up to December 25.)

One person said in particular he liked the pecan balls that had made an all-too-brief appearance in a gallon bag of assorted cookies that, as far as I can tell, appeared anonymously in the kitchen while I was asleep. I half-lied and said I had a recipe. The lie here is that I implied that I had actually made the recipe before. In reality, I decided this was as good a time as any to dredge up the remains of First Lady Bakeoffs.

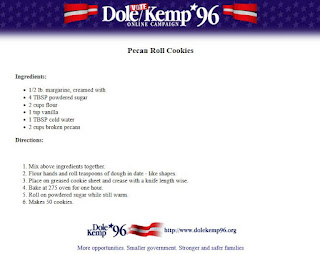
In 1996, you had to stare at a blank screen while this slowly filled the page.

Pecan Roll Cookies
1 c margarine
4 tbsp powdered sugar
2 c flour
1 tsp vanilla
1 tbsp cold water
2 c broken pecans

Heat oven to 275°.
Cream the margarine and powdered sugar, beating until very light. Stir in the water and vanilla. When mixed, add the flour. Lastly, mix in the pecans.
Coat your hands with flour and roll teaspoon-sized pieces of dough into date-like shapes. Place on greased cookie sheet and crease with a knife length wise.†
Bake at 275 oven for one hour.* While they're baking, put a thin layer of powdered sugar in a medium-sized container.
Set the cookies on top of the powdered sugar as soon as they are baked. Cover them in additional powdered sugar and leave to cool. (You can do the cookies in layers instead of covering a big tray with powdered sugar.)
Remove from the powdered sugar when they are completely cooled off.
Makes 50 cookies.

*We suggest 45 minutes instead.
†We prefer half-tablespoon sized balls instead of shaping them as the original recipe says. If your measuring spoon set doesn't have a half-tablespoon, just make them a little smaller than bite-size.

Source: Dole Kemp '96, archived by 4President

In 1996, the First Lady Bakeoff still got a lot of space in the newspaper, Bill Clinton was running into his second term, and Hillary Clinton's recipe was about to defeat yet another political cookie. We've previously discussed the history of the First Lady bakeoff, and will only note that you can see the winner of the 1996 cookie contest just from the name of today's recipe. You will not beat chocolate chips in a bakeoff if you bring nut rolls.


It appears 1996 was the year of the butterless bakeoff. Hillary Clinton would once again ride a victory train on shortening-greased rails. Elizabeth Dole would use margarine to become, as they euphemistically say, first runner-up. Though perhaps she was just as uninterested in a cookie contest as Hillary was. Her Wikipedia page shows a very long political career which suggests that regardless of whether enjoyed baking, she likely had little interest in a public domestic-science contest.


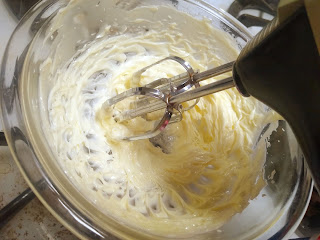
At first I beat the butter and rather small allotment of powdered sugar with a spoon for a little bit. Then I looked at the recipe to see what's next and saw that we have no leaveners in it. That means that, like the waffle iron cookies before them, the only leavening in this recipe is your effort. To properly aerate your dough-in-progress, you could take inspiration from Fanny Cradock. She would stare at the television camera and tell you to think of someone you've never really liked (but you're too well-bred to say anything) so you take it out on your cooking. Or, you could get out the power tools.

I've spent a blissful year with a dishwasher, and yet I still have to remind myself that I no longer need to ask myself if it'll be worth the bother of hand-washing the beaters. 

And here we get to the ingredient that gave me pause in this recipe: tap water. Granted, it's only a little spoonful, but I'm not used to seeing people add water to cookies. I'm guessing that the dough was a bit crumbly without it. 


There. Now that it's all mixed, you'd never guess that we watered down the cookies.


After adding the flour, the cookie dough was surprisingly bland. I'm guessing it's because I used butter instead of margarine. We purchased margarine for the cookie recipe on Maxine Menster's grave, but no one cut today's recipe into stone.  This may have been a mistake, because butter just doesn't have that artificially intensified butter flavor that margarine does. I had added a bit of salt to make up for its absence in our margarine-free cookies, but they still tasted a bit blank.


Well, as promised, we put pecans in these. The chopped pecans cost less than the intact ones, meaning that for once I could economize while also doing less work. At this point, the person who instigated this recipe came into the kitchen. It was so sweet to see his face light up and say "Ahh, my wish is being granted!"

And now we get to the shaping of them. The original recipe tells you to basically shape teaspoons of this into little pecans. I made a few according to the original specification, but I like these better when they're shaped like spheres. They just seem to have a nicer texture after baking. You can see that after making a few teaspoon-sized balls, I got tired of dealing with all these tedious teaspoons and got out a tablespoon instead. (For those of you who live in metric countries, a tablespoon is three teaspoons, meaning I tripled the cookie size.) 

I suspect that Elizabeth Dole used generous teaspoons of dough rather than carefully-measured ones. You can see that we got two dozen cookies here, which is just about half what the recipe told us it would yield. Given that we cut the recipe in half, you would think that we would have far fewer cookies since we made about half of them triple-sized.


Long before the cookies were done, the smell was already taking over the house. They also already had that distinctively toasty overtone that tells you your cookies are no longer hot dough. Honestly, they smelled like they were done long before the specified one hour of baking time elapsed. But who am I to argue with would-have-been First Ladies? I figured these are probably supposed to dry out like biscotti, and therefore they should stay in the oven the whole time. They puffed up a lot more than I expected for cookies with no leavening. Maybe the water turned to steam early enough to puff out the dough a bit before it all baked and hardened.

Figuring that they very likely would not burn at such a low temperature unless I baked them overnight, I did my best to ignore the wonderful intermingling smells of roasting pecans and nearly-baked cookies. The house smelled a bit like those nut roasters you see at carnivals who sell barely-cooled candied nuts.

I should note that the recipe claims to yield 50 cookies. We're halving the recipe, so in theory we should get 25 cookies (minus however much cookie dough mysteriously disappears before it can get baked). We made about half of the cookies to the original specified one-teaspoon size, then decided we could be done baking a lot sooner if we tripled the cookie size by using a tablespoon instead. 

Nevertheless, we got two dozen cookies, which is one short of the 25 cookies we should have gotten had we made all the dough into the tiny size from the original recipe. In other words, the recipe says "one teaspoon" but I think that you're supposed to make them a lot bigger.

The recipe has us rolling the cookies in powdered sugar. In case you didn't know, that is absolutely not the way to make these things right. What you really want to do is bury them in powdered sugar immediately out of the oven and leave them there until they cool off. Anyone who does anything less is totally missing the point.

Yes, you will find that powdered sugar is the culinary equivalent of glitter- it gets everywhere and you can never clean it from every last corner and crevice it got into. And you will probably use half a bag of the stuff properly immersing the cookies (I sift it and then put it back into the bag afterward). But it really is the only way to get these cookies to be absolutely perfect. You will, however, have a surprisingly hard time finding all of the cookies when it's time to gently lift them out of their sugar bath.


---I couldn't resist the tantalization after the long wait. When the timer went off, I entered the kitchen to find that the whole room smelled powerfully like those burnt-sugar pecans you can get at outdoor festivals. After dropping them into the powdered sugar, I waited barely a minute before plucking out one of the smaller ones and tasting it. Where the cookie dough had been a bit bland, the cookies were a crispy burst of delicious toasted nutty flavor that almost crumbled to flavorful powder as soon as you bit into them. 


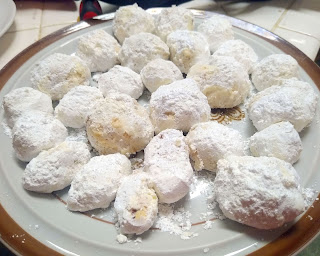
Above, we see a few of the cookies shaped according to Elizabeth Dole's specification (those are the more oval-looking ones on the front left of the plate). We then have some balls, measured out with the same teaspoon as I used to make the pecan-shaped ones. And of course, we have the big mega-cookies when I got tired of making so many little ones. 

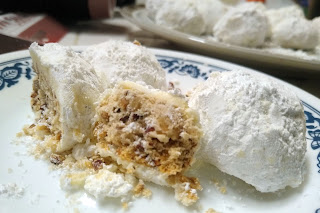
Below, we see some cookies baked exactly as specified. I tried to break one in half to show the middle, and this happened.

So yeah, these cookies are a bit more delicate than I thought. After an hour of drying out in the oven, I expected something a lot harder- like cookie croutons or something. Instead, you get these delicate cookies that just barely hold it together until you eat them- and I mean that in the best, we-are-making-this-recipe-again way possible. However, the consensus was that these cookies, while delicious, were perhaps a bit dry. If we (more carefully this time) break one in half, we see that they didn't just brown on the outside like most baked things do. They turned the color of medium toast from outside to center.

Despite the dryness, everyone kept pecking at the cookie plate until it emptied in far less time than it should have. However, one person noted that perhaps I could make them a bit smaller. However, one teaspoon was a bit puny. I used the half-tablespoon instead. 


Ah, perfection! I also baked them a bit shorter. At 45 minutes, the cookies are baked through and crispy, but not so dry. For this batch, the more finely pulverized pecans were on sale, so that's what we got. But I'm going to suggest you treat yourself and get the pecans that are broken up rather than finely chopped. 

In sum, I can tell why Elizabeth Dole sent in this recipe. It's so good I already made it multiple times--- by request/demand of others. I can also see why Hillary Clinton won the bakeoff. No amount of powdered sugar can beat chocolate chips in America.


On a closing note, last month on the 17th, we finally brought music into the kitchen! It's so nice to be put on lively tunes when making supper.


It turns out that a lot of record stores will just let you take home large boxes of 78s with the purchase of a phonograph. I came into the living room to see this stunning example of the "attention, students" type of record player and a shoebox of lovely music waiting to be played on it. After decades of grinding out the audio tracks to filmstrips about the life cycle of earthworms and the history of Wisconsin, it's now playing actual music that people like. 

Saturday, December 25, 2021

Cream buns: or Baking choux with Fanny Cradock

Even when I'm evading the holiday, Christmas always makes me want to make Fanny Cradock recipes. We have made every species in her Christmas bird episode (see the chicken here, the duck here, and the turkey here). And today, we make the most dreamy way to make luxurious desserts while barely spending any grocery money! If you think this is an exaggeration, this is literally everything we are using for today's recipe. (Well, everything except the ingredients for the filling and icing at any rate.)
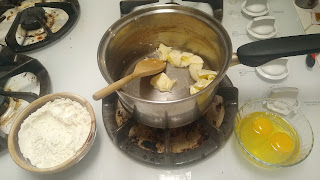
Now that a dishwasher has entered my life, I can measure out ingredients without handwashing a pile of tiny bowls.

Today, we turn to her episode on petits fours to make this!

Choux Buns
2 oz butter*
4½ oz water (½ cup plus 1 tbsp)
2½ oz self-rising flour† (½ cup plus 2 tbsp)
2 eggs

If you have a pot that you can use an electric mixer in without scratching it, use it.
Melt the butter in the water in a small pot over medium heat, then turn up the burner until it boils very hard. Dump in the flour all at once, keeping the burner at high heat. When the boiling water starts to bubble right over the flour (this should only take a few seconds), remove from heat and beat hard until smooth.
Switch to a hand mixer if it won't scratch your pot. Add the eggs, one at a time, beating the mixture very hard until completely smooth after each one.
Put the dough in a piping bag with a wide tip (one-half to one inch). Leave it out at room temperature until it cools completely. If you don't, you will have hot goo in the middle of your buns.
When the choux paste is cold, lightly grease a cookie sheet. Move an oven rack to the top of the oven and heat it to 450° (yes really).
Pipe the dough out into the shapes you desire, leaving plenty of room for expansion. Use a knife dipped in cold water to cut the dough off of the piping bag, re-dipping it in cold water whenever the dough sticks to it. You can also use the knife to reshape any buns don't come out like you wanted.
Bake until darkly colored, which can be about 12 minutes if you piped out little ones or even thirty minutes if you made big ones.

For the filling, make any custard recipe you like. You can fold whipped cream into it if desired. When the custard and the buns are cooled, cut the buns open and fill them. It'll be easier to make tops stay on after filling them if you leave a little hinge instead of cutting them all the way off.
To ice the buns, mix powdered sugar, a tiny pinch of salt, vanilla, food coloring, and enough water to barely make it thin enough to slowly pour out. You want a very thick glaze. Spoon it over the buns.

*Apparently unsalted butter is an American-only thing, so I added a pinch of salt to make up for its absence.
†Don't blame me for the added baking powder, Fanny Cradock wrote the recipe.

Today, we are making one of the sacred recipes of French cooking canon: choux paste (or choux pastry if you want to sound proper with two rolled R's). As with all French recipes made by anyone outside of France, there are people who swear that this is a super-ultra-rare-special technique and don't you dare change it or else Escoffier and Careme will come from the grave and swat you. If you delve deep into the world of people who unironically use the word "gastronomy," you will find people can't even give the recipe entirely in English (using French names for the various steps of it is just so much more authentic). Google Translate even refuses to give an English translation of the word "choux" when you're looking up baking terms.
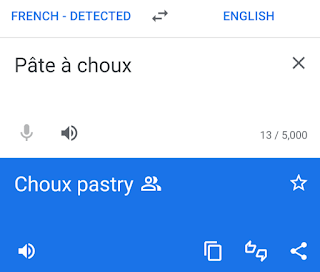
Oh. Choux is the French word for choux. Thank you, robotranslators.
 

But if you took French in school and remember the grocery store vocabulary words, you will know that "choux" means cabbages, and therefore "pâte à choux" means "cabbage paste." Apparently if you shape it into balls, the buns kind of look like cabbages after expanding in the oven. But "cabbage pastry" just doesn't have the je ne sais quoi that "choux pastry" does. 


On a related note, at some point after Miss Leslie gave recipes for "puff paste," "the best plain paste," and suchlike in the bestselling American cookbooks of the 1830s, we all decided that we were making pastry instead of paste.  It is acceptable to make paste if it's in other languages (pasta, pâte, etc). But a long time has passed since anyone lined a pie pan with paste in English.
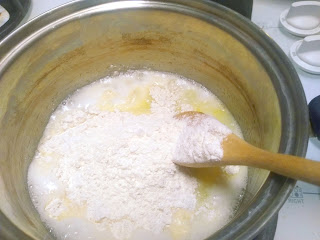
Like Fanny Cradock says, just dump all the flour in and wait until the boiling water seethes over it.
 

Because it's a Very Traditional French Recipe, I saw a lot articles that made choux paste seem like a super-advanced technique that requires a thermometer, years of practice, and several hours of sweating over a hot stove to get right. But if you ignore the cultural heft and look at the recipe, anyone who can make white gravy can make choux paste. The only thing that felt weird to me was using water instead of butter. I've never thought about it, but it seems that nearly every baked dessert recipe uses milk instead (cue the long list of exceptions I totally should have named).


After a really hard beating with a spoon to bash out the flour lumps, we have what's basically a unpourably thick white gravy. It smelled exactly like an extra-buttery pot of mashed potatoes.

At this point, Fanny Cradock tells us that we would discard the spoon if we're clever and get out an electric mixer. And while I may be clever(ish), I also don't have pots that can withstand an electric mixer without getting ruinously gouged. I was afraid the egg would immediately scramble on contact with the hot paste, but dumped the egg in anyway. Fanny Cradock didn't have any problems with curdled eggs, and she did this on TV. Sure enough, instead of cooked egg lumps, we got what Fanny Cradock called "the globule stage." Fanny Cradock really does make this recipe sound enticing as she mutters about "nasty little lumps" while wielding an electric mixer that scrapes and grinds into the pot.


It's a lot harder to get everything beaten smooth when you're using a spoon instead of an electric mixer. You really do need to beat the globules very hard before everything finally mixes together. Fanny Cradock was right when she said to just think of someone you never liked but you're too well-bred to say anything so you take it out on your cooking. But if you have stainless steel pots, I definitely recommend using one and getting out the mixer. Even if you have to handwash dishes including mixer beaters, you'll still be glad you did.

After all this hard beating, we've basically made a batch of gravy that you could sculpt like modeling clay. I don't get why people babble on about choux paste like it's a maddeningly difficult French recipe. The only hard part was the excessive arm workout. And now, as Fanny Cradock tells us, we need to let it get absolutely cold. And so, I put it into my piping bag and waited. This stuff held heat unexpectedly well. Every time I thought it was cold, I would squish it and find that some of it was still warm in the middle.

The last time I made choux paste, it was in cooking class. Since we had to make everything in a short time, I did not have time to let it get cold. Nor did the official recipe in the cooking textbook tell me that I should. As a result, all of my choux balls were full of the "surplus goo" that so infuriated Fanny. We ended up frantically picking out all the hot dough in the middle before filling them with whatever the stuffing was that time. That dough browned on the outside, but it never baked. It just got hot instead. At the end of class, one of my classmates tried dropping some of the extra dough in a hot frying pan where it turned into a big splat of hot goo with a browned exterior. The danged stuff absolutely refused to turn into baked bread no matter how much heat we put on it. But since I have no end-of-class deadline this evening, I just left this out on the countertop and until it was as cold as the drafts blowing in through the walls.

Fanny Cradock makes these three-step shaped buns, though a quick image search shows that people these days make ball-shaped ones instead. You can see how badly I messed up the last one when I was trying to get a bun's worth of a dough out of a now-empty bag.

Fanny Cradock tells us we may not believe her when she says to bake these at gas mark 8 on the top oven rack. I looked up a conversion chart, and apparently gas mark 8 is around 450 Fahrenheit or 230 Celsius. Fanny Cradock was right-- I didn't believe her. But even watching her online with about forty years between her broadcast and you, it's hard to argue with her glare. And so, I heated the oven to the hottest temperature since the pita bread. I then spent the entire time these baked anxiously hoping the bottoms of these things wouldn't turn to charcoal. I can live with baked failures, but I hate when they leave a smell that I have to live with for the next week. As a result, I took these out a bit earlier than Fanny Cradock might have. It's easy to admire the lovely golden color, but I was instead terrified that these things were full of hot goo.

I would say that you should double this recipe if you're making these for a lot of people, but these things expand a lot in the oven. So instead, just make them a lot smaller than you think, and this seemingly-small amount of choux paste will be plenty. Have a look:


They do look kind of like little cabbages, don't they? Or at least, they would if I had made balls instead of little three-tiered buns. Here is a better view of just how much bigger they got. These things didn't rise in the oven, they inflated.

The biggest surprise lay underneath these puffed-up creations. Despite spending nearly twenty minutes in an oven hotter than I ever bake at, they were not even close to burnt on the bottom.


We left these until they cooled off, and then cut them open to reveal...

Perfect hollow things ready to receive whatever we want to stuff in them! In full disclosure, some of them didn't have that perfect hollow space in the middle. We had to press the inside of these open with a fingertip. But we weren't picking any unbaked goo out of these, nor were we cutting anything out of them. We merely pushed the little layers of perfectly goo-free bread to the sides. 

As for the custard, Fanny Cradock has a recipe for it and actually gives the amounts on camera. This is a rare departure from her usual way of telling us that "the recipe's in the booklet." However, her recipe uses egg yolks. I wasn't about to throw out egg whites, so I just made the recipe for pecan pie with extra vanilla and without pecans. 

We are then directed to fold in whipped cream. I didn't think to buy a carton of cream, but one of the people in the house has taken to keeping a can of the stuff on hand for medicinal ice cream.
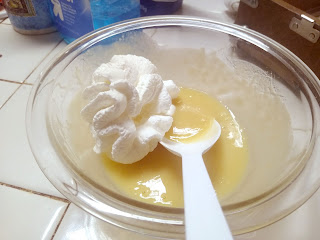
Don't think of it as Redi Whip. Think of it as crème fouettée en boîte.

Fanny Cradock cuts her cream buns open very low, leaving a lot of unfilled space on the top of each one. I did the opposite, making these more like custard mugs with edible lids. Also, these things are a lot more fragile than they look on Fanny Cradock's show. She makes it look like you just saw them open, but in reality you have to be very careful with the knife lest they squish.

I thought this filling was very runny, but so was the custard she used on TV. And apparently that's just like what we could get in France if we traveled. On a related note, I think perhaps our American fascination with France is so severe because so few of us go there. France probably has a lot less of a mystique when you can just cross the English channel in an afternoon. Maybe American culinary snobs wouldn't try so hard to use French words whenever possible if you could just go to France for a weekend instead of hearing secondhand myths about their exquisite cooking--- er, cuisine. 

Back to filling our buns with custard, I am very happy that I made just the right amount. All of the cream buns got happily filled, and the bowl got nearly emptied. I didn't run short, nor did I have a lot of unused extra. It felt almost as satisfying as when your cupcake batter exactly fills your cupcake pan.


I thought about making cinnamon icing for these but decided to keep it simple. So these just got powdered sugar and water- with a pinch of salt and a splash of vanilla for flavor. We only had red food coloring on hand, so these got iced with pink. I do like how the tops fit so perfectly back on after inserting the custard that you can't see the cut line under the icing.
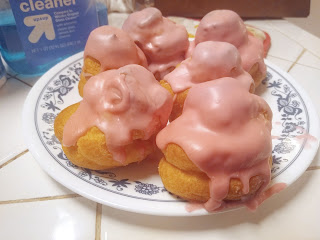
If you're going to make these, you probably want a much thicker custard filling than these contain. Fanny Cradock, ever prepared, brings out a quote from some famous person or another (she kind of mumbles over the name) who says that "To eat cream buns that are properly made you should be sitting in your bath in your altogether." She then helpfully informs us that of course that's not suitable for parties. As far as I can tell, she made up that quote to compensate for a runny custard cream. I looked around online and couldn't find anyone ever saying anything about eating cream buns in the bath. With that said, it did get all over my shirt the first time I ate one. Maybe I should have eaten one while I was in a bathtub.

When they were fresh, the dough tasted kind of eggy. I know a lot of people worry that choux buns need food-grade humidors to keep them at their best, but I just put these in the refrigerator on an open plate. They tasted a lot better when they were cold. When they were at room temperature, the somewhat eggy taste of the buns clashed with the custard and the icing. Everything harmonized after they refrigerated. 

The choux buns, like a pie crust, are relatively flavorless on their own. That means you can put whatever you want in them. With custard and icing, they tasted just like something from one of those doughnut shops that actually makes them fresh instead of trucking them in. So if you make these, definitely put them in the refrigerator. 

The verdict from others in the house: "Pretty good, but not mind-blowing." I did, however, get a lot of complaints that the filling was too drippy. So if you make these, you'll want to cook your custard a lot thicker than I did. 

But these really are very easy to make if you already know how to make white gravy. And they really are very cheap to make. The only part that took a long time was waiting for the paste to completely cool off before piping it out.

In sum, follow Fanny Cradock and you can never go wrong! But after all these custard-filled delights, you may have difficulty getting into your clothes.
Friday, December 24, 2021

Peanut Butter-White Chocolate Chip Cookies

 Today's recipe begins with something that brought high hopes and disappointment.


I was so excited at the idea of uniting peanut butter and white chocolate. I've never had anything that put these two together, but the combination seems both very obvious and very delicious. But these were just peanut butter in a flavorless white coating. I don't know why I've never thought to put white chocolate chips in peanut butter cookies before these things dashed my hopes, but since inspiration struck here we are:

Peanut Butter Cookies
½ c brown sugar
½ c white sugar
½ c butter
1 c peanut butter
1 egg
1 tsp salt
½ tsp baking soda
1½ c flour
½ tsp vanilla
1 c white chocolate chips (optional)
Additional sugar for coating cookies

Heat oven to 375°. Grease a cookie sheet.
Cream together the butter, sugars, salt, baking soda, and vanilla. Add peanut butter, beat well. Add the egg. Beat until creamy. Mix in the flour, then the chips if desired.
Roll the dough into balls of the desired size, then roll in sugar. Place on the baking sheet and press with a fork. These cookies won't spread very much, so you will need to flatten them well.
Bake for 10-15 minutes, or until a bit darkened at the edges.

Source: Clara S. Matuschak (McConnellsville, Pennsylvania), Anniversary Slovak-American Cook Book, First Catholic Slovak Ladies' Union, 1952

This recipe began as well as cookie recipes do when I wield the spoon. I thought to myself how nice it is that we're using a half cup of all the first ingredients, meaning I could use the same measuring cup to us halfway through the recipe. 


Then, as one tends to do many times in the course of baking, I looked at the recipe to see what I should do next. Then I noticed that we are not supposed to use a half-cup each of white sugar, brown sugar, butter, and peanut butter. It's a half-cup of everything until we get to the peanut butter which is a full cup. This led to a short moment when I asked myself whether I was so enchanted at using the same scoop for all the ingredients that I failed to notice this the first time. This is the tradeoff when one keeps chatting with everyone while cooking instead of shooing people away to better focus. Eventually I decided that I probably had accidentally halved the peanut butter and put more in.

Either this recipe now has the correct amount of peanut butter or I just ruined it.

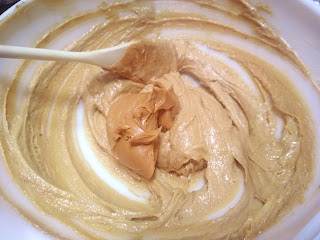
I think I got the peanut butter right because the dough looked perfect. We'll never know if I owe these cookies to a mistake or not, but I'm almost sure I did exactly what Clara Matuschak intended. The dough was firm enough to shape with your hands but not stiff or crumbly. We gleefully dumped in the special ingredient.


I think that I have differing ideas than Clara Matuschak about cookie size. The recipe claims to make about 60 cookies. I somehow mysteriously only got twenty. Keep in mind that this is with a generous scoop of white chocolate chips adding volume to the cookie dough, so I maybe got two dozen cookies out of this dough that purports to make sixty of them. I'm sure this has nothing to do with my choice to use the eighth-cup measure as a cookie scoop.


In all seriousness, I know that I am making much larger cookies than the recipe intended. But since we're getting exactly one third the cookies the recipe promised us, I think we can safely assume that the definition of "medium-sized cookie" has shifted between 1952 and today.


I still can't look at a cookie recipe and tell how much they would spread. Most of the peanut butter cookies I've made spread quite a bit, so I didn't want to flatten these too much before they had a chance to get hot and oozy. It turns out these cookies don't merely need a gentle denting with the fork to give them those signature gridlines that all peanut butter cookies should have. You need to squash them flat. Although the peanut butter poufs were rather cute if a bit oversized.

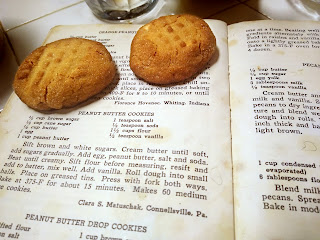
My cookies shown with the cookbook for scale.


After smashing the second batch much harder, we got much better cookies. So if you make these cookies, you'll want to be forceful with the fork. These cookies expanded a bit while baking, but otherwise held the same shape as they had before entering the oven. However, it seems that the clubwomen of the Slovak-American Ladies' Association liked their peanut butter cookies a bit overbaked. These cookies, despite being much larger than the recipe intended, were done in about two thirds of the baking time. We have seen this before in a peanut butter cookie recipe from the same book. You may think I need to get the oven checked, but only peanut butter cookies from the Slovak-American Ladies' Association cookbook ge burnt if baked for as long as the recipe directs.


With that said, this is a dangerous recipe if you still want to fit in your clothes. White chocolate chips or not, these cookies seem hard but they're delightfully crumbly once you bite into them. They're surprisingly airy inside but still wonderfully filling. We will be revisiting this recipe.... but sparingly because we don't have elastic in our clothes.