Showing posts with label Saturdays. Show all posts

Saturday, August 16, 2025

Do not make the apricot brandypud!

Don't try this at home.

When last we saw the raisin butterscotch pudding, some lovely people suggested that we try using dried apricots, and also adding brandy to the sauce. Which sounds good enough to make, but I didn't think my method through very well.

My thought process was quite simple: Replace some of the water that you pour over the batter with brandy. As it happens, this bottle of conveniently flavor-matched apricot brandy happened to be in the cabinet. I don't know how long it's been there, but it hasn't been uncapped since the last time I made a honey fruit pie.

Yes, it is empty now. And yes, that is foreshadowing.

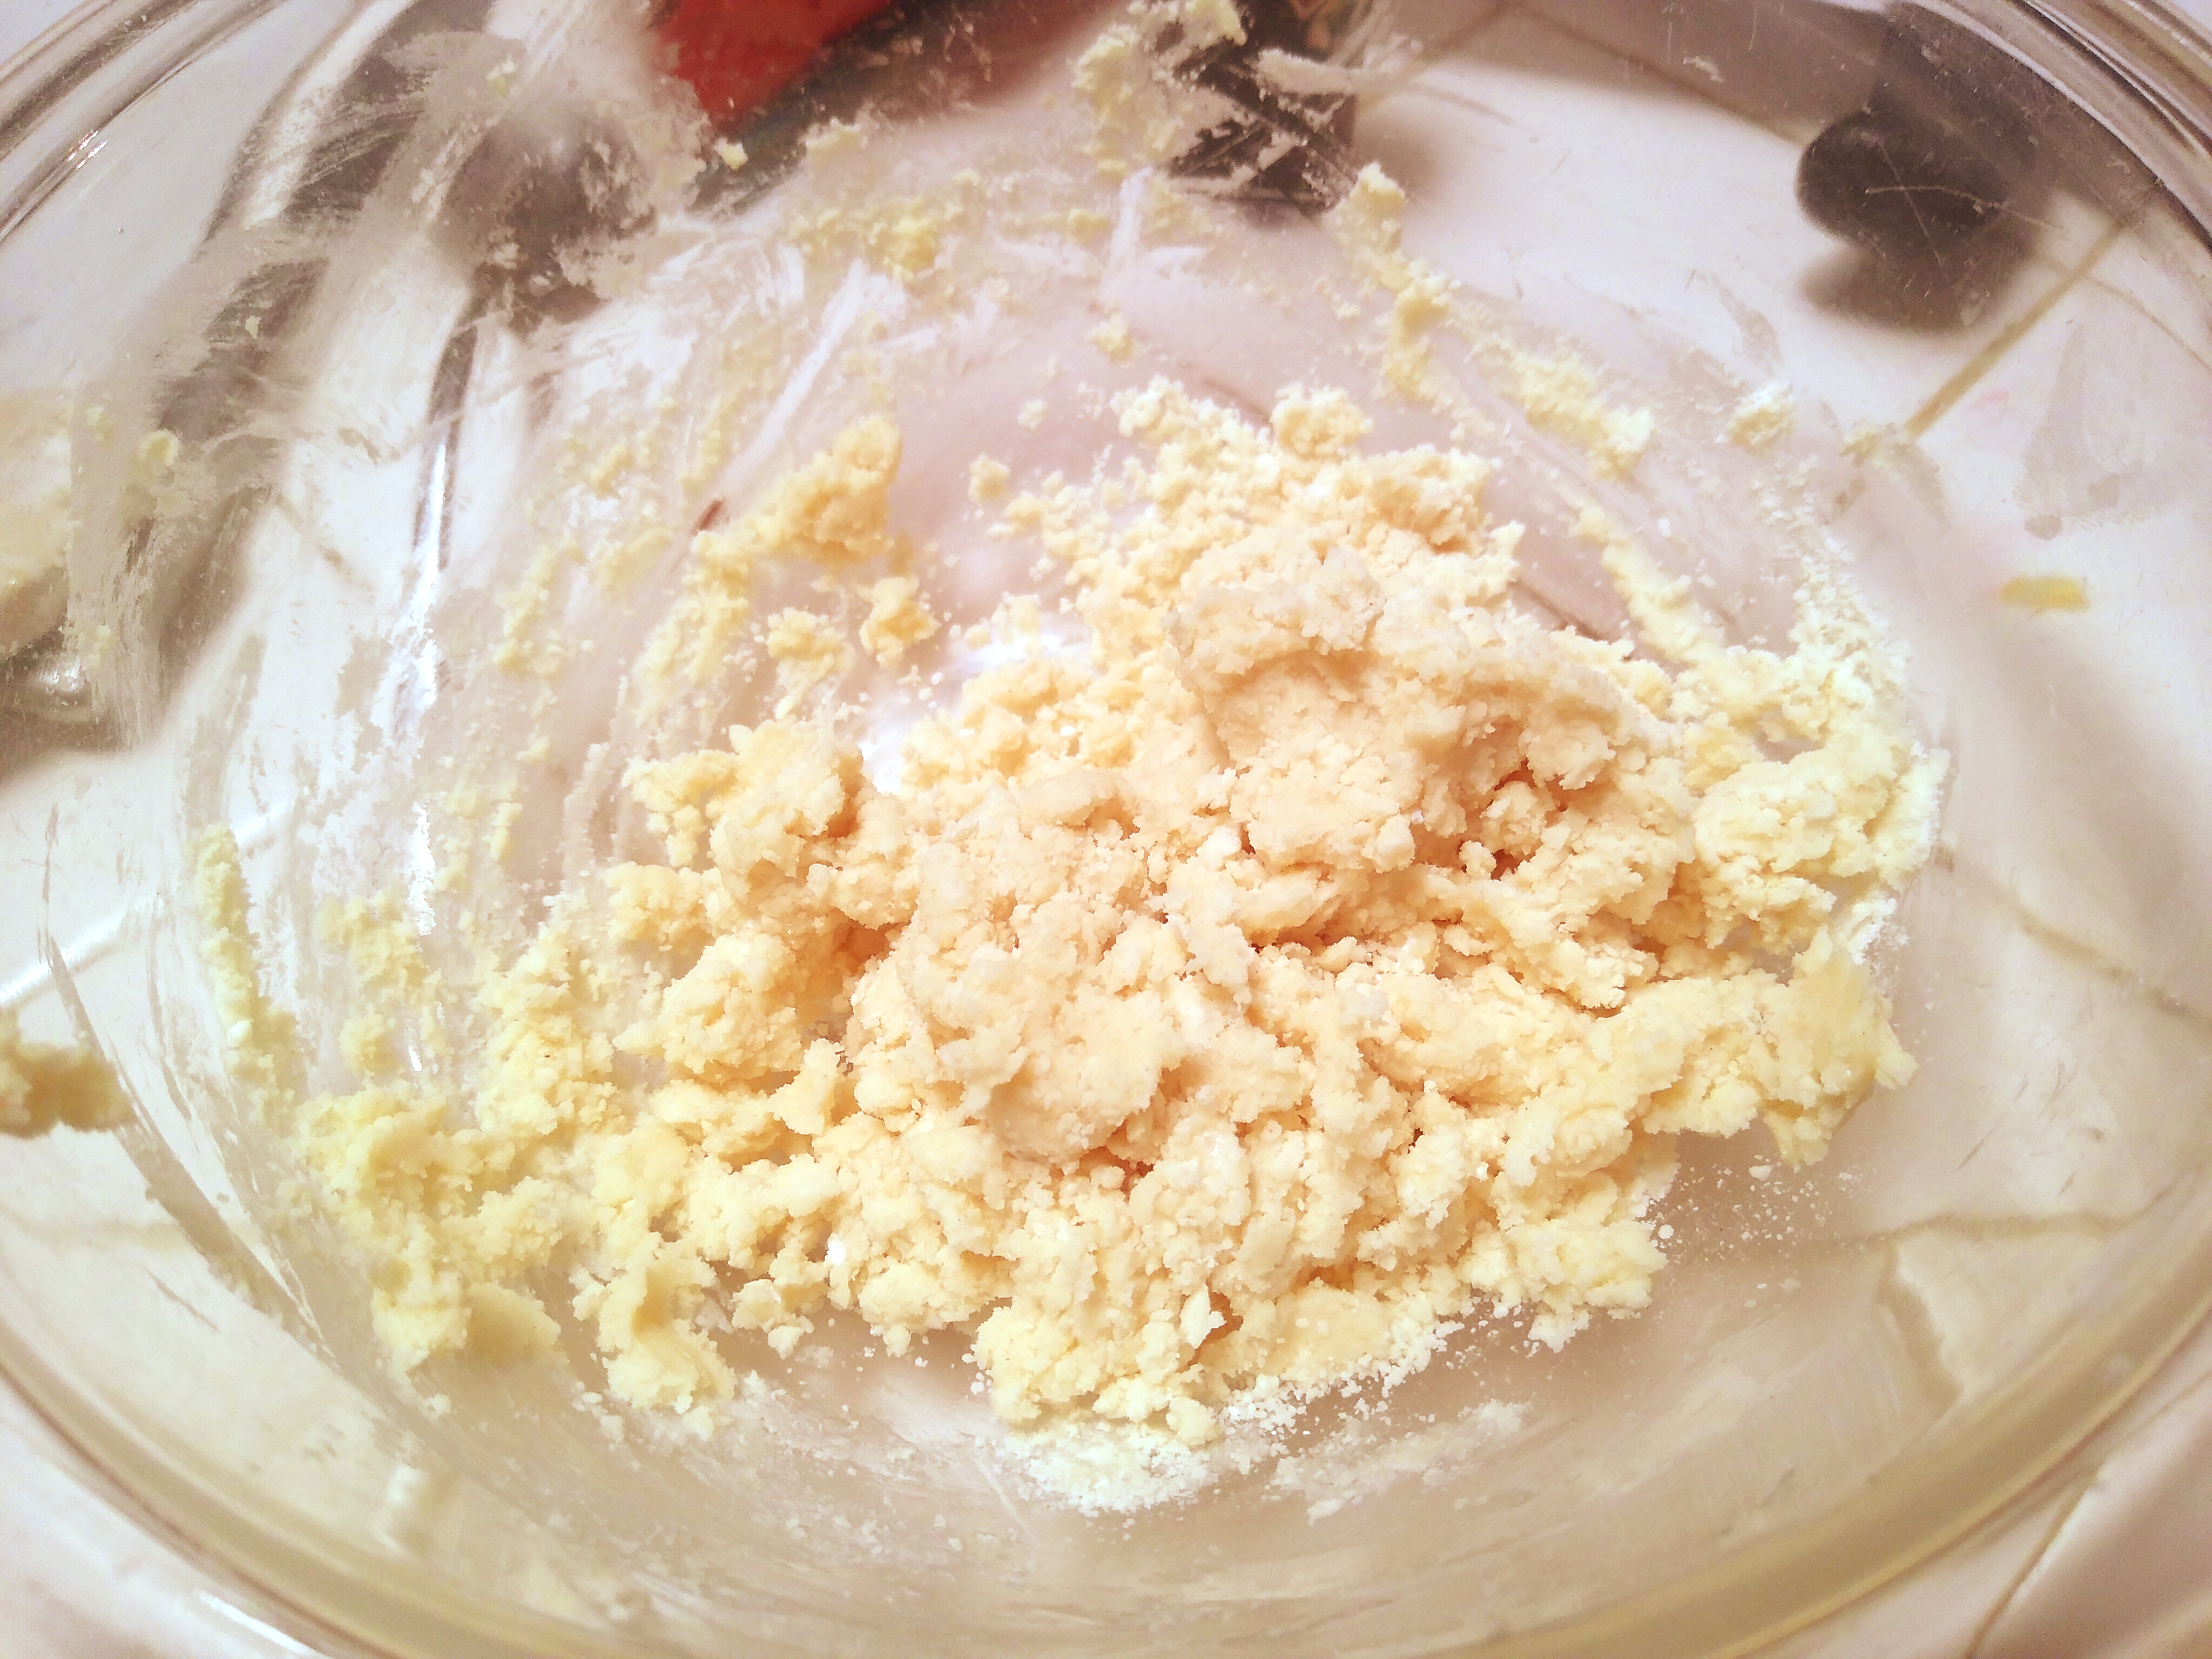
Let's start with the things that that went right. Our chopped apricots looked unexpectedly pretty when I dropped them onto the batter. Incidentally, it turns out that a six-ounce package of dried apricots yields about the ⅔ cup of raisins that the original recipe calls for.


After I mixed the apricots in, I couldn't thinking this looks like one of those salad recipes that ends with the direction "Stir in the marshmallows and refrigerate until dissolved."


As we noted when we made this as written, this recipe goes by really fast. This means we wasted very little time getting to the fire hazards. You see, we had about a half-pint of brandy left in the bottle. (For our metric friends, that's a scant quarter-liter.) Partially to eliminate a shelf-sitting bottle and partially as a nod to the fact that "the relatives from Chicago" were reportedly the very schnockered type of Irish, I poured all of the brandy into the sauce. Also, I had just read a few articles about "tipsy cake" and thought the name was too whimsical to pass up.

Here I had my first warning thoughts about what was going on. The recipe calls for hot water, and putting a lot of liquor in the microwave didn't seem wise. I heated the heavily brandied water on the stove instead, where the vapors had plenty of room to dissipate. I may have been a worrywart, but our microwave remains undamaged. Also, I took this opportunity to put the lemon rind in the pot to better draw its flavor. This was one of the last happy moments before I realized what danger I had just stirred my way into.


After getting the brandy-water into the cake pan, things looked almost normal. I closed the oven, set the timer, and was really excited about our boozy adventure for a few very short minutes. Then I had an awful realization: A lot of the alcohol was going to cook out of this, and the flammable vapors in the oven had nowhere to dissipate to. 


I tried to tell myself that I've made a lot of rum cakes without incident, but none of those involve putting a half-pint of liquor in a hot oven. Before long, I had terrible visions of the alcohol vapors making their way to the red-hot baking coil, leading to something like this:


And so, thanking every available god that no one else was in the house, I kept going to the oven and vigorously flapping the door every few minutes to dispel the fumes. The first time I did that, I got ever-so-slightly dizzy from inhaling so much alcohol. (Or maybe I was imagining that in my worried state of mind.) I don't know if this would have been just fine and I was scaring myself for nothing. But I would like to proudly point out that at the end of the recipe, the oven remained unexploded.


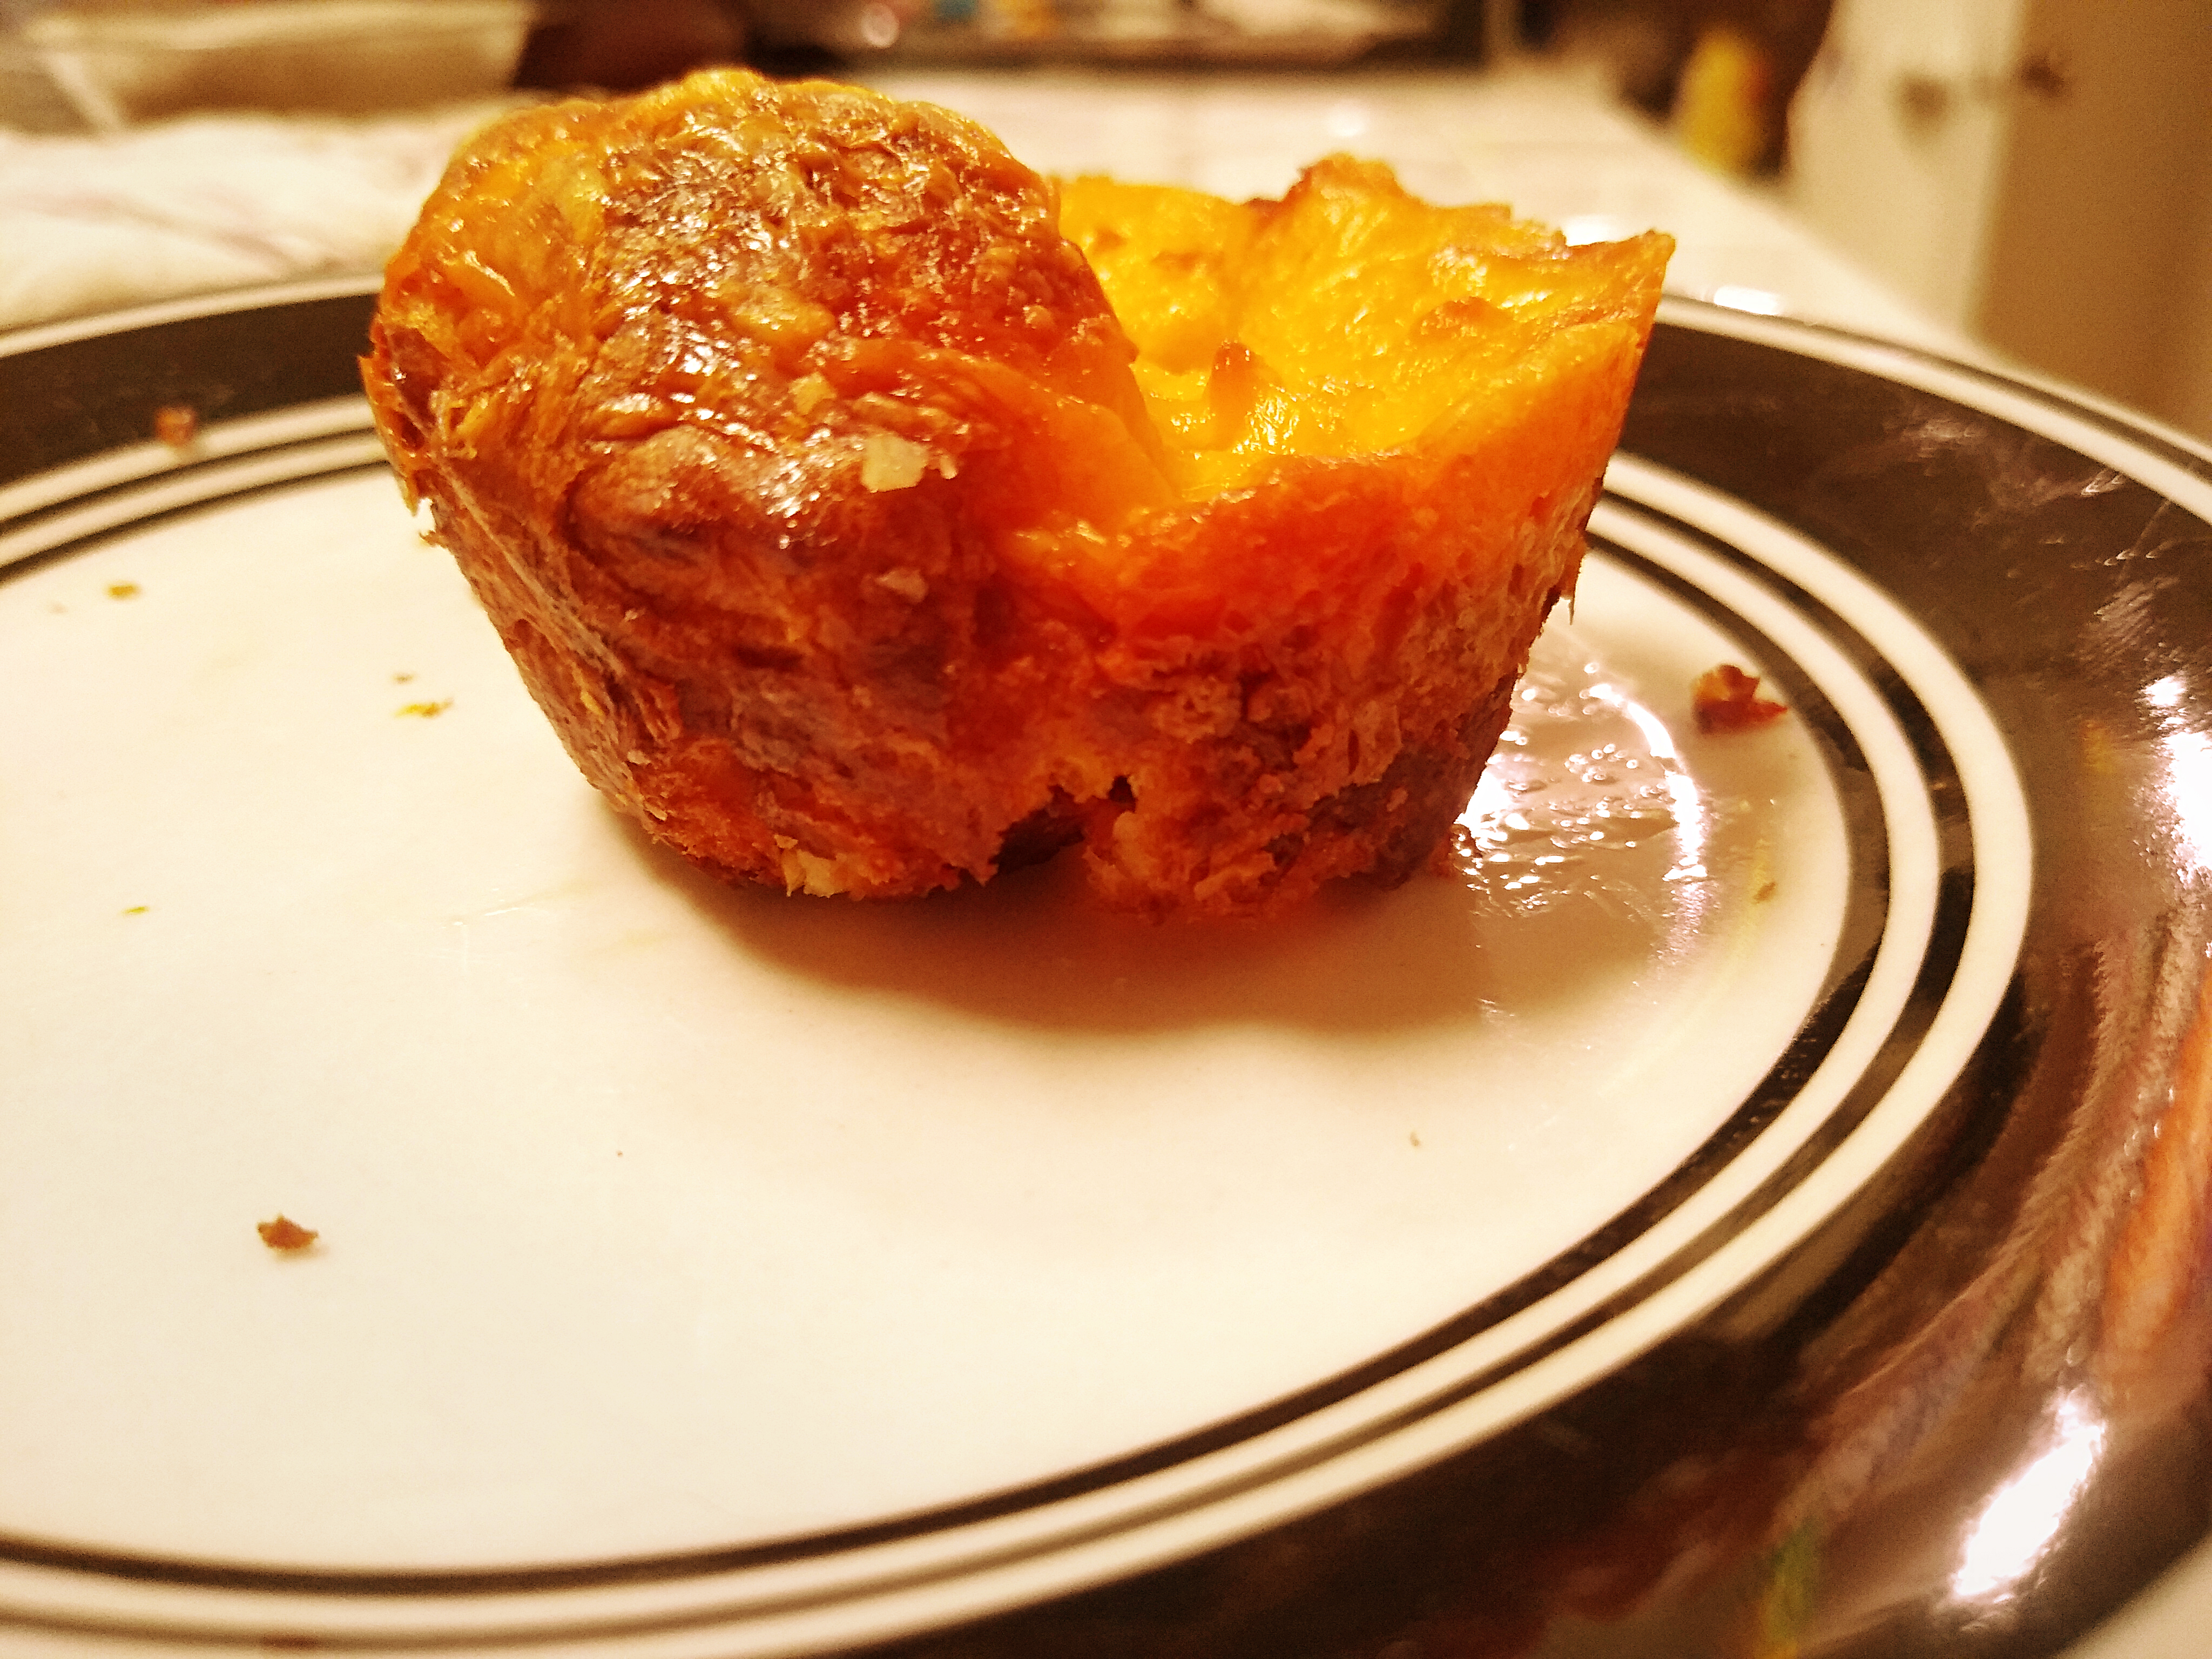
Amid all the angst, the brandied sauce filtered down to the bottom of the pan, just as the non-alcoholic version does. But then it erupted into little bubbling geysers as the baking time wore on. It left the cake perforated with tunnels and holes. 


After most of the sauce boiled away, what remained reminded me of of what sits on a pineapple upside-down cake after you flip it out of the pan.


I tried some of this as soon as it cooled off. It was like doing shots with dessert. Seriously, the alcohol nearly burned. The flavors almost fit together, but this was the first time I've wanted a chaser after a cake.

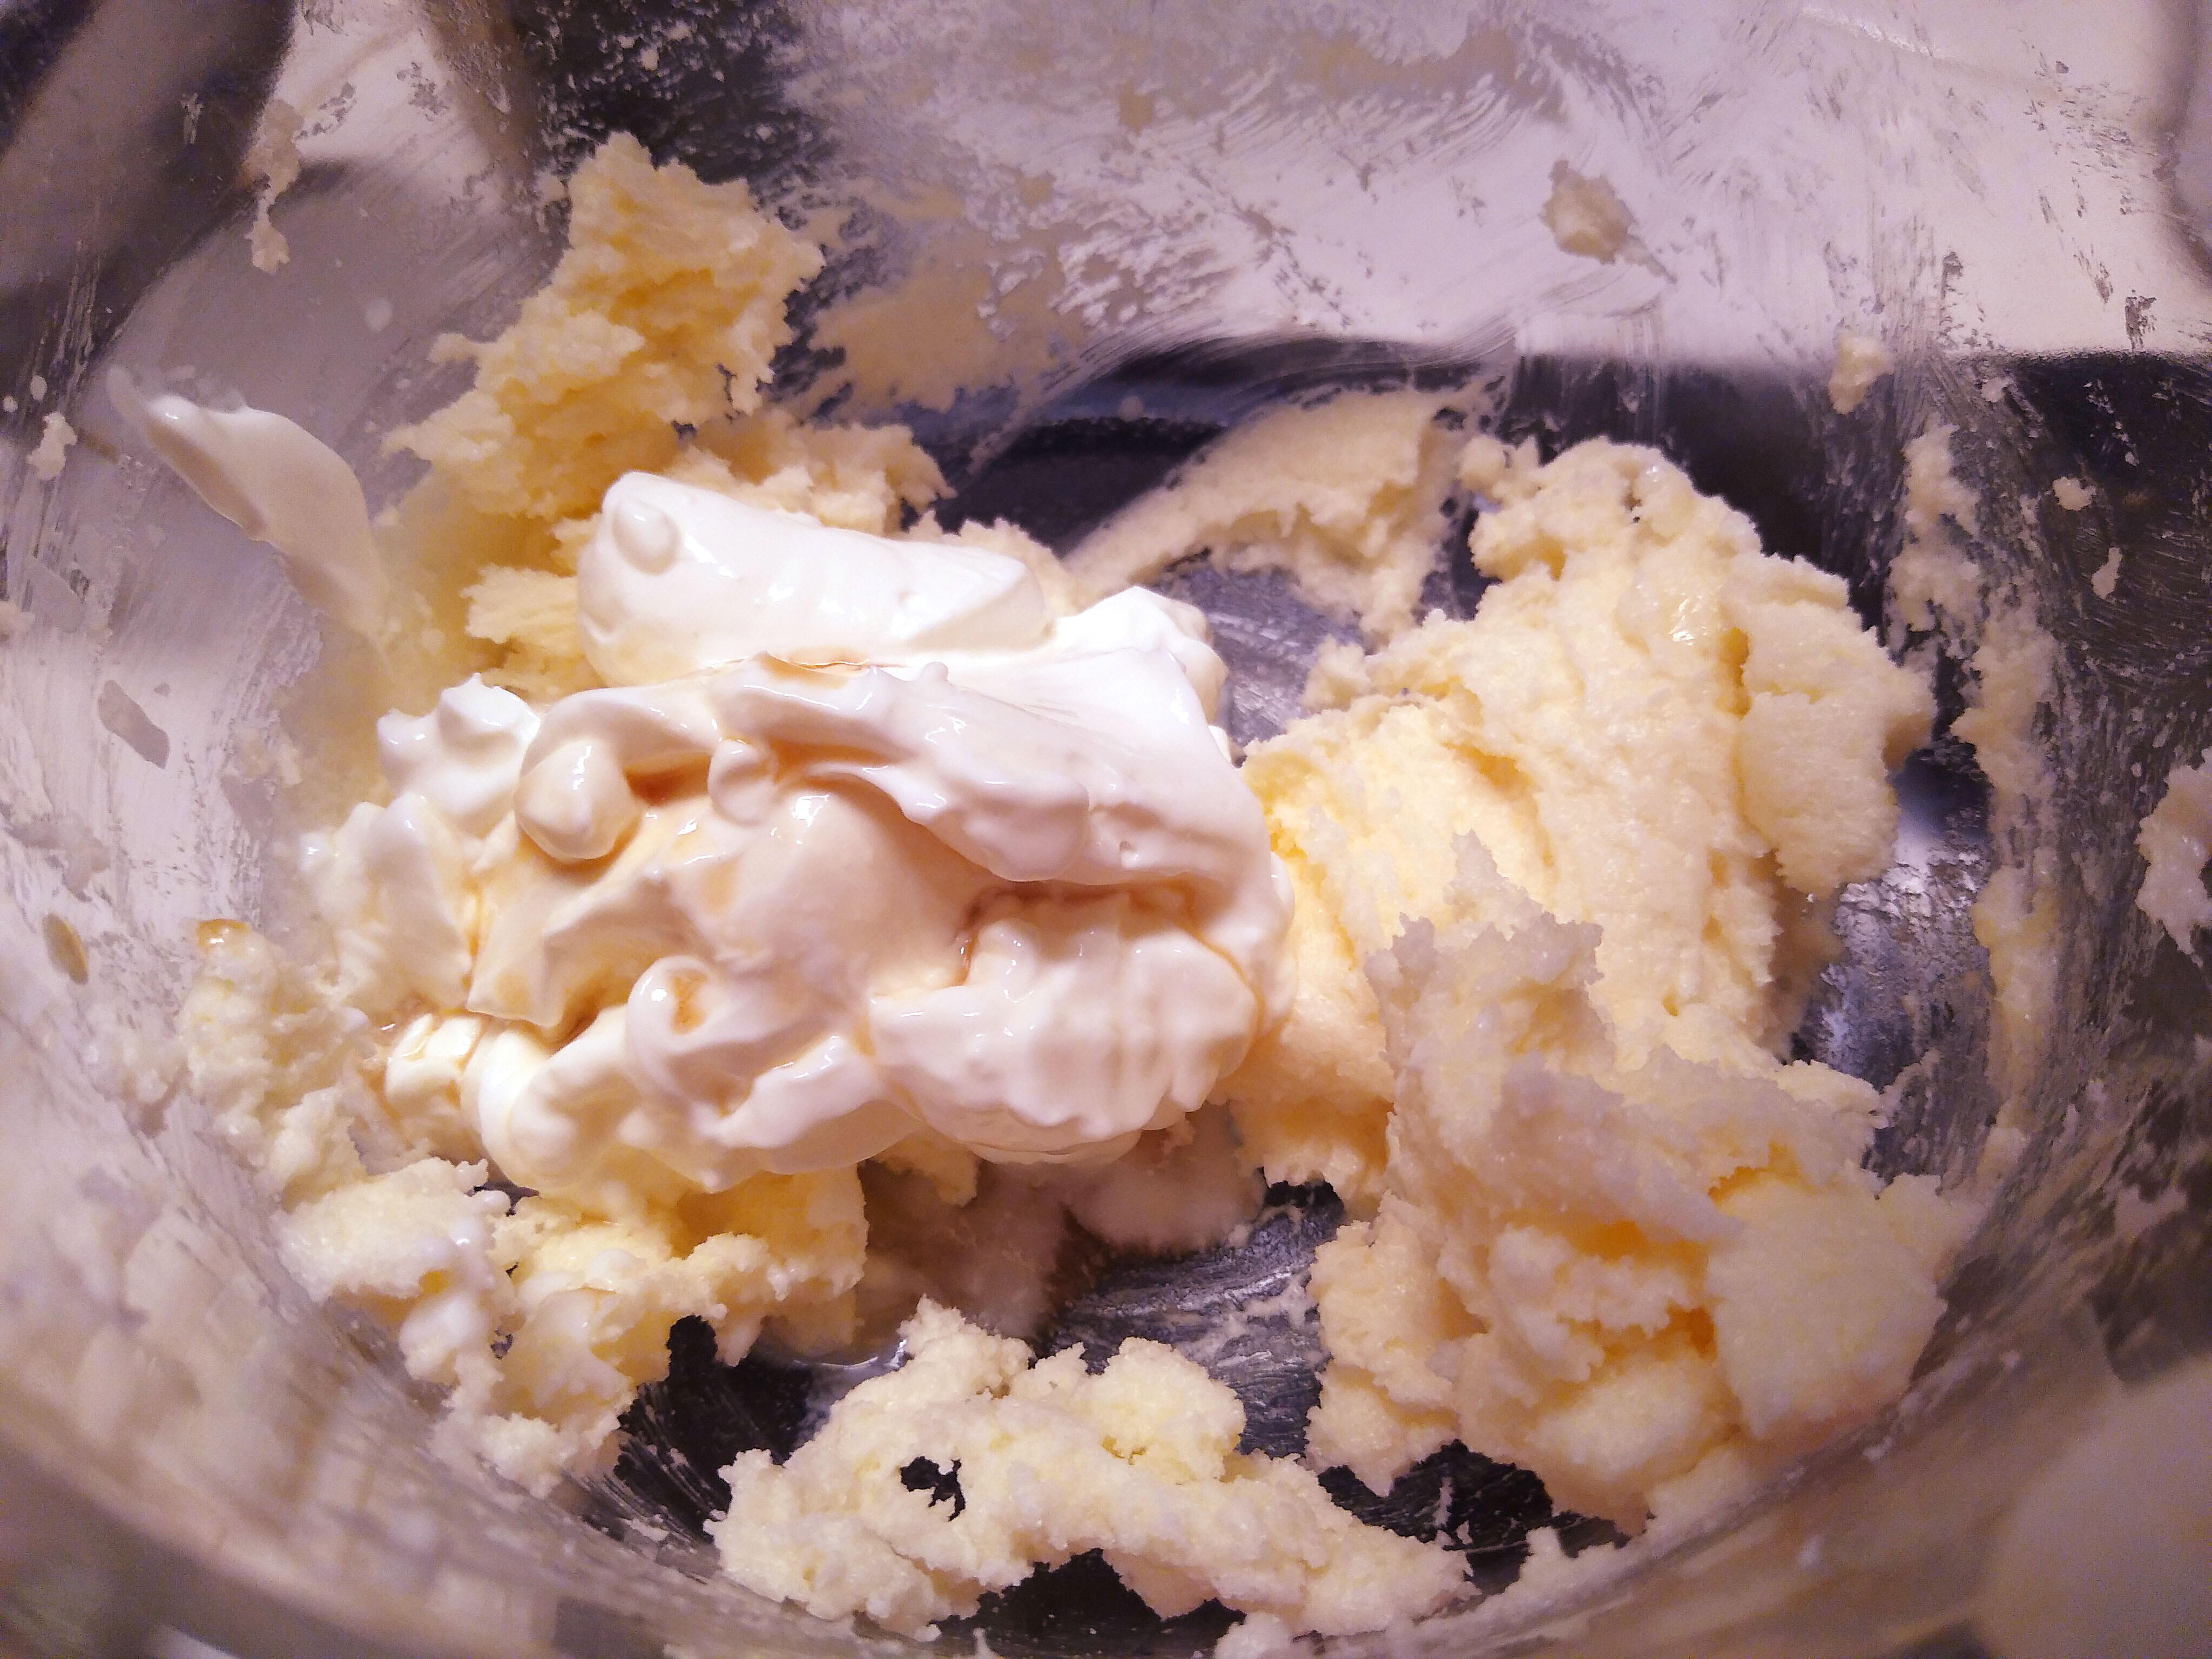
But with that said, it occurred to me that perhaps some whipped cream was just what this needed. These days, I keep a pint of cream on hand because a lot of recipes call for the occasional splash or spoonful. It took nearly no time at all to make this happen:


I hate how good this was. Like, you could serve it at a wedding. I don't know what sort of magic happened, but the whipped cream on top made united everything below it. I never would have expected such ecstasy from a hasty recipe that had threatened to blow up the kitchen. It's delicious. It is exquisite. I would actually pay for it at restaurants.

And so, in conclusion, I don't think anyone should make this. (You'll note that I didn't even put a recipe on top because I care about all of you.) Just because you have a fire extinguisher in your kitchen doesn't mean you should use it.

But the fault here is with how I did this, not with the idea of an apricot-brandy pudding cake. And the flavor combination is just so good. I'm already thinking about how to make it in ways that don't involve nearly blowing up the kitchen. Perhaps make the apricots-and-brandy sauce on the stove and serve it with the cake?

Saturday, June 14, 2025

Second-Stab Saturday: Bangin' Bangor Gingerbread

This may the first brownie recipe that is better without chocolate.

Bangor Gingerbread
1 cup flour
1 tsp baking powder
Pinch of salt
Spices (adjust amounts to taste, and to what's in your kitchen):
  • 2 tsp cinnamon
  • 1 tsp nutmeg
  • 1 tsp cardamom
  • ½ tsp cloves
  • 1 tbsp ginger
¼ cup melted shortening
1 cup molasses
1 egg
1 cup nuts, if desired

Heat oven to 325°. Spray a 9" round or 8" square pan. Line the bottom of it with paper cut to fit, firmly pressing it into place. Then spray the top of the paper.
Sift together flour, baking powder, salt, and spices. Set aside.
Mix together the shortening and molasses. Then add the egg and beat well. Beat well. Then stir in the flour. Add nuts last.
Pour into the pan and bake about 15-20 minutes, or until firmly set. Turn out of the pan as soon as you take it out of the oven, and cut with a sharp knife.
These are better after letting them sit (tightly wrapped) for a day. The spices become stronger.

adapted from The Metropolitan Cook Book, Metropolitan Life Insurance Company, via Mid-Century Menu

When last we saw the molasses-filled Bangor Brownies, we had made the surprising discovery that chocolate and molasses do not mix. Given how well brown sugar harmonizes with chocolate, we had thought that molasses and chocolate would be like sticky brown poetry. Then we tasted the results.

As we discreetly sent the chocolate Bangors to the municipal hereafter, we speculated that this recipe was only a few spices from making really good gingerbread. And by "a few spices" I mean a lot of them. If you sniffed inside the bowl, it smelled like pumpkin spice season was back.

Just like the first time, the batter got unnervingly bubbly in the oven, but turned out all right in the end.

It is a fundamental truth that brown-colored foods rarely look pretty without a lot of photographic effort. But even by brown food standards, today's recipe looked ugly. The molasses turned it an unfortunately perfect shade of burnt. I promise, it's not even slightly scorched.


As is often the way with unphotogenic cakes, it looked better after cutting.


This was exactly as delicious as I hoped it would be. 

I called it gingerbread, but this recipe wants to be brownies. It has that perfect brownie texture, even though the recipe really doesn't welcome chocolate into the batter. Even though I didn't use the word "brownie," my grandmother called me a few days after I gave her some and said "Those molasses brownies were delicious!" And when people say they like something, you don't start a name dispute. 

I think this is the third time that we've improved a recipe by removing the main ingredient. Sometimes you have to follow a recipe even when it takes you away from its own written directions.

Saturday, November 23, 2024

Second-Stab Saturday: New England Cinnamon Drops (they are now raisin-free!)

Today, we are revisiting a recipe that had so much potential but came out so bland.

New England Cinnamon Drops
1 cup sugar
¼ cup shortening
¼ cup butter
1 tsp baking soda
½ tsp salt
1 tsp baking powder
1 egg
1½ tsp vanilla
½ tsp almond extract
1 cup thick sour milk, or buttermilk (I used sour cream)
3 cups flour
Cinnamon-sugar for sprinkling

Heat oven to 375°. Grease a cookie sheet. Cream the sugar, butter, shortening, baking soda, baking powder, and salt.
Add the egg and extracts. When thoroughly mixed, add the sour cream and beat well. Then mix in the flour.
Drop by the teaspoon onto baking sheets. Then sprinkle the cookies with cinnamon sugar. If desired, pat them into a neater shape after sprinkling (the cinnamon-sugar will keep them from sticking to your fingertips).
Bake 10-12 minutes, or until golden on the bottom.

Bertha Lyman Shellington, 3 West Park Avenue, Haddonfield, NJ; Philadelphia Inquirer Recipe Exchange, June 21 1935, page 12

Some readers may recall when we made the New England Raisin Drops. At the time, we asked "Would it have killed Bertha Lyman Shellington to add some damn vanilla?" Well today, we are flavoring the cookies with the fermented seed pods of a vining orchid that only grows in the beautiful tropics! That is, we are adding some damn vanilla. And also a little almond extract because I felt like it.

You can see the the vanilla right where it should be: in the mixing bowl instead of on the shelf.

Our cookie dough was a lot floppier than last time. Our previous New England Raisin Drops were firm enough to shape with the hands. But today's dough was too sticky for anything but spoon-dropping. Well, they are called New England Raisin drops, so I can't be mad when they acted like their name. Anyway, Bertha Lyman Shellington spoon-dropped her cookies, and she won the $2 basket of groceries.


I didn't know if today's softer dough would spread and flatten in the oven, or if the cookies would retain their shape like the last ones did. After sprinkling on the cinnamon sugar, I patted away the pointier protrusions just in case. I'm glad I did, because these cookies spread a little but not much. Also, they puffed up a lot. I could easily have made them smaller.

And of course, I will grab any excuse to play with the cookie press. For this recipe, I resisted the temptation to use every stencil in the box. I am already learning that the star is the most reliable stencil in the box. It's not the fanciest one, but the other shapes can bake into sad-looking blobs if your cookies are in a bad mood.


Our cinnamon stars looked ever-so-cute. However, I don't know whether I recommend using a cookie press for this recipe or not.

If you own a cookie press and want to try these for yourself, you should know that they did not come off the ungreased pan without a fight.

It's been a surprisingly long time since I had to scour a baking sheet.

Adding flavorings to the dough did wonders for the cookies. When I let everyone try these, one person said "These are dangerous!" and left the kitchen with two in each hand.


The cookies vanished rapidly when I wasn't looking. (Of course, I contributed to their disappearance too.) The spoon-dropped ones are what muffin tops wish they could be. They're almost like little snickerdoodle cakes. That generous splash of vanilla did wonders for them. And so did de-raisining the recipe.

Saturday, October 19, 2024

Second-Stab Saturday: Girl Scout cookies with a squirt gun!

Today, we are playing with our new toys!

The original Girl Scout cookies
½ cup butter
½ cup sugar
1 tsp baking powder
¼ tsp salt*
1 egg
1 tbsp milk
½ tsp vanilla
1½ cups flour
Additional sugar for sprinkling

Heat oven to 375°. Have baking sheets lined with ungreased paper.
Cream the butter sugar, baking powder, and salt until light and fluffy. Add the egg, milk, and vanilla. Beat until well-whipped. Mix in the flour.
Place the cookies into a piping bag or a sandwich bag with a corner snipped off. Pipe small cookies onto the pan. Sprinkle them with sugar and bake 7-9 minutes.

*Only add this if butter is unsalted.
The original recipe uses 1 cup of flour, but that has been too runny every time I tried it.

Source: Girl Scouts

Just for fun, I bought a cookie press. If you've never seen one of these things before, it is basically a squirt gun for cookie dough. If your cookie dough would burst out of a piping bag, you put it in one of these instead.


When I bought it, I was far too excited to realize that I was accidentally purchasing one of those cheaply-made gadgets that only briefly grace our homes before moving on to the landfill. But while this thing feels like it could fall apart at any second, it has held up so far.

Of course, we had to pick a cookie recipe to put into it. Some readers may remember that when we made the original Girl Scout cookies, they had a bit of a wardrobe malfunction. The cookies', um, distinctive appearance caused an unacceptable amount of amusement in the house, which naturally meant we have permanently added the recipe to our box of cards. Here is a visual reminder:

I am trying to be a mature adult. I am trying to be a mature adult. I am trying to be a mature adult.

But squeezing cookie dough out of a slippery sandwich bag is tedious and annoying. And so, I fitted my new cookie gun with a plain round stencil and made a panful of delightfully pointy cookies. 

I should note that I had no idea how to use this thing when I unboxed it. I understood the basic premise, but not the specifics of operation. The instructions were a bit unclear and suprisingly jargon-heavy, but I found this delightful video on Youtube which looked like someone animated it in 2009:

Well that tells me all I need to know.


Our first attempts came were misshapen, and we returned them to the bowl to try again. I had thought a cookie squirter was as foolproof as a cheese shredder, but it takes a bit of practice. However, it's not too finicky. You would get the knack before you finished piping out the first panload. And once you figure out how to use it (which, again, doesn't take long at all), you can squirt a batch of cookies in less than a minute.


Unfortunately, our cookies lost their titillating tips in the oven and came out depressingly normal. I have never been so disappointed by perfection.

We do not tolerate bowdlerization in this house.

I piped a batch of cookies out of a sandwich bag just to see whether the dough or the caulker was at fault. They came out with perfect points. So clearly, some things need to be done by hand. If I wanted to launch A Youtube Of Cookrye, these could be my first "demonetization bait."


While we had the dough in a bag, I decided to try some other shapes. The spirals came out cute (if smaller than I expected). The rings would have been nice, but I didn't know that you must watch them really carefully to prevent burns.


Of course, I couldn't resist trying some of the other stencils in the box. This little heart in a wreath came out unexpectedly cute.


Another stencil that looked like a random scattering of lines produced some unexpectedly pretty geometric cookies. But I think that for this particular recipe, the hand-piped ones are by far the most, um, visually arresting.


Of course, no one really needs a cookie squirt gun. But they're almost as fun as a waffle iron. And if you keep your eye out, you can get one for less than $20. However, if you want your cookies to have those perfect and ever-so-censorable pointy tips, you will need to do them by hand.

Saturday, September 28, 2024

Second-Stab Saturday: Harris Teeter lemon squares, correctly this time!

There is no logical reason for Harris Teeter to be on my mind.

Lemon Squares

      Crust:
2 cups flour
⅔ cup powdered sugar
1 cup butter, softened

Heat oven to 350°. Grease a 9"x13" pan.* (We recommend lining the pan with parchment paper or foil first.)
Mix butter, flour, and sugar together until crumbly.
Press into the pan and bake until light brown, about 18-20 minutes. Make the filling while the crust bakes.

      Filling:
4 eggs
2 cups sugar
¼ cup flour
½ tsp baking powder
⅓ cup lemon juice
2 tbsp powdered sugar

Mix all dry ingredients except powdered sugar. Whisk in the eggs and beat well. Then stir in the lemon juice.
Pour over the hot crust and bake until set, about 20 minutes.
When cooled, sprinkle with powdered sugar. You can make the powdered sugar look much nicer if you sprinkle it through a sifter.

*The original recipe claims you can do this in an ungreased pan, but I have always had rotten luck with that.
If squeezing your own lemons instead of using juice from a bottle, grate off the rind and add that also.

Note: If halving this recipe, use an 8" square pan or a 9" round.

Source: Harris-Teeter powdered sugar label

The last time I made the lemon squares from the back of a bag of Harris Teeter powdered sugar, they were a goopy failure. And I know I didn't remove the previous batch from the oven too early because they were as brown on top as well-done toast. Here is a visual reminder:


That hot mess still pops into my mind to this day. 

Usually, the recipes on food labels are very thoroughly tested. (Apparently, some commercial test kitchens deliberately make the most likely cooking mistakes to ensure that people at home still get a passable result.) At the time, I figured that I must have made a mathematical error when halving the recipe. And so, I decided to actually write down the halved amounts this time. Furthermore, I did all my ingredient calculations and double-checked everything before even softening the butter.

Having ensured that our recipe was completely correct, we could proceed with the first part of it: the crust. Just like the previous time, we got a slightly crumbly shortbread dough. It's not very sweet, but I figure all the sugar in the filling makes up for that. Of course, this recipe uses far more butter than I've encountered in other pastries. We must remember that Harris Teeter is from the American South. The Midwest may be famous for its life-size butter sculptures, but southerners eat it instead.

Back when we first made this recipe, the crust baked perfectly. And it did the same today. 

Because the last lemon squares went wrong at the filling, I was afraid of once again feeding the trash can. A last-minute double verification of my recipe math did not make me feel better. Nevertheless, I whisked everything together and poured it out. Twenty minutes later, our lemon squares were baked and goop-free.


Although lemon squares had firmed up and set beautifully, they looked a bit pallid and underwhelming on top. This must be why Harris Teeter printed this particular recipe on the back of their powdered sugar bags. A quick sprinkle of white fairy dust made them look so pretty!

I love how they molded themselves exactly to the precautionary foil that I put in the pan.

Harris Teeter's lemon squares are almost as good as the lemon loves (and that is high praise). I think they'd be a lot better if you used fresh lemon juice in the filling (and also grated in the rind). The flavor would pop a lot better. Of course, using bottled lemon juice speeds up the recipe and eliminates the need to clean out a juicer. But whether you use pre-bottled lemon juice or squeeze it yourself, these lemon squares are really good. And if you don't mess up your amounts when halving or doubling the recipe, they will come out perfect. 

Saturday, June 22, 2024

Second-Stab Saturday: Apple Cookies with invisible apples!

When last we saw the apple cookies, the recipe was a runny, half-burnt failure. I noted that we already have a fruit cookie recipe ready to receive apples. The recipe is even called fruit cookies, so it's perfect for making, well, fruit cookies.

Apple Cookies
1 cup butter, margarine,* or shortening
2 cups dark brown sugar
2 tsp cinnamon
1 tsp cloves
1 tsp nutmeg
¼ tsp salt
1 tsp baking soda
3 eggs
2 tbsp cream
1 tsp vanilla
4 cups flour
1 cup raisins
1 cup finely chopped apples (no need to peel)
White frosting

Heat oven to 375°. Have greased cookie sheets ready.
Cream the butter, and sugar, spices, salt, and baking soda, beating until light and fluffy. Then beat each egg in thoroughly, one at a time. Add the cream and vanilla, beat well. Next, mix in the flour, stirring just until blended. The dough should be firm enough to shape in your hands. If it's sticky, add more flour. Then add the raisins, nuts, and dates.
Roll into 1 to 1½-inch balls. Place 3 inches apart on the pan. Gently pat each one to make it flat and about a half-inch thick.
Bake 10-12 minutes.
When cool, top with white frosting.
These are better the next day. The spices get stronger.

*Use the margarine that comes in sticks, not the spreadable kind that comes in tubs.
The original recipe calls for ⅓ teaspoon of salt. But I don't know anyone whose measuring spoons come with a one-third teaspoon. Rounding down to a quarter teaspoon won't hurt a thing. Omit the salt if using margarine or salted butter.

Adapted from a handwritten note, The Woman's Club of Fort Worth Cook Book, 1928 (original recipe here)

I added enough apples to get the same (ish) fruit-to-dough ratio as the previous cookies, and made no other change to the recipe.

As with the original apple cookies, we chopped the apples very finely. Even though the recipe was a failure, cutting the apples into extremely small pieces got them completely cooked in the cookies' short baking time.


Our cookies came out perfect, which I already knew would happen since I've made this recipe before. However, the apple pieces, which had taken on a dull color in the oven, made the cookies look subtly yet unfortunately corn-fed.


I have to give credit to Mrs. John Stevens, the creator of the apple cookie recipe. She realized that her cookies (such as they were) looked like specimens that some enterprising ornithologists would analyze to determine a species' diet. Her solution: Hide the cookies with icing. They look really cute with a cover-up, don't they?


I didn't expect to say this, but the apples really didn't change these cookies. You might think the apples softened them, or that they added a lovely tart flavor. They didn't. The cookies were neither better nor worse for having apples in them. I guess if you can convince yourself that blueberry muffins count as a serving of fruit, you can pretend that the apples make these cookies a great source of vitamins. 

So if you have some iffy-looking apples on the counter, chopping them into cookies is not a bad way to keep them out of the trash can. But I can't think of any other reason to make cookies with them.

Saturday, June 15, 2024

Second-Stab Saturday: More Dormeyer Cheesecake

I love when I can simultaneously clean the freezer and make dessert.

Cheese Pie Royale
1 pie pan lined with a graham cracker crust
12 oz cream cheese, at room temperature
2 eggs
½ tsp vanilla
½ cup sugar
Cinnamon

Topping:
¾ pint (1½ cups) sour cream
2 tbsp sugar
½ tsp vanilla

Heat oven to 375°.
Thoroughly beat eggs and sugar. Add cream cheese, and beat at low or medium speed until mixed.
Pour into pie pan, leaving about ⅜" of headspace in the pie pan for the topping. Sprinkle with cinnamon, and bake for about 20 minutes, or until the cheesecake jiggles in the center but does not slosh.
While the pie is baking, whisk the topping ingredients together. Spread it over the pie after it's baked. Heat oven to 475°. Return the pie to the oven and bake 5 minutes.
Cool the pie, and then refrigerate it until thoroughly chilled.

Source: All Electric-Mix Recipes Prepared Specially for your Dormeyer Mixer, 1946

After making the poppyseed cake, we had half a brick of cream cheese in the freezer. I didn't know what to do with it, but I also didn't want to let it go to waste. I decided I could use it to revisit a recipe that didn't get a fair chance last time: the Dormeyer cheesecake. Some readers may recall that due to a faulty oven, we burned it. And burning a cheesecake isn't a valid recipe test. 

Since we had all the ingredients at hand, I cut the recipe amounts down to the tiny pie pan's worth of cream cheese that had been waiting in the freezer.  Then, while supper was already baking, I slid this into the oven next to it.


Unlike the first time we tried this cheesecake, we didn't burn it. (I do love using an oven with a working thermostat.) The non-burnt Dormeyer cheesecake looked so pretty that I wished I'd bought enough cream cheese to make a full-sized one. (I later realized I forgot the cinnamon, but it was too late.)


I really wanted to try the sour cream topping that came with the recipe. I've never had a cheesecake with sour cream on top. Given that the Dormeyer company comes from Chicago, is this a Chicago thing? The recipe handout credits every recipe that doesn't have a brand name to Dormeyer's own test kitchens, which apparently means they had people in the company office send in recipes to round out the book. So maybe there are some Chicago regional specialties between the other recipes.


After baking, the sour cream on top of our cheesecake wasn't completely set, but it was at least firm enough not to drip. The cheesecake itself looked oddly... aerated. Is it just me, or does it almost look like a slice of well-leavened cake?


If we turn the cheesecake around and look at where the crust would have been had I bothered to make one, you can see the texture better. I think it looks like I added a lot of baking powder to it.


The cheesecake tasted fine, but the texture was weird. It was almost but not quite curdled. Perhaps a better way to describe it is "aggressively fluffy." I have to wonder if this is a regional preference, and the people of the greater Chicago area think this is what cheesecake should be like.

But while the cheesecake itself was a bit underwhelming, the batter was amazing. I wouldn't toss the recipe aside, but I wouldn't bake it either. It's probably fantastic if you put pour the batter into an ice cream machine. To the Dormeyer people's credit, the part of this recipe that involved using a Dormeyer mixer went great. But the part that involved an oven did not.

Saturday, May 18, 2024

Second-Stab Saturday: Cheddar Cheese Puff Bread!

The weather may be getting warmer as spring goes on, but we recently had a random chilly night. Although it wasn't quite cold enough to turn on the heater, we were wearing jackets in the house after sunset. It was the perfect time to revisit a recipe that involves an unspeakably hot oven. (Indeed, it may be our last chance of the year.) And so, we decided to make cheddar gougères! 

 Before proceeding, let's reiterate the recipe:

French Yorkshire Pudding or La Gougère Bourguignonne
4⅜ fluid ounces milk (½ cup plus 2¼ tsp)
1 oz butter (2 tbsp)
2 eggs
¾ teaspoon salt,
2½ oz flour (½ cup plus 2 tbsp)
2 eggs
1½ oz diced cheese, divided into 1 and ½ oz
½ oz grated cheese

Before beginning, crack one of the eggs into a small bowl. Then beat it, and set aside a small spoonful to brush onto the top.
Select a small saucepan that can handle using an electric mixer in it. (You can beat this by hand with a whisk, but if you use a mixer you'll be glad.)
Put milk, butter and salt in the saucepan. Heat slowly until butter melts and the milk boils. Toss in flour all at once. Allow to boil for a few seconds until the milk begins to bubble over the flour.
Turn off heat, insert an electric handmixer, and beat on high speed until smooth. Add the eggs one at a time, beating each time until mixture is smooth. Stir in 1 oz diced cheese. Spread mixture into buttered shallow cooking dish (mine was about 5" x 7"). Brush with the reserved spoonful of beaten egg, then sprinkle on remaining diced and grated cheese.
Set aside until it gets completely cold (you can refrigerate it to speed this up).
When ready to bake, heat oven to gas mark 8, 450°F, or 230°C. Bake for 20-25 minutes, or until the top is a deep golden brown.
Allow to cool for a few minutes, and serve warm.
Leftovers can be placed on an uncovered pan and reheated at 350°F (180°C, or gas mark 4).

Note: You can assemble this ahead of time and put it in the refrigerator until ready to bake. If wrapped airtight, it should keep for at least a day before baking. There's no need to bring it back to room temperature. Just take it directly from the refrigerator to the oven.
Note 2: Gruyere or Emmenthal cheese is the traditional choice. If you choose something else, be sure to use a type of cheese that melts well.

Source: Fanny Cradock via Keep Calm and Fanny On

When last we made Fanny Cradock's gougère, we learned that "gougère" is a fancy word for cheesy bread. We speculated that although "the classic preparation" (as the purest of purists say) uses gruyere or emmenthal cheese, this would be absolutely delicious with cheddar cheese. 

The name "gougère" may sound French and fancy, but-- and I say this in the most loving way possible-- it tastes like it should come in a cardboard box from the nearest cheap pizza place where the owner often works the cash register.


I thought cupcake-sized cheese poufs would be as cute as they are delicious. And look at that beautiful orange-golden color on top!


Despite my excessive use of cooking spray, our cheddar puffs stuck to the pan. Maybe I should have brushed the pan with melted shortening instead. I had to get out a knife and cut them free. Unfortunately, these things are as fragile as they are airy. They really don't stand up to being manhandled as you try to gouge them out of a pan. Despite my best efforts, they all came out of the pan looking a bit stomped on.


This was my punishment for contravening Fanny Cradock's directions. She put her gougère in one big pan, and it didn't stick. I used a different pan than Fanny Cradock did, and paid for my disobedience with welded-on cheesy bread.

I think I know why the cheesy poufs stuck to the pan. It seems the tops of these rose so fast that the egg wash hadn't set. Instead, the egg dripped down the rising cupcake domes. It then slid between the dough and the pan, and welded the two together. So if you're going to do individual gougères, we recommend omitting the egg wash. Otherwise, you'll have to soak your cupcake pan overnight because it looks like this:


Moving back to the food, none of the cheese poufs came out of the pan intact. This one came the closest.

De-panning problems aside, cheddar cheese gougères are absolutely delicious. If you like the cheese breadsticks from the nearest not-at-all-Italian pizza place, you will love these. We will be revisiting this again when the weather gets cold (or when I feel the house's air conditioning has had it too easy), this time with provolone, and a lot of garlic. But seriously, if you don't mind a really hot oven, you owe it to yourself to try the cheddar poufs.