Showing posts with label Miss Leslie. Show all posts

Wednesday, December 25, 2019

Gingerbread: or, Of course we did this on Christmas

If you're reading this, it's Christmas day-- assuming you read it the day we posted it, or just happened to read it on December 25th in a later year. We at A Book of Cookrye are honestly burnt out on Christmas, and took the entire holiday break to go out visiting and avoid the high-stakes family memories. This anticlimactic Christmas has been the best we ever had. Anyway, we just happened to be in the company of friends in Ohio, where we did this.
Seventy-Five Receipts for Cake, Pastry, and Sweetmeats, Miss Leslie, 1832

It just figures that we flee from Christmas and end up making gingerbread.
Common Gingerbread
⅓ c molasses
⅓ c butter
1½ c flour
⅓ c milk
1 pinch baking soda
1 tbsp ginger (or to taste)
Other spices to taste

Heat oven to 340°.
Dissolve the baking soda into the milk, set aside.
Cut the butter into the flour like you're making a pie crust. Add the spices and mix.
Add about half the milk, quickly work it in. (You may end up having to just do all the mixing with your bare hands.) Then add about half the molasses. When it's completely mixed, add about half the remaining milk. Mix well. Add half the remaining molasses. By now the dough should be a bit softened. Mix in the remaining milk, and then the remaining molasses.
Make the dough into long, very thin ropes (about the diameter of a pencil or a little narrower). Form them into little spiral-shaped cookies, or put two ropes together and make twists.
Or, you can roll the dough out very thin and cut it into shapes. The original recipe says to dust your table with flour, but we found that unnecessary.
Bake for 20 minutes, rotating the sheet so the front is in the back halfway through the baking time. Watch the cookies carefully, because (due to the molasses) they will very easily scorch if overbaked. If they do get a bit overdone, shave off the blackened bits the same way you would burnt toast (this is what the original recipe says to do).
You may want to make a few extra scrap-dough cookies on each batch so you can taste-test for doneness. Let the test cookie cool completely (we put it in the freezer right under the blower) before eating it.
This is even better if made a day or two ahead.


We've never made gingerbread before, so using a recipe so antique we don't get a time or temperature seems like a swell idea. We've never really craved gingerbread, but this year we assembled one of those gingerbread house kits and staring at it made us want some to eat.

All right, let's step back and look at the recipe. You may notice we are really cutting back on quantity. The original recipe uses two and a half pounds of flour (that's a smidge over one kilo for all our metric friends). That's 10 cups of the stuff, which would make a lot more gingerbread than we even want to think about getting in and out of the oven. Yes, gingerbread is known to keep for a long time, so baking a lot of it at once would make sense in a time when baking day began with lighting a wood fire in the oven. But now we're cooking with gas, and also there's also a table covered with cookies already.
Also of note: this recipe has no sugar at all. The only sweetener is molasses. We at A Book of Cookrye were fine with this, but then again we pour molasses on our waffles. It appears this will be one of the many recipes that we've had to apologize for and say "Well, they didn't like things as sweet back then." There's a reason most of us looking for old-style recipes tend to find modern ones called "Old-Fashioned Nutmeg Cake" rather than finding a nutmeg cake recipe from the 1700's, and that reason is extra sugar.
The ginger flakes look like breakfast cereal, don't they?

We normally only use fresh ginger because the powdered stuff seems to have no flavor, but this dried sliced ginger turned up in our friend's spice rack. The smell of it fiercely assaulted the nose, so we figured it would actually taste like ginger and not like nothing. Unfortunately, we had to chop these into powder. This made a short recipe become tedious. Maybe we should have gotten out a blender and put them in with the milk.

The trouble with making a recipe this old is that you can never tell if it's coming out weird because it's what people liked back then or if you have erred. But as long as we're chopping things up, let's add these granules!

Those are dried orange peels. We thought orange would make a good flavor counterpoint to everything else in the recipe. Another cookbook by the Miss Leslie has a recipe for Molasses Pie, which is literally just a pie crust filled with molasses and baked. She recommends slicing oranges and laying them across the bottom of the pie before you add all the molasses. Therefore, in the spirit of Miss Leslie, we're adding these orange granules from the spice rack.

As you can see, we've got a lot of spice in here. So hopefully this will be delightfully-seasoned gingerbread. You're looking at a big heap of ginger, a smattering of orange, and several shakes of pumpkin pie spice. Also, you know you're in the house of people who cook when the wooden spoons look like this.

Things were going relatively well at first. We added the milk and, like our patron saint Fanny Cradock, thought of someone we don't like but we're too well-bred to say so, and instead took it out on the bowl of ingredients. However, this merciless approach to Christmas failed when we added the molasses. No amount of beating would mix the molasses into the rubbery mess of dough. This molasses-striped mess was the best we could manage after nearly breaking the spoon while thinking of someone we don't like and taking it out on the floury failure in the making.
Note also the move to a bigger bowl after we kept flinging things all over the kitchen.

And so, we ended up copying Fanny Cradock in another way. We pretended we were Fanny Cradock making a Christmas cake and just used our fists. The dough was soon ready for the next splat of milk.

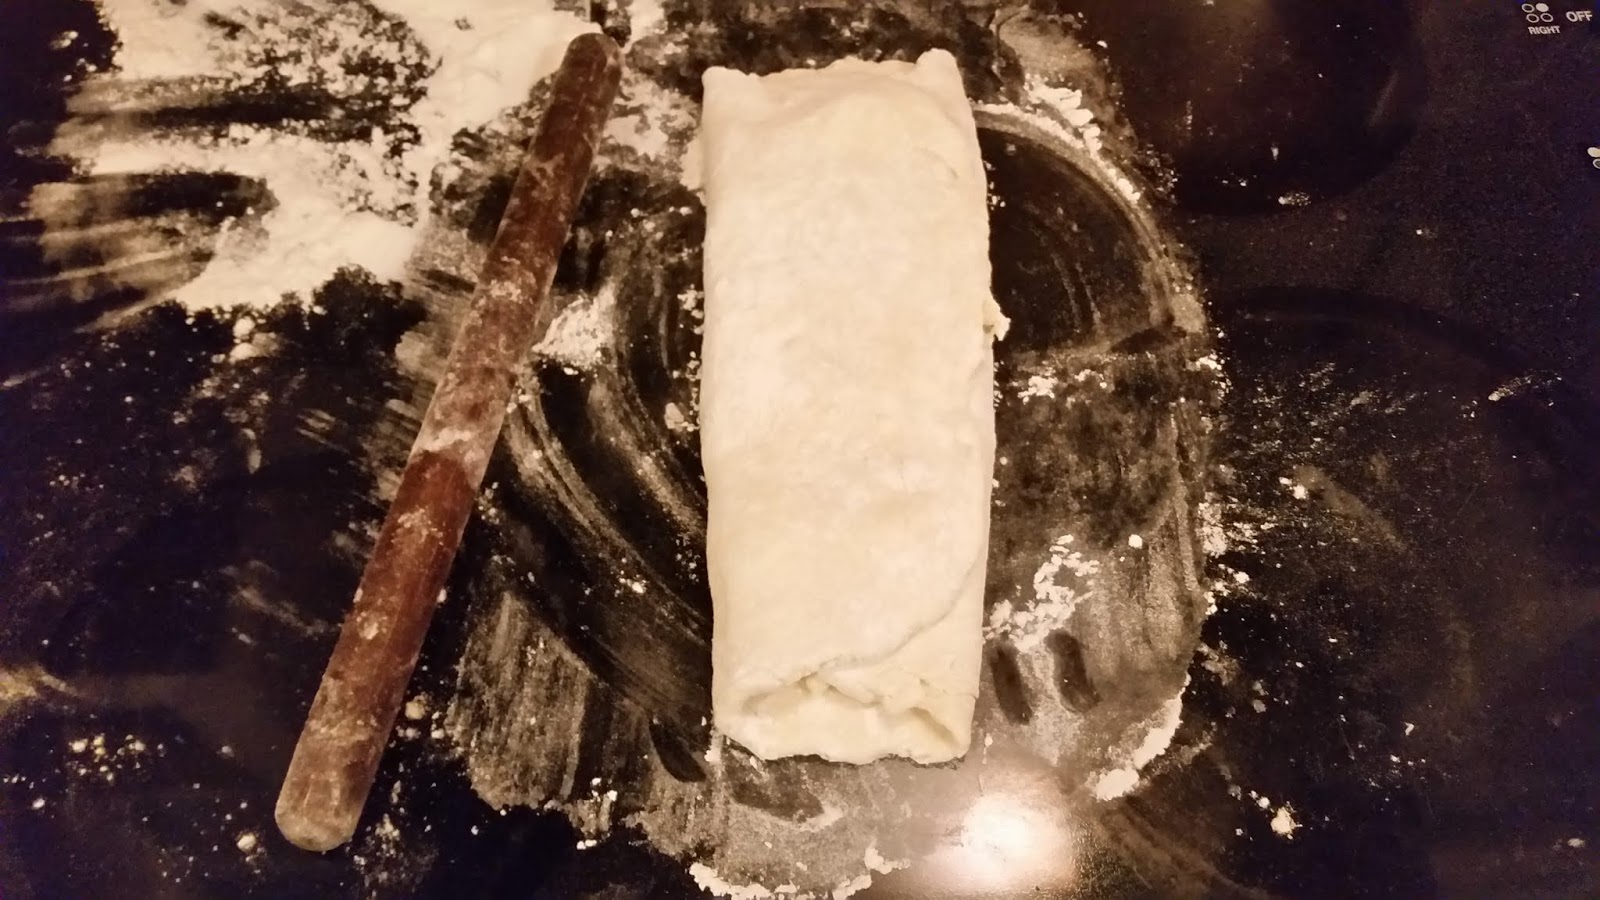
See, when the dough is this rubbery, you have to add the liquids in just a little bit at a time. Otherwise, you end up with little hard dough curds that refuse to actually mix with the milk they're floating in. We had considered mixing the milk and molasses together. But Miss Leslie clearly states to add the two alternately, and we were going to follow her instructions. That way we could blame her if this failed. Eventually, we ended up with some oddly rubbery and springy dough that looked like this.

We actually weren't too terribly unnerved, even though we could have repurposed this dough as a rubber band. It very much resembled the dough we got when we made gingersnaps, and those came out all right. But we tasted it, and all we could detect was the molasses. And so, back to the spice-chopping!
Is this enough ginger yet?

We got the extra spice mixed in, and tasted no difference. Our only hope was that the steam in these cookies would draw out the flavor, but since this was a very dry dough that seemed unlikely. And so, we figured the dough was as good as we could get it and got to cutting! And so, because we were visiting people who still had their Mom and Grandma's things in the house, the Box of Dreams was brought forth.

I was informed this one is meant to be Santa, but to me it looks like a check engine light.

We had a relatively small batch of dough, and everyone had picked out some cutters they really wanted. The little mini ginger-dude was popular. As for myself, I wanted lots of stars and moons. We also found a very antique playing card set- hearts, spades, clubs, and diamonds.
No matter how old you are, using all the cookie cutters makes it look like 5-year-olds did it.

As you can see, the dough was oddly leathery. It tasted like molasses and flour.

This doughnut cutter was also very popular because we could simultaneously cut cookie rings and gingerbread bonbons.

As we reached the end of the dough, we decided to take the last tiny bits and actually make little twists as the original recipe suggests.

They took a lot longer than we expected to bake, especially given how thin we made them. We were paranoid that we'd burn them because they're mostly made molasses. For the uninitiated, if you overbake most desserts, they just come out a little bit extra brown and toasted-looking. If you overbake something with a lot of molasses, it just burns.

I know this shape is supposed to be a snowman, but with brown cookies I think it looks like Mr. Hankey the Christmas Poo.

These baked into some very nice, surprisingly-mild molasses cookies. They were crunchy like biscotti despite only baking them once. I think the baking soda reacted with the molasses and mellowed its taste. Unfortunately, we may as well have skipped the spices entirely because they were imperceptible. We considered that next time, we could boil the milk and add the spices to it, steeping it like an herbal tea before adding it to the dough. But they were nice and light in the middle, and very good for dunking in tea.

However, if you're going to make little gingerbread twists, we recommend you twist them tightly. Otherwise they can come apart.

Lack of spiciness aside, we think we at least got the dough to come out as intended. It was crispy enough to eat, but sturdy enough that one could make little houses out of it. One could do all the traditional gingerbread things with these cookies as they came out: build houses, make tree ornaments, eat them and actually like it, and break them with friends.
However, next time we make these we will probably boil the milk and drop all the spices in it to infuse. In theory, making a high-concentration herbal tea will actually add the spice flavor to the bread.

We're going to cut in with a night-after-Christmas postscript and add that it was a LOT better the second day. The texture was a lot better, and the spice flavor actually came out and soffused the bread. So if you make it, make it a few days ahead and leave it out to ripen.

Thursday, April 11, 2019

Is puff paste really that hard?

Guess what we at A Book of Cookrye are attempting! Here's a hint: The recipe has three ingredients, but the directions run for two pages.


Puff Paste
2 c flour, plus extra for dusting on the countertop when rolling
Pinch salt, optional*
1 c butter, cold enough to be firm but not rock-hard
Cold water
Note: These are half of the original recipe amounts.

Sift the flour and salt into a big bowl. Then divide the butter into four equal parts. Cut up one of the quarters into the flour; and divide the remaining three quarters in half for a total of six pieces. Then divide each of these into small bits, but keep them in separate piles.
Mix the flour and butter that you already added to it (the original recipe says to use a knife, but honestly you can just use your hands), adding by degrees a very little cold water till you have made it into a lump of stiff dough. Pat it into a disc about 1-1½" thick.
Sprinkle some flour on your rolling surface (Miss Leslie thinks you should have a marble slab). Take the dough from the pan and coat it well on all sides with the flour. Roll it out the paste into a large thin sheet. If you're one of those rare people who can control what shape the dough rolls out to, try to go for a square or rectangle. Or at least something symmetrical.
All right, we've made an ordinary pie crust. Now we're going to turn this into puff paste. With the knife, put all over half of it, at equal distances, one of the six pieces of butter which you have divided into small bits. Fold the dough up and over the butter, flour the dough and the table if the dough even tries to stick, and roll it out again. For some reason, it works better if you only push the rolling pin away from you, instead of rolling it back and forth. Add in the same manner another of the portions of butter.
Whenever the dough even makes the slightest attempt to stick to the table put flour under it or else you will go nuts trying to deal with it. Similarly, dust the top of the dough with flour if it tries to stick to the rolling pin.
Repeat this process till the butter is all in. Then fold it once more, lay it on a plate, and set it in a cool place till you are ready to use it.
Then divide it into as many pieces as you want sheets of paste; roll out each sheet, and put them into buttered pans.
The original recipe says "Bake in a moderate oven, but rather quick than slow" (which is probably about 375°). No air must be admitted to it while baking.
The edges of paste should always be notched before it goes into the oven. For this purpose, use a sharp penknife, dipping it frequently in flour as it becomes sticky. The notches should be even and regular. If you do them imperfectly at first, they cannot be mended by sticking on additional bits of puff paste; as, when baked, every patch will be doubly conspicuous when it rises up and turns into a huge wart of flour. There are various ways of notching; one of the neatest is to fold over one corner of each notch; or you may arrange the notches to stand upright and lie flat, alternately, all round the edge. They should be made small and regular. You can form the cut-off scraps into leaves or other shapes with little cookie cutters.
Puff paste freezes well, but the homemade stuff tends to go a bit stiff in the refrigerator or freezer. You might want to freeze it as a flat sheet instead of folding it up. Also, as Miss Leslie notes in the introductory note to the pie chapter, it comes out better if made in the cold. The butter you're folding in is less liable to melt while you're making it, so it will keep its layers better and then rise better when baking.
If the above directions for puff paste are carefully followed, and if it is not spoiled in baking, it will rise to a great thickness and appear in flakes or leaves according to the number of times you have put in the butter.
It should be eaten the day it is baked.

*The recipe doesn't mention adding any salt, but pie crust without it tastes like nothing.
Or into nine; and roll it in that number of times.
This way looks really cute after baking. The folded-over bits turn into puffy triangles all around the edge.


Slightly adapted from Directions for Cookery in its Various Branches, Miss Leslie, 1837

If you've been reading this blog for a while, you've gotten to witness my progression of pie crust skill- from this:
Back when we made individual fruit-and-kidney pies in a muffin tin.


To middlingly-skilled like this:
It nearly landed in the pan in one piece!


To, finally, this:
My own success terrified me.

In fact, after we'd gotten about as skilled as the last picture, we once semi-accidentally made puff paste with cheese, which (once cut into squares) made lovely biscuits.


And so, we decided to look at one of the longest recipes in the entire book. One that has scared us for a long time. After all, when you can barely roll out a pie crust once without ripping it to shreds, why would you be so stupid as to try to keep folding it--- and then rolling it again?
As we so often do when trying intimidating recipes, we decided to follow absolutely all of the instructions- even the ones that we usually skip in the name of laziness. Things were happening in the Kitchen of Cookrye that never happen.
I don't think I've actually sifted flour when a recipe said to since before I could legally drink.

Following every minute instruction means that whatever happens, we are clear of blame. No one can say something like "Your cupcakes turned into hockey pucks because you forgot to spin the bowl thrice widdershins like the recipe says!" If this fails, we can blame Miss Leslie for faulty recipe-writing, not ourselves for skipping half of the steps. Speaking of steps, let's get to the part of this recipe where all the butter makes the kitchen start looking like Thanksgiving!
As you gaze upon the butter, you should know that we're cutting this recipe in half.

In addition to using a sifter, we got out... this thing! I'm kind of surprised we still have it. When I was a wee tot learning how to cook, I asked Our Mom of Cookrye if we still had it in a drawer. The trouble was I didn't know what it was called. Our Mom of Cookrye didn't know either, which made an interesting experience out of finding what long-abandoned corner of the kitchen it had gotten to.
In case you too are wondering, it's called a "pastry blender."

All right, so far this looks like we're making regular pie crust, doesn't it?

Now, this is the point where it starts to look less like pie crust and more like puff paste. Miss Leslie thinks we should have a marble slab for this purpose. As it happens, we actually have one! Sort of.
Flat-top stoves work great for a lot of purposes. However, heating pots of food is not one of them,

This prompts the question: Was marble cheaper in 1837? Granted, Miss Leslie was from Philadelphia which is near(ish) to a lot of quarries, so maybe marble was cheap where she lived. But how many families embarking on the long journey west carried marble slabs with them?

All right, so here is the last point where we're making a nice, normal, easy(ish if you know what you're doing) pie crust. Note that we've cut the recipe in half and it's still enough to cover a lot of the stove if we were to roll it out as thin as it would be if we were about to bake it. While bulk production makes sense from the 19th century perspective where kitchen sinks didn't have running hot water and a little bottle of soap, where were you supposed to store the extra without a freezer?

And now, we finally get to turning this into puff paste. What we're basically going to do is repeatedly encase butter in the dough. So first, we fold it over into a sort of dough-butter sandwich.
 
And once you've got that rolled out flat again, you keep adding more butter and folding it on itself, again and again and again. It helps to give the dough a quarter turn every time you repeat this. Otherwise, you end up rolling it into an annoyingly long rectangle.

Believe it or not, re-rolling this actually got easier as we kept doing it. The dough got springy and almost rubbery. It seemed a lot more resilient against tearing every time. Like, the first few times the dough as almost like semi-delicate cookie dough, but as we reached the last few butter portions, the dough had gotten so tough we could have hung it off a coat hanger without it tearing.

You may be surprised what a difference repeated encounters with a rolling pin made. The dough got really smooth and kind of elastic toward the end of this. It even looks different. To our own surprise, this entire process (that goes on for two pages in the book) was really fast once we started rolling all those layers of butter in.

And now we've got all the little butter pieces encased in the lovely pie dough! See how you can see them kind of peeping through the translucent layers? That's a good sign. It means the butter's still in separate layers rather than just mixed into the dough.

And that, dear readers, is how to make puff paste like it's 1837! Let's revisit the question we started today's perpetration with: Is puff paste really that hard? Well, if you can roll out pie dough once without cracking and tearing it, rerolling it a few more times to turn it into puff paste is easy. If on the other hand you can't, perhaps this recipe is not good for your sanity.
 You may be wondering what you might do with this now that you've got it made. Now, you can make a lot of super-fancy dessert things easily (the hard part was making the damn puff paste). But our favorite (at the moment) is... these!


As the recipe promised, the puff paste did indeed expand in the ovn, giving us these lovely cookies.


Let's snap one open and BEHOLD THE FLAKINESS!

Assuming you can make the puff paste (or just buy it frozen), these buttery sugar-bombs are surprisingly easy to make. That post is forthcoming!

Thursday, November 30, 2017

Pumpkin Chips: or, These are worth half their weight in sugar

You know those orange things people ritualistically put on their porches every fall?

It's a strange ritual perpetrated here in the United States. Because it is fall, people almost automatically put pumpkins out on their porches every year. I don't mean jack-o-lanterns, I mean just... putting pumpkins in front of the house. Because fall. Did you know you can eat them?
Everyone of course knows about pumpkin pie and the astonishing proliferation of pumpkin spice everything, but it seems few people realize you can make it yourself using those funny orange things they deposited right outside the door.
We at A Book of Cookrye aren't going to make our own pumpkin pie, but we will bravely carry the autumn torch of sugary pumpkin-flavored things even though December is upon us with fake snow and mandatory cheer.
Miss Leslie, Directions for Cookery in its Various Branches, 1848

Pumpkin Chips
1 pumpkin
for every pound of cut-up pumpkin:
1 pound (2 cups) sugar
½ c lemon juice

Pare the outer skin off the pumpkin. Your vegetable peeler if you have one will prove useless, so use a paring knife. And have a knife sharpener on hand- you will need to resharpen it about halfway through.
Remove the seeds and strings, then cut the pumpkin into strips about 2 to 4 inches wide. Then cut them into slivers about ⅛" thick.
Weigh the pumpkin, then measure out the lemon juice and sugar (This will be a lot of lemon juice; you may want to just get a bottle instead of squeezing it yourself). Mix everything in the pot you'll be boiling it in, and let it soak overnight in the refrigerator.
The next day, put it on to a moderately fast boil. You don't want it to boil too hard, but don't slowly simmer it either. When the chips are transparent, put them in jars.
These are delicious put in already-baked individual tartlet shells.

Source:Directions for Cookery in its Various Branches, Miss Leslie, 1848

When you read the title of Pumpkin Chips, did you imagine a sort of orange equivalent of kale chips? Well, in 1848, pumpkin chips were boiled in lemon syrup that contains literally their own weight in sugar! You thought the pumpkin spice lattes were diabetes in a caffeinated cup? Miss Leslie and her 1848 cookbook use so much sugar that even the iced pumpkin spice creations with whipped cream on top are practically health food.  Let's get on with it, shall we?

A pumpkin is maddeningly tedious to skin. For one thing, they are really big, so you're going to have a lot of square footage to peel. Furthermore, these things are hard. A vegetable peeler is useless here. And your paring knife will need resharpening at least twice per pumpkin.

Now, when I make preserves, I almost always go through the following thoughts in this order:
1. I probably should make a lot, since I won't be doing this for a long time.
2. (after getting the fruit ready to cook) This is way too much fruit! What was I thinking?
3. (after the fruit shrinks in the syrup) I'm barely going to get one tiny jar of preserves out of this! Why did I work all this time only to get a tiny teacup of preserves?
4. (upon getting the preserves into the jars) There is so much of this! What would anyone do with this much preserves?

With this in mind, and given that not-canned pumpkins are so seasonal, I decided to make chips out of not one but two whole pumpkins. The paring alone took over an hour. Incidentally, a pumpkin without its skin feels surprisingly spongy.
Is this a recipe or a cry for help?

Eventually, we reached the point where we get the pumpkin into slivers.
After carefully trying to scrape off as little rind as possible, this felt so good.

Now, normally making a recipe in large quantity doesn't make it that many times harder. Like, doubling a cake recipe and baking two of them doesn't take twice as long as if you had baked only one. However, in this recipe, we didn't have any such time-saving. You see, it takes exactly twice as long to cut up two pumpkins as it does one.
The knife is included for scale. This is a lot of pumpkin.

I have to admit, at this point I was done. I could take no more and had to call this off for the day. I thought I'd just hack the pumpkins into manageable-sized pieces and finish this project the next night. While there was no reason the pumpkin couldn't spend the night in the refrigerator, even the large gallon bags I'd had in mind for this seemed worthlessly puny in the face of all this pumpkin. However, even that hasty cutting job took longer than an hour.

If you are at home and cooking so much food you must store it in a trash bag, either you have a big party coming up, you're volunteering your kitchen for charity, or something is wrong with you. I should note that this bag was full to the top and so heavy it threatened to rip. Once I forced it to fit in the refrigerator, the shelf sagged unnervingly. I wasn't sure the support brackets would survive the night.
And so, the next day, all of this pumpkin had to be cut into slivers "about as thick as a half dollar." The whole trash bag of pumpkin. I have to think that back in Miss Leslie's day, preserves were a group effort. They had to be. Even in competent hands, this would be at least 4 hours with a knife.  If someone had to make enough preserves to last until fruit came back in season, literally all other housework would have to stop.

Meanwhile, we had to deal with step 2 of this recipe: cooking the chips.
It is a fundamental fact that the modern suburban kitchen is simply not equipped for cooking in quantities to feed a large family of 1800's farmers. Even if someone goes out and buys the sort of massive cauldron you'd need to boil all of this at once, it may not actually fit on the stove. Furthermore, rarely will anyone have the counterspace to handle such a massive undertaking.
Now, it is true that at any point I could have decided I didn't need to make chips of all the pumpkin. Even after reducing all of it to slivers, there are a lot of things you could do with cut-up pumpkin if you wanted to scale down the preserves recipe. Nevertheless, I forged daftly forward with candying all of it.
The first major problem was selecting a suitable pot. I'd hoped that the pumpkin would fit into a much smaller space once it was cut into tiny chips. While it did, two pumpkins make even the big pot your mom boils spaghetti in look puny when you try to fit them inside.
Fortunately, I have Mexican family, which means some of us make tamales! I called my sister asking if I could borrow their massive tamale pot (if you've never seen one, imagine one of the bigger metal buckets from the hardware store, but with pot handles on the sides). Unfortunately, theirs had finally rusted.
This ended up happening instead.

You may think that's a lot of sugar, and you would be right. Ever seen those massive bags of sugar and flour on the very bottom shelf at the grocery store? The ones that look like feed sacks instead of baking ingredients? Making two pumpkins' worth of chips will use up one of those. Let's pull the camera back and see what all this pumpkin and sugar ended up cooking in.

You know what the worst part of this was? If you go up to the recipe, you'll see that you're supposed to measure out the sugar and lemon juice by the weight of the pumpkin. Meaning, you're going to have to weigh the pumpkin.
Before I realized just how much pumpkin I would have on my hands, I'd planned to just take it into the grocery store and use the scales in the produce department. But those tend to have a maximum weight of 10-20 pounds. So I had to get out a bathroom scale and weigh myself- both holding the trash bag full of pumpkin and not. Some quick subtraction yielded the weight of the pumpkin (which was about 30 pounds if you're curious). But let's go back to what happened- I had to weigh myself. If you've had crippling image issues all your life, the act of stepping on a scale and looking down will forever be emotionally fraught.

Yes, that is two roasting pans, each of which is perched on two burners. There's something both delightfully old-fashioned and fiercely intimidating about using a pot that is so big. There was a third pan's worth of pumpkin still bagged in the refrigerator, but I had only two pans and four burners.
Even after an overnight soak, the soaking water tasted like concentrated lemonade with not a slight suggestion of pumpkin flavor. Nor did a pumpkin aroma exude from the pans.
But finally, after all this work, it was time to get these suckers into jars. I don't know the first thing about actual home canning. I've just heard it's reasonably straightforward to do right, but if you do it wrong you will die of botulism. So instead I decided to keep these in the refrigerator. There were... a lot. In case you don't quite realize what you're looking at, this is so many jars of pumpkin chips they do not all fit in the refrigerator door.

But you haven't seen the biggest jars yet. I'd thought these two would actually contain all the chips. But when you're cooking in such massive amounts, absolutely everything in the kitchen- from the massive stewpot to the roaster that held two turkeys in last year- starts to look ridiculously dinky compared to the massive mountain of cut-up pumpkin.

As a helpful tip, clear off absolutely all the counterspace before getting your pumpkin chips from the pot to the jars. You will need more room than you expect. Also, the syrup will get absolutely everywhere. If you have spices, plates, or figurines on the counter, you will have to rinse and wipe them one by one.
But what does one do with all the candied pumpkin chips? Miss Leslie suggests putting them in baked puff-paste shells. I brought some to share with my friends, and having not seen that the recipe suggests making tartlets, they all independently said "These would be really good in little pies!"
I didn't have the time or patience after all this, but for a Thanksgiving gathering I did smush scraps of pie crust into a cupcake pan.

Ain't they pretty?

As for the taste, they were insanely good. Pumpkin and lemon is a surprisingly delicious combination that should appear more often. I'm really glad these are good, because there are... a lot of pumpkin chips waiting in the refrigerator.
In short, this is really tasty. I actually recommend it most highly. However, do not do a whole pumpkin, and under absolutely no circumstances do two at once. Make chips out of maybe one quarter of a single pumpkin, and you'll be delighted with the results without being exhausted getting there.