Monday, February 28, 2022

Strawberry Cake!

Sometimes a recipe keeps coming to you from different places. 

A friend of my parents' made a strawberry cake as one of her signature birthday cake for all of her kids' parties (and we went to a lot of them). Then one year my mother found a printed copy of a similar recipe somewhere else and asked me to make it for... some occasion or another. I forget what the occasion was, but I ended up making something else. Then, my mother came back from visiting her mother, and my grandmother had sent this recipe back an index card in her mother's handwriting. She also sent me her mother's silver cake server.


Strawberry Cake
1 box white cake mix
3 tbsp flour
1 box strawberry gelatin (I used a 3-oz one)
1 (10-oz) box frozen strawberries-- thawed, drained, and divided in half
1 c cooking oil
½ c cold water
4 eggs

Heat oven to 375°. Grease a 9"x13" pan.
Mix half the strawberries (and the juice you drained off of them) and everything else together. You might want to first put the strawberries through a blender unless you're using a two-beater mixer which will chop them up anyway.
Pour into the pan and bake 30-40 minutes.

Icing:
⅓ c margarine
¾ package of powdered sugar*
Remaining half box of frozen strawberries

We will have to revisit this recipe before we can with assurance write directions that work, see below.

*Some powdered sugar packages are 1 pound, some are 2 pounds. This icing recipe appears most likely to work with the latter size.

Source: Handwritten recipe card

Well fine, if this recipe is going to keep bumping into my life, I can't do anything besides make it. 

This is not from the pen of the same great-grandmother whose graham cracker and coconut cake we made not too long ago. Today's recipe comes from the same great-grandmother whose fudge recipe you can find on the back of a marshmallow creme jar. We've also used her hand-cranked egg beater in the process of baking for my grandmother's bake sale. 

When I got this recipe, I thought it would be cute to bring this to the next family gathering. Wouldn't it be so lovely, I thought, to serve my great-grandmother's cake with her own cake spatula? Unfortunately, I then put the card somewhere so safe that even I couldn't touch it. But as evidenced by the fact that we're making the cake today, I later found the card and photographed it before putting it somewhere easier to remember.


Well that looks easy enough. Like a lot of recipes that start with a box of cake mix, I figured the instructions consisted of putting everything in the bowl and letting your electric mixer do the rest. If you use a mixer that has a single paddle instead of two beaters, this may not work for you because the two beaters kind of chop up the strawberries as they go. You might have to do some scissor-snipping (or blenderizing) of strawberries before putting them in.

As a recipe note, we have a lot of olive oil, margarine, and also a surprising amount of beef fat. This house is well-stocked with various fats, and I was not about to add cooking oil to them. Therefore we're using melted margarine instead of the specified cooking oil in this recipe. It's always more economical to use what you already have.

As a second recipe note, I didn't know how big the "1 box frozen strawberries" we're supposed to put in this cake is supposed to be. An image search for boxes of frozen strawberries shows that they're all ten ounces. Since every single box of frozen strawberries we found online was the same size, I think we can safely assume that 10 ounces is the standard size of a box of frozen strawberries. All of the strawberries I saw in the freezer aisle were bags of individually-frozen berries, but I figured that it would make no difference whether the berries had been frozen separately or pressed into a 10-ounce block before freezing. You can't tell the difference when they thaw anyway.

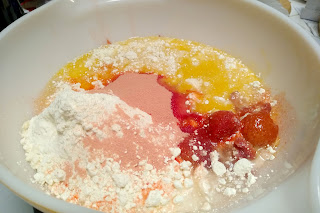
Having gotten everything into the bowl, we let the mixer do its electrical magic and turn these disparate ingredients into a cake batter.


I love how pink this is! I know it's mostly the artificial red dye in the Jello that gives it that perfect hue, but I also don't care. 

Like I said earlier, this particular copy of the recipe is in my great-grandmother's handwriting but the recipe has found me multiple times before I ever knew she wrote it down. She attributes it to a friend of hers on the top right corner of the card. My point is, this recipe has gotten passed around a lot. Perhaps it's not in as many recipe boxes as the cookie recipe on the back of the chocolate chip bag, but it seems like this cake recipe has remained popular much longer than the corporate test kitchen thought it would. 

I really wanted to know where this recipe first came from. But so many people have shared this recipe online that I couldn't find who might have first published it. It's probably from the 1950s or 60s, when a lot of creative cake mix recipes flew out of test kitchens to help people feel less lazy for making dessert without measuring out flour. Since we have Wesson Oil named on the card, it might be from that company. Or maybe for people of a certain era or region, Wesson Oil  is a general term like Crisco or Xerox.

If you make this at home, I suggest you add the water after everything else is mixed. The batter is so thin that the last little lumps of cake mix can stubbornly evade any attempts to mix them.

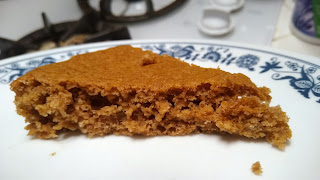
After meaning to make this recipe for a while, it was quite anticlimactic how quickly we went from putting the first things into the mixing bowl to putting the cake into the oven. The cake is an ordinary-looking brown on top, but you could see that it was still wonderfully pink in the middle.

And now, we move on to the icing. The ingredients tell us to use "3/4 package" of powdered sugar. It's either the one-pound boxes of powdered sugar that used to be the standard, or the two-pound bags that you find nowadays. I guessed that the "3/4 package powdered sugar" in the recipe is meant to be three-fourths of a one-pound box. This may not have been correct, as we will shortly see.


Things start out like most icings do, with the powdered sugar in a nest of oleo. It soon looks like any buttercream before you thin it out a bit.


Here we make our grave mistake: we just dumped the strawberries in. In retrospect, we should have drained the juice into the cake batter instead saving it for the icing (you'll see why).


As before, the mixer did all the fruit-chopping for us. However, it soon became apparent that the icing had too much strawberry juice in it. I could live with icing that was a tad runny, but today our icing had re-separated into oleo curds suspended in strawberry syrup.

Ordinarily, one might keep adding powdered sugar until the butter-curd soup turns back into icing, but it soon became obvious that I would have to use up all the powdered sugar in the house to fix this mess. So instead, I poured a fresh bowl of powdered sugar and slowly dribbled in the buttery red goop until the mixture looked right. 


This resulted in some adorably pink icing with strawberry speckles. It also had an absolutely wonderful strawberry flavor. Clearly I got the original amounts wrong, but I'd definitely recommend this icing to anyone who can get it right the first time.

Our icing misadventure also resulted in a bag of strawberry-oleo failure which I froze away. I figured I can reconstitute it with extra powdered sugar at some point in the future. That way, instead of waste, we can have delicious strawberry icing twice. Also, strawberries are not cheap regardless of whether you get them fresh or frozen.

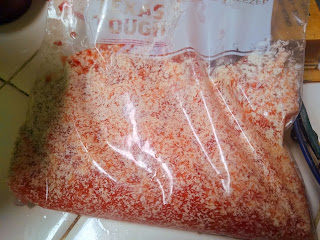
This is what cheapskatery looks like.


Before we step away from the icing, I have one further quick note. You may think that the icing would work if you melted it. I thought so too, and put the unused strawberry-oleo mess in the microwave to find out. The butter merely floated on top- but this time in liquid form.


I thought that perhaps the icing would mix if it got put through a blender. True, anyone who paid attention in science class would know that oil and water do not mix. But you may remember that the honey fruit dressing resisted mixing until it got a very hard whisking, but never separated (even after a few days) after we got it combined.

This turned into a decent looking glaze after blenderizing it. And even after leaving it out for a few minutes to watch for any re-stratification, it looked like it would decisively stay mixed. However, it tasted like you were eating a stick of butter with strawberries on top. Therefore, I'm inclined to say that we should have used a two-pound bag of powdered sugar, not the single-pounder that we used today. But of course, that would make a lot of icing-- so much that if you put all of it on one cake it would collapse in a sweet swamp. I think it might have worked had I drained the strawberry juice into the cake batter instead of the icing.


And so, after an unexpected near-failure, we finally reach that magical point where we mate the salvaged icing to the cake! I think it's an extra-special moment when you're topping a cake with an icing that specifically came with it in the recipe. It feels more satisfying than arbitrarily picking an icing for a cake that doesn't have its own designated one.


This icing was almost but not quite runny enough to be a glaze. If you wanted it to be a bit less drippy, you would probably have to cheat a bit and 
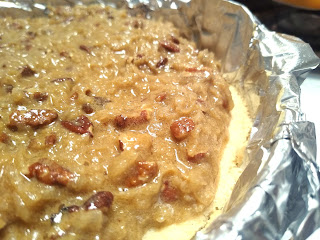
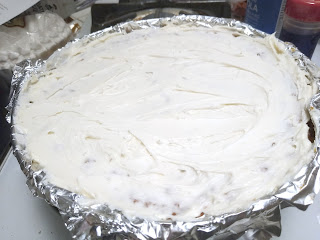
add a tablespoon or two of shortening. In its current form, the icing spread in just a few seconds. However, it really did need to sit out overnight to firm up enough to forestall pink drips. Nevertheless, I absolutely loved the pink and strawberry-speckled result. I don't know why the camera's doing its best to make this look bad.

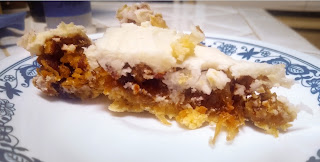
I will admit it's not much to look at. The icing, no matter how evenly you spread it, looks like a dumped-on slick with unfortunate chunks. Perhaps employing a blender would improve it, but I think your best bet would be to cut the cake up before serving it. The same strawberry chunks that add an unfortunate appearance to the uncut cake turn into cute flecks and speckles on an individual slice.

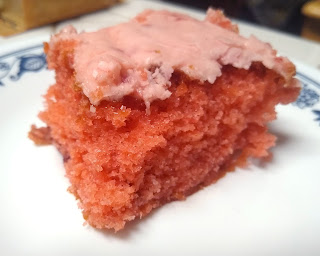
I would like to point out that no red food coloring went into the icing. The strawberries turned it pink unassisted.

 Opinion was divided on the bright color. Some people thought it looked really cute, others thought it looked, and I quote, "radioactive." 

This is one of the few "dress up a cake mix" recipes I'd actually make again. I think adding actual strawberries to the batter fixed a lot of the bland artificiality of the cake mix. I carefully tried some of the cake with no icing on top, and it's just a bit lighter and more delicate-textured than most cake mixes. The strawberry flavor is perfect. The icing is of course really good after correcting for some very severe mistakes. I would make it again for any cake--- or at least, any cake you serve right out of the pan. It would look drippy (and not in that cute drizzly way) on a layer cake.

With that said, the last three words of the recipe, "very rich cake," are very correct. If you're not making this for a lot of people, I would suggest measuring out half of the cake mix and then making half the recipe. However, we did eat the whole thing.

Wednesday, February 23, 2022

Hump-Day Quickie: Soda Cake (literally!)

Sometimes an idea gets dumped on me that sticks in my mind. I don't constantly think about it, but it will sit in the back of my mind and sporadically remind me of its existence, like a splinter that you can't decide is worth finding the tweezers over.


The pixelation of this image makes it look like it has made the reposting rounds a lot before someone semi-automatically forwarded it to me. It's got a HuffPost Taste watermark on it, but I suspect it started as a Betty Crocker advertisement. One will note that only Betty Crocker's cake mixes appear in the allegedly helpful infographic. 


Anyway, I had to admit that this recipe got to me. Therefore, we're making the ginger spice version we see at top right. We didn't want a full 9x13 pan of cake mix reconstituted with soda, so we measured out half of the soda can. Halving the cake mix should have been trickier. If I wanted to be precise, I would have either poured all of the cake mix into a large measuring cup and then put half back in the box. Instead, I just eyeballed what looked like half of that synthetic-smelling powder and dumped soda on top. 

One vigorous whisking later, we had a surprisingly convincing facsimile of cake batter. The taste of the ginger ale completely hid in the other spices. I expected perhaps a bit of extra pepperiness from the extra ginger, but it just tasted like spice cake. It seemed to retain a bit of fizziness even after an unnecessarily-thorough beating.

At first I thought a whole can of soda would make this batter ruinously runny. Previous experience strongly suggested that I would do nothing but waste the cake mix. But this time the batter at least looked fine, perhaps because the soda was the only liquid in the batter.

The resulting cake looked almost as thin as a pancake, but keep in mind that the initial cake batter barely coated the bottom of the pan. Manufacturers have long been shrinking cake mix boxes in that insidious a-snip-at-a-time way. Ten years ago, half a box of cake mix would have filled this pan without the aid of a rubber spatula to coax it to the edges.


 The cake was a little spongy when we cut it, but it didn't seem unnervingly rubbery. Honestly, it appeared pretty normal.

I'm surprised to say this, but you get a perfectly normal cake out of a box of mix and a can of soda. I thought the cake's texture was just a little bit off, but others in the house said it was perfectly fine. It's not the best cake I've ever had, but it's not bad either. As you can see above, it's only thin because the batter started out so thin. What batter we had rose to a nice, fluffy height. The cake is a bit fragile and crumbly, so I would definitely just pour a glaze on top instead of icing it.

I can see how it'd be amusing to experiment with different combinations of cake mix flavors and different types of soda. Also, if you check the ingredients label on the cake mix, this could be a decent in-a-pinch vegan cake. 

This got me to thinking: What is in cake mix that apparently allows you to reconstitute it into a reasonable approximation of cake with any liquid you can dump into it? I've never thought about the components of cake mix before. Like most of us, I've always thought of cake mix as a homogeneous compound that smells like artificial flavoring. I checked the ingredient label, and it's mostly flour, sugar, a bit of powdered milk, leavener, and a lot of other ingredients that I couldn't identify but I assume to be various flavorings, preservatives, and a few other things that presumably alter the texture. It looks more or less like the ingredients for a yellow cake if you left out the butter, milk, and eggs. 

You probably already guess where this is going. We started with this yellow cake recipe from my friend's mother's Better Homes and Gardens Cookbook. It looks like the sort of thing that would have been made year after year for birthdays and various holidays, assuming you don't think you can substitute soda for butter and eggs. Anyone who actually followed all of the directions instead of going off-book before you've gotten halfway through the ingredient list would get a very nice cake. Unfortunately I am too daft for that.


We commenced, of course, by putting all the ingredients that are neither liquid nor perishable into a bowl.  


I would like to say that it looked a lot like cake mix after a quick stir, but it didn't. The texture wasn't quite right. It didn't have that powdery-yet-gritty consistency of cake mix when you dump it out of the box.


By request of others, we are putting root beer into this attempted cake. The resulting batter tasted surprisingly acidic in a way that the cake-mix-based batter did not. The root beer tasted like it went from mildly tart to corrosive upon contact with flour. 

I've never thought of root beer as particularly acidic. If anything, it tastes like fizzy vanilla to me. But this tasted less like cake batter and more like I should be scouring the floors with it instead of passing it off as edible. The "homemade" version of today's cake tasted more synthetic than the one that started with that mysterious powder loaded with natural and artificial flavors.

The resulting cake batter had the same color as the literal coffee cake we've made before. But unlike our various caffeinated cakes, this batter tasted terrible. Sometimes (usually) I deliberately do a lousy job of scraping the cake batter into the pan because it tastes too good not to eat. But this time, the batter was so weird I had to keep tasting it to see if it was as... unsubtly incorrect as I thought it was three seconds ago.


The batter looked totally normal going into the pan. But despite the harmless appearance, I suspected that I would be discreetly throwing this into the trash without letting anyone try it. I was getting comments from kitchen observers about how (barring a miracle in the oven) this was a waste of perfectly good root beer.


The resulting cake was oddly shiny on top, but otherwise it looked relatively acceptable. 


If we examine the alleged cake in cross section, we see that it has managed to leaven itself. But it does look a bit... not right to anyone else? It looks less like a cake and more like a beige kitchen sponge.

After baking, the cake was still unnervingly acidic from the root beer. It had the same paste consistency as the Diet Coke cake, except this time it has air bubbles trapped in it. But you could knead it into a clay ball just like that time. While few cakes look good after you squish them in your fists, you should not be able to press a cake into a translucent ball like this:

This cake is of course not at all healthy, but it has that peculiar disappointment one gets from unrelentingly nutritious facsimiles of cakes and pies. You know, the hard cookies, carob brownies, and dusty pies that are infuriatingly close to the real thing but also flavorless and just wrong enough to go from mediocre to slightly depressing. This cake was so paste-like that I thought I had underbaked it. So, I put it back in the oven for so long that it should have hardened into one big crouton. This made no difference except to slightly dry the exposed edges. 

We thought we might figure out what other little things we might add to correct the texture of this almost-viable cake, but then we all agreed that we would just be reverse-engineering a box of cake mix. It's easier and cheaper to just go out and buy one.

So, in conclusion, yes. You can pour a can of soda into a box of cake mix and get a decent cake. It's not the best cake you'll ever make, but it's not bad either. It's fun to make, and the results taste just fine albeit not all that great. 

But you can't dump a can of soda into a previously normal cake recipe after leaving out the butter and eggs. If you're going to try a soda cake, you must embrace the box of prefabricated petrochemical magic. You should also use a smaller pan than you probably think. 

Instead of closing today's (mis)adventure with disappointment, we're saying "au reservoir" with a photo of surprising success.

Friday, February 11, 2022

Butter Finger Dessert Bars: or, Three-fourths of the recipe name is a lie

Sometimes, when one cleans out a pantry, a quasi-pie ensues. This box of powdered sugar turned up in the far back corner of the top shelf, still half-full of powdered sugar.


I thought that this recipe, with the name Butter Finger, predated the candy bar. But Wikipedia tells me that Butterfingers date back to 1923. Also, did you know Butterfingers are Italian? They're from the same company that makes Nutella. I haven't been this surprised about confectionery since I found out that Kit Kats are British.

Butter Finger Dessert Bars
   Crust:
1 c butter or margarine, room temperature
2 c flour
¼ tsp salt
2 tsp sugar
Heat oven to 375°. Grease a 9x13 pan. (Even if you normally don't, we recommend lining the pan with foil for this recipe.)
Mix butter, flour, salt, and sugar until crumbly. Press into the pan.
Bake for 10-15 minutes. Leave the oven on when you remove the pan.

   Filling:
4 eggs, well-beaten
¼ c flour
2 c brown sugar
¼ c flour
2 tsp baking powder
1 c shredded coconut
2 c chopped pecans
Whisk together the eggs, sugar, baking powder, and flour,* beating well. Then stir in the pecans and coconut.
Spread over the crust.
Bake at 375° for 15 minutes. It should be golden on top. It should also jiggle like gelatin instead of sloshing like a pan of liquid. Cool completely before frosting.

   Icing:
6 tbsp butter or margarine
2-3 tbsp milk or cream
2 tsp vanilla
3 c powdered sugar
Beat together the butter, milk, vanilla, and about a half cup of the powdered sugar. When it's all well-mixed, beat in the remaining powdered sugar.
Spread on the bars. Let sit a few hours before cutting.

*I also added a pinch of salt.
If using margarine for the icing, you'll want to use stick margarine. If you use the spreadable margarine from a tub, the icing will be too drippy and runny unless you also add a spoonful of shortening.

Source: Imperial powdered sugar box

Moving on to today's recipe, this is the first Butter Finger recipe I've seen that neither imitates nor incorporates the candy bar. This recipe is also a lot more, shall we say, involved than the other recipes I've seen. The Butterfinger recipe I have encountered the most is a "Butterfinger cake," which has graced many a potluck I've gone to. The recipe seems to be "Make one box of cake mix according to directions, then put a layer of crushed Butterfingers on top instead of icing." 

I don't get why today's perpetration is called "butter finger" at all. The only butter in the recipe (assuming you put oleo in the icing) is in the crust. It doesn't resemble the candy at all, and it doesn't look particularly buttery. It looks like the recipe writers started with a pecan pie. They then replaced the pie crust with one that you finger-press into the pan (which agreeably simplifies things), and put icing on top so they had an excuse to put it on a powdered sugar box.


Before I made the recipe I thought this was going to basically be a cookie crust. Then, upon actually reading the recipe (as one often does when making it) it looks more like a pie crust. However, things were not going according to the instructions. The bowl of (what I thought should be) pie crust didn't look crumbly like the recipe claimed it should be. I did not expect this because back-of-the-box recipes are (theoretically) tested by a passel of kitchen staff before they get printed on any food labels. I checked the ingredient list to see if I had either mismeasured something or made a mathematical error when halving the recipe. I had not.


This allegedly crumbly crust was the stickiest mess I have tried to press into a pan in a long time. I tried spritzing my hands with cooking spray, but it only helped for a few seconds before the dough stuck to my fingers anyway.


When I first examined the recipe closely and saw that we weren't doing a cookie dough crust, I was afraid it would be really bland and a waste of time in this recipe. Then I saw how much sugar we're putting on top of it. So aside from suspecting that this would be a failure of a crust because it didn't look like the recipe claimed it should before baking, I was ready to move on to the pecan-coconut affair that goes on top.


I thought I would whisk the flour in first to really bash out any lumps, but a few little ones persisted until I added the sugar which broke them up. Therefore, I think this separate whisking step was a waste of time. You can probably just dump the flour and sugar into the eggs and beat everything together at once.

Since we're cutting this in half, I was able to measure out the coconut and pecans into one cup which I then set aside until things were ready for them. They reminded me of those cute layered cookie mixes that were a popular gift for a while. You know, the ones where you put sugar, flour, chocolate chips, and whatever else into a jar, making cute-looking stripes of all the ingredients instead of just dumping them in. 


Extremely observant people will notice that I accidentally used twice as much coconut as I should have. I am very glad I made this mistake because it only improved this quasi-pie.


See? It looks like we're making a pecan pie except with coconut shreds. Granted, the round pan is definitely adding to the pie-like appearance. However  I wouldn't be at all surprised if I could find this exact recipe for pecan pie in a very old cookbook. I wondered if someone at the Imperial Sugar test kitchen added the coconut to make the recipe different enough to avoid plagiarism.

Anyway, this is one of the thickest pie fillings I ever made. They don't often need a spoon to force them to spread.


I had imagined this recipe would produce a thin layer of this candy-nut stuff on a crust, but this is a lot of pie filling. And let's just go with calling this a pie. It looks like a pie, it's acting a pie, the only thing we're missing is a crust that goes up the sides of the pan.

See? After baking, it looks like pecan pie. Or maybe it looks like we replaced the raisins with coconut in an osgood pie.


The recipe instructs us to cool the pie completely before icing it. Fortunately, it is miserable outside.


I put a sheet pan on top to keep further sleet off, and the pie was ready for icing after just 10 minutes in the snow. Using the weather for culinary purposes reminds me of when I visited a dear friend/relation in Olympia (that's in Washington state) during the winter. The way the house was cut into the ground, her bedroom window was right at ground level and tucked under the second-floor patio. We would set cases of (store-brand) Diet Coke outside, and the upper deck hid them from view. It was amusing in its own little way to open the window for a can of Diet Coke as easily as normal people would open the refrigerator.

Moving on with the recipe, I thought I would avoid using the electric mixer for the icing because it always kicks up powdered sugar dust no matter how carefully I try to beat things at slow speed. This was a waste of time. Instead of icing, all I got was a whisk filled with ingredients that lodged themselves in there and would not come out. Therefore, if you have an electric mixer I definitely recommend you use it.


I spooned the icing into little mounds around the pie instead of just plopping it in the middle. It seemed like it would make covering the pie easier. I had even considered putting the icing in a bag and squirting it out, but then decided I didn't feel like it. But even though the pie looked like it would release a lot of crispy golden crumbs into the icing, it didn't. 


The top appears interspersed with broken-off pieces of pie, but that's actually where the icing is so thin that the pie shows through. I think the thin icing was for the best. This pie is so sweet that a thick slathering of icing on top would have overwhelmed even the most sugar-happy six-year-old.

All right, let's go back to the illustration on the back of the box and see what these, um, dessert bars should look like.


And let's get a look at what we actually got.


This is the best-looking piece we got out of this. I think we can safely say that if you tried to cut this into tiny squares like the recipe claims, they would all crumble to nothing. I will also add that despite our promiscuous use of cooking spray, the crust stuck to the pan. However, I do have to give the recipe writers credit: the crust may not have been crumbly during mixing like the recipe thought it should have been, but it was certainly crumbly after baking. It fell apart and left fragments behind, no matter how skillfully one operated the pie spatula. You don't lift pie slices out of the pan; you scoop this out like cobbler.

With those quibbles aside, I served this out and everyone really liked it. This is not a dessert bar recipe. It is a pecan pie with coconut in it. It's a very good pecan pie with coconut in it. If you try this, you will wonder why no one has ever thought to unite pecans and coconuts in a pie before. 

I thought the icing was superfluous, and really only an excuse for using enough powdered sugar to print the recipe on a powdered sugar box. Others disagreed, thinking it improved the pie a lot. The extra layer of concentrated vanilla on top did make the flavor more complete. However, in the future I might use a light drizzle of glaze with extra-concentrated vanilla instead of icing.


So, I highly recommend making this, with a few changes. First, cut the recipe in half and bake it in a pie pan. It's really rich anyway, so a big pan of it is excessive unless you're bringing it to a big party. But don't cut the amount of coconut in half. Second, ditch the crust that came with recipe and use an actual pie crust (bake it before putting the pie in it). You might roll the crust a bit thicker than usual if you make it yourself, so that it really holds together when you lift out a slice. Third, I wouldn't bother with the icing. Put a lot of vanilla into a small batch of glaze- much more than you normally might. Then lightly drizzle it on top.