Monday, March 29, 2021

Smoked Slabs of Cow: or, A Book of Cookrye Goes Outdoors!: or, I'm probably going to regret this

Today's perpetration starts with discounted slabs of beef. We thought we might make something interesting and therefore purchased them, and froze them as soon as we got home. We then removed them from the freezer a few weeks later, but the one person who has a specific way of doing a roast was... shall we say, not doing so well. (Don't worry, it wasn't the plague.) So after a few days without cooking them, we just tucked them back into the freezer and hoped that thawing them twice wouldn't ruin them. Which brings us to today. 

We've made the mistake of reading articles about how easy grilling can be, and got it into our heads to attempt to smoke them on the gas grill. In theory, you just encase the meat in foil and leave it on the grill with the burners set to low for a few hours-- or so those "It's So Easy!" articles claim. We figured this meat, which has already been thawed once and leaked a lot of juices into its shrink wrap before refreezing, was the perfect candidate for this probably misguided attempt. In our favor, we have a gas grill and a fresh propane tank. A lot of people apparently think that gas grills aren't real grills. But as someone said in a cookbook I lost long ago, "If Alain Ducasse, Michelin-star drenched chef, uses gas, then so can you." Cooking over wood or charcoal may be more authentic, but I just want to put the meat on the rack, turn on the fire, and forget about it until it's done.

We put the meat in a drawer full of water to defrost it faster. While most of today's beef adventure may seem ill-advised, I would like to pause and note how nice a designated defrosting drawer is. We emptied one of the refrigerator drawers and designated it as the place to leave frozen meats while defrosting them. If sticky juices leak out, we can just take out the whole drawer and hose it off. It's much nicer than trying to reach into the refrigerator and wipe off a shelf. You can also fill the drawer with water if you want to defrost something a lot faster. You may also remember that you're apparently supposed to soak your wood chips while the meat is thawing.


I didn't know how much wood I was supposed to put into this, but fortunately the woodchip bag had instructions on the back (they say to use two cups). So if the beef turned out to be so over-smoked that it smelled like a housefire, we could blame someone else's directions. 

On The Big Day, we took the meat out, dropped it unopened into the sink, and attempted to remove all those little wood shards from the water. We got most of them out easily, but the last few of them kept running away from any scooping implement we tried. We then remembered that 1) No one's eating the wood, so we don't need to be as obsessive as usual about what it touches, and 2) after getting the plumbing redone, we had all agreed that those drain strainers would be a nice idea.

Let your plumbing accessories do your woodgathering for you!

And so, we packed the wood in foil. Every article we read agreed that if you didn't pay for one of those dedicated smoking trays, you should encase the wood in foil so it doesn't get enough air to actually catch fire. That way, you get smoke instead. You then poke holes in it to release the smoke you're cultivating.


A lot of articles talk about overnight marinating, dry rubs, wet rubs, brining, and all sorts of other madness. They also devote far too many paragraphs to getting "the perfect coat of bark" on it, which apparently means they want a quarter-inch layer of pure cinders on the outside. Some people spend bizarrely excessive amounts of time attempting to cook a single piece of meat outside. If you want to, you can spend an entire month trying to make the perfect slab of dead cow. We at A Book of Cookrye didn't have time for that, so we figured we'd just coat the meat in a big squirt of barbecue sauce (with a little cider vinegar in it). To prevent getting raw-meat germs all over the bottles, we squirted it out before even touching the meat wrapper.


When we pulled the meat out of the drawer, ice layers had accumulated around the packages. It fell off and looked like a pair of strikingly pretty bowls.


All right, let's get to the actual meat! In an attempt to make up for not bothering to marinate, we stabbed it all over with a fork before slathering it in that sweet, syrupy goodness.


The barbecue sauce got absolutely everywhere and stank up the kitchen. I had to wash my hands, the counter, the floor, and a few nearby countertop vessels that were within splattering range. After washing my hands, I then had to wash the soap dispenser.


After safely encasing the drippy meat in foil, we took it outside. This is the first time I've ever tried to light a grill in daylight. You can't see the flames in the daytime. I didn't know at first if I had ignited the gas or if I was spewing unburnt propane all over the yard. Well anyway, let's shut this thing and get back in the house.


This grill happens to have a thermometer on it. Therefore, instead of just setting the burners to low and going to sleep, I spent almost an hour twiddling the gas knobs in an attempt to get the grill to hold a steady temperature. It didn't work. After a while, I was like "Wouldn't it be just wonderful if you could just set the temperature and have the gas automatically regulate itself?" I then realized that I could have just used the oven in the house. I then asked myself, "Why the heck am I doing this outside?" before shifting things around and perching the wood directly on the burner.


Again, I should have just used the oven. I'm very familiar with ovens. I've had a lot of success using ovens. They regulate their own temperatures. Instead of cooking the carefree, modern, thermostatically-controlled way, we're using this thing outside that ignores over a century of kitchen appliance innovation. The last time I successfully smoked anything, I did it not on a grill but on a stovetop. (Only attempt this in a very well ventilated kitchen.) 

 Anyway, while we were constantly going outside to see if we needed to turn the gas up or down to maintain temperature, we had plenty of time to consider the gender divisions of cooking. You may have noticed that culturally speaking, grilling is for men and anything done inside the house is for women (or at least it is in the US). This division seems to have occurred after we traded our kitchen fireplaces for stoves. Cookbooks from the days when your kitchen had a fireplace would routinely direct the lady of the house to put meat on a spit or on a gridiron over hot coals. Not a single one of them instructs you, the lady reader, to have your husband skewer up the dead pig while you get back to beating eggs and whipping cream.

I spent more time staring at this than I ever planned.

I thought after a while that I finally had the perfect burner settings to hold a steady temperature. It turns out everyone else in the house was also checking on the food-in-progress and adjusting it when I wasn't looking. Therefore, the way to keep your grill at the perfect temperature is to have friends. Anyway, after 8 hours (which arbitrarily sounded right), we brought the meat off the grill and brought some delicious smells into the house.


Apparently it's standard practice to let your meat rest for 15 minutes before cutting it. I thought it was just silly man-lore, but even Delia Smith tells us that we should. We therefore left both slabs in their foil for fifteen minutes, after which we unwrapped the first one and revealed cinders. Friends, there was sawdust when we tried to cut into it.


 Let's have a closer look at what we're not having for dinner.


Well, at least it has a good coat of bark on it.

If you picked out the not-burnt parts, they were dry and bland but not awful. At the very least, they were not over-smoked. With that said, no one was going to eat this. We cut it up to leave outside for the feral cats that we've been encouraging to move in for pest control, and got plan B out of the oven.


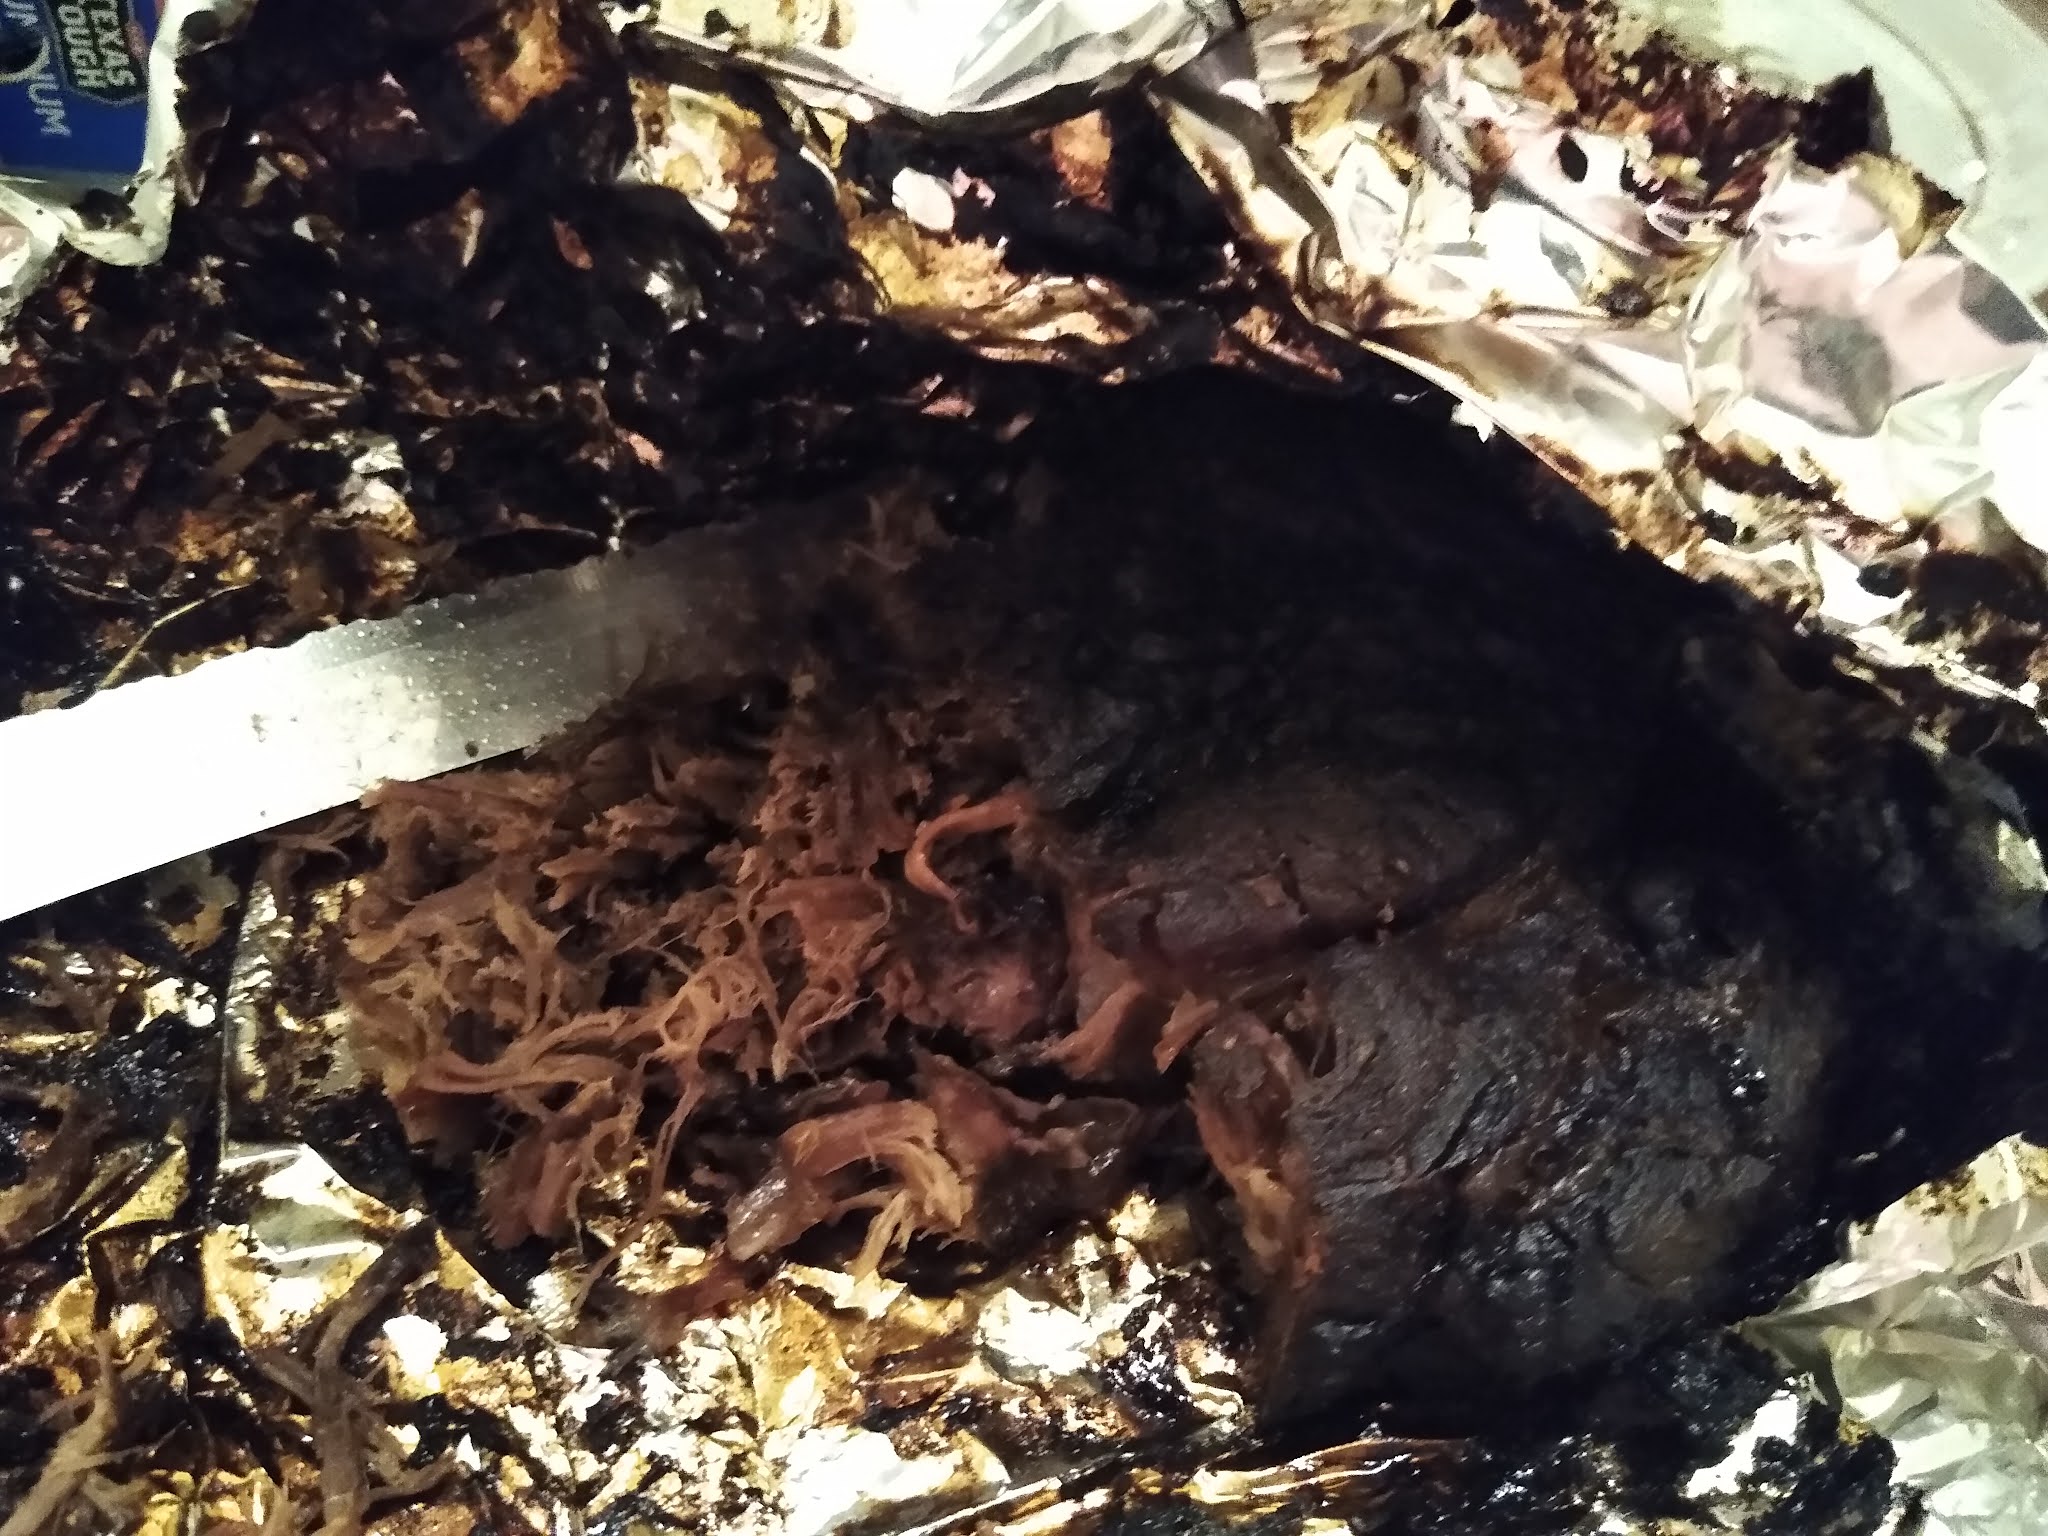
At this point, we haven't even unwrapped the second beef slab. I was tempted to throw it away in its intact foil wrapping and never speak of it again. But we decided we may as well saw it into pieces for the local wildlife. As the delicious smells of cheese and pepperoni filled the kitchen, we took a knife to the other beef cinder to reveal.... success.


I don't know why one beef slab turned out right but the other one dried up and died. But I'll take a 50% success rate over total failure.


Yes, there were still a lot of burnt parts to cut off, but there was a lot of delicious slow-smoked cow. These mixed results were promising enough that while I wanted to let any future efforts drop, everyone else was already planning what we will do differently next time. But for now, there was enough decent meat to make this a semi-success. Or at least, that is what I told myself to avoid realizing that I spent 8 hours slow-cooking cat food.

Saturday, March 27, 2021

Second-Stab Saturday: Successful sourdough bread!

 Ever done something out of spite?

One day a cutting board may enter my life.

What you're looking at is 100% whole-wheat, 100% sourdough bread. We didn't do any of that underhanded cheating where you add a packet of yeast to your dough for insurance (although it worked last time). Because I bake a lot and therefore try to tell myself that I'm good at it, I had a minor identity crisis when the two previous attempts at sourdough bread turned into bricks of failure. (Well, the second one didn't, but only because we dumped the aforementioned packet of yeast into it.)


Look at this jar, full of foamy lies!

We've been dutifully feeding this jar of glop for a while now, so now it's time to once again try to make it work. In the comments of our previous attempt, Lace Maker recommended this video, and we were sold on it for a few reasons. First (and I know this is daft), he is French and has the accent to prove it. Multiple people who've gone abroad say that the bread in France is so amazing that they can never again be happy with the bread back home. Of course, I don't know any of those people, but I've seen their posts about it in various travel articles. 

Anyway, let's check in on our starter! We are told to do the "float test." Supposedly, if a spoonful of your starter glop floats in water, it is lively enough to raise the bread. 

Well, crumbs.

We've gotten a few new tips out of his video, and my favorite is this new way to make a happy environment for your bread to rise. We used to just turn the oven to its lowest temperature, pop the bread in, and turn the oven off as soon as it heated up. That works very well (we've been doing it a long time). But to be a bit nitpicky, it dried the bread out a bit before it's had a chance to bake. 

To try this new (to us) way, we brought a pot of water to a hard boil and put it in the oven next to the bread. It fills the oven with cozy warmth without drying anything out. Of course if you're trying this at home, you'll want to fill the pot fairly high instead of just putting a bit of water in the bottom- that way, the pot has a lot more heat in it to slowly radiate out. You should also tell everyone not to turn on the oven without first emptying it.

Here we see the starter (set on a plate to catch any spill-out as it rises) in its nice incubation chamber.


After the starter got lively with foam, we tried the float test again. It didn't float. The starter dissolved as soon as it landed on the water. But we decided that our starter must be ready anyway because it was so full of life that it oozed right out of the jar and onto the spillover plate.


As you can see, this starter dissolved right into the water before it could pass any float test. Sorry, French person with a Youtube channel, I know my float-failing baking would break your grand-mère's heart. But we still hoped that this gravy-looking mixture of sourdough starter and water would make our bread rise without one of those newfangled yeast packets. (I should note that before proceeding, I made sure we had at least one yeast packet ready for emergency action.)


And now, while we try to make bread the historic way, let's have some actual history! When I started my first baking class, the teacher reverently read out the words "Bread in its simplest form consists of flour and water leavened by yeast," intoning them like they are the first sentence of Shakespeare's diary. That is not strictly true, the simplest breads have no yeast at all and are baked flat. Sourdough breads are the oldest leavened breads, but bread in its simplest form (contrary to the textbook) consists of just flour and water.


We should first note that most cultures around the world invented boiling, frying, and other stovetop cooking techniques before they invent baking- you need far less fuel than you would to heat an empty box long enough to bake something, and you food will be ready sooner. The history of bread follows this pattern. At first, we had porridge, because we discovered that grains get a lot easier to eat if you boil them soft. At some point, the mush was spread onto pan over a hot burner (or whatever the predecessor of a stove burner was) and became pancakes. Sourdough bread came naturally after that. If you leave flour-water paste out, yeast will move in. The very air around us is always full of floating yeastie-beasties, and apparently they like carbs as much as anyone who's ordered a third plate of spaghetti. So if you mix flour and water and just set it out, in a few days you will find that it's gotten rather bubbly. Or maybe it will just grow mold, but that's a rare enough occurrence that people started cultivating bread starters anyway.


Obviously, the first bakers came a few thousand years before we had microscopes to find just what is going on that makes bread rise, but they figured out most of the basics of baking anyway. They didn't know that yeast microbes existed, but they knew something was going in their bread dough, and they soon discovered that if you set aside bread dough to add to fresh flour, the new dough would rise faster (and was a lot less likely to get moldy instead of rising at all). They also discovered that the hot mash from beer-making made bread rise better (a few thousand years later, across the BC/AD divide in 1837, Miss Leslie still told people to obtain yeast from the local brewery in Directions for Cookery). People would also add things like grape skins to bread starter to make it work better. As later scientists would discover, grape skins (and plum skins) have thriving yeast colonies on them. 

Making sourdough bread is such a finicky process, it's no surprise that the Romans had a goddess of the oven. People baking bread the old way, back when it was the only way, needed someone to pray to lest their bread fail to rise and instead become a flour brick. Her name was Fornax. Her feast day, called Fornicalia, was February 17. But before we misrepresent baking as a primitive, unreliable process throughout history and up until 1925, you should know that bakeries in Herculaneum and Pompeii had commercial-scale flour-grinding, mixing and kneading machines, cranking out bread at least 80 loaves at a time (that's how many were in one oven when Vesuvius erupted). Just like many people today set a bread machine to the dough cycle, many bakeries did nothing by hand until it was time to shape the dough into loaves and rolls. Of course, the ancient machines were often powered by livestock or slaves, neither of whom ever get much credit for anything in history books.


A lot of the science of bread hasn't been discovering new methods. Instead, it's been using science to find out why we traditionally do extremely specific things to turn your flour into bread rather than clay.  What happens in a jar of flour and water that makes it foam with life if you leave it out in the open for a few days? What makes bread dough springy when you knead it, and why does kneading make your bread better? Why do we let the dough rise, flatten it back down, shape it into loaves, and let it rise again-- couldn't we save a few hours and skip the first rise? 

Speaking of letting bread rise, we must pause to appreciate the biggest shift science brought to bread. Long after US independence from Britain, after everyone in the world spent thousands of years of carefully keeping sourdough starters alive and patiently waiting for them to raise the bread, a marvelous innovation entered kitchens everywhere: yeast in little cubes (and later in powder packets). Sourdough bread, which for thousands of years had been the only way to make bread, experienced the same fate as candlelight, stick-shift cars, and vinyl records.  

Very soon after packet yeast, an absolute miracle came to everyone: white powders you could just add by the spoonful to make bread rise without any fuss at all! Or at least, early powders worked that well in theory. In practice, many of them either didn't work right or left chemical aftertastes. But we're getting ahead of ourselves, so let's step away from baking powder and its predecessors. Let's come back to using our microscopic friends to make bread.

Look, it expanded!


Speaking of traditional bread, you may think that round loaves are only for expensive bakeries that overuse the word "artisan." I know I did until I tried to shape the dough for myself. This oval shape is easier than making a long dough snake for baguettes.


Anyone trying sourdough at home soon finds out why packet yeast, that marvel of microbiology, usurped sourdough and became the "traditional" way to make bread. Making your own bread without modern yeast (or baking powder if you're daring) feels like doing my great-grandmother's recipes from Mexico. There's a lot of "You add more of this until it looks like that" and "keep mixing until it feels right" and "I don't know how long it should rest, you'll have to see if it's ready. You should be able to tell."  While scientists have given us a better understanding how breadmaking works, you should probably still pray to Fornax. I did, and our tight little ball of dough rose into this ready-to-bake, almost foamy-light ball of sticky success.

They say if you poke the side and it stays dented, the bread has risen enough to bake. I may have finger-stabbed it a bit too hard.
 

After all these days of carefully feeding the bread starter, after many hours of patiently waiting for the bread to rise, the baking time was so short it almost felt disrespectful. Nevertheless, the bread was done. We leapt forward a few thousand years in technology at the end of baking time, using a modern thermometer to ensure that the bread was thoroughly baked. Of course, we also used a modern thermostatically-controlled oven. My great-grandmother refused to follow her husband into the United States until he purchased her a stove that she didn't have to light a woodfire in, and we're not about to dishonor her today.


Depending on your attitude, this loaf is either cute, or it's rustic, or else it's severely plain. I could have cut decorative patterns into it for panache before leaving it to rise. But after so many sourdough failures, I was afraid it would collapse if I touched it more than strictly necessary. Plainness aside, this bread was absolutely delicious. 

I've heard people come back from France saying that the bread there is so much better than here. It turns out that if you hop onto the internet and find the nearest tutorial from someone in France, you too can have amazing bread at home. However, as adorably artisan as these traditional round loaves look, you will soon slice one and find that you can't make much of a sandwich on bread-fingers. You can, however, immerse them in soup.


The French may be fine with narrow bread slices. But here in America, bread is a vehicle for sandwiches more often than it is something you eat on its own. These bread slices were far too small to load with a whole lunch's worth of meat and vegetables. But by cutting one of these long bread-twigs in half, a decent (if unsatisfyingly small) grilled cheese can occur.

Someone else in the house thought these tiny single-egg frying pans would be nice. We've used them more than one would expect.


Because the plague has caused to me have more free time and less income, we're not using butter on this like some normal person would. Today's grilled cheese has been spread with ham fat, which we rendered while making soup stock out of the bones and stringy bits of the hams we bought on clearance after Thanksgiving. I had high hopes for this ham-and-grilled cheese, but you couldn't taste the ham-fat difference. It's a dang good grilled cheese though, even if it's so small you can put it on a tea saucer.


 With that said, I didn't want artistic bread. I wanted something you could make a sandwich on. I didn't care about making sandwich bread very much until I kept failing at it. So, with our next attempt, we made a loaf pan that seemed about the right size for the dough ball we had so patiently kneaded. If you're going to do this yourself, fold the foil first until you have several layers of it. Otherwise, your bread may push through the flimsy sides.

You can really see how much the bread knocked out the initially-upright "pan" sides if you upend the loaf.


But with that said, it tasted so good that it did not last nearly as long as an entire loaf of bread should. We all kept randomly cutting off a slice every time we passed through the kitchen. Even if one was just passing through to get to the next room, it was hard to do so without making a bread detour. And so, we at A Book of Cookrye highly recommend trying sourdough if you like bread and have a bit of free time on your hands. It may not come out well on your first attempt (or three), but the ingredients are just flour and water. So it's not like you're out the price of an expensive beef cut or something like that every time your bread comes out lousy. And if you persist, you can have one of these in your own kitchen!

Tuesday, March 23, 2021

Sweet Cherry Ham Bake: or, I've been waiting for this

 It's all fun and adventure in the cold until the water goes out and the electricity threatens to follow. Cavorting in the snow is only amusing when you when a toasty house waits with a cozy hot shower. In between doing various preparations to keep the house and ourselves all right, we've all been doing things that we like-- just to make sure we don't go nuts from worry. For some in this house, it's watching car videos. For others, it's doting on the household quadrupeds. For myself, it's cooking things that sound bizarre.

I have often mentioned to the others in the house that in the Before Times, I loved dredging up weird recipes and making them with friends. When you're with people who also enjoy the horrors of culinary discovery, you can have a delightfully memorable time making things like peanut butter and chicken soup or boiling a pudding in a shirt. But these days, of course, going out to visit is like coming up with a wardrobe to go en promenade that still fits after a year of quarantining with your favorite foods. It's just not going to happen. 

Anyway, we purchased a lot of groceries ahead of the freeze-out. At this point I have to credit everyone else in the house for saying we should get groceries to ensure that we have enough to eat for a few days. I thought they were being worrywarts and that we'd just laugh about it later when nothing happened but we had a lot of extra frozen vegetables waiting for a casserole recipe. Then snow took out the roads and we were all housebound, watching videos of Canadian snowplowing and wishing it would happen here. We had to dislodge a lot of things from the freezer to make room for a lot of frozen dinners (we figured that we might all be a bit too stressed for domesticity). Among the things we moved from the freezer to the refrigerator was something we got on clearance last Thanksgiving:


We figured we could just saw off pieces of the ham over the next week or so, putting it in sandwiches, soup, or just reheating it on a plate. But I've had this one recipe in mind ever since I saw it on Mid-Century Menu a few years ago. She used to intersperse her cooking adventures with interesting recipes posted without comment. One of them lodged itself in the back of my mind. It was a strange concoction of ham, celery, and cherry pie filling. The cookbook photograph showed an unnaturally red swamp of cherries and celery surrounded by a ring of bread rolls, all on an even brighter red background. 

Unfortunately, I didn't save the recipe and couldn't find it anywhere on her site. All of those recipe-only posts seem to have vanished in a site redesign. Searching for things like "ham cherry recipe" turned up a few Pinterest links with that mesmerizing photo and a now-dead link to a post on Mid-Century Menu that does not exist anymore. Because I have a lot of free time on my hands, I said to myself "I wonder if the Wayback Machine has any older versions of her site?" It turns out, they do! Sometimes, if you forget to save something you found online, the Internet Archive will save it for you. Behold the recipe that has sporadically tickled the back of my head ever since I saw it!

Source: Mid-Century Menu via archive.org

Sweet Cherry Ham Bake
4 c cubed, cooked ham
1 c (2 stalks) chopped celery
½ tsp dry mustard
2 c (one 16-oz can) cherry pie filling
2 tbsp brown sugar
3 tbsp lemon juice
⅛ tsp cloves
    Parkerhouse Biscuits
1½ c flour
1 tbsp sugar
2 tsp baking powder
½ tsp salt
¼ c shortening
⅓ c milk
1 egg
1 to 2 tbsp butter or margarine
milk for brushing

Heat oven to 425°.
Mix the ham, celery, and dry mustard. Put into a 12"x8" (2 quart) baking dish. Mix together the remaining ingredients and spoon over the ham. Bake 20 minutes. Place the biscuits on them and bake 15-20 minutes or until golden brown.
    To make the biscuits:
Mix the dry ingredients together. Cut in the shortening like a pie crust. Add the milk and egg. Knead 12 times. Roll out to a quarter inch. Cut into 2½" circles. Using the flat side of a knife, make a crease just off-center. Put a small pat of butter on the bigger side. Brush around the edge with milk, fold over, and press to seal.

Note: You can skip the business of making biscuit dough and just use canned ones. Or serve this masterpiece over rice instead.

Source: Pillsbury's Meat Cook Book, 1970 via Mid-Century Menu on the Wayback Machine

Cherries and ham didn't seem so strange to me. I've seen plenty of people who put pineapples on ham, and swapping pineapples for cherries isn't the most radical change in the world of ham and fruit. But I've never seen anyone attempt to make cherry pie out of ham and celery. I asked everyone in the house if we could attempt to make this if we survived the great freeze. No one here shares my love of exploring unfortunate foods, but they benignly decided that yes, we can do this thing--- on the condition that I cut the recipe in half. This was no problem since I was going to halve it anyway. Who wants a massive vat of cherry pie filling impregnated with ham and celery? I did, however, say that I was going to make the full quantity of rolls because they looked like they'd be really good. After these trying times, none of us could argue against eating a lot of delicious bread.


Speaking of bread, I was surprised that we're not using yeast in these. But I guess no one selling a cookbook full of exciting new ways to use modern convenience foods wants to tell their readers to start baking early so the bread can rise. I also find it a little strange that we're not using butter but shortening in the bread dough. We are are then directed to put butter in the middle of each roll. If we wanted them to taste buttery, why are we not just making these with butter to begin with? I guess shortening is modern and scientific since it comes from a factory while butter comes from some antiquated farm somewhere that smells like cows. Anyway, since we already have a massive can of Crisco because of the Hillary Clinton cookies, we're not going to argue with our friendly friends who wrote the Pillsbury Meat Cook Book at the beginning of the seventies.


At this point, I decided that we had a long baking time ahead of us before we got to the bread, so it was the perfect time to bring out the knife and our star ingredients. We have already seen the ham lying in freshly-defrosted splendor on the counter. It is now joined by celery. I bit into some of the celery while cutting, and noticed that it wasn't as awful as I used to think it was. I always thought celery was unrelentingly awful and bitter. One year at a kiddie summer camp, I caused a minor scene and disrupted everyone else making ants on a log when I realized that we were expected to actually eat it. It's often noted that one loses one's sense of taste over the course of one's life. To me, it almost seems like the opposite is true because I now notice subtle background flavors that were previously undetectable under a barrage of bitterness. However, I still can't stand black coffee or broccoli.


This bowl of ham and celery could have been the makings of a decent casserole or soup. But today, we are following the instructions from Pillsbury's Meat Cook Book. Because when I want to know exciting and delicious ways to cook meat, I turn to the manufacturers of flour, cake mix, and frozen cookie dough. Surely their mid-sized army of home economists would never lead the modern homemaker into regret. 


I had surprising difficulty finding the one-pound can of cherry pie filling specified in the recipe. I say "surprising" because I'm used to finding that various food package sizes have been ever-so-slightly shaved down in the intervening decades by unscrupulous manufacturers who hope we won't notice or care that we get less food for the same money. I did not expect to find that we got even more cherry pie than the homemakers and ham bakers of the 1970s.


Not that I mind the extra artificial cherry glop that will be going back into the refrigerator. Canned cherry pie is one of those things that I would eat with a spoon right out of the can if I wasn't trying to avoid doubling in size and dabbling in diabetes. Speaking of, the writers of the Pillsbury Meat Cook Book would now like us to take this corn-sweetened scientific triumph and add... more sugar! And also dry mustard.


At this point, we had to make a brief detour and add a little class to this recipe. Unlike all you lazy heathens who just use powdered spices, we at A Book of Cookrye grind our own cloves. Or at least, we do this week since these were the only cloves in the entire spice section of the grocery store. Which brings us to a question: what recipe is popular among home cooks that everyone wants cloves this month?

I did not expect to use a coffee grinder as much as I have since discovering it in the back of a drawer. While it did the job eventually, it wasn't the best thing for cloves, since they got oily and made clumps that stuck to the sides of the little canister. We had to repeatedly dislodge them from the sides so they could actually get cut up.


Meanwhile, back at the canned cherry pie, we are adding lemon juice to our crimes. I refused to bother squeezing lemons for this, so this cherry ham delight gets the cheapest bottled lemon juice in the entire baking aisle. It is weirdly translucent and tastes like artificial lemonade.


At this point, all of our ingredients are ready to go into our foil-lined baking dish! I wondered why the recipe doesn't just say to stir it all together and dump it into the pan. Instead, we put the ham and celery in first, and then delicately spoon the spiced cherries over it. I think they added this pointlessly tedious step so that you, the modern housewife of 1970, didn't feel like you were being lazy by serving your husband and children canned cherry pie with ham in it.


As I tried to level off this fantastic creation of flavors I would have never thought to put together, let's contemplate just what we have in this pan. On the one hand, you could say that the combination of sugar, spices, fruit, and meat is very traditionally British and carried over from the days before we started separating the savory and the sweet. One could technically argue that this has a direct line of ancestry to such Elizabethan favorites as sweet florentines with dried fruit, spices, and kidneys. On the other hand, I described this recipe to one person who said "That sounds Midwest as fuck."

Meanwhile, let's to get to the part of this recipe were the Pillsbury cookbook writers tread on sounder footing: making bread. I'd figured that if we had the dough ready to roll (literally) before getting the ham into the oven, we could get the biscuits cut out and folded over just in time to put them on as scheduled.


I asked myself if we wanted to use the real butter to drop on the middle things. On the one hand, butter always tastes better. On the other hand, we're going to put these biscuits on top of boiling ham syrup. With that in mind, we got out the cheap margarine reserved for toast.

Also, the recipe writers are getting very persnickety in telling us to use a precisely 2.5-inch cutter. Is that the size most people use, and the Pillsbury people just happened to write out the measurement? Did people have sets of biscuit cutters, each with the size stamped on the rim? Did most people trying this recipe just get out a cutter and ignore the given size specification? I did get out the measuring tape (feeling faintly guilty, for reasons I cannot define, for using sewing supplies in the kitchen) to see which of the drinking glasses came the closest, but I did not end up with 2.5-inch diameter biscuits.


As an added recipe note, I made one slight change to the biscuit directions. I've tried to make biscuits where you fold them over before, and they never stay closed. So I brushed on a little ring of milk around the edge to sort of glue them shut. It worked really well, and I'm surprised that the Pillsbury people didn't write in an instruction to do that.

Meanwhile in the oven, we had steam geysers and unnerving smells while the ham and cherries boiled merrily away. Some sort of protein substance, presumably from the ham, had formed slimy deposits on top.


Since we halved the ham-cherry part of this recipe but made the full amount of biscuits, we kind of had to cram them in there. A few of them didn't fit; we put them on a tiny pan next to the main attraction in the oven. You can see how the biscuits nearly tore apart where we folded them. So if you're trying this at home, be sure to carefully fold your biscuits in half lest you break them apart at the crease instead.


I know I rarely do nutritional analysis, but I a little unnerved at the idea of serving this for dinner. There's practically nothing in it that's good for you. If we start at the top of this and make our way down into the pan's bubbling depths, we first find white flour glued together with white shortening. We then find a lot of sugar with the over-processed remains of cherries in it. And also some ham and celery, which are the closest this recipe will come to providing anything that has actual sustenance. A serving of this thing will have the same nutritional value as a slice of store-bought cherry pie with a tiny handful of ham and celery cubes on the side-- and you won't get much ham or celery after we've divided this up into individual portions. Anyone who reads the recipes I like will know I'm not a health nut, but serving this for dinner is right up there with claiming that a big fat squirt of ketchup is good as eating three tomatoes.

That kinda crumpled-looking one is the dough scraps from after biscuit-cutting.


But enough about how you can't make a dinner out of cherry pie (or at least you really shouldn't). While the biscuits on top of the ham still looked gummy and doughy, the handful of extra biscuits we had baked on the side had attained golden perfection, even if they don't look that great piled on top of foil. While we awaited tonight's featured dinner dish, we ate the biscuits. And they are fantastic. I am not surprised that a flour company would put out a good biscuit recipe. We were already agreeing that we should make them again, and sooner than planned. And so, while sated and happy from delicious bread, we withdrew this delight from the oven.


It's a lot runnier than I thought after you get a spoon into it.


As aforementioned, I've been thinking about this recipe off and on for years. I've wondered about this strange combination of cherries, celery, and ham. After all this time sporadically thinking about it, this recipe was disappointingly bland and dull. Baking it for forty minutes turned the ham into hard cubes and the celery into flavorless mush. The spices did not add intriguing flavors; they just made this taste a little musty. Despite adding no salt, this was far too salty from all the ham. This surprised me- after all, if ham is not too salty to eat, why would it turn this into brine? 

I'm not disappointed that this was bad. I am disappointed that it is was bland. On paper, it looks like one of the most bizarre recipes anyone in this millennium could make. But when you eat it, it's just an anticlimactic hot splat of ham cubes in artificial red syrup. The biscuits are pretty good though. We're making those again.