Showing posts with label strange substitutions. Show all posts

Wednesday, November 15, 2023

Pumpkin Pie (Made With Carrots): or, Autumn-flavored deception

Today on A Book of Cookrye, we are warping unsuspecting housemates' minds!

These taste just like pumpkin.
Carrot Tarts

      Filling:
⅔ cup cooked and cooled carrots (firmly press and squish them into the measuring cup to measure)*
⅔ cup milk
1 egg
⅓ cup white sugar
2 tsp dark brown sugar
¾ tsp cinnamon
½ tsp cloves
¼ tsp salt
¼ tsp ginger

      Pie crusts:
1 cup flour
⅓ cup butter
pinch salt
Water to form a dough

      To make the crusts:
Make the pie crust dough and form into 1½-inch balls. Let rest in the refrigerator for at least thirty minutes. Then roll each one out and press into a cupcake pan. (You should have at least ten.) Refrigerate the empty tart shells for at least thirty minutes. Then bake at 350° until the just barely start to turn golden.
Allow to cool. Then gently loosen and remove each one, and set it back into the pan. (This ensures that the crusts don't stick to the pan).
      To make the filling:
Heat oven to 375°.
Place the carrots and the milk into a blender, and thoroughly liquefy. Add the egg, and blenderize until completely mixed.
In a medium bowl, mix the sugar, salt, and spices. Be sure to break up any spice-clumps. Then pour in the blenderized carrots, and mix thoroughly. (If you have a large enough blender, you can simply add the sugar and spices and then blenderize everything some more.)
Pour into the pie shells, filling them almost to the top. Bake for 10 minutes. Then reduce the oven temperature to 325° and bake 25 more minutes.
Serve with whipped cream or nuts.

*You can boil or steam the carrots, but I suggest you microwave them instead. Cut them small enough that they fit inside a small bowl, add a spoonful of water, and cover with a wet paper towel. Microwave until fork-tender. Two carrots ended up being exactly the right amount for me, though results will vary depending on carrot size.

Adapted from "Helping the Homemaker" by Louise Bennett Weaver, Fort Worth (Texas) Star-Telegram, October 28 1933 morning edition, p. 5

We at A Book of Cookrye are big fans of Betty Feezor, who had a cooking and housekeeping show in Charlotte, North Carolina from the fifties to the seventies. All of her ideas, recipes, and projects seem so feasible. 

There's not a whole lot of surviving episodes (or at least, very few have been taken out of the television station's archives and put online), but a fair number of short clips are floating around. In choosing her craft projects and recipes, she seemed to always keep in mind that her audience didn't have a lot of time to spend hand-embroidering anything. 

I really like how she doesn't pretend her creations always come out perfect. It's a refreshing change from the TV presenters who cheerfully make it look like you can effortlessly whip up a wedding dress with built-in corset and then hand-paint an impressionist mural on the accent wall in your living room. In the only complete episode of her show currently on YouTube, she brings out a dress she made that turned out too small, and shows how she fixed it.  She ends by saying "So don't despair, there's always a way that you can correct your mistake."

Apparently her show remains fondly remembered decades after it ended. In a recent video montage put up by her TV station, there's a short clip where she introduces her pumpkin pie recipe, saying "When we were first married, my husband and I tried to peel a pumpkin and cook it in little squares- and that's what lots of recipe books tell you to do. But they're so hard to cut. He had to do most of the peeling, and I tried to do some of the cutting and of course cut my hand as well as the pumpkin." She then suggests that you cut the pumpkin in half and bake it cut-side down in a pan of water. That way you only have to make a single cut through the raw pumpkin instead of spending forever hacking it into small pieces.

After telling us how to cook a pumpkin without the need for a husband or a first-aid kit, she goes on to give the advice that inspires today's recipe: "Now, you can use pumpkin, carrots, and squash interchangeably. And unless you tell the people that you're feeding what it is, they probably won't even know."

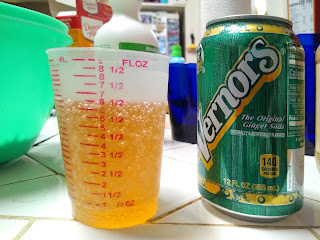
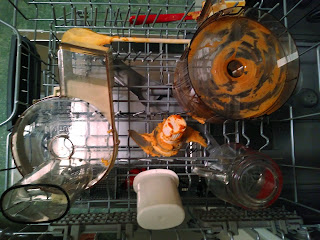
We unfortunately have a surplus of carrots in the refrigerator. and I was more than willing to turn them into a pie. Instead of getting out a potato masher, I decided to do this the modern way. (As a side note, you can tell I've gotten blissfully used to having a dishwasher because I fearlessly use the blender, food processor, spice grinder, and other appliances that would be a real pain in the pumpkin to wash by hand.)


Of course, substituting carrots for pumpkin is a very old cooking tip. I see it mentioned in cookbooks and household hints from practically every decade, but I have always been a bit skeptical. After all, carrots taste nothing like pumpkin. But this time we saw the the idea from Betty Feezor, who surely wouldn't go on live TV and lie to the greater Charlotte metropolitan statistical area.

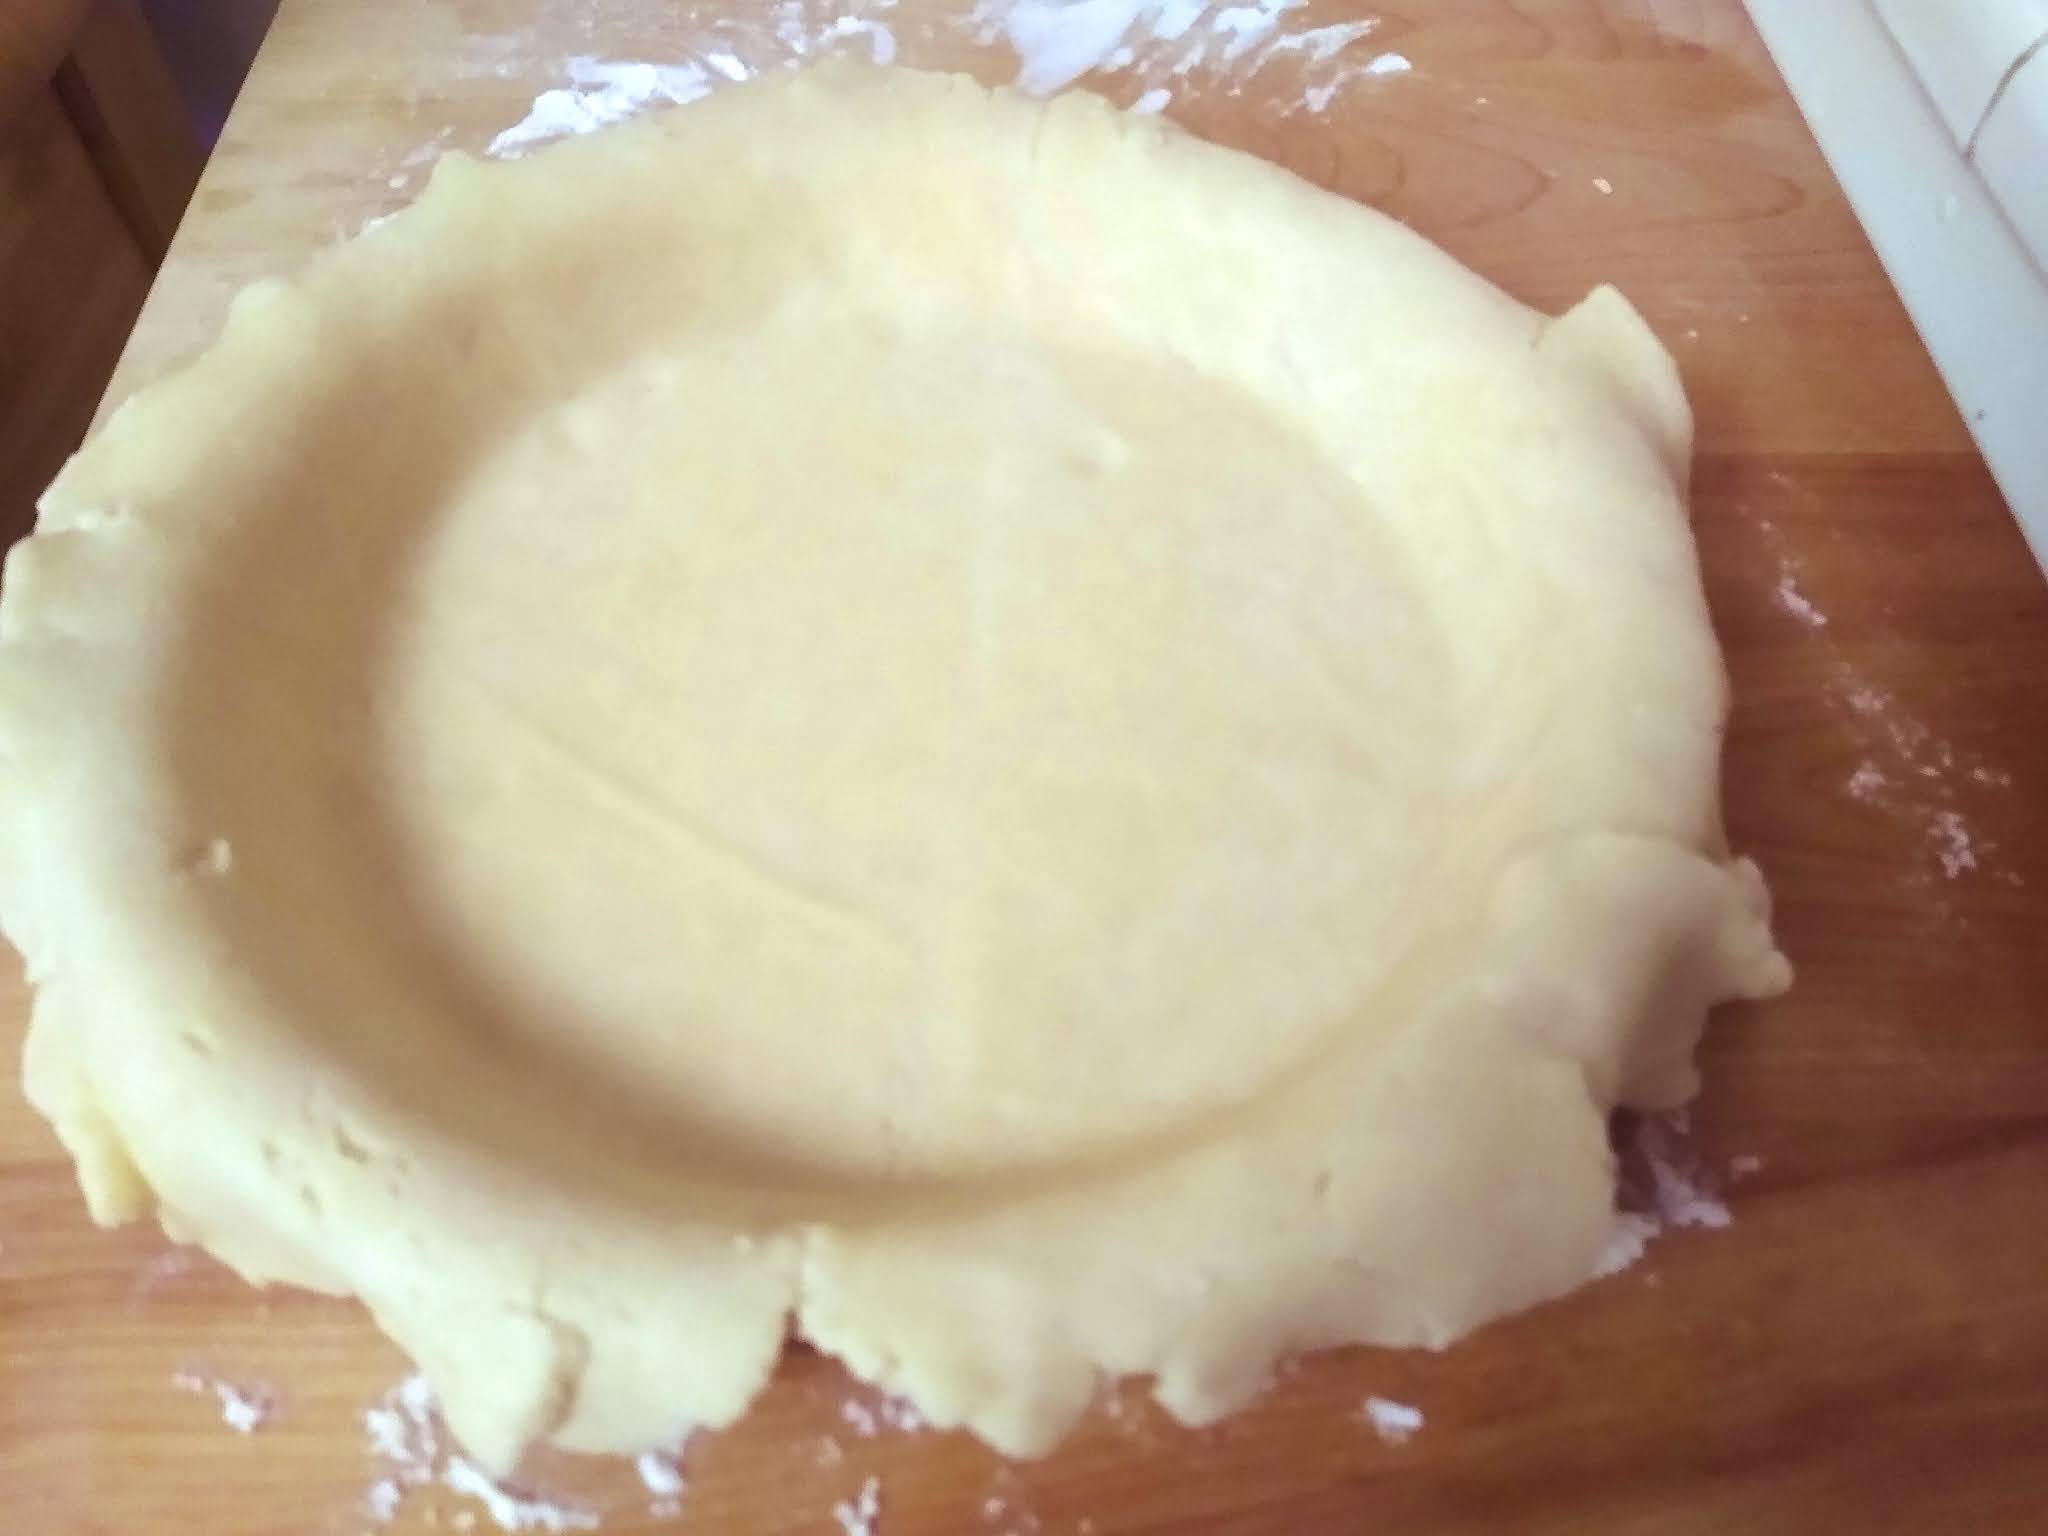
And so, I used Louise Bennett Weaver's pumpkin tart recipe (which you may recall that I digitally clipped from the newspaper before the free trial ended) because it turned out so good last time. Because the little pie crusts came out half-cooked when we last saw the recipe, I baked them until they barely started to change color before putting any pie filling in them. This worked just as well as I hoped. Our tarts had crisp, fully-baked crusts.

The pie filling made with carrots was a lot thicker than the same recipe made with pumpkin. Those who saw the previous pumpkin tarts may remember that the pie filling was so watery that I could stir it into iced coffee (Which, assuming you have no reason to be leery of raw eggs, I highly recommend).


Aside from having to first cook and then blenderize the carrots, these were just as easy as the pumpkin tarts that contained actual pumpkin. One merely needs to dump everything into a bowl, stir it for a few seconds, then pour the resulting I-can't-believe-it's-not-pumpkin into the pie shells.


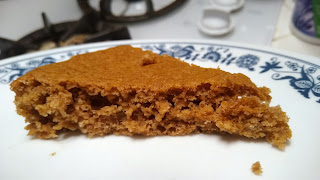
As they baked, our carrot tarts smelled just like pumpkin tarts. They also looked just like pumpkin tarts. And when they were done, they puffed up just like pumpkin tarts.

As the not-pumpkin tarts cooled, they fell back to their previous height. Most of them looked suspiciously perfect, though in full disclosure one or two of them cracked as they slowly deflated. But such aesthetic failures are why we have canned whipped cream.


But the real question, of course, is how did they taste? I served these without telling anyone of my surreptitious use of carrots, and no one suspected a thing. In fact, a few people came back for seconds without suspecting anything fishy about the, ahem, "pumpkin" tarts.

However, great consternation ensued when I told everyone the secret ingredient. Disbelief came first. "You mean these are carrots?" Unexpected dramatics immediately followed. "My entire perception of reality is bending! What even is pumpkin?" But at least if reality was bending, we had whipped cream to put on top.


In conclusion, and I barely believe it despite tasting the evidence, you really can substitute carrots for pumpkin in your pies. No one will know unless you serve the pumpkin and "pumpkin" pies side-by-side--- and even then, they may remain in pumpkin-spice ignorance. The carrots will help you see better, but you will never see that you were deceived.


Wednesday, February 23, 2022

Hump-Day Quickie: Soda Cake (literally!)

Sometimes an idea gets dumped on me that sticks in my mind. I don't constantly think about it, but it will sit in the back of my mind and sporadically remind me of its existence, like a splinter that you can't decide is worth finding the tweezers over.


The pixelation of this image makes it look like it has made the reposting rounds a lot before someone semi-automatically forwarded it to me. It's got a HuffPost Taste watermark on it, but I suspect it started as a Betty Crocker advertisement. One will note that only Betty Crocker's cake mixes appear in the allegedly helpful infographic. 


Anyway, I had to admit that this recipe got to me. Therefore, we're making the ginger spice version we see at top right. We didn't want a full 9x13 pan of cake mix reconstituted with soda, so we measured out half of the soda can. Halving the cake mix should have been trickier. If I wanted to be precise, I would have either poured all of the cake mix into a large measuring cup and then put half back in the box. Instead, I just eyeballed what looked like half of that synthetic-smelling powder and dumped soda on top. 

One vigorous whisking later, we had a surprisingly convincing facsimile of cake batter. The taste of the ginger ale completely hid in the other spices. I expected perhaps a bit of extra pepperiness from the extra ginger, but it just tasted like spice cake. It seemed to retain a bit of fizziness even after an unnecessarily-thorough beating.

At first I thought a whole can of soda would make this batter ruinously runny. Previous experience strongly suggested that I would do nothing but waste the cake mix. But this time the batter at least looked fine, perhaps because the soda was the only liquid in the batter.

The resulting cake looked almost as thin as a pancake, but keep in mind that the initial cake batter barely coated the bottom of the pan. Manufacturers have long been shrinking cake mix boxes in that insidious a-snip-at-a-time way. Ten years ago, half a box of cake mix would have filled this pan without the aid of a rubber spatula to coax it to the edges.


 The cake was a little spongy when we cut it, but it didn't seem unnervingly rubbery. Honestly, it appeared pretty normal.

I'm surprised to say this, but you get a perfectly normal cake out of a box of mix and a can of soda. I thought the cake's texture was just a little bit off, but others in the house said it was perfectly fine. It's not the best cake I've ever had, but it's not bad either. As you can see above, it's only thin because the batter started out so thin. What batter we had rose to a nice, fluffy height. The cake is a bit fragile and crumbly, so I would definitely just pour a glaze on top instead of icing it.

I can see how it'd be amusing to experiment with different combinations of cake mix flavors and different types of soda. Also, if you check the ingredients label on the cake mix, this could be a decent in-a-pinch vegan cake. 

This got me to thinking: What is in cake mix that apparently allows you to reconstitute it into a reasonable approximation of cake with any liquid you can dump into it? I've never thought about the components of cake mix before. Like most of us, I've always thought of cake mix as a homogeneous compound that smells like artificial flavoring. I checked the ingredient label, and it's mostly flour, sugar, a bit of powdered milk, leavener, and a lot of other ingredients that I couldn't identify but I assume to be various flavorings, preservatives, and a few other things that presumably alter the texture. It looks more or less like the ingredients for a yellow cake if you left out the butter, milk, and eggs. 

You probably already guess where this is going. We started with this yellow cake recipe from my friend's mother's Better Homes and Gardens Cookbook. It looks like the sort of thing that would have been made year after year for birthdays and various holidays, assuming you don't think you can substitute soda for butter and eggs. Anyone who actually followed all of the directions instead of going off-book before you've gotten halfway through the ingredient list would get a very nice cake. Unfortunately I am too daft for that.


We commenced, of course, by putting all the ingredients that are neither liquid nor perishable into a bowl.  


I would like to say that it looked a lot like cake mix after a quick stir, but it didn't. The texture wasn't quite right. It didn't have that powdery-yet-gritty consistency of cake mix when you dump it out of the box.


By request of others, we are putting root beer into this attempted cake. The resulting batter tasted surprisingly acidic in a way that the cake-mix-based batter did not. The root beer tasted like it went from mildly tart to corrosive upon contact with flour. 

I've never thought of root beer as particularly acidic. If anything, it tastes like fizzy vanilla to me. But this tasted less like cake batter and more like I should be scouring the floors with it instead of passing it off as edible. The "homemade" version of today's cake tasted more synthetic than the one that started with that mysterious powder loaded with natural and artificial flavors.

The resulting cake batter had the same color as the literal coffee cake we've made before. But unlike our various caffeinated cakes, this batter tasted terrible. Sometimes (usually) I deliberately do a lousy job of scraping the cake batter into the pan because it tastes too good not to eat. But this time, the batter was so weird I had to keep tasting it to see if it was as... unsubtly incorrect as I thought it was three seconds ago.


The batter looked totally normal going into the pan. But despite the harmless appearance, I suspected that I would be discreetly throwing this into the trash without letting anyone try it. I was getting comments from kitchen observers about how (barring a miracle in the oven) this was a waste of perfectly good root beer.


The resulting cake was oddly shiny on top, but otherwise it looked relatively acceptable. 


If we examine the alleged cake in cross section, we see that it has managed to leaven itself. But it does look a bit... not right to anyone else? It looks less like a cake and more like a beige kitchen sponge.

After baking, the cake was still unnervingly acidic from the root beer. It had the same paste consistency as the Diet Coke cake, except this time it has air bubbles trapped in it. But you could knead it into a clay ball just like that time. While few cakes look good after you squish them in your fists, you should not be able to press a cake into a translucent ball like this:

This cake is of course not at all healthy, but it has that peculiar disappointment one gets from unrelentingly nutritious facsimiles of cakes and pies. You know, the hard cookies, carob brownies, and dusty pies that are infuriatingly close to the real thing but also flavorless and just wrong enough to go from mediocre to slightly depressing. This cake was so paste-like that I thought I had underbaked it. So, I put it back in the oven for so long that it should have hardened into one big crouton. This made no difference except to slightly dry the exposed edges. 

We thought we might figure out what other little things we might add to correct the texture of this almost-viable cake, but then we all agreed that we would just be reverse-engineering a box of cake mix. It's easier and cheaper to just go out and buy one.

So, in conclusion, yes. You can pour a can of soda into a box of cake mix and get a decent cake. It's not the best cake you'll ever make, but it's not bad either. It's fun to make, and the results taste just fine albeit not all that great. 

But you can't dump a can of soda into a previously normal cake recipe after leaving out the butter and eggs. If you're going to try a soda cake, you must embrace the box of prefabricated petrochemical magic. You should also use a smaller pan than you probably think. 

Instead of closing today's (mis)adventure with disappointment, we're saying "au reservoir" with a photo of surprising success.

Saturday, December 18, 2021

Pumpkin-Spice Cookies

 Here at A Book of Cookrye, we believe it's always pumpkin spice season in your heart, any time of year, if you truly believe. And so, as the grocery store plays relentlessly festive music which hits the ear a bit differently as prices rise, we are bringing the flavors of autumn into our kitchen. Which brings us to... cookies! We wanted to have our pumpkin spice in cookie form, and decided to swap out the title ingredient in the banana cookies we liked enough to make multiple times. After all, canned pumpkin is about the same texture as blenderized banana.... right? 

Pumpkin Spice-Oatmeal Cookies
1 c sugar
½ c shortening
½ tsp baking soda
¼ tsp salt
1 tbsp pumpkin spice
1½ c flour
1 c canned pumpkin
1¾ c oatmeal
½ c nuts if desired

Heat oven to 350°. Line a cookie sheet with foil and grease it.
Beat together the sugar, shortening, soda, salt, and spices. Mix in the flour (it will be sandy). Add the pumpkin and oatmeal, mix well.
Measure the dough into 1-tbsp portions. Roll them into balls, and press each one flat in your hands. Bake 12-15 minutes (I only needed to bake for 12). Separate them from the foil while still warm (you may need a spatula).
These cookies aren't as well-suited to leaving out on an open plate- they will go stale. Put them in a sealed container as soon as they're cool so they keep fresh.

adapted from a recipe by Mary Skurka (Whiting, Indiana), Anniversary Slovak-American Cook Book, First Catholic Slovak Ladies' Union, 1952

Today, we are using the last of the shortening.

I don't know what unnerves me more: that we bought a 3-pound can of shortening, or that we (gradually) ate it all. Anyway, in the comments to the original recipe, Freezy noted that they were a lot easier to make in a food processor. I keep forgetting that one can use a food processor because I haven't had access to one until very recently, but I'm game!


Indeed, we had these cookies mixed up in mere minutes. We had no frustrations with keeping sandy, dry ingredients from flying out all over the kitchen. Just like those gushingly ecstatic advertisements promised in the 1950s, we had cookie dough at the press of a button.  However, you should know that a food processor requires a big commitment of rack space in the dishwasher.

I firmly believe that if you have to rinse your dishes, your dishwasher is broken.

 The pumpkin cookie dough was a little bit stickier than the original banana cookies.


They baked up fine, though they were a little bit more cake-like than cookie-like in texture. Despite the big scoop of shortening and other diet-killing ingredients, they reminded me a lot of the desserts you get from a place that still substitutes carob for chocolate. To my further disappointment, a lot of the pumpkin flavor baked out. You could easily compensate for this by really putting the "spice" in "pumpkin spice." But even then, they would just be spice cookies with a little bit of a pumpkin undertone. 

So this didn't live up to my autumn dreams, but they weren't too terribly bad either. This just means more attempts are needed so we can have pumpkin spice cookies.

Wednesday, September 22, 2021

Cow Cookies!

When we last saw beef fat, it was holding together a pie crust for a mysteriously resilient pink pie. Jana from Time Travel Kitchen noted that if we put our beef fat in hot water, we will wash away the various things suspended in it and therefore it will last far longer. But you really should see what we got when we first upended the cup that held the fat and the random pan juices that came out with it. We had this after letting the fat harden in the refrigerator:

And when we upturned the cup to release its contents (and did some prying and cutting around the edges), we had a perfect freestanding beef gelatin.

Rather than going down the drain, the gelatinized beef juice got frozen until the next soup night.


I know I said that despite my hatred of food waste, I wasn't going to look for ways to better integrate beef fat into our diet. But I also got a little bit obsessed with beef fat in desserts. I previously thought that the beef-fat-crusted pie was the end of my explorations of bovine sweets, but then I thought to myself "Maybe the artificial strawberry flavor concealed the beef fat too much! Maybe we were all too distracted by the ballistic-gelatin-like pie filling to notice what a bad idea this was!"

So I had to try the cow-derived dessert idea again. I know it seems like I've gone nuts in quarantine, and maybe I have. But a lot of people outside America swear by using hog lard in their cookies and pastries. All we're doing here is swapping species.

Beef Shortbread Cookies
½ c beef fat
A little milk
¼ c sugar
1 tsp. vanilla
1¼ c flour

Heat oven to 350°. Grease a cookie sheet well.
Thoroughly beat the sugar, fat, and vanilla. Then mix in the flour. Add the milk, a tiny half-teaspoon at a time, until it comes together into a cookie dough. Stir the dough as little as possible to keep it from going tough.
Roll into 1-inch balls, and then flatten them with your hands. Or, roll the dough out into a sheet and cut them. Place on the cookie sheet.
Bake until slightly golden at the edge and cooked through. Refrigerate the dough for a few hours after shaping into cookies for a more shortbread-like texture.

I picked this recipe for two reasons. First, it's a very plain recipe. I didn't want to cover any meat-related flavor problems with spices or molasses. Second, since this recipe uses no eggs, we can easily cut it down to a very tiny amount. In the likely event that this turns out to be a bad idea, we won't have wasted a lot of flour or sugar in this. Yes, one can subdivide eggs (which I did on our adventure into our great-grandmother's forgotten kitchen), but it is a very irksome task that I did not want to do again.

I thought about doing a cake instead of cookies, but I wanted to cut this recipe down a lot in case it was terrible. Therefore a cake was not suitable. If you bake too small of a cake, your tiny puddle of cake batter will just dry out in the pan instead of baking properly. But you can cut a cookie recipe down to a thirty-secondth of its original quantity, and the one or two resulting cookies will turn out fine. You might think I should have just made 6 or so cupcakes, but I didn't think of that until the oven was hot and the cookies were mixed.


I'm partially trying this to see how we can economize better than we already do. But mostly, I thought it would be a hoot to make beef-based sweets. Everyone else in the house has by now just let me expend a moderate amount of dry goods in these experiments, especially since nothing to date has been worse than the ham-cherry pie. When I told everyone I was making cow cookies, by now they knew me too well to think I meant cookies iced with a novelty splotch-pattern black-and-white decoration. When they saw the tiny amount of cookie dough forming in the smallest mixing bowl in the drawer, everyone's objections melted into curiosity-motivated "Let me know when they're done."


Figuring that we'd definitely notice undesirable beefiness when we had only beef fat and sugar beaten together, I tried a tiny amount on the tip of a spoon. It tasted... fine. Nothing thrilling, but it was fine. Basically it tasted like if you accidentally used granulated instead of powdered sugar in your cake frosting. It seemed like using beef fat instead of butter would make no difference. However, upon mixing in the flour, we got sand instead of ready-to-bake cookie dough.


At first I wondered if I should just press and smush the floury fat-gravel into cookie shapes and hope for the best. But then I realized: a stick of butter contains at least a spoonful of water. That's why butter boils a little bit when you melt it. So I added milk by the teaspoon until we had cookie dough.

As aforementioned, I cut this recipe down by a lot. These are all of the cookies we got. If the cow cookies are a success, I reasoned, we can actually make a full batch of the things.


They got a little puffy in the oven, and smelled unexpectedly normal.


To my surprise, these cookies are just fine. It's true that they have no buttery flavor (nor any butter), but no one would taste one, look at it suspiciously, and ask "What's in this?" They tasted like perfectly normal baked sweets. I would like to emphasize that I used the plainest, most unadorned, if-something-was-fishy-or-beefy-we-would-notice-it recipe.

The cookies formed this sort of extra crisp layer on the outside that was almost like an ultra-thin glaze-- rather like how brownies form their own separate top layer. The inside of them was crispy and then melted in your mouth like one of those Mexican wedding cookies that people put in powdered sugar. As someone else put it, they were "delightfully crumbly. Everything you make with beef fat has been delightfully crumbly." I'm not going to start fanatically putting the fat we drain out of various frying pans of beef back into our daily diet, but this happened barely two weeks later:

One of them did not fit.

That's right, we made a full batch of cow cookies-- and others in the house were excited about them. Have a look at how light and crisp they are on the inside.

And so, in conclusion, you can put beef fat anywhere butter would have gone. Next time you drain off a frying pan of ground beef, put the fat into your refrigerator and then pick the recipe of your dreams.

Tuesday, July 27, 2021

Slipping Whole Wheat Where it Should Never Be

White flour is still a bit of a scarcity around here. But it seems that few of everyone who is just now getting into baking (note if this includes you: Welcome! Watch out for people who start throwing recipes at you and asking you to make them for parties!) has dared to try using brown flour. The shelves where white flour should be are as barren as the toilet paper aisle a few months ago, but brown flour remains as plentiful as ever. 

We've been trying to stretch that bag of powdered white gold by means of slipping brown flour into recipes. It's true that doing this to desserts can lead to the sort of letdowns that make one think of those health-food stores that tried to convince you that carob was as good as candy. With that said, I've been putting whole-wheat flour into brownies ever since Maida Heatter recommended it in her Book of Great Chocolate Desserts. As she wrote in that cookbook (which is good enough that I had a friend make a custom cover for it out of duct tape that says THE HOLY BIBLE), the whole-wheat flour adds a bit of "oomph" (her word choice) to them.

Anyway, today's recipe is one of the many that started out getting commercially published and has become almost a tradition. Our Mom of Cookrye has been making these since we were wee tots, long after the cookbook fell apart into spattered paper fragments. Naturally, instead of making the recipe as written, we are changing ingredients that shouldn't be changed.

Blondies
½ c butter, shortening, or any combination of the two
2 c light brown sugar (if all you have is dark brown sugar, use half that and half white)
2 eggs
2 tsp vanilla
1 tsp baking powder
½ tsp salt
1½ c flour

Heat oven to 350°. Grease a square pan.
Melt butter and butter/shortening. Add the brown sugar. When mixed, beat in the eggs. Then, stir in the baking powder, vanilla, and salt. Mix in the flour.
Spread in the pan and bake for 25-35 minutes.

Source: Betty Crocker's Cookbook (1994 edition)

Before you think this means that we at A Book of Cookrye have decided to healthify desserts, you should know that today's adventure starts out by economically replacing part of the butter with a big scoop of white glop from the massive can of shortening that is only in the kitchen because Hillary Clinton made me buy it.


I could have started this recipe from the beginning twice. But since we add the only test ingredient last, I decided to take the easier road, make one big batch of pre-flour batter, and divide it in half at the critical moment. I later realized that this made it a bit difficult to perfectly halve this well-beaten mixture of butter, sugar, and eggs.

We didn't have light brown sugar, so we used half dark brown and half white.

If I had a kitchen scale, I could have made a perfect and exact division of all the ingredients after I had them nicely mixed. Since I don't, let's move on to our waiting flours!


I have to pause here and thank the pizza purveyor for giving us a big stack of the tiny pans they bake garlic knots in when dispatching them for deliveries. While waiting for our pies, I mentioned offhand that the pans were the perfect size for small-batch baking. The cashier lifted a stack of them, handed them to us, and said that she uses them a lot at home too, both for cooking and for feeding her cats.


As aforementioned, I don't think I divided the ready-for-flour mixture perfectly in half. We have the same amount of batter in both pans, but that's because I scraped one bowl as thoroughly as possible but left a fair amount behind in the other.


That would automatically invalidate the results of this little experiment if I was trying to find out how a brown-for-white flour swap changed an otherwise unaltered recipe. After all, one has a lot more butter, flour, eggs, and sugar than the other. However, I just wanted to find out whether blondies are any good if you make them with brown flour, something we will still find out regardless of uneven halving. Besides, even if one kitchen mistake totally ruined anything we might have learned today, we'd still have blondies coming out of the oven in 25 minutes or less.


I don't know if it's just the darker color playing tricks on my mind, but the brown flour blondies seemed to have a slightly stronger molasses flavor. The white flour blondies had a more delicate top crust, but the top of the brown flour ones was ever-so-perfectly on that divide between crispy and crunchy. As aforesaid, I'm not shoving brown flour into cakes and pies in an attempt to force the illusion of healthiness. We all liked both of them, but the brown flour blondies disappeared faster.

Wednesday, July 21, 2021

Beef Fat Pie Crust: or, Can we eat dinner for dessert?

As aforementioned, we at A Book of Cookrye have a lot of beef fat pass through the refrigerator and then to the trash can. Since the extra-lean beef got too expensive, we have taken to draining the fat off of the more affordable not-so-lean beef, putting it in a cup, and refrigerating it until we can drop the hardened puck of fat into the trash. This steady output of food waste has irked us so much that we not-so-secretly swapped the beef fat for the shortening in our new favorite biscuit recipe with delicious results. The success in breadcraft and bounty of meat also led to unwarranted kitchen crafts, culminating in beef-stuffed beef bread.


You really can't taste the beefy difference in biscuits, but perhaps we are more apt to dismiss a suspiciously meaty flavor in something that's meant to go with a savory dinner.  We wondered: can one put beef fat into dessert? As an experimental substitution, we decided to make pie because I like making pie crusts. Besides, since the beef and pie filling would remain in separate layers it would be easier to tell if something was fishy-- or beefy-- with a pie that tasted like dessert on top of steak. 

We could have first made quiche or something similarly savory, but we wanted to see just how far we can take this bovine substitution. Since I can't ask any of my great-grandmothers about this (though in photos they look like the sort of people who would know), we're going to have to discover for ourselves whether we can economize on butter with this beige-colored byproduct of spaghetti night.


In our earlier posts about the wonders of baking with beef, we noted that the fat was so hardened from refrigeration that we couldn't really mix it. In the comments, Lace Maker reminded us that electric refrigerators used to be quite the extravagance, and therefore I should have at least let this sit out and soften a bit first. You might think I remembered to soften the beef fat after reading that, but I forgot and therefore had to bring in the power tools.


I have never made pie crust in a food processor before. It's a common technique, but this is new territory for me. Also, I think this particular food processor must be missing a lid. The only lid I have found has a downspout on the side that I had to tape shut to prevent it from spraying flour all over the floor.


Having used masking tape to force the food processor's lid to do the very basic job of keeping food inside the machine, we turned these hardened fat fragments and flour into a perfect sand in about twenty seconds. 


I wasn't sure how to add water to the pie crust when using this exciting new electrical method. How does one know one has added enough? I kept dribbling in tiny drops and opening up the container after mixing them in to check. I shouldn't have bothered, because eventually (and rather suddenly) the beige sand suddenly coalesced into a big ball. You can see parallel notches where the blades kicked it around a bit before I realized I should turn off the motor.


I like doing pie crusts completely by hand because it's just oddly satisfying to me, but it's nice to know that if I want to I can have one completely mixed up in two minutes after getting the ingredients ready. However, I would never consider using a food processor without a dishwasher to put the pieces in. Anyway, I know I should have refrigerated this dough before rolling it out, but it was already so pliable in my hands that I decided to proceed. This was ill-advised, but not for the reasons you likely think. There were a few times when the dough tried to tear, but it turned into a competent sheet nonetheless.


You might think that failing to let the dough rest in the refrigerator after mixing meant that it was too brittle to drape into the pie pan, but actually it handled very well. The only rip I needed to repair was right on the edge of the pie-to-be anyway.


In no time at all, I had this thing all pricked and ready to bake. A lot of people use a fork for this, but I have found that the resulting pinholes seem to close up as the crust melts a bit in the oven.


As we get this pie crust into the oven, keep the following in mind: The dough got slapped around hard in the food processor, and it didn't get to rest afterward. I really should have just put it in the refrigerator and watched videos to pass time while waiting for 30 minutes. Delia Smith, from whom we learned to make pie crusts, would have let the dough rest. Things seemed successful after baking... at first. True, there's a single fissure on the side, but that's just homemade charm.


However, this pie crust looked a bit... shallow.  It turns out that by not resting the pie crust, its precious gluten strands didn't get to relax. But since I'd done such a dang good job anchoring the edges around the pan rim, the dough couldn't shrink into the pan. Instead, it shrank so much it raised itself off the pan. If you shine a flashlight through the pie pan, you can see how it the crust tightened itself like a gluten-based drum skin. Have a look at the airspace that should not be below this empty pie. I'm impressed that the dough stayed in one piece.

Twenty minutes in the refrigerator could have prevented this.

I'd taken the crust scraps and rolled it into a little mini-pie just so I could try a piece of the crust without breaking into today's featured dish.


It also shrank a bit in the oven. If we'd had instant pudding, I'd have put some in. But today we didn't.


However, look at how flaky it got when you broke into it!


All right, let's get back to today's featured experiment. I didn't want to waste expensive ingredients on a pie that might taste like custard on top of steak, so I went with something easy and cheap. I'm referring to that classic mixture of strawberry Jello and Cool Whip. If I had also mixed in canned pineapple and put it on a lettuce leaf instead of a pie, this could have been what our Pieathlon friend Poppy Crocker has so often told us technically qualifies as a salad

Between the gelatin and beef fat, tonight's dessert could not exist without animal byproducts.

I had intended to say that the filling wasn't really noteworthy. I was going to say there's no surprises when putting together Cool Whip and Jello. I intended to finish discussing the filling by saying that my pink fluff is interspersed with Jell-o clumps and therefore lacks that homogeneity that would have allowed me to bring it to a church supper without losing my dignity. That was before I cut the pie.

 First, let's have a look at a slice. You will notice that the beefy pie crust, which is the entire reason for this experimental undertaking, is delightfully flaky and full of crisp layers. You may also notice that the filling is so hard that the knife left serration marks.


Before we go any further, I want to answer the question that launched this whole experience. Yes, you can use beef fat in a dessert pie crust. It doesn't taste like meat at all. It's not quite as good as butter, but it's a lot better than shortening. The crust has lots of wonderful crisp flaky layers. 

If you drain the fat off a frying pan of ground beef, I highly suggest saving it for recipe use. The pie crust did not clash in flavor with the pink dessert on top. You could serve it to people without telling them (unless they're vegetarian or suchlike). The pie crust is that good.

However, I do not think I will make this filling again. I wanted something cheap and easy in case the pie crust turned out to be a failure, and that's what I got. The gelatinous pink foam didn't taste great but it wasn't bad either. However, it was a lot harder than a fluffy pie should be. If you slap a pie with a spatula, you should leave a dent.


I know I've often said how I don't like pies that you can't cut, and how I think that if you have to scoop your pie with a spoon you should just serve it as a cobbler or in a pudding bowl. But this pie has gone too far the other way. You could seal the edges of your bathtub with it. You could use this pie to pack delicate items for shipping. I will be finding a different cheap-and-effortless pie filling for any future pie crust experiments.

However, as someone else in the house said upon trying this: "It's a damn good crust. Not a good pie."