Tuesday, July 27, 2021

Slipping Whole Wheat Where it Should Never Be

White flour is still a bit of a scarcity around here. But it seems that few of everyone who is just now getting into baking (note if this includes you: Welcome! Watch out for people who start throwing recipes at you and asking you to make them for parties!) has dared to try using brown flour. The shelves where white flour should be are as barren as the toilet paper aisle a few months ago, but brown flour remains as plentiful as ever. 

We've been trying to stretch that bag of powdered white gold by means of slipping brown flour into recipes. It's true that doing this to desserts can lead to the sort of letdowns that make one think of those health-food stores that tried to convince you that carob was as good as candy. With that said, I've been putting whole-wheat flour into brownies ever since Maida Heatter recommended it in her Book of Great Chocolate Desserts. As she wrote in that cookbook (which is good enough that I had a friend make a custom cover for it out of duct tape that says THE HOLY BIBLE), the whole-wheat flour adds a bit of "oomph" (her word choice) to them.

Anyway, today's recipe is one of the many that started out getting commercially published and has become almost a tradition. Our Mom of Cookrye has been making these since we were wee tots, long after the cookbook fell apart into spattered paper fragments. Naturally, instead of making the recipe as written, we are changing ingredients that shouldn't be changed.

Blondies
½ c butter, shortening, or any combination of the two
2 c light brown sugar (if all you have is dark brown sugar, use half that and half white)
2 eggs
2 tsp vanilla
1 tsp baking powder
½ tsp salt
1½ c flour

Heat oven to 350°. Grease a square pan.
Melt butter and butter/shortening. Add the brown sugar. When mixed, beat in the eggs. Then, stir in the baking powder, vanilla, and salt. Mix in the flour.
Spread in the pan and bake for 25-35 minutes.

Source: Betty Crocker's Cookbook (1994 edition)

Before you think this means that we at A Book of Cookrye have decided to healthify desserts, you should know that today's adventure starts out by economically replacing part of the butter with a big scoop of white glop from the massive can of shortening that is only in the kitchen because Hillary Clinton made me buy it.


I could have started this recipe from the beginning twice. But since we add the only test ingredient last, I decided to take the easier road, make one big batch of pre-flour batter, and divide it in half at the critical moment. I later realized that this made it a bit difficult to perfectly halve this well-beaten mixture of butter, sugar, and eggs.

We didn't have light brown sugar, so we used half dark brown and half white.

If I had a kitchen scale, I could have made a perfect and exact division of all the ingredients after I had them nicely mixed. Since I don't, let's move on to our waiting flours!


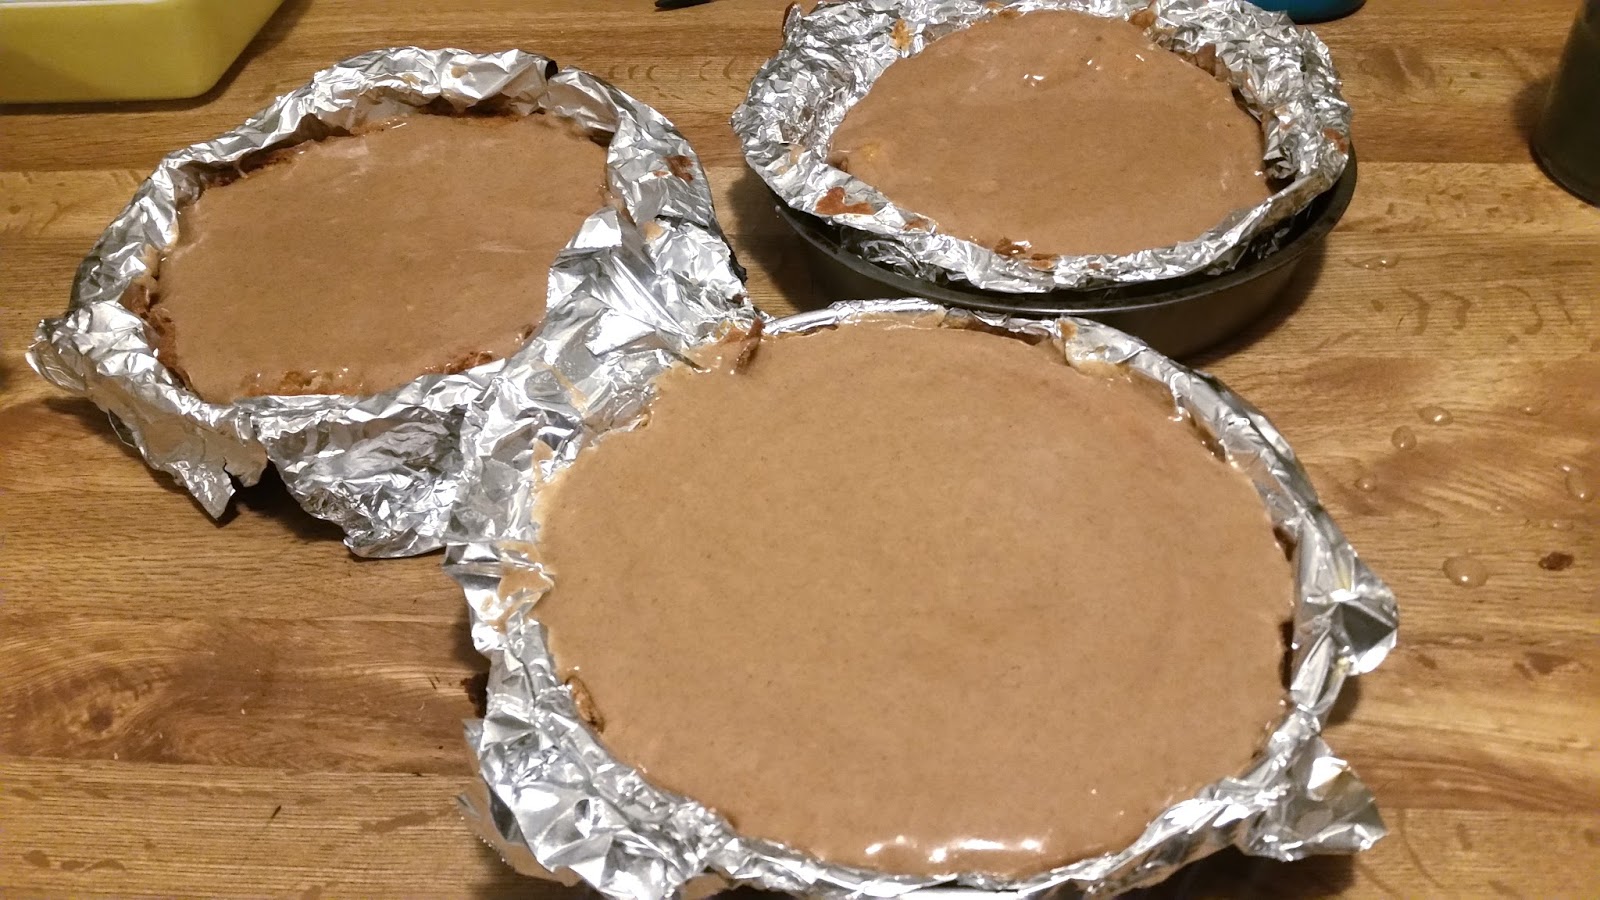
I have to pause here and thank the pizza purveyor for giving us a big stack of the tiny pans they bake garlic knots in when dispatching them for deliveries. While waiting for our pies, I mentioned offhand that the pans were the perfect size for small-batch baking. The cashier lifted a stack of them, handed them to us, and said that she uses them a lot at home too, both for cooking and for feeding her cats.


As aforementioned, I don't think I divided the ready-for-flour mixture perfectly in half. We have the same amount of batter in both pans, but that's because I scraped one bowl as thoroughly as possible but left a fair amount behind in the other.


That would automatically invalidate the results of this little experiment if I was trying to find out how a brown-for-white flour swap changed an otherwise unaltered recipe. After all, one has a lot more butter, flour, eggs, and sugar than the other. However, I just wanted to find out whether blondies are any good if you make them with brown flour, something we will still find out regardless of uneven halving. Besides, even if one kitchen mistake totally ruined anything we might have learned today, we'd still have blondies coming out of the oven in 25 minutes or less.


I don't know if it's just the darker color playing tricks on my mind, but the brown flour blondies seemed to have a slightly stronger molasses flavor. The white flour blondies had a more delicate top crust, but the top of the brown flour ones was ever-so-perfectly on that divide between crispy and crunchy. As aforesaid, I'm not shoving brown flour into cakes and pies in an attempt to force the illusion of healthiness. We all liked both of them, but the brown flour blondies disappeared faster.

Wednesday, July 21, 2021

Beef Fat Pie Crust: or, Can we eat dinner for dessert?

As aforementioned, we at A Book of Cookrye have a lot of beef fat pass through the refrigerator and then to the trash can. Since the extra-lean beef got too expensive, we have taken to draining the fat off of the more affordable not-so-lean beef, putting it in a cup, and refrigerating it until we can drop the hardened puck of fat into the trash. This steady output of food waste has irked us so much that we not-so-secretly swapped the beef fat for the shortening in our new favorite biscuit recipe with delicious results. The success in breadcraft and bounty of meat also led to unwarranted kitchen crafts, culminating in beef-stuffed beef bread.


You really can't taste the beefy difference in biscuits, but perhaps we are more apt to dismiss a suspiciously meaty flavor in something that's meant to go with a savory dinner.  We wondered: can one put beef fat into dessert? As an experimental substitution, we decided to make pie because I like making pie crusts. Besides, since the beef and pie filling would remain in separate layers it would be easier to tell if something was fishy-- or beefy-- with a pie that tasted like dessert on top of steak. 

We could have first made quiche or something similarly savory, but we wanted to see just how far we can take this bovine substitution. Since I can't ask any of my great-grandmothers about this (though in photos they look like the sort of people who would know), we're going to have to discover for ourselves whether we can economize on butter with this beige-colored byproduct of spaghetti night.


In our earlier posts about the wonders of baking with beef, we noted that the fat was so hardened from refrigeration that we couldn't really mix it. In the comments, Lace Maker reminded us that electric refrigerators used to be quite the extravagance, and therefore I should have at least let this sit out and soften a bit first. You might think I remembered to soften the beef fat after reading that, but I forgot and therefore had to bring in the power tools.


I have never made pie crust in a food processor before. It's a common technique, but this is new territory for me. Also, I think this particular food processor must be missing a lid. The only lid I have found has a downspout on the side that I had to tape shut to prevent it from spraying flour all over the floor.


Having used masking tape to force the food processor's lid to do the very basic job of keeping food inside the machine, we turned these hardened fat fragments and flour into a perfect sand in about twenty seconds. 


I wasn't sure how to add water to the pie crust when using this exciting new electrical method. How does one know one has added enough? I kept dribbling in tiny drops and opening up the container after mixing them in to check. I shouldn't have bothered, because eventually (and rather suddenly) the beige sand suddenly coalesced into a big ball. You can see parallel notches where the blades kicked it around a bit before I realized I should turn off the motor.


I like doing pie crusts completely by hand because it's just oddly satisfying to me, but it's nice to know that if I want to I can have one completely mixed up in two minutes after getting the ingredients ready. However, I would never consider using a food processor without a dishwasher to put the pieces in. Anyway, I know I should have refrigerated this dough before rolling it out, but it was already so pliable in my hands that I decided to proceed. This was ill-advised, but not for the reasons you likely think. There were a few times when the dough tried to tear, but it turned into a competent sheet nonetheless.


You might think that failing to let the dough rest in the refrigerator after mixing meant that it was too brittle to drape into the pie pan, but actually it handled very well. The only rip I needed to repair was right on the edge of the pie-to-be anyway.


In no time at all, I had this thing all pricked and ready to bake. A lot of people use a fork for this, but I have found that the resulting pinholes seem to close up as the crust melts a bit in the oven.


As we get this pie crust into the oven, keep the following in mind: The dough got slapped around hard in the food processor, and it didn't get to rest afterward. I really should have just put it in the refrigerator and watched videos to pass time while waiting for 30 minutes. Delia Smith, from whom we learned to make pie crusts, would have let the dough rest. Things seemed successful after baking... at first. True, there's a single fissure on the side, but that's just homemade charm.


However, this pie crust looked a bit... shallow.  It turns out that by not resting the pie crust, its precious gluten strands didn't get to relax. But since I'd done such a dang good job anchoring the edges around the pan rim, the dough couldn't shrink into the pan. Instead, it shrank so much it raised itself off the pan. If you shine a flashlight through the pie pan, you can see how it the crust tightened itself like a gluten-based drum skin. Have a look at the airspace that should not be below this empty pie. I'm impressed that the dough stayed in one piece.

Twenty minutes in the refrigerator could have prevented this.

I'd taken the crust scraps and rolled it into a little mini-pie just so I could try a piece of the crust without breaking into today's featured dish.


It also shrank a bit in the oven. If we'd had instant pudding, I'd have put some in. But today we didn't.


However, look at how flaky it got when you broke into it!


All right, let's get back to today's featured experiment. I didn't want to waste expensive ingredients on a pie that might taste like custard on top of steak, so I went with something easy and cheap. I'm referring to that classic mixture of strawberry Jello and Cool Whip. If I had also mixed in canned pineapple and put it on a lettuce leaf instead of a pie, this could have been what our Pieathlon friend Poppy Crocker has so often told us technically qualifies as a salad

Between the gelatin and beef fat, tonight's dessert could not exist without animal byproducts.

I had intended to say that the filling wasn't really noteworthy. I was going to say there's no surprises when putting together Cool Whip and Jello. I intended to finish discussing the filling by saying that my pink fluff is interspersed with Jell-o clumps and therefore lacks that homogeneity that would have allowed me to bring it to a church supper without losing my dignity. That was before I cut the pie.

 First, let's have a look at a slice. You will notice that the beefy pie crust, which is the entire reason for this experimental undertaking, is delightfully flaky and full of crisp layers. You may also notice that the filling is so hard that the knife left serration marks.


Before we go any further, I want to answer the question that launched this whole experience. Yes, you can use beef fat in a dessert pie crust. It doesn't taste like meat at all. It's not quite as good as butter, but it's a lot better than shortening. The crust has lots of wonderful crisp flaky layers. 

If you drain the fat off a frying pan of ground beef, I highly suggest saving it for recipe use. The pie crust did not clash in flavor with the pink dessert on top. You could serve it to people without telling them (unless they're vegetarian or suchlike). The pie crust is that good.

However, I do not think I will make this filling again. I wanted something cheap and easy in case the pie crust turned out to be a failure, and that's what I got. The gelatinous pink foam didn't taste great but it wasn't bad either. However, it was a lot harder than a fluffy pie should be. If you slap a pie with a spatula, you should leave a dent.


I know I've often said how I don't like pies that you can't cut, and how I think that if you have to scoop your pie with a spoon you should just serve it as a cobbler or in a pudding bowl. But this pie has gone too far the other way. You could seal the edges of your bathtub with it. You could use this pie to pack delicate items for shipping. I will be finding a different cheap-and-effortless pie filling for any future pie crust experiments.

However, as someone else in the house said upon trying this: "It's a damn good crust. Not a good pie."

Friday, July 16, 2021

Wacky Cake: or, Better cooking without bowls

 Today, we present a recipe that comes to us from one of our readers! Freezy wished to send in something better than the banana-egg "pancakes." And so, straight from the handwritten flyleaf of a reader's mother-in-law's copy of The Joy of Cooking, we are making this!


Wacky Cake
3 c flour
1½ c sugar (or half Splenda)*
6 tbsp or ½ c cocoa powder
2 tsp baking soda
1 tsp salt
2 tsp vanilla
2 tbsp vinegar
⅔ c oil
2 c water, milk, or coffee

Heat oven to 350°.
Mix the dry ingredients in a 9"x13" pan. Make three holes in the mixture. Put the vanilla in one hole, the vinegar in another, and the oil in the last. Mix thoroughly, being sure no dry ingredients remain in the corners. A whisk will eliminate lumps easily.
It should be a relatively thin cake batter. Add a bit more water, a teaspoon at a time, if it's not.
Bake about 30 minutes, testing the center with a toothpick. It may be spring back when pressed in the center before it's completely baked.
This recipe easily cuts in half for a square pan.

*The original recipe uses 2 cups, but we are advised that we can take out half a cup.
I used melted margarine and it was fine.

Source: Freezy's mother-in-law

When I worked a desk job, I would often read a website called Food Timeline because they lovingly record the history of the foods most us think are too ordinary to bother documenting. It's pretty easy to find people gushingly retelling the history of high-end and high-priced dishes like crepes Suzette, but how many places have the history of the foods that are practically the background noise of everyday life-- like grilled cheese, potato salad or trail mix? Anyway, Wacky Cake gets its own entry, but this is the first time such a recipe has landed right on my digital doorstep.


This is the second time I've gotten a recipe you're supposed to mix in the pan, and both recipes involve chocolate. The first one is for brownies, and if you like your brownies more like sweet chocolate toffee than dark fudge it's a good one. 

I was going to use water, but I decided coffee would be a lovely addition. And so, after pouring the coffee into a shallow bowl, we had to wait for it to actually cool off. This coincided with others in the house wanting to visit the new gas station for obscenely large fountain drinks and other assorted delights, which is one of the few sources of entertainment around here that does not close at 9PM. 

If you think I'm exaggerating, you should see the crowds at this new 24-hour gas station after the clock has struck eleven. Everyone who has nowhere else to go for fun at night, (ourselves included) goes there since they opened last month. The people working the hot sandwich counter don't have to check how long food has been under heat lamps.

Anyway, when we got back, the coffee had cooled.


We had to make two substitutions today. First, the only vinegar in the house is cider vinegar. But since we're only using a spoon of it, I didn't think we'd imbue the cake with apple flavor. Second, we lacked one ingredient for tonight's recipe: cooking oil. 

We have no plain cooking oil in the house at present. So even though we're deviating from the recipe a bit, we decided to melt some of the spreadable margarine that usually goes on toast and grilled cheese. In a bizarre turn of grocery store markdowns, they had gallon jugs of olive oil at 75% off a few weeks ago. Therefore, after we used up the last of the plain oil, we just didn't bother replacing it.  After the margarine had its brief turn on the microwave turntable, it was one of the prettiest shades of yellow that modern artifice can produce.


I was pretty sure this recipe would be a good one because it was handwritten in a cookbook. That is commitment to keeping a recipe. You may write recipes out on scrap paper if you've been meaning to try them, but you have to really want to keep a recipe before you put it permanently in a book.


As I got out the ingredients for this recipe, I noticed that (unless you use milk or butter) this is a vegan cake recipe. At first I thought I didn't see the eggs in the page, but if I forgot them it's because Freezy's mother-in-law forgot to write them down. 


I'm not sure why we're supposed to make separate holes for each of our three principal liquids, but all the recipes I saw on Food Timeline also direct you to do that. Those of you following along at home should be sure to make an extra-wide hole for your oil (or melted margarine or whatever you're using) if you don't want it to spill over into the other two. However, the oleo flood didn't seem to adversely affect anything.


Upon first pouring the coffee, I thought the recipe didn't use enough to turn this pan of powder into cake batter. After all, it kind of looks like we've barely dampened the flour where the coffee landed. However, upon mixing we had the runny cake batter the recipe says we should have. Those of you trying this recipe for yourselves should know that you will have little pockets of unmixed powder in the pan corners. You will also likely find yourself trying to chase down little lumps unless you get out a whisk. 


This cake came out a lot darker than I thought it would. I don't know if there's a lot more chocolate in here than I thought or if the coffee darkened everything a bit. However, our wacky cake is somewhere between brown and black. You'd almost think I burned it, but I promise you I didn't.


The top of this cake was extremely porous (and perhaps a bit lunar-looking) which meant that the icing I poured on it soaked right in. I could barely get the entire cake covered before all the icing got absorbed.

When we cut the cake, I noticed that the middle of it had gotten a little red. People writing about red velvet cake will often note that the earliest ones used chocolate and vinegar to get the red color. Sure enough, this cake had a definite reddish tinge to it when cut. It was also so dark we had to get out a flashlight to make it stop looking like a black blob in pictures.

Also, this cake is a lot better than a recipe that appears to rely on a mixing gimmick has any right to be. It's so moist and delicate that it feels like it should barely be able to hold itself together. Someone else in the house described it as "velvety." And of course, that favorite word of cookbook writers, "moist," was deployed. 

Because I wanted to really see what kind of cake we got, I made sure to taste it without any icing on top. It tastes like a very old-fashioned chocolate cake, or perhaps like a less-heavy red velvet. The chocolate flavor is a bit milder than a chocolate cake from today. It reminds me a lot of long-ago birthday parties with decorations that by now would qualify as retro. We agreed that we should keep this recipe. As further proof, this is how much cake got eaten after it had barely cooled enough to cut.


The only thing I didn't like about the recipe is that you'll have to soak the pan overnight before washing it. With that said, this cake got eaten very quickly instead of sitting around until someone discreetly discarded it. I had wondered if it's one of those cakes that just seems to perfectly lift itself off of the pan with perfect neatness (some of them do that), but it isn't. If you want an easier-to-clean pan, or if you want to bake this in layers and stack them, you might want to mix this in a bowl and pour into a well-greased pan instead of mixing it in the baking vessel.


You can see what the cake leaves behind in the above photo. But since leaving a pan full of water overnight doesn't exactly demand effort, I don't mind. This cake will be gracing our countertop again.

Wednesday, July 14, 2021

Hump-Day Quickie: Cinnamon Icing

 Today on A Book of Cookrye, we want to quickly show you a really tasty and marvelously easy way to finish any cake you have baked!

Cinnamon Icing
2 tbsp butter
4 tsp water (if you want a very thick glaze, use less)
Tiny pinch of salt
1 tsp vanilla or so
Generous shake of cinnamon
1 c powdered sugar

In a microwave safe bowl (a 2-cup measuring cup also works), melt the butter with the salt and water. Whisk in vanilla and cinnamon, then add powdered sugar. Stir until smooth. Add more powdered sugar if it's too thin, or a tiny bit more water if it's too thick.
If you're serving the cake in the pan, pour the icing over it right after it's out of the oven, and tilt the pan back and forth to spread.
Wait until the cake is ready to ice before making- it doesn't sit and wait very well.

A friend of mine gave me this recipe when we were in high school, and I've put on many baked goods since. I first posted this as part of a chocolate carrot cake recipe (which is good, but you should only make it if you have a dishwasher) You don't need to know how to decorate cakes to just pour glaze on them, nor need you set aside a lot of time. This adds a really good, buttery and cinnamon-filled flavor to anything you put it on. And it's just exactly thick enough to make a nice finishing layer on top of your cakes without being an excessive piled-on mass of sweetness.


I originally would melt the butter and then pour in hot water, but it turns out that you can easily just pop them both into the microwave. I also started using one of those 2-cup glass measuring cups because it has a pouring spout which comes in handy at that magical moment when icing meets cake.


You can add just a bit of cinnamon if you want a slight flavor, or if you want a strong spice flavor you can put a lot in as shown above.


It always amuses me how much powdered sugar shrinks when you get it wet. You can see how the far the waterline dropped.


This icing only takes a minute or two to make, and it makes the perfect finishing touch on nearly any cake you pour it on.


 It is so easy to make and such a tasty topping that I have put it on many cakes, from the one I made after a recipe suggestion failed:


To the tripled batch I put on top of the cake experiment I tried to see whether changing how you mix a cake makes a difference (it does):


I also put it on the elaborate, two separate batters, yeast-raised creation I made for my grandparents' anniversary:


You might be tempted to fancy this icing up with other spices. But I suggest you first try this as it is because it's really good in its simplest form (although using pumpkin pie spice in it is definitely lovely). You know how people like cinnamon rolls more than twenty-spice rolls? 

Anyway, this is one of my preferred things to grace the top of a cake with. It's (in case I didn't say so) really easy and really good.

Monday, July 12, 2021

The Original Girl Scout Cookies

 We at A Book of Cookrye have been doing some leisurely reading, and somehow ended up learning all about the history of Girl Scout Cookies. That brings us here:

Source: Girl Scouts

Apparently, various Girl Scout troops had been baking their way through fundraising for a while when their national magazine published this recipe in 1922. Let's taste how Girl Scout cookies first got their grip on all of us, in the barely-remembered days before they handed off oven duty to factories. 


We begin, as so many good things life tend to do, with a lot of butter and sugar. We soon thereafter get to the part I always find oddly satisfying: cracking in a whole egg and then beating until it completely vanishes into the delightful proto-cookie goo.

After getting all our happy ingedients in, I was more than slightly skeptical that this recipe would work. Does this look a bit runny to roll out and cut? You may as well try to use a rolling pin on cake frosting.


Thinking I may have mismeasured the flour, I added a bit more a little at a time until the bowl contained one and a half times as much flour as the recipe claimed it ought to. It was still really floppy and seemed hopelessly drippy. The cookie recipe over Maxine Menster's grave had seemed too squishy to roll out and cut before refrigerating, but at least her recipe was approaching slightly warmed Play-Doh before we got it cold. 

I muttered to myself that I could incrementally add the entire sack of flour and accomplish nothing put a pointless waste of baking ingredients. Then I decided to turn this runny dough into cookies another way.


I've often written that I hate making tiny cookies because it's so tedious, but that's because I never tried piping them out before. All you do is just squirt, squirt, squirt across the cookie sheet and, and before you know it you have cookies! (If you're trying this at home, hold the business end of the bag just high enough to not touch the pan and the dough will spread out as you squeeze instead of making a mound.)


I didn't think much of how pointy all these little plops on the pan were because this dough was so runny. Surely they would all flatten out during baking.


Yeah, these came out of the oven hot but also looking rather chilly. I'm sorry, but I'm not the only person who noticed a distinct appearance to these. Or, as others in the house less delicately put it, "Are you going to make the titty cookies again?"


With that said, these cookies are as addictive as the Girl Scout cookies you can buy today. I think a lot of it's how small they are-- you just can't stop eating these things! We polished off most of the first batch before the second one had baked and cooled. They have a wonderfully rich flavor and they're crispy without being hard. 

I'm a little irked about the flour measurement, though. I later made another batch exactly as written, rather than using 1.5 times the flour as I did here. They melted into one big dough puddle on the pan. Either the recipe was miswritten or someone mis-transcribed it. But if you use one and a half times as much flour as the recipe thinks you should, you will be delighted with what you get. Just pipe them out into dainty little squirts on the cookie sheet, being sure to give them plenty of room to spread.