Showing posts with label experiment. Show all posts

Monday, November 20, 2023

Coffee Icing: or, Fun with percolators

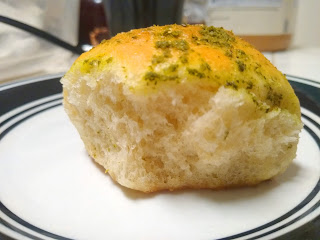
I made these as an excuse to use the percolator.


Coffee Icing
1½ cups granulated sugar
¾ cups strong black coffee
1 tsp butter

Cook coffee and sugar until they form a soft ball when tested in cold water (about 240°F with a candy thermometer). Drop the butter on top without stirring it in. Then allow to cool until lukewarm.
Beat the mixture until it thickens and lightens in color. Quickly spread onto the cake (it sets very fast).
This is very good on spice cakes.

Note: The original recipe was for fudge icing. If you want to make it as written, stir three tablespoons of cocoa powder into the sugar before you begin (eliminating any lumps), and use milk instead of coffee.

Source: A Book of Selected Recipes, Mrs. George O. Thurn, 1934

A Book of Selected Recipes, Mrs. George O. Thurn, 1934

I don't like coffee, but I just find percolators so entertaining in their own understated way. And so, I wanted an excuse to use the one I have lying around the house. First, we revisited Mrs. George O Thurn's mocha cake. I have let that recipe lie dormant for too long. Good recipes should not be pressed into the pages of a book, they should be splattered with errant eggs.


But that was only one batch of coffee. And obviously, we can't drink quarts of iced coffee just as an excuse to operate the percolator again. You may think I'm daft just because I love the burbling sounds of this thing, and seeing the water splash up in the glass knob in the lid and gradually get darker. Also, it looks like an 1800s silver teapot with a power cord coming out the back. As things get tougher and tougher, sometimes it's nice to take pleasure in the little things without worrying about how silly you look. 

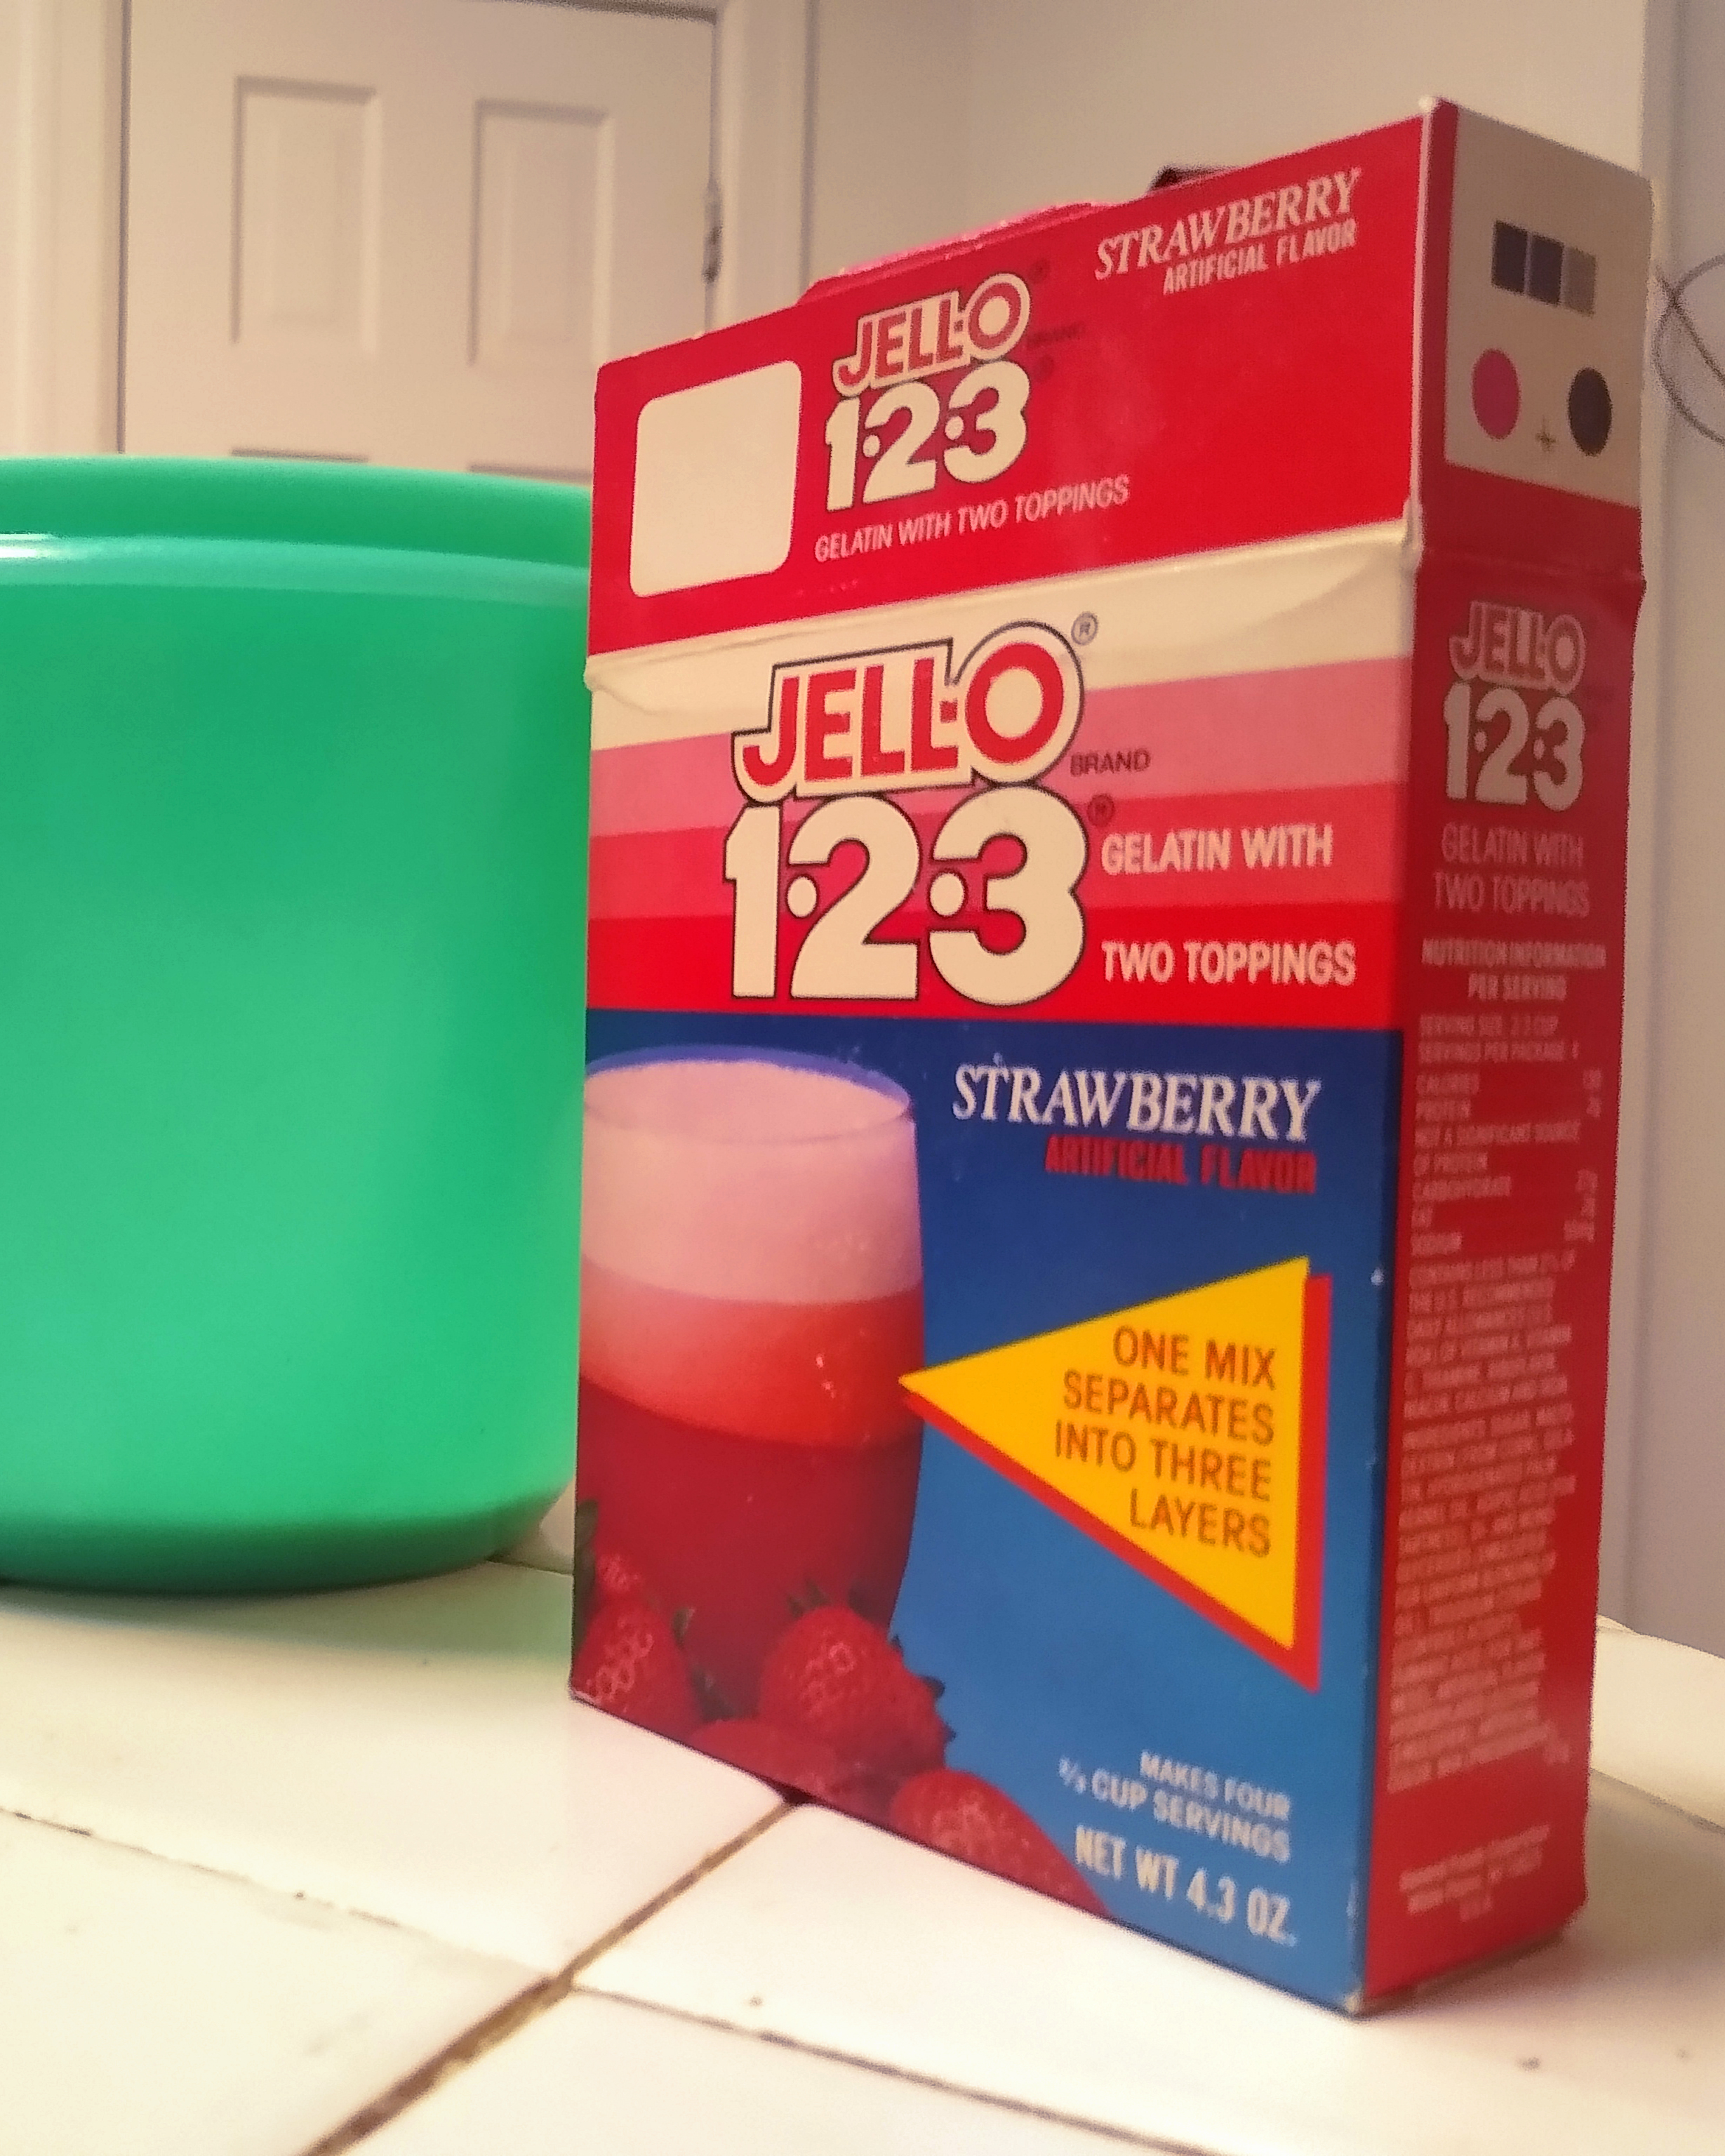
Anyway, we've made a few attempts at boiled icing, and I thought that today was the perfect day to try making it with coffee. If it came out right, it would be like topping a cake with a delicious cup of iced coffee made to A Book of Cookrye standards. As a reminder, a cup of coffee in my happy world looks like this:


I took a boiled fudge icing recipe from Mrs. George O. Thurn's book. At first I was like "Why does she have six recipes for boiled icing?" But actually, having six icing recipes allowed us to pick the one that matched what ingredients we had on hand. Five of them used egg whites, and I didn't want to waste egg yolks. One called for heavy cream, which never buy unless I have specific plans for it. And so, only one recipe remained to suit my percolator-related needs.

And so, we took Mrs. George O. Thurn's recipe for fudge icing,  omitted the cocoa powder, and replaced the milk with coffee. As an aside, boiled icings use a lot of sugar. Just like the last time we dabbled in boiled icing, we are putting more sugar on top of the cake than we put in it.


In other words, after adding the coffee to the pot, I could have either made a batch of icing or drunk this as-is. I should note that I reduced the recipe to two-thirds its original quantity because I couldn't imagine putting nearly a pound of sugar on top of a small square cake- even though I only made the cake as a vehicle for said icing. Even after getting out the tiniest thing that was stovetop-safe, we barely had enough coffee to coat the bottom of it.

For the longest time, nothing happened in the pot. I began to wonder if the stove was defective or something. (I have a bit of a combative history with flat-top stoves.) But after a long time, the coffee boiled up so much that I wished I'd used a bigger pot.


This mixture took a surprisingly long time to reach the soft-ball stage.  I began to wonder if the milk used in the original recipe was crucial to making this icing work. But eventually, after a lot of stirring, the icing formed a soft ball when tried in iced water. And so, we set aside our syrup to cool down to nearly room temperature. I would have forgotten to add the butter had I not measured it out at the beginning and left it conspicuously waiting right in front of me.


And so, we left the coffee syrup out to cool, just as we did when we made Louise Bennett Weaver's spice cake. Then came the long beating. And I do mean the long beating. I must have spent a solid fifteen minutes with a wooden spoon before seeing anything different in the pot. I began to wonder if I needed to return it to the stove for further boiling. Then, at long last, we began to see the slightest suspicion of a color change. After beating the snot out of the icing for still longer, it finally lightened to about the color of peanut butter.

I've seen a lot of candy instructions that say "beat until it loses its gloss," and decided that made sense for today's icing. We were again bitterly reminded of (what apparently is) a fundamental truth of boiled icing. You may have to beat the icing for half an eternity, but once it's ready you have at most 45 seconds to hastily smear it onto the cake. As you can see, I was not fast enough.


Indeed, while the icing had been obstinately runny for a long time, it completely solidified onto the pot while I hastily tried to scrape it out and smear it onto the cake.


However, an easy solution to our icing ineptitude was at hand: the presentation platter! We could cut away and conceal all the unsightly edges, even if it meant no one (besides those who did the baking) got a corner piece.


The cake, of course, was fine. But I was more concerned with the icing on top..... which was absolutely delicious. You may think that boiling coffee for so long would ruin it, but it was just fine.

Imagine a cake topped with coffee-flavored fudge on top, because that's what we got. I would definitely make it again. However, in the future, you shouldn't beat it too firm. As soon as it barely begins to lose its gloss, get it onto the cake- and fast. I wouldn't try to use boiled icing to cover a layer cake. The icing would probably set in the saucepan before you were halfway done. But it's great for when you're serving a cake out of the pan, or for drizzle topping. 

Also, this kind of icing requires patience. But on the bright side, you may offset the calories with the arm workout that comes with making it.

Tuesday, September 19, 2023

Rosemary Rolls: or, Presentation doesn't matter if people eat them in a few short minutes

Some recipes have more potential than their own writers would credit.

Rosemary Rolls
1 c milk
2 tbsp fresh rosemary, finely chopped
½ scant tsp salt
1½ tsp sugar
1½ tsp lard (or shortening)
1½ tsp butter
1 egg, well beaten
¼ cake compressed yeast*
½ c tepid water
About 3¼ cup flour, divided into 2½ cup and ¾ cup

       Topping:
2 tbsp fresh rosemary, finely chopped
¼ cup melted butter
Salt to taste

Before making the dough, mix the topping ingredients. Then, let the topping sit out all day to infuse.

Add rosemary to the milk, then scald it (this draws out the rosemary's flavor better than simply mixing it in). Then stir in the salt, sugar, lard, and butter. When all is melted and dissolved, pour into a large bowl and set aside and cool until lukewarm. Dissolve the yeast in the tepid water, then beat it in along with the egg. Add enough flour to form a stiff batter (about 2½ cups), mix well. Then add enough flour to make a dough that is only just firm enough to knead, about ¾ cup.
Cover the top of the bowl with a wet cloth and let rise overnight, or until it is bubbly and has at least doubled in height.
In the morning, knead the dough well, lay it onto a well-floured surface, and sprinkle more flour on top so it can't stick to anything. Pat it out to somewhere between ½ and 1 inch thick (this dough is so soft that you really don't need a rolling pin). Then cut it into squares about 1½-2 inches on all sides- you don't need to be precise about this unless you want exactly uniform buns. Then roll each of these into a ball, pressing firmly with your hands as you roll them.
Let rise until doubled in size.
When ready to bake, heat oven to 350°.
Melt the topping if it has re-solidified and brush it over the rolls. Use all of the topping. If it seems to make puddles on the dough, they will become deliciously concentrated rosemary flavor after they're baked.
Bake for 35 minutes. These go stale quickly, so wrap any extras tightly. Or, cut them small and make croutons.

*or ¼ envelope dry yeast, or ½ tsp dry yeast.

Adapted from "Efficient Housekeeping" By Laura A. Kirkman, Fort Worth (Texas) Star-Telegram morning edition p. 10, November 24, 1921

We have made Laura Kirkman's cinnamon buns many times since we first encountered the recipe, and every time people have absolutely loved them. I remain more than a bit surprised that non-dessert cinnamon rolls would be so popular. But oftentimes, people are more broad-minded than we expect, especially when bread is involved.

When it came to Laura Kirkman's cinnamon buns, I couldn't help thinking how the bread itself was quite flavorful and delicious- even without the cinnamon on top and the raisins within. So, I wondered what else might be good with these buns. This brings us to our bounty of fresh rosemary.

We have no working printer, so if I want a recipe typed I have to do it myself.

I was going to write about how rosemary is such an easy plant to grow no matter how relentless is the summer. I was going to cheerfully say that if you put it outside, it practically cares for itself and thrives on getting sun-roasted. However, our rosemary struggled in the fiery summer heat, drooping despite our valiant efforts with a garden hose. Then winter came (or at least, the first round of winter) and finished off the plant. I looked up how to grow rosemary online, hoping the plant was more deciduous than I remembered. But Wikipedia dashed my hopes of plant dormancy by stating that rosemary "is an aromatic evergreen shrub." I then tried to convince myself that it would come back from the roots, but in the spring nothing came up but weeds.

However, my sister-in-law had much better luck with hers, and cut off some branches of it for me.


I first thought I would let the leaves remain whole, and that they would artistically intersperse the dough. However, it looked less like artisan craftsmanship and more like I threw a handful of grass clippings into the food. But that was an easy problem to solve. The blender made short work of long leaves.


This recipe is always easier than I think it's going to be. In nearly no time at all, our dough was ready to rise. Laura Kirkman tells us to leave the dough out all night (or in our case, all day). A lot of modern bakers use a similar technique of adding only the tiniest pinch of yeast to bread and letting it slowly rise all day. This gives the yeast more time to make all those delicious flavor compounds that make yeast bread so good. 

But almost every recipe I've seen directs you to let the lightly-yeasted dough sit for a few hours and then add a whole packet of yeast later on. In other words, you make a delicious-smelling spongy substance, and after it's bubbling you just pretend you're making bread the normal way. Laura Kirkman doesn't have time for that business, and she decided that her readers didn't have time for that either. The bread may be an all-day affair, but we readers of "Efficient Housekeeping" can just drop a wet rag over the bowl and spend the entire long breadmaking time doing literally anything else.


I decided to make the topping as soon as I had covered the dough for its day of leavening. That way, the butter could infuse with herbal oils the entire time the bread was sitting out. I resisted the temptation to complicate things with parmesan, garlic, or paprika. I wanted nothing to get in the way of the rosemary. There's no need to complicate beauty. Unfortunately, our rosemary butter looked like were about to make brownies with Satan's salad greens.


Every time people ask me if I can make special brownies (and that happens a lot), I tell them I will make the brownies if they supply the special. (So far, no one has.) But now I think I should recommend special rosemary rolls instead of special brownies. Not only are rosemary rolls less cliched, but they already look right for it. 

The butter with a damp heap of ground rosemary looked so much like the beginnings of special brownies that I considered putting the rosemary and the butter in a hot frying pan. I am informed that a short time on a hot stove really draws out the, um, herbal flavor. But even before the butter had cooled enough to re-solidify, the rosemary had already dyed it a refreshing jade green. I promise we're not cooking with the groovy greens. It just looks like it.


After sitting out all day while the dough rose, the butter was (depending on your perspective) either well-infused, or a suspicious shade of green. Every now and then, I picked up as I passed by so I could get a whiff of lovely rosemary. The butter had plenty of time to infuse since the dough was extremely slow to rise. I began to fear I had killed the yeast by putting it through a blender. But eventually, the dough got over whatever problem was bothering it and rose to life.


I meant to serve these with dinner. We were eating thrilling leftovers that night, and it's nice to have something fresh alongside the fruits of the microwave. However, since the bread dough took so long to rise, we ended up having middle-of-the-night bread instead. And there is nothing wrong with that.

Here you can see my big mistake: I quartered the recipe. This would prove regrettable as soon as the rolls were out of the oven and before they had a chance to cool off.


Our rosemary rolls came out of the oven looking just as infused with illicit herbs as they did before they went in. I might add paprika to the topping next time just to make these look less like the product of some dispensary, but this time I didn't want to impede the flavor of rosemary.


And gosh, did the rolls ever come out golden and beautiful on top! When you broke one open, it was so perfectly fluffy inside.


I never bother writing about the underside of bread, but I have to note the fantastically buttery crispness underneath these. All of that rosemary butter seeped between the rolls and infused them with pure deliciousness as they baked.


However, because I am picky about what I make (particularly when deciding whether to make it again), I carefully tasted some bread from the middle so I could see if it's good without the rosemary butter, or if the herbed topping was like cream cheese icing making up for an underwhelming cake beneath it. The bread itself, completely unadorned, is absolutely wonderful. The rosemary made it so delicious that I was glad I avoided any other spices.

But the biggest compliment came when I told everyone else that the bread was at last done. (I should not that due to my poor planning, the bread was ready six hours after the rest of supper had been cleared away.) I wandered away from the kitchen for a few minutes, and returned to find everyone else standing over a near-empty pan. The bread didn't even have time to get cold. "This is the best bread you ever made!" they said. "You should double it next time!" So great was the clamor over the bread that I had to promise to ask my sister-in-law for more rosemary branches for future culinary use.

I am surprised that Laura Kirkman didn't recommend using herbs instead of cinnamon glaze as a suggested variation under the cinnamon bun recipe because it is so good. And if you plan ahead and make the dough the night before you want it, it's not a whole lot of work when you want to serve it. While you do need to let it rise for 8-10 hours, you can simply cover the bowl and forget about it all day. You don't even need to check on it occasionally throughout the day.

I'm sure rosemary isn't the only herb that would be good here (and yes, the marijuana jokes keep setting themselves up). So feel free to use whatever herbs appeal to you when you're getting groceries- or whatever you have growing outside. You will be very glad you made these.


Sunday, January 29, 2023

Yellow Velvet Cake: or, Ill-advised adventures in food coloring

Red velvet cake has bothered others in the house ever since we made the Saint Patcaken. The excessive use of food coloring has apparently haunted their visions as they drift to sleep. Every now and then, when someone sees me using a bit of coloring to make some icing look more festive, they'll say something like "At least you're not adding enough food coloring to make a red velvet cake!" I have seen them shudder when we pass the cake stand at the grocery store if red velvet is on display. (They don't think it's noticeable, and I choose not to say anything.)

"What would happen," I was asked one day, "if you made red velvet cake but with yellow?"

Red Velvet Cake
¼ cup shortening
¾ cup sugar
½ tsp baking soda
½ tsp salt
4½ tsp cocoa powder
½ tsp vanilla
1 egg
1 oz red food coloring
1 cup + 1 tbsp flour
½ cup buttermilk, sour cream, or Guinness*
1½ tsp vinegar

Heat oven to 350°. Grease a 9" round pan.
Cream shortening, sugar, salt, baking soda, and cocoa powder. Then add the vanilla and egg. When mixed, stir in the food coloring. Beat well. Add the flour alternately with the Guinness.
Stir in the vinegar. (Even if you used a mixer to make this, get out a spoon and stir in the vinegar by hand.)
Pour into the pan and bake 30-35 minutes.

*You may think that Guinness sounds out-of-place in this recipe, but it's really good.

Adapted from "'Recipe of the Week,' Mrs. Cagle's Red Velvet Cake," Denton [Texas] Record-Chronicle, June 16, 1960 (p. 12) via Food Timeline

Before we proceed, I want to note that I have simplified the recipe. First of all, I omitted the whole business of making a paste out of food coloring and cocoa powder. That step only served to give us more chances to accidentally splash food coloring all over the place. Second, I omitted the step of stirring the baking soda and vinegar together, then hastily stirring the fizzing foam into the cake batter.

Anyway, let's get to the shortening and sugar! It amuses me that a cake famous for its color starts off as white as copy paper.

And now, let's bring out our star ingredient: a whole bottle of yellow food coloring! This was surprisingly hard to find. Most stores have large bottles of red and green (and also black, which surprised me), but it seems like no one wants to purchase massive quantities of artificial yellow dye.

As you may have surmised, we are not just adding a drop or a spoonful of yellow dye to this cake. I didn't want to. You see, we already knew what would happen if we added a few drops of yellow to the cake batter: we'd get a yellow cake. We wanted to know if we dumped in an entire red velvet's worth of artificial yellow!

It turns out that if you use enough yellow food coloring, your baked creation turns orange. I don't know if it's possible to recreate this vivid and bright shade of orange with actual orange food coloring. I love the filmy yellow residue clinging to the sides of the bowl, making all of this look even worse.

You should know that when I tasted this orange stuff, I instantly recognized that unmistakable red velvet flavor. I always thought red velvet cakes get there flavor from the tiny allotment of cocoa powder. It turns out that artificial food coloring is a key component of that distinct red velvet cake flavor. 

After I had the flour mixed in and the cake ready to get into the pans and bake, I noticed that the batter looked wrong. Well, it was going to look wrong anyway because no one wants a yellow velvet cake. But the texture looked wrong. It looked more like a cookie dough than cake batter. 

Then I checked the recipe and realized I forgot the buttermilk. (Well, we're using sour cream instead since we already had it on hand.) I was just so stunned by the food coloring that I forgot to add the rest of the ingredients to the cake.

Look at those pure white swirls commingling with the traffic-cone orange of the cake!

You know what this color reminds me of? Well, you know those huge boxes of Crayola crayons? The ones that have like 100 crayons in them? Well, one of the colors you'll sometimes find in those extra-large boxes is called "macaroni and cheese." And it more or less looks like this.

And so, having gotten all the ingredients into the cake batter, we were ready to bake!

We were curious about what kind of cake we would get both with and without cocoa powder. However, none of us wanted to track down all that yellow food dye again just to repeat the experiment. And so, after we got about half the batter into the pan, we added cocoa to the rest. It turned our batter from a hilariously cheesy orange to what a lot of news articles called the world's ugliest color a while ago. You know this color is ugly because official trade publications called it "opaque couché," apparently hoping that slapping some French on top would make it look better.

Who knew chocolate could make something look worse? Never try to predict the unpredictable ways of artificial dyes.

The cake looked odd after baking. It browned on top, as cakes tend to do. But browning makes such natural golden colors, which clashed with the proudly artificial orange of the cake below.

I thought about putting yellow icing on top of that, but that was vetoed by others who wanted to see if the yellow would bleed through. After all, the cake had successfully dyed the paper we used to line the pan.

After dressing the cake, it looked so innocent. You'd never guess that it contained enough dye to festively tint at least fifty cakes if you're smart enough to avoid dumping out the whole bottle all at once.

I thought the cake tasted fine. I think sour cream makes it a little better than buttermilk did, though I think Guinness is better than either of those. (I would have never believed that beer improves the cake before I tried it for myself.) But enough about flavor, we came here to see coloring used in proudly poor taste! Here are representative samples both with and without cocoa powder. (You couldn't taste the difference between the two.)

But the real star of any red velvet cake is the food coloring. I actually like that insane orange a lot. It makes the cake look kind of like Cheetos. And while the yellow dye didn't penetrate the icing, it left stains on the plate.

Other people's reactions to the cake were... interesting. At first everyone kind of backed away from the cake. It reminded me of the response when a friend brought a lot of pudding to a party in an industrial-sized mayonnaise jar. No one could explain why, but they nevertheless didn't want it.

However, after a day or so, people made their first daring incisions into the cake. And they discovered that... it tastes perfectly fine. Kind of like how a lot of people have to recover from learning how sausages are made, everyone eventually got over the stunning and unnatural color.

I hope you enjoyed this adventure in food coloring as much as I did! And if you have any ideas for the prodigious amounts of blue dye that we had to buy because it was in the same box as the yellow, please share!

Saturday, November 26, 2022

Second-Stab Saturday: The pumpkin bundt of my autumn dreams

Happy weekend-after-Thanksgiving from A Book of Cookrye!

Pumpkin Bundt
1¼ c brown sugar
½ c shortening (or butter)
2 eggs
¾ c canned pumpkin
1 tsp vanilla
1 tsp lemon extract
½ tsp salt
¼ tsp ginger
½ tsp nutmeg
½ tsp cinnamon
4 tsp baking powder
2½ c flour
1 c raisins
1 c chopped nuts

Heat oven to 350°. Grease a bundt pan and dust it liberally with flour.
Cream sugar, shortening, seasonings, and baking powder. Add eggs one at a time, beating well after each. Stir in pumpkin. When all is well mixed, add the flour. Add raisins and nuts, blend thoroughly.
Pour and spread into the cake pan. This cake batter will not go runny and level itself off as it bakes. Therefore, be sure to push the cake batter into every crease and crevice of the pan. Also, be sure the batter is smooth and level on top before baking.
Bake for about 40 minutes, or until a knife or a long skewer inserted halfway between the center and the rim of the pan comes out clean.

adapted from Mrs. M. Peterson, 321 Cottman St, Jenkintown, Pennsylvania; Philadelphia Inquirer Recipe Exchange, October 11 1935, p. 16

You know how we said that those pumpkin cookies seemed like they wanted to be a cake instead? Well, we used Thanksgiving as an excuse to find out!

At first I was going to double the recipe. But as I was writing it out, I noticed that this would be a lot of cake batter. Doubling this recipe would require over a quart of flour, two cans of pumpkin... you get the idea. Obviously, we decided to instead use the recipe amounts that Mrs. M. Peterson sent to the Philadelphia Inquirer. The--- cake batter? cookie dough?--- filled up the pan rather nicely,  It didn't threaten to rise over the top, nor did it look like we would end up with a bundt stump. And indeed, it baked up beautifully. You'd never guess this was supposed to be cookies.


A lot of us are familiar with cookie recipes that turn into rather nice bars if you smoosh all the dough into a pan instead of making batch after batch of dough drops, but I have never had cookie dough turn into such a perfect cake.

Incidentally, that white skin on top is the result of my overenthusiastic deployment of flour when coating the pan. The cake may have a layer of flour paste on top, but it did not stick to the pan. Things got a bit unnerving when I flipped the pan over and nothing fell out, but after a few hard thwaps the cake came out in one piece.

It seems like every house I go to has a bundt pan. I wondered if Mrs. M. Peterson ever made a bundt out of her pumpkin cookie recipe, but some quick jaunts through Wikipedia tell us that she would have to wait another 20 years before the bundt pan was invented (unless she was Jewish, in which case she probably had a kugelhopf pan around the house). 

In closing, Mrs. M. Peterson's recipe makes good pumpkin cookies, but an even better pumpkin cake. Have a look at the cross-section: you'd think this recipe is supposed to be a pound cake. Note also how much of the cake is already gone.


Wednesday, July 13, 2022

Jello 1-2-3: The actual original still-in-the-box powder!

Today's adventure begins with something innocuous:

Let's talk about brand dilution...

Yes, jello! Someone else in the house randomly craved a box of the stuff, and it was both easy and cheap to make. This soon led to encasing canned fruit in gelatin, which is benign creation but also the gateway to terrible and jiggly times. 

It turns out that making the fruit properly float in the gelatin is a matter of careful timing. If you put the fruit in too early, it will just sink to the bottom of the bowl. If you wait too long, the gelatin will completely set and you can't get the fruit in it. You have to keep checking it every quarter hour or so, hoping it has reached that perfect "egg white consistency."

If you're like me, you will forget all about your congealing salad until it is too firm to accept the fruit, but there is a way to fix it. You can just microwave it, stirring after every ten seconds, until partially melts. It'll look kind of chunky on top, but who cares? 

Here is the innocent beginning of our gelatin voyage. Don't the suspended fruit slices look like they're swimming in a strange aquarium? 


As much as I remain dumbfounded at serving gelatin as a "salad," I had to admit that the gelatin-suspended fruit was an unexpectedly perfect side dish for the pot roast we had that night. I highly recommend fruit suspended in Jello when when you're serving pot roasts- the light, cooling dessert (or salad, if you prefer to call it that) is a perfect counterpoint to the rich, heavy main dish. 

Also, and I am not the first to note this, gelatin extends the life of nearly-expired fruit by at least a few days. If those last uneaten strawberries are starting to look a little wrinkly, they will remain fresh for another week if you put them in gelatin.

Perhaps detecting future jiggly schemes, others in the house said "This is so good, it's the only gelatin you should ever make!" Despite the hopeful tone in their voices, we were just beginning our congealed journey. Other dear acquaintances who don't even live in the same state saw the ill-advised future already firming up in the refrigerator.


They were right to be worried. Scavenging the back of the pantry, we found some forgotten crushed pineapple. The can had no rust, so we decided it must be safe for human consumption. This led to the creation of a Hawaiian Fruit Salad. As you know, in the world of processed foods, "Hawaiian" means "contains canned pineapple." 


The fibrous canned pineapple embedded in the gelatin made it feel like you were cutting into a steak. The shreds of pineapple itself had no flavor in them (I may have over-enthusiastically squeezed the excess juice out of them), so they did nothing but get stuck in one's teeth. No one wanted to eat the Hawaiian Fruit Salad. It was discreetly given to the raccoons. 

But all of that is a warmup for what turned up in a recent pantry excavation:


Yes, we found an inexplicable box of Jello 1-2-3, a product that has a small yet devout nostalgic following long after it was discontinued. It seems a lot of people remember Jello 1-2-3 as the first thing they ever made and served to their family. A lot of people online reminisce about how they felt so grown up when they ritualistically poured the mixture into wineglasses and later brought them out of the refrigerator for dessert. 


Jello stopped making 1-2-3 in the previous millennium, so this is definitely one of the less well-advised things we have reconstituted. I didn't expect it to be any good after who knows how many years (although the box had no expiration date), but I wanted to see if it really did that magical layer separation promised on the box photo.

The camera really doesn't show the bright pink that appeared when we reconstituted the powder. It was the same color as the plastic they use in Barbie accessories. 

I'm not going to dwell on the foul stench that conquered the kitchen. There's nothing surprising about a box of 30-year-old gelatin product expiring and lightly decaying in the many decades in which it was ignored in the pantry. But I would be remiss not to mention the olfactory attack at least once. Also, despite smelling distinctly like long-expired milk, this product is dairy-free.

And so, with the kitchen timer counting down the two minutes specified on the back of the box, we inserted the electric mixer. The directions say we should use a blender if possible, but I didn't feel like gathering all the blender parts from the various drawers in which they reside.


From here, the instructions are quite straightforward. First, your about half of the mixture amongst the random transparent glasses you have chosen from the cabinet. Then, you go back pour the rest of it, filling each glass in the same order as the first time. I didn't know why we're supposed to do incrementally pour it instead of just dump it out. But I figured that unless I go out and deliberately pay for another box of expired gelatin, this will be the only chance I get to make this fabled discontinued product.


The Jello 1-2-3 didn't really have three layers immediately after pouring. If you count the beer-like foam on top as a layer, you could say it had two. I thought that perhaps it separates into three layers as it sits, but it did not. I guess it sort of had a middle layer if you looked closely enough. 

Here they are, all firmly set and ready to throw out! The camera's autofocus actively sabotaged my attempt to document this historic culinary event. Also, I don't know why this stuff looks like it is a tasteful salmon color in all the pictures. I promise, it was the same color as the girl's section of a toy store.


The middle layer is really the foam on top as it partially sank into the gelatin beneath. You will notice that unlike the three-tiered confection pictured on the box, we really have two stripes on top of a translucent pink mass. Since it's a bit hard to see in the photographs, here it is in MS-Paint:

If we peep into this from the top, it looks like dense pink cobwebs.


If we pretend this is edible and scoop some of it out (and after it spent who knows how many years of putrefying in the pantry, you'd be foolish to try), it looks like you made a normal box of Jello with milk instead of water. As aforementioned, smelled exactly like extremely putrid milk. I double-checked the ingredient label, and this product contains no dairy derivatives. I wonder what non-dairy substances smell just like expired milk after spending at least 20 years in the pantry.


Lastly, here's what it looked like in motion! This may be the only video of Jello 1-2-3 in existence. A lot of people have made homemade-ish reconstructions (often involving a box of modern-day Jello and a tub of Cool Whip) and filmed it, but this is the actual prefabricated original in all its jiggliness! Apparently gelatin retains its power long after the natural and artificial flavors have decomposed. Anyway, this is both the rarest food-related event yet documented on A Book of Cookrye, and proof that I should not be the one documenting it.


As a final note, I compared the ingredient labels of both the Jello 1-2-3 and a box of normal, non-expired Jello that we had. The only major difference is that 1-2-3 had maltodextrin in it. So if anyone reeeeally wants to recapture what has long ceased production, and the new recipes just don't do it for you, try obtaining some maltodextrin and adding a spoonful to an otherwise factory-standard box of Jello.

I have to reiterate two things in closing. First, none of the previous photos capture how synthetically pink this stuff was--- but you can finally see an honest show of the aggressively pink color in this photo of the splats that dripped from the bowls into the dishwasher.


Second, this really did smell like thirty year old expired food. When I heard the dishwasher start draining, I hastily turned on the kitchen faucet to flush the drain in the sink and make very sure that the foul steam coming from the dishwasher didn't have a chance to re-stink the kitchen. 

In closing, we at A Book of Cookrye do not recommend attempting to reconstitute food products from the last millennium.