Thursday, August 25, 2022

Smothered Cauliflower: or, I did not expect to like this so much

We are having a few stovetop-related problems here at Our Kitchen of Cookrye.

What does one do for supper when you can't even boil the tea to drink with it? One turns to the Philadelphia Inquirer Recipe Exchange! 

Philadelphia Inquirer Recipe Exchange, 21 June 1935 morning edition, p. 12

Smothered Cauliflower
16 oz frozen cauliflower
1 16-oz can stewed tomatoes
Salt, pepper, onion powder, and chili powder to taste
2 tsp butter, finely cut up
½ cup breadcrumbs
1 c shredded cheese (mozzarella, provolone, or any other kind that melts well)
¼ cup shredded parmesan cheese, if desired

Heat oven to 350°. Grease a deep casserole.
Cook the cauliflower until tender. You can boil it in salted water. Or, you can put it in a microwave-safe bowl, add one or two spoons of water, shake some salt over it, put a dinner plate on top of the bowl, and then microwave until tender- about 6 minutes. (You won't tell the difference between boiled and microwaved cauliflower.)
Mix the (undrained) tomatoes, seasonings, and butter. Place the cauliflower in the baking dish and pour the tomatoes over it. Sprinkle with the breadcrumbs, then with the shredded cheese. If desired, sprinkle with Parmesan.
Bake until browned, about 45 minutes.

adapted from a recipe by Mrs. J Peterman, 637 W York St Apt 3, Philadelphia Inquirer Recipe Exchange, 21 June 1935 morning edition, p. 12

I tried to make do after the stovetop went out of service. We have a gas grill with a little stove burner sticking out on one side, and I gamely tried to make it work. But this happened to the poor frying pan:

And so, we had only the oven, microwave, and a rice cooker until further notice. Hence, baking cauliflower.

The original recipe would have you boil a whole head of cauliflower and then serve it uncut, but the frozen cauliflower was a lot cheaper. We simply popped it into the microwave with a generous spoonful of water in the bottom of the bowl. In the meantime, let's get to the other half of the ingredient list:


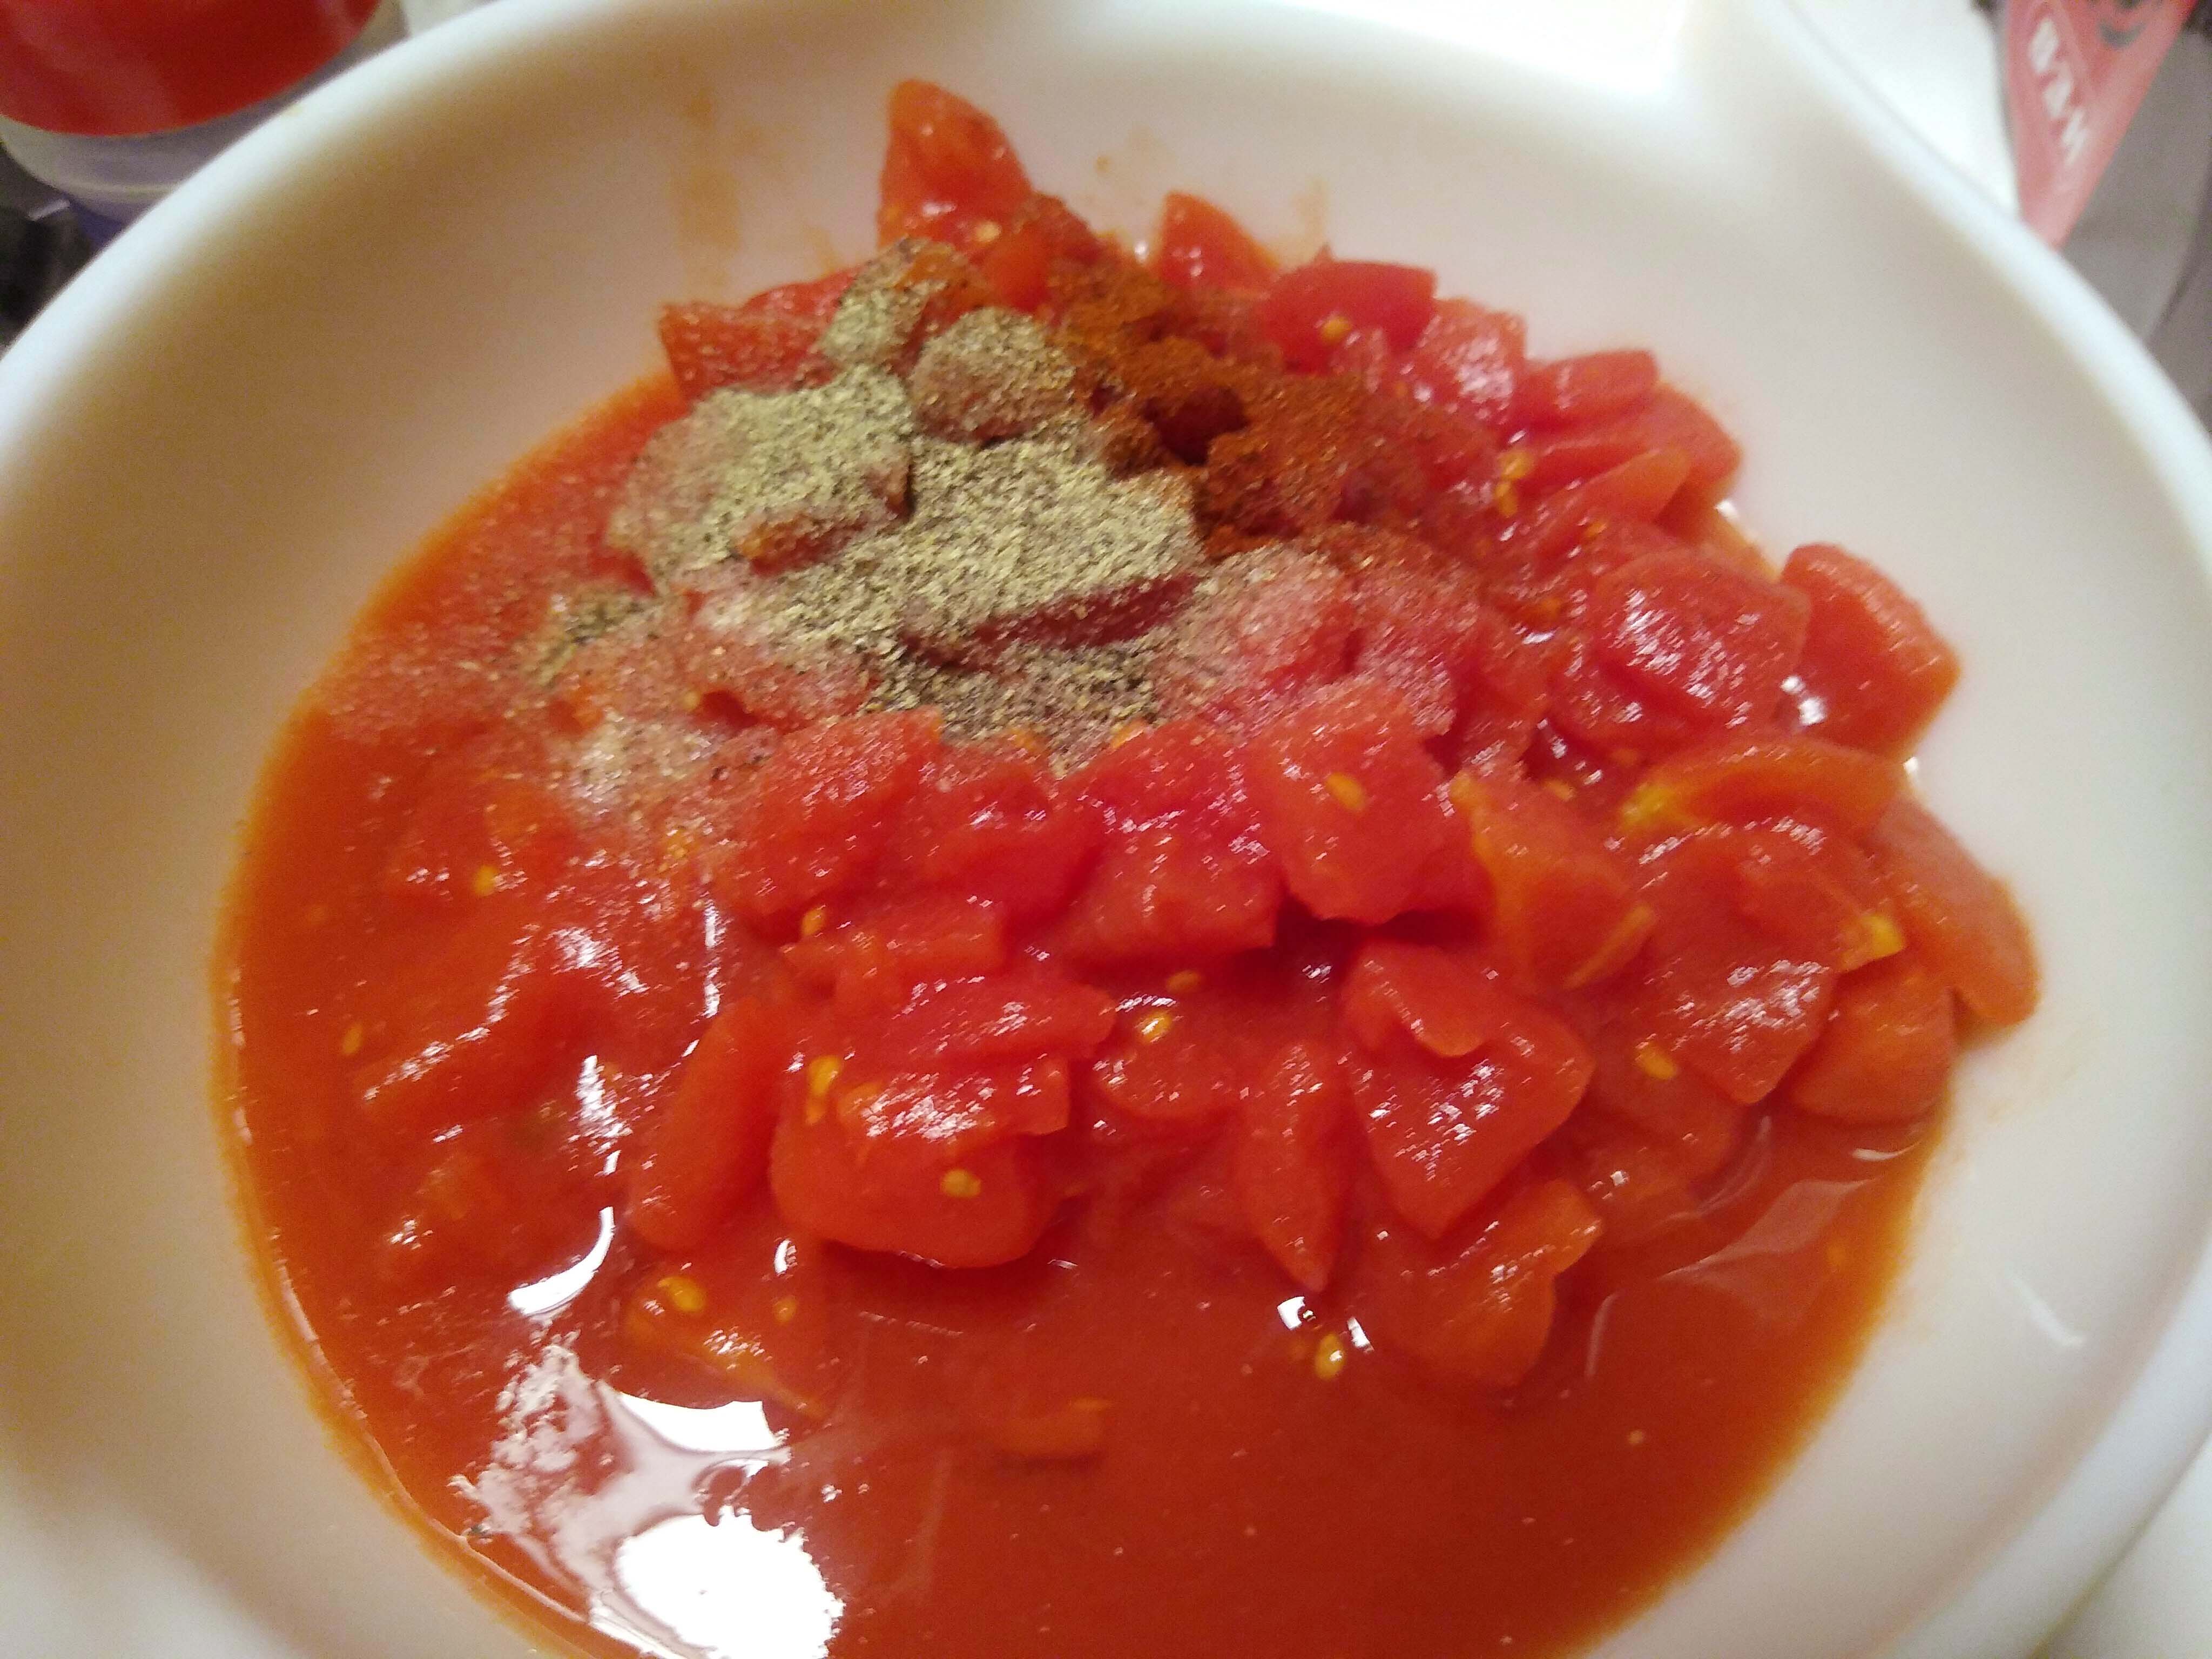
I know the recipe just says to use salt and pepper, but I figured Mrs. J. Peterman wouldn't mind a bit of chili powder. She lived a few streetcar stops away from the Italian Market, so surely she wouldn't be stunned at seeing three spice shakers on the counter.

Lastly, we are apparently supposed to mix two teaspoons of butter into this. I thought the butter was meant for the top, but either Mrs. Peterman was not very good at phrasing her recipe or the butter should go with the tomatoes. Maybe it kind of soaks into the cauliflower while everything bakes. Since I had already dirtied the cheese grater getting the top of this casserole ready, I thought it would be easier to intersperse the butter  amongst the tomatoes if I shredded it first.


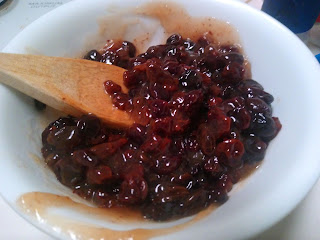
This did not work. All of the dainty butter curls turned into one big butter clump when I tried to stir everything together.


Well the butter broke up and interspersed itself in the canned tomatoes with little spoon-bashing. Less than ten minutes after removing the cauliflower from the microwave, we had a big pan full of vegetables and regularity.


The rest of this came together as easily as dumping canned tomatoes and frozen cauliflower into a pan. I considered toasting some bread and then pulverizing it as we have done before, but decided it is false economy to dry and pulverize half a loaf of bread instead of just buying a canister of crumbs.  The cheapest breadcrumbs on the shelf were the Italian-seasoned ones, and who am I to argue with the prices these days?

I figured the breadcrumbs, while dry and sandy before baking, would absorb a lot of the runny stuff that bubbled up from below. The instructions simply tell us to "brown in a moderate oven," which I took to mean we'd be eating this in twenty minutes at the longest. This lovely golden-crisp cheese topping required 45 minutes of baking, so perhaps a higher oven temperature is in order next time. 

Readers will note that this recipe is dated June 21. Forty-five minutes is a long time to run an oven in the middle of June in a time when houses do not have air conditioning. 

During the three quarters during which we waited, a much better smell than one would expect from cauliflower and canned tomatoes suffused the house. I never thought people would impatiently ask if the cauliflower was ready yet.


This simultaneously tastes exactly like the ingredients that went into the pan and somehow better than them. It's tempting to try adding mushrooms or other things to this recipe, but I highly recommend you first try it as it is. It is so simple but so, so good. As someone else in the house said, "I don't usually go back for thirds, but...." 

Tuesday, August 23, 2022

Persian Fudge: or, You had me with the recipe name

This is my idea of a good time.

Philadelphia Inquirer Recipe Exchange, 9 August 1935 morning edition p.5
 
Persian Fudge
2 c light brown sugar
½ c whole milk
1 tsp butter
2 tsp marshmallow cream*
¼ c sliced pineapple, chopped
¼ c raisins
½ c nuts, chopped

Grease a square pan well. Cut the pineapple into small pieces and blot on paper towels.
Put the pineapples, raisins, and nuts into one bowl. Spoon the marshmallow cream on top (don't mix it, just let the cream sit on everything else) and set aside. That way, all of those ingredients are ready for when you need to dump them all in at the same time.
Mix sugar, milk, and butter. Boil until it forms a ball a little harder than for chocolate fudge (about 235°-240°F). Remove from heat and beat until it thickens. Add everything else, quickly mix well, and pour into the pan.
Mark into small squares and let cool.

*Just round it up to 1 tablespoon. You can also use 1 tablespoon corn syrup instead.
I used hazelnuts.

Frances E. Kent, 1914 S Ithan St, Philadelphia, Philadelphia Inquirer Recipe Exchange, 9 August 1935 morning edition p. 9

I try not to fall for gimmicky recipe names, but "Persian Fudge" grabbed me by the title during that fateful weekend of free newspaper clippings. I may have to write Newspapers.com and blame them for allowing more desserts into my life. At any rate, we had a long day of household maintenance, and I decided to treat myself for semicompetently helping with some this-should-not-be-DIY projects.

Looking at the recipe, I don't get what's so Persian about this. At first I thought maybe there's a very similar Iranian recipe that uses dates instead of raisins, but pineapples are apparently not native to that part of the world either. For some reason I thought pineapples originally came from Asia, but apparently they are South American. 

Let's begin with why I picked Persian fudge: a can of pineapples turned up when I was looking for something else. Unfortunately for others in the house, I have a recipe for every unexpected canned food that turns up in the pantry except the canned beets.

After we got the pineapple drained (but did not blot the pineapple on paper towels, which will come back and ruin our fudge later), we read ahead in the recipe and saw that all the fruits and nuts get dumped in all at once. So I put them all in one bowl because sometimes I am just that good at planning ahead. 

Moving on in ingredients, did people used to just keep jars of marshmallow cream on hand? I've only seen it used for two purposes: Rice Krispy treats and fantasy fudge. Both of those use the entire jar. What am I supposed to do with the rest of the white stuff after taking out two teaspoons for this recipe? Marshmallow cream seems to deflate into sticky goo within ten minutes of opening it, so I can't exactly save the rest for later. In the name of economizing, I instead used a spoonful of corn syrup from a bottle that has been hanging around since someone made a long-forgotten pecan pie. Marshmallow cream is mostly whipped corn syrup anyway.

Now that we have all the other things ready, we could get to the fudge itself! I'm not sure what that tiny spoonful of butter is supposed to do here, but I'm not the one who got my recipe printed in the newspaper. Besides, they printed Miss Frances E Kent's name and address right with the recipe so I can send her an angry postcard (since it's 1935, there's a Depression on, and postcard stamps are cheaper) if this recipe goes wrong.


Sometimes I surprise myself by being able to make candy without a thermometer. Doing candy with just the cold-water test always seemed like one of those magic skills that only a select few can ever master. But unfortunately, candy thermometers have a short lifespan around me. Every time I get one, use the thing once and then put it in the drawer in its little protective storage tube. The next time I want to make candy, I take out the thermometer and find only broken glass. At least once, I have accidentally thwacked the thermometer with a spoon while stirring the candy, sending glass shards into the molten syrup. So I've given up on candy thermometers.

The small bonus of cold-water testing your candy is you get to eat the little blobs.

I could have stopped the recipe here and probably eaten the entire batch. This is some really delicious brown sugar fudge. Either unfortunately or fortunately, one of the benefits of doing the cold-water test on candy instead of using a thermometer is that you get to taste-test your creation long before it cools. You might even pour a long, hot drip into the cold water just so you can eat it now.


But we didn't come here to make brown sugar fudge, we want Persian fudge! This big pile of stuff is what makes this Persian, apparently. 

My expectations for the Persian fudge dropped significantly when I poured it out into the pan. It looks like one of those novelty rubber vomits that you humorously place where someone will hopefully mistake them for genuine puke. Perhaps it would look better if I used a smaller pan, which would help all the fruit and nuts to sink into it instead of protruding like yesterday's corn. If you're going to serve Persian fudge, you will need to cut it into cute little cubes and artfully arrange them or else you will put everyone's ability to keep a straight face on trial.

Incidentally, I decided to try pouring the fudge onto paper instead of greasing the pan. Cooling spray always makes bottom of the candy a bit oily, and I was hoping the paper would prevent that. The fudge welded itself to the paper. But at least we could easily lift the entire thing out of the pan after it cooled. 

After come careful peeling and judicious use of a spatula, we could taste this Persian delight. It looks a bit less previously-eaten after you cut it. If you cut it into tiny squares and put them in those paper liners meant for mini-muffins, they might look downright cute.

I must note my biggest mistake because this is when it made itself obvious: I drained the pineapple but I didn't put it on paper towels to really dry out. At the time, I was afraid that overdrying the pineapple would turn it into flavorless yellow pieces of fiber. To the recipe's ruination, the pineapple juice leached into the surrounding candy, causing the Persian fudge to break itself apart from the inside.

With that said, the Persian fudge has a lot of promise if you remember to blot your pineapple. It tastes like a granola bar with slightly more sugar on it. Or, it tastes like trail mix set in brown sugar fudge. Whichever one it reminds you of, this recipe works really well. Miss Frances E. Kent definitely earned the $2 grocery basket for this recipe.

But this recipe is really rich. I could feel the ever-disappearing remains of my pre-pandemic figure getting ever farther away whenever I ate any. Consequently, I gave most of it away and hoped no lucky recipients came back asking me to let out their clothes. 

I would cut the original published quantities in half unless you're making this for a very large party and no one else is bringing homemade candy. And regardless of how much fudge you make, cut it into very small pieces.

Thursday, August 18, 2022

Orange-Raisin Squares

When I showed this recipe to friends, most of them asked "What do they mean, seedless raisins?"

Mrs. David K Harris, Philadelphia Inquirer Recipe Exchange, 1935

Orange Raisin Squares
    Filling:
1½ c seedless raisins
3 tbsp sugar
2 tbsp quick cooking tapioca (or cornstarch)
1 c hot water
Juice of 1 lemon
    Orange Pastry:
2 c pastry flour*
1 tbsp sugar
1 tsp baking powder
¼ tsp salt
⅔ c shortening (I used butter)
¼ to ⅓ c orange juice
Milk for brushing

Heat oven to 375°. Grease a 9" or 10" square pan
To make the filling, cook all the ingredients in a double boiler (or over medium heat, scraping the bottom of the pot really well) until thickened. Set aside to cool completely.
While the filling is cooling, make the orange pastry. Mix the dry ingredients together. Then cut in the shortening. Add enough orange juice to make a dough.
Divide the dough in half, and roll out one portion until it covers the bottom of the pan.
Put the (cooled) filling on top of the pastry. Then roll out the other portion of dough to make the top crust. Lay it over everything and then prick with a fork. Brush the top with milk.
Bake 20 minutes. When cold, cut into squares.

*Just use all-purpose. It'll be fine.
I used juice concentrate instead.

Source: Mrs. David K Harris, 838 S Franklin St, Wilkes-Barre, Pennsylvania, Philadelphia Inquirer Recipe Exchange, June 21 1935 morning edition, p. 12

It seems that most people I know had a terrible experience when the chocolate chips in some cookies turned out to be terrible, awful, slimy, sticky raisins. As for myself, I don't exactly love raisins, but I do think they add nice little spots of concentrated tartness to oatmeal cookies and a few other things. And so, after subjecting myself to the awful, bitter, cookie-ruining walnuts, I am indulging in another polarizing ingredient.


During the free Newspapers.com trial that sent me on a recipe-screenshotting binge that lasted until the end of the weekend at midnight Mountain Standard Time, I was surprised to find that most of the newspaper recipes came from syndicated columns. I thought at least a few newspapers would have their own cookery columnists on staff, but apparently that was rare. This disappointed me. I didn't want to see what was approved for national distribution, I wanted to see what was actually cooking in the kitchen of people who were not professional home economists with publishing contracts. This brings us to the source of today's recipe:

During the 1930s, the Philadelphia Inquirer had a weekly recipe exchange. That's two full newspaper pages of recipes every week from the houses of ordinary people instead of some far-off test kitchen full of professionals. If your recipe was one of those chosen for printing, not only would the entire greater Philadelphia area see it with your name, but you would win a $2 basket of groceries. That's, like, $45 in 2022. Doesn't $45 in groceries sound like a minor yet marvelous windfall in a time of economic uncertainty? This week, Mrs. David K Harris of Wilkes-Barre won a $2 grocery basket with these squares of citrus and raisins.


I should note that we're using orange juice concentrate because we have it on hand. We keep a can of it in the freezer and scoop out generous spoonfuls of it to add to marinades. I'm sure Mrs. Harris (and anyone else doing the daily cooking with a Depression on) would understand that we want to reduce the cost of this recipe by the cost of a fruit. In further economization, we bought neither fresh lemons nor the cheapest bottle of lemon juice to use in the raisin filling. We still had frozen lemon juice from the lemon cream cookies that used only the lemon rind. "Helping the Homemaker" lived up to its name and spared us the price of a lemon.

The raisin filling bore a strong resemblance to the beginning of a raisin cake we made one winter-- and an even stronger resemblance to the honey and dried fruit pie that is now one of our favorite Pieathlon recipes. 


I thought this looks like a really nice wintertime recipe. The ingredients seem right for that time of year. A lot of older stories get lovingly reminiscent about getting an orange for Christmas, so apparently citrus could keep fresh into the bleak midwinter. And of course, raisins have the shelf life of dried fruit. 

But upon checking the date on this recipe, it came out in mid-June. I'd have thought the economical home cook of 1935 would be more inclined to take advantage of the fresh summer produce and let the dried fruits wait until snow season. But then again, it's the middle of summer and I'm making this very recipe.

Not a fresh fruit in sight.

As we arrived at the point of final assembly, it became obvious that I had erred in pan size selection. I had halved the recipe and therefore used a little pan. However, this recipe already uses a small pan, and cutting it in half meant that even the tiniest pan in the house wasn't little enough. I could barely coax the raisins to spread from edge to edge. The orange pastry had to be rolled so thin it threatened to rip like wet paper. 


At any rate, we were ready to bake these at--- hold on a minute. There is no way 475° can be right. You'd burn a pizza baking it at 475° for twenty minutes, even if it was still frozen when you put it in the oven. For our Celsius friends, 475°F is about 250°C, which you may recognize as way too hot for baking cookies. I decided this must be a typesetting error and set the oven to 375° (that's about 190°C for everyone outside the US) instead. 

I felt a little bad for Mrs. David K Harris. Someone (I'm guessing) grabbed a 4 instead of a 3 when typesetting the oven temperature, which added 100 degrees to it. Then the misprinted recipe was distributed all the way from Harrisburg to Trenton with her name and address below it.


Every time I make orange-flavored recipes, I'm always surprised that they're never orange-colored without a bit of artificial assistance. Maybe people in the days before this recipe was vintage didn't expect every orange-flavored baked good to identify itself by color, but in this era it is a bit jarring for the orange pastry to have the same color as the vanilla one.

This recipe tastes exactly like what goes into it. I kind of expected the orange and the raisins to meld and harmonize into something greater than themselves, but they did not. Nevertheless, orange and raisins go very well together. The orange-raisin squares kind of remind me of Fig Newtons with the shortbread encasing a dense brown filling. If you like raisins (or whatever dried fruit you might substitute), this is an easy, economical, and all-around nice way to cook them. Orange-raisin squares may not be the first thing to disappear from a cookie table, but they won't be the last neglected rejects either.

Wednesday, August 17, 2022

Walnut Cookies: or, Stick to pecans. They're better.

Today, we at A Book of Cookrye are facing ingredients we have long despised!

I hate walnuts so much. Some people will never forgive raisins for looking like chocolate chips, I hate the common walnut whenever it has the audacity to intrude on a dessert. Walnuts interrupt brownies with bitterness. They add unpleasant hard spots to banana bread. They're never crunchy, just hard enough to be annoying.  

You may recall that I would not permit walnuts into the recent coffee cake without grinding them beyond recognition. Indeed, when someone in the house wanted brownies made from a specific brand of mix that contained the offending walnuts, I sieved out all the walnut pieces and ran them through a grinder before permitting them in the mixing bowl. But today, we are confronting our ingredient biases with the help of "Helping the Homemaker," the newspaper friend of every housewife of 1934!

"Helping the Homemaker," Fort Worth (Texas) Star-Telegram morning edition p. 5, January 9, 1934


Pecan Cookies
⅔ c butter
1½ c sugar
1 tsp vanilla
2 tbsp cream*
¼ tsp salt
1 tsp baking powder
⅔ c shopped pecans
2 eggs
3½ c flour

Heat oven to 375°. Line cookie sheets with foil, then grease them.
Cream the butter and sugar. Stir in the salt and baking powder. Add an egg, vanilla, and cream. Beat well, add the other egg, then beat well again. Mix in the flour. When all is combined, add the pecans.
Shape into 1-inch balls, then press each one flat in your hands. Place about 3 or 4 inches apart on the baking sheet.
Bake 12 minutes, or until slightly golden on the edges.
These seem to like sticking to the pan, so have a spatula ready to slide under them to loosen them up.

*or milk in a pinch

Source: "Helping the Homemaker," Fort Worth (Texas) Star-Telegram morning edition p. 5, January 9, 1934


The recipe says to use pecans, which we have good reason to believe will be a lovely flavorful addition to the cookies (see the Elizabeth Dole cookies). However, walnuts are cheaper than pecans. Also we already had them in the house. 

But before we face our spites, we must first make the cookie dough. As much as I love the stand mixer, today I felt like doing it all by hand. It's just so satisfying to see a the butter and sugar coalesce into one smooth, sculptable mass...


Then the egg and the cream (well, milk but I figured such a substitution wouldn't ruin anything since it's only a spoonful) turn it into a runny batter. Oh no! How will we ever make cookies out of this (delicious) goop?


Then we add the flour and it seems so dry that nothing will ever come together! Where once we had sugar soup, we now have crumbly clay!


But after a bit of persistent stirring, all of the ingredients unite into cookie dough. All is resolved, and everything tastes wonderful.


At this point, we added the horrible, horrible walnuts. If you have a pathological hatred of raisins from that one time when you were a kid and thought those cookies contained chocolate chips (and it seems like that would be a lot of you), you will understand the revulsion I felt when I heard the walnuts land in the measuring cup like I was pouring out gravel.


After I had all the happiness-ruining walnuts mixed into the dough, I tasted one to see if they really are as bad as I thought. They tasted awful and rancid. For confirmation, I asked others present to taste some of the awful walnuts. "They're fine to me," I was informed. "That's what walnuts are supposed to taste like." 

I know I am biased against walnuts, but I know the smell of rancid food when it hits my nose. Like finding rotten potatoes in the pantry, if you've smelled it once you will always recognize it. If normal walnuts taste rancid, I no longer feel bad for my longstanding hatred of them. Unfortunately, I had already mixed everything very well, though I did try to pick every last shard of walnut out of the dough for a good fifteen minutes before giving up. I decided to bake the cookies anyway and hope the walnuts didn't completely ruin them.

We de-nutted about two cookies' worth of dough before resignation set in.

The recipe says to "drop from the tip of a spoon," which I took to mean that they spread out on their own while baking. This was wrong. After baking, we had the same dough plops we had put into the oven (though they did puff up a bit). 


Maybe people liked cookie lumps in the 1930s. Changing trends in home baking were just as fickle back when you had to wait for the latest issue of Good Housekeeping to arrive and tell you what you're supposed to like this month. Perhaps rock-shaped cookies were considered the sign of an up-to-date hostess. They look endearing if you are in the right mood.


Or maybe, like drop biscuits, this is one of those recipes you picked when you didn't have a lot of time. After all, cookie clumps still taste like cookies, and that's a lot better than no cookies at all. I wouldn't be surprised if a lot of people made cookies like this when it's just for people at home, and only took the time to neatly shape cookies for company.


For batch 2, we decided to shape them more properly. They may look a bit puny before baking, but the first batch puffed up enough that I wasn't worried about disappointing cookies. Sure enough, we had some lovely looking not-pecan cookies! They almost look like professionally made pecan sandies, don't they? Unfortunately, these cookies contain not pecans but walnuts. And while baking the walnuts did make them taste better in a toasty way, they still tasted like walnuts. 


At this point I should mention that I had planned to give some of these away as a thank-you for services rendered. Unfortunately, no one feels thanked when they get cookies full of rancid walnuts. So you know all that joy we experienced from making these by hand? We got to experience it all over again, only this time we used butterscotch chips. 

I wasn't irked at starting over. I actually find the act of baking more satisfying than eating the fruits of the oven, so it was a peaceful way to spend an evening. I was, however, irked at the walnuts for defiling a perfectly good recipe. The walnut-free cookies tasted better, but the dough formed some odd-looking holes around some of the chips.


This is a good recipe either way you make these cookies, with pecans or with butterscotch chips (or maybe walnuts if you like them- I don't judge other people's preferences unless they judge me first). The cookies are soft, but they're firm enough to drop into a cookie jar- which I'm guessing was the recipe writers' intent. 

This seems like a cookie recipe meant to be made to keep on hand. You can drop them in a bag or a box, and they won't crumble or fall apart. You can leave them out for a day or two before they go stale. Also, if you put spoon-plops and round-shaped cookies on the same plate, they can look like a cute assortment without having to make two recipes.

With that said, this does mean I accept walnuts. I gave walnuts an entire batch of cookies, which is more than enough chance for them to prove they're not as bad as I think. And.... they're not awful, but I can't think of a single time they've made a recipe better.

Choose your plate wisely.


Tuesday, August 16, 2022

Sour Cream-Pecan Coffee Cake: or, Always follow the handwriting to find something delicious

This recipe is shorter than it looks.

Sour Cream-Pecan Coffee Cake
   Topping:
¼ c brown sugar
2 tbsp white sugar
½ tsp cinnamon
½ c pecans

Mix and set aside. If desired, grind the nuts with the white sugar in a food processor (or a little at a time in a coffee grinder). The sugar will prevent them from oiling and turning into nut butter.

   Cake:
¼ c butter or margarine
½ c sugar
½ tsp baking soda
½ tsp baking powder
¼ tsp salt
½ tsp vanilla
1 egg
1 c flour
½ c sour cream

Heat oven to 325°.
Grease the bottom and sides a 9" square pan. Cut a square of parchment paper to fit the bottom of it. Press the paper into the pan, pushing out as many bubbles as you can. Grease the pan again so the paper is coated on top.
Cream together butter, sugar, baking soda, baking powder, and salt. Add egg and vanilla, beat well.
Alternately add the flour and sour cream. Start with about a third of the flour. When mixed, add about half the sour cream. Add the next third of the flour, then the remaining sour cream. Add the last third of the flour and mix well.
Sprinkle half the topping into the pan. Drop the batter in small spoonfuls on top, then gently spread it even. Sprinkle on the remaining topping.
Bake for about thirty minutes, or until it springs back when pressed in the center and a toothpick comes out clean.
Immediately after removing from the oven, whisk together the icing and drizzle on top.

   Icing:
½ c powdered sugar
½ tsp almond extract
Water

Whisk together, gradually adding water until it's the consistency of a glaze. Drizzle over cake right after removing from the oven.

Source: Handwritten recipe card

This recipe begins with typewriting my own recipe cards. As aforementioned, one of the people in the house has taken to repairing typewriters. It's hard to repair typewriters if you have no typewriters to fix, so a lot of them have been brought into the house in varying states of dereliction. Because it's always well to support your friends' interests, I near-shamelessly offered to provide him a practice typewriter or two. That is how mine ended up on his table in pieces.

Ask me about how this machine went to India without me sometime.

Believe it or not, I actually did school assignments on this thing a few times in middle school due to our unreliable printer. If you think I'm humble-bragging that I could type without errors at such a precocious age, you should know that all my typewritten papers had more crossed-out words than not, and half the time my words ran right off the page because I didn't know margins were an option.

Unrelated to typewriters but relevant to today, this turned up while freeing up cabinet space:


Having a box to put recipe cards in has caused to make typewritten recipe cards. I may have a speed of one minute per word, but it's oddly satisfying to make these things. I also am probably one of the first people make a recipe cards using the word "tedious" and "heretofore."

The cursive card is done on the my friend's Selectric that led to us getting a Mixmaster.

I've been tucking the cards into the recipe box, which is already full of someone else's recipes. Sometimes I flip through them for interesting ideas, but a lot of them reflect pre-pandemic grocery prices. Other recipe cards have been gently returned to their places because whoever owned this recipe box was as... adventurous as I like to be when cooking. In other words, no one but me liked some of the more eccentric recipes. But this week, we had a surplus of sour cream lying around the house and some bananas that were threatening to rot on the counter. Towards the back of the box, we found....


Aside from cutting the recipe in half, we only made one alteration. Pecans are, shall we say, a teeny bit costly of late. So we got walnuts instead. 

In full disclosure, I hate baking walnut chunks into cake. They seem to go extra-bitter as everything bakes, and they take on this unpleasant not-crunchy-but-not-soft-either consistency. So, we got out the power tools. I know this is technically a coffee grinder, but we more often put assorted other things through it instead. Rarely do we put coffee in the coffee grinder unless it's for a recipe.


It turns out that nuts expand a lot when you grind them! This half-cup of nuts filled up one of the soup bowls after reducing it to sand. We still appreciate Eric C's suggestion to add sugar to the grinder to prevent everything from oiling up. Instead of walnut paste, we got this lovely crumbly cake topping. That's all walnut aside from that little cap of brown sugar and cinnamon on top.


Before we get any further in the recipe, I will note that this recipe looked like it would really want to stick to the pan. So, I put paper in it to guarantee that no one would be chiseling dessert out of the pan. I then used enough cooking spray to practically deep-fry the cake.


After that quick detour, we move from electric grinders to even bigger motors! I've often said I prefer using a wooden spoon over a mixer because it's more satisfying, but it's really convenient to let your ingredients mix together unattended while you get the next item out of the pantry. I seem to do it by hand less and less these days. It's just more fun to see the ingredients whizz around the bowl.


Using a mixer also means it doesn't matter as much whether I properly softened the butter. Any refrigerator-hard clods get thoroughly bashed out of existence with no effort from me.

For a recipe that runs to both sides of the card, you get this mixed together pretty dingdang quick. I was adding in the sour cream before I knew it. 


The finished cake batter was the thickest I have made aside from a 1234 cake. As you can see, it neither drips nor droops off the cake beaters. It also tasted so delicious that it revived my dream of dumping cake batter into an ice cream freezer and eating the resulting frozen delight. 


There was no way I could spread this in the pan without shoving all the walnut sand all the way to the edges. Instead, I dropped little spoon plops in the pan so I could gently smear them flat without having one big pile of cake batter skidding over the walnuts. 

The batter didn't look like it would turn into a cake. It looked more like the first step of one of those multilayered cookie-bar recipes where you partially bake the bottom layer and then put custard on top. We sprinkled the other half of the walnut sand and hoped that this cake contained a lot more baking powder than I remembered adding.

The cake looked reassuringly less wafer-thin after baking. The icing wasn't very visible, but it does serve the useful purpose of gluing down a lot of the walnut sand that would otherwise fall off as soon as you lifted out a slice of cake.

If we take a closer look, we can see that the pulverized walnuts made a really nice streuselesque topping. I imagine that we're supposed to have embedded sprinkles of powdered sugar and an artful scattering of pecans instead of a uniform crumbly topping, but this worked really well. Besides, there are no gravelly walnut pieces ruining the cake.


If we turn a slice on its side, we can see that the bottom layer of walnuts turned into what almost looks like a graham cracker crust. 


Given how thick the batter was, this cake turned out really light. I thought it would be really dense and heavy, but it's quite the opposite. The toasted nuts on the top and bottom add a lovely flavor, and the streaks of concentrated almond extract drizzled on top make it perfect. 

But as you may know, I do not care how good cake toppings are if the cake itself is bad. And.... this cake is so good we made another one the next week.