Wednesday, September 28, 2022

Pieathlon the Ninth: Walnut Pie from the Stars!

The Pieathlon is back!


This is how I felt when Yinzerella sent out an email asking who wanted to make more pie:

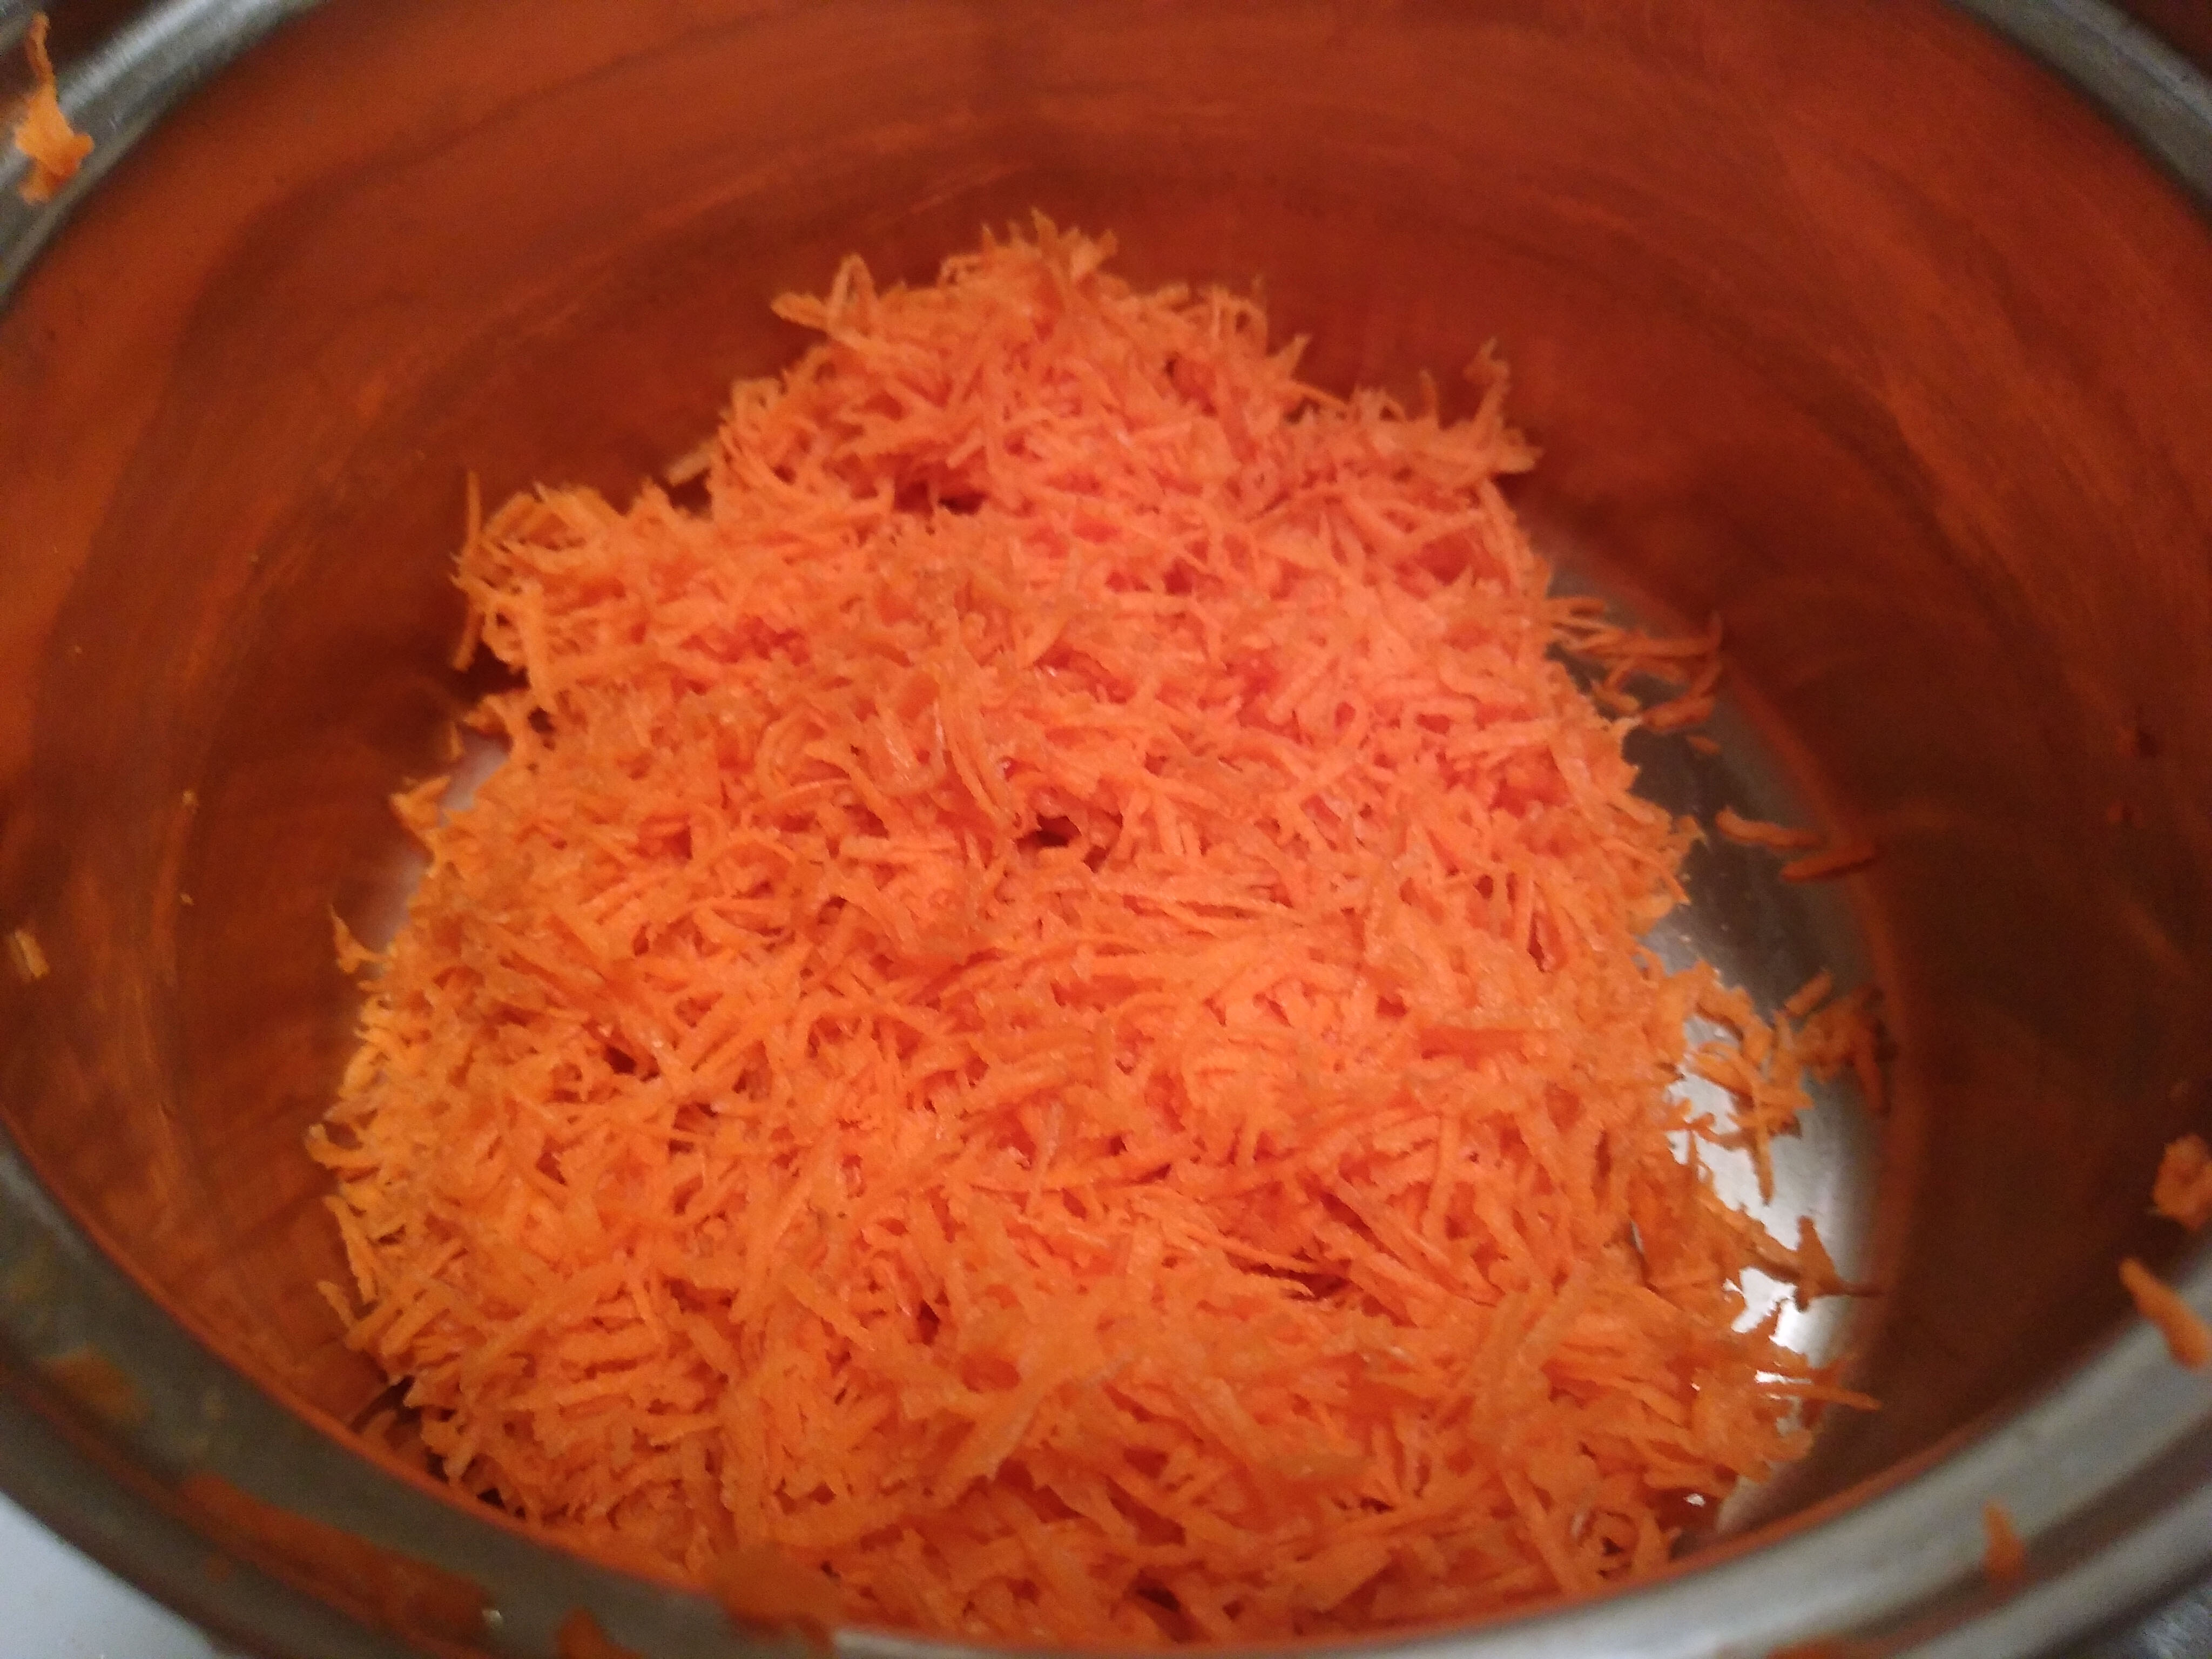
I could not answer yes to more pies fast enough. After getting two absolutely delicious pies in a row, I decided to step away from the weird recipes and send in something that would almost certainly make someone really happy. Dr. Bobb may have made a few pumpkin pies before, but has he made praline pumpkin pie? It looked so delicious that I just knew whoever got it would love it, so hopefully he did.

And now, let's have a look at what came to my kitchen in return! I was super excited to see whether we got something really delicious, or something so frightful that making the pie is its own entertainment. (Good or terrible, no one ever sends in a boring pie recipe to the Pieathlon.) And so, a week after dispatching a praline pumpkin pie, who should appear in my mailbox but Yul Brynner!

This comes to us from Jenny of Silver Screen Suppers. Jenny writes about the recipes in celebrity cookbooks, which makes for a wonderful look through random pieces of pop culture of the past. I also have to mention that she and some friends are DJs who use antique windup record players instead of those newfangled electric turntables. I can't lie, donning fabulous vintage clothes and entertaining people with the sounds of windup Victrolas sounds like a dream come true.

Anyway, back to Yul Brynner. Of all the pies fit for the king and I, which one did we receive?


Yul Brynner's Walnut Pie
     Crust:
1 c flour
½ c unsalted butter, at room temperature
Pinch salt
1 egg
1 or 2 tbsp milk

Mix flour, butter, and salt. Add the egg, mix until you have a smooth dough. If the dough is too dry, add the milk a very little time.
Coat a plate with cooking spray. Place the dough on it and pat it into a flat patty (1 inch thick or so). Refrigerate until firm.
Remove the pie crust from the refrigerator. Place the dough on a well-floured countertop, and coat it well with flour. Roll it out quickly so it doesn't have a chance to warm back to room temperature, and lay it in a 9" pan.

     Filling:
1 c light corn syrup*
1 c dark brown sugar
⅓ c sour cream
Dash salt
⅓ c melted unsalted butter
1 tsp vanilla
3 eggs
1½ c whole shelled walnuts

Heat oven to 350°. Beat the eggs well with a whisk until they are a uniform yellow.
Combine the corn syrup, brown sugar, sour cream, and butter in a large bowl. Mix well. Then add the eggs. Stir thoroughly.
Pour into the unbaked pie crust. Sprinkle the walnuts over the pie filling. If they sit on top of the filling in a pile, use the spoon to push them under. Before putting the pie in the oven, set it on a baking sheet with either foil or parchment paper on top in case it boils over.
Bake for 45 minutes, or until the pie is completely cooked. The pie should be jiggly (a bit like a gelatin), but it should not slosh like a liquid. It will probably also puff up a bit when it's ready.
Serve warm with whipped cream. If making the pie ahead, you can rewarm it in the oven just before serving.

*Just leave the corn syrup out. You don't need to substitute anything for it. Simply forget all about corn syrup and make the pie without it.

The Yul Brynner Cookbook: Food Fit for the King and You, Yul Brynner with Susan Reed, 1983 via Silver Screen Suppers

You know how a lot of people hate raisins? And how a lot of them start shouting and ranting when they encounter the evil raisins in a batch of cookies or a pie? Well, I hate walnuts just as much. After I swore I would never allow walnuts near my kitchen again, I got sent an entire pieload of them! Walnuts! 

In a tacit admission that walnuts apparently go rancid quicker than strawberries rot, the recipe notes "For the best flavor try to use very fresh walnuts." We are limited to what's at hand at the nearest supermarket, because I am not driving 130 miles (that's 210ish kilometers for our metric friends) to the nearest nut wholesaler. We did get the actual name-brand walnuts instead of the cheapest ones. The bag says they expire in two years. Nevertheless, I made someone else taste one for my own safety.


Let's set the bitter, banana-bread-ruining walnuts aside. We have already bought them and opened the package, thus exposing the kitchen to walnuts. That's enough walnuttery for the moment. Instead of walnuts, let us examine my favorite line in the recipe. You will find it at the very end:


That's right, this entire pie is only six servings. That's a big fat chunk of a full-size pie for every person. Let's have another look at our heart-smoldering cookery author:


After cross-checking the copyright date on the book with Yul Brynner's Wikipedia page, he was 63 when this book was published. If you exercise enough to pull off an outfit that's all sleeves and no shirt at age 63, you have earned the right to an extra-large slice of pie.

This picture is relevant because it's the author of today's recipe--- and for absolutely no other reason at all.

As long as we have the walnuts safely banished to the back corner of the countertop (for now), let's begin with the pie crust. For once, I actually planned ahead and set out the butter earlier in the day so that it could reach room temperature. I rarely bother with such formalities, but you don't contravene the recipe when it's a Pieathlon.


The recipe notes to add milk if the dough is too dry, but we had the opposite problem. Before we added the egg, the dough was already unworkably sticky. I thought about adding more flour, but then I wondered if the pie dough is supposed to look like this, and whether that gives the baked crust a different texture which improves the recipe.


After getting the egg mixed in, the pie dough looked almost like cake batter. But instead of adding scads of flour to it, I just put it in the refrigerator and hoped it would firm up enough to work with. I figured that if the dough remained sticky even after a long time in the refrigerator, I could pat and finger-smear it into the pie pan.


After refrigerating, the pie crust was a lot easier to work with, though I had to be hasty lest the dough come back to room temperature and melt before I got it into the pan. To Yul Brynner's credit, the recipe makes just about enough pie crust for one pan. There's almost no extra crust dough. We at A Book of Cookrye always appreciate minimizing food waste.


All right, enough of playing with pie dough, it's (almost) time to face the walnuts! 

We began by beating the eggs. I really don't understand why we're supposed to separately beat the eggs. You could easily mix the eggs with the sugar and let the gritty crystals completely break the eggs up. But because we have a dishwasher and therefore I don't mind getting out extra bowls, I gave our eggs a spirited beginning of the Mrs. Goodfellow treatment.


Moving on to ingredients I don't like (besides the walnuts of course), we have now gotten to the oddly sparkling corn syrup!

I found the corn syrup in the back of the pantry, where I suspect it has lived ever since someone long ago made a pecan pie. I'm not saying half-bottles of corn syrup lurk in the dark corners of everyone's kitchen. However, a lot of people I know made a pecan pie once and have permitted a half-used bottle of corn syrup to live in cabinet shadows ever since. 

This particular bottle expired in 2019. In an attempt to guess how long it's been in the refrigerator, I checked the expiration dates on corn syrup the next time I got groceries. Most of the bottles of corn syrup at the supermarket had about three years of shelf life. So someone (probably) made a pecan pie like five years ago and put the bottle away, where it slowly got nudged further into the back of the shelf every time someone put more groceries in the pantry. But I figured corn syrup is nearly pure sugar, so I don't think it can ever really expire. Also, I didn't want to buy another bottle of corn syrup and have it move in next to the old one and stay in the pantry until the end of time.


You might think that doesn't look like I'm using a lot of that weird transparent syrup. But have a look at the main bowl, where the corn syrup drowned all the other ingredients. 

I tried some of the corn syrup on the tip of a spoon, and it wasn't nearly as sweet as I thought it would be. The syrup was bland instead. Hopefully the brown sugar and sour cream make up for that. 

Moving on in the recipe, don't you think the well-beaten eggs look like a very cheery shade of yellow paint?

At this point, we could avoid the walnuts no longer. I really like the choice to sprinkle the nuts into the pie after you've got the rest of the stuff into the pan. As we have seen in the Osgood and rhubarb pies, the star ingredient in pies like this often lands in a big mound in the center of the pie pan while the rest of the filling spreads out and fills the crust. Sprinkling the nuts over the pie pan ensures an even walnut distribution.

I first suspected that this pie would be like the ones I have seen served at many a depressing luncheon: a parsimoniously thin layer of nuts sprinkled on a pie full of syrupy glop. Given that we're using walnuts, I can't decide whether that's a bad thing or not.


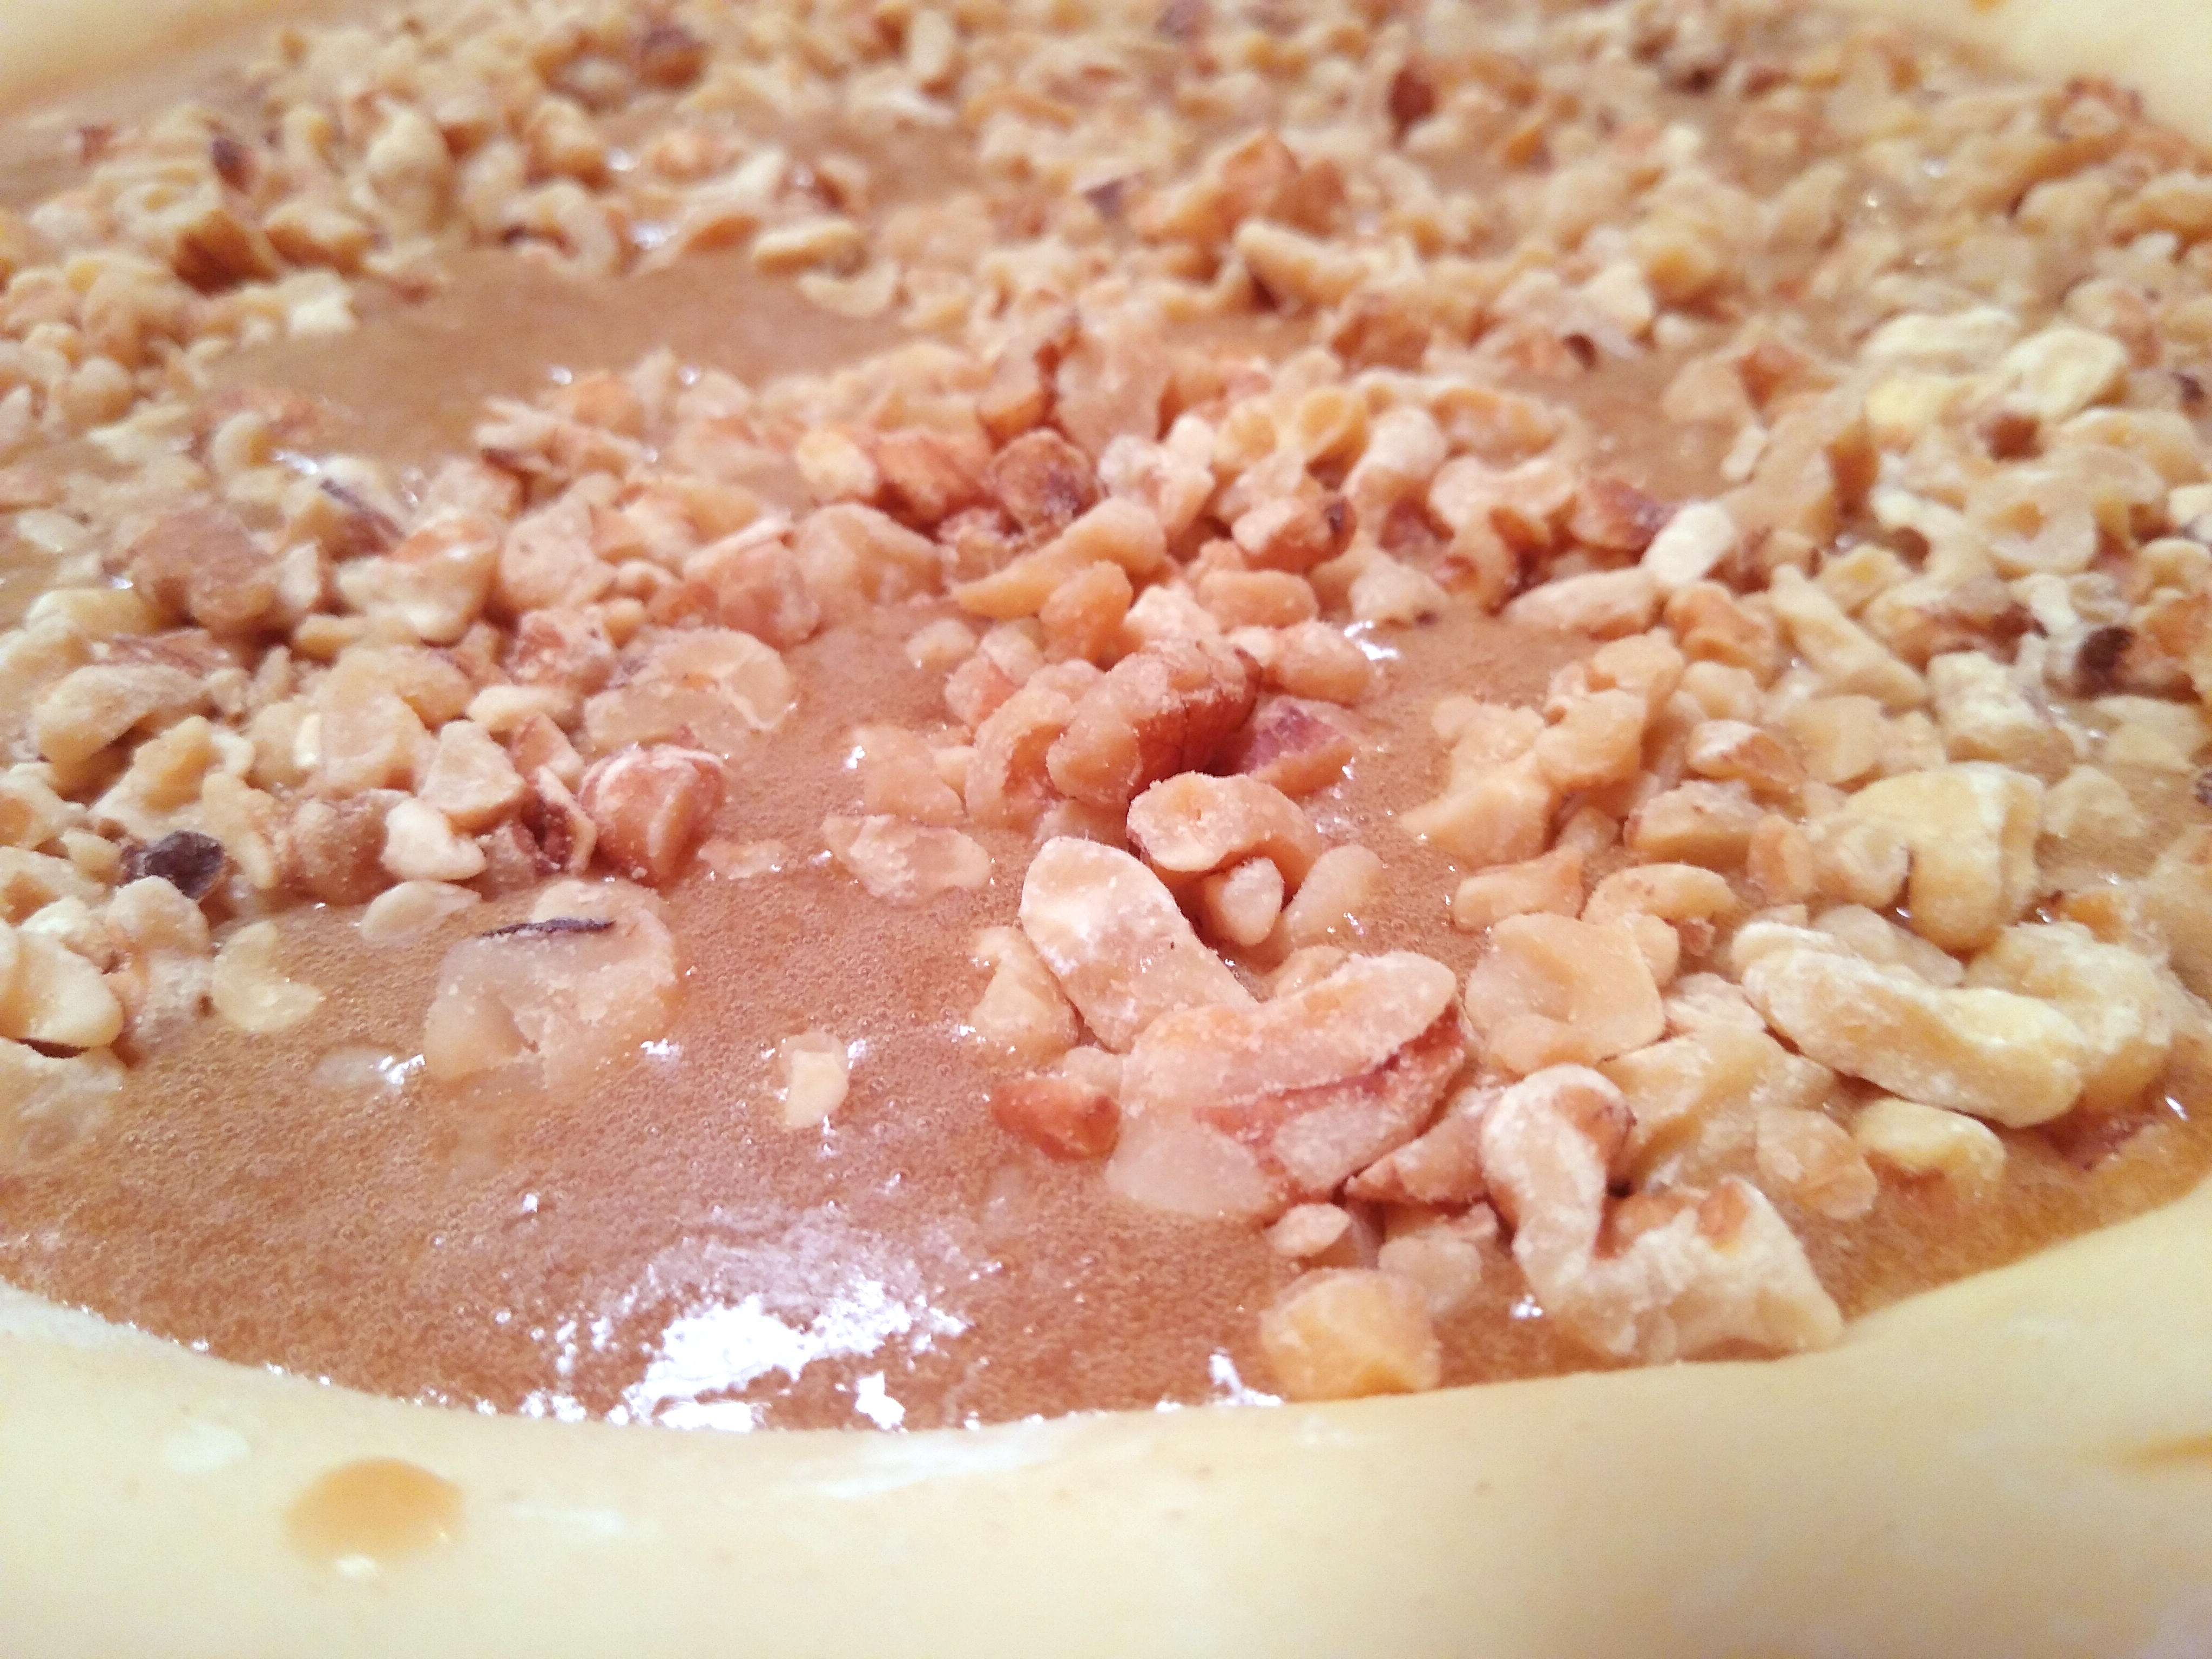
As you can see, the walnuts sat on top of the syrup instead of sinking into it. I know the recipe says to use whole walnuts, which may have sank into the filling instead of remaining high and dry. But when we were at the grocery store looking at the shocking prices of nuts these days, I was asked "So, um, how good is this pie?"

I answered "I don't know, I haven't made it."

"You don't even like walnuts."

"That's right..."

We therefore got the far cheaper chopped nuts instead. Sorry for going off-recipe a little bit. But to the recipe's credit, it uses a lot of nuts. So if you like walnuts (and please tell us what that's like!), you won't be disappointed with Yul Brynner's pie. I took out a spoon and did a bit of gentle mixing to ensure that I didn't bake a mound of dry burnt walnuts floating on corn syrup. Would you trust a pie that looks like this to bake correctly?


While the pie baked, I sprinkled a little sugar on the extra crust dough and put it on a little pan to bake next to the pieload of walnuts. I may have overbaked the scrap crust a bit, but it was still promisingly flaky when you broke it in half, which suggested that the crust that's actually in the pie would be really good.


When we took the pie out of the oven, it was merrily bubbling and boiling. Aside from the excessively browned crust, the pie looked so gosh-darned pretty I didn't want to cut it. I've never seen walnuts look this good.


We let the pie cool until it was just a bit warm, as specified in the recipe. When we cut out a slice, it was simultaneously runny and sorta-set-ish. The corn syrup glued the crust to the pie pan, making it simultaneously soft yet impossible to remove.

I think people like goopiness in their corn syrup-based pecan pies-- maybe? It's been a long time since I made or ate one. At first I thought the walnut pie was still underbaked, but the gelatinous filling stayed in a mound on my little plate instead of just dripping all over it.


Oh wait! We're supposed to put whipped cream on top! Or at least, discover that the spray can of it that lives in the refrigerator has finally sputtered out.

I tried.

I really don't like those mostly-corn-syrup pecan pies, but I will try to get past myself in saying what I think of this pie.

I'm as surprised as anyone else to say this, but the candied walnuts were the best part of this pie. I would skip the whole pie business and just coat walnuts in this mixture before baking them. The pie really didn't have enough nuts for all the syrup that went into it. As I feared, it's a dense layer of nuts on top of a hot, gooey pie full of corn syrup. The corn syrup part really isn't all that great without the nuts in it. 

So, just as some people pick the shredded cheese off the casserole and leave the rest, I really only liked the top of this pie. I think it would have been better for stirring the nuts in so that they were a part of the pie filling instead of something on top of it. But again, I just don't like the half-a-bottle-of-corn-syrup version of pecan pie very much to begin with. From what I can tell, this is a pretty good example of it if you like walnuts.

With all that said, I ate far less than what Yul Brynner thinks is one serving, and I had to make myself dry toast afterward.

But that's just me. What do others think? 

No one in the house exactly rushed to the kitchen upon hearing that the walnut pie awaited. However, a few curious people eventually drifted in. The first thing that was noticed: the pie weeps corn syrup into the empty parts of the pan.

Assorted comments: "It's very liquidy. The nuts on top are good, but the filling is bland. It tastes like nuts and sweet." Also noted: "I don't think I'll be having another slice." Final remarks pronounced over the pie: "I would take this to a church potluck if I didn't like them very much."

I have to blame the corn syrup for this one. Since we had extra walnuts, I decided to give the recipe another go without the offending ingredient. (To my own surprise, the offending ingredient is not walnuts.) Usually you ruin a recipe when you omit large quantities of ingredients, but I said to myself "The hickety heck with it! We have nothing to lose but the extra walnuts!"

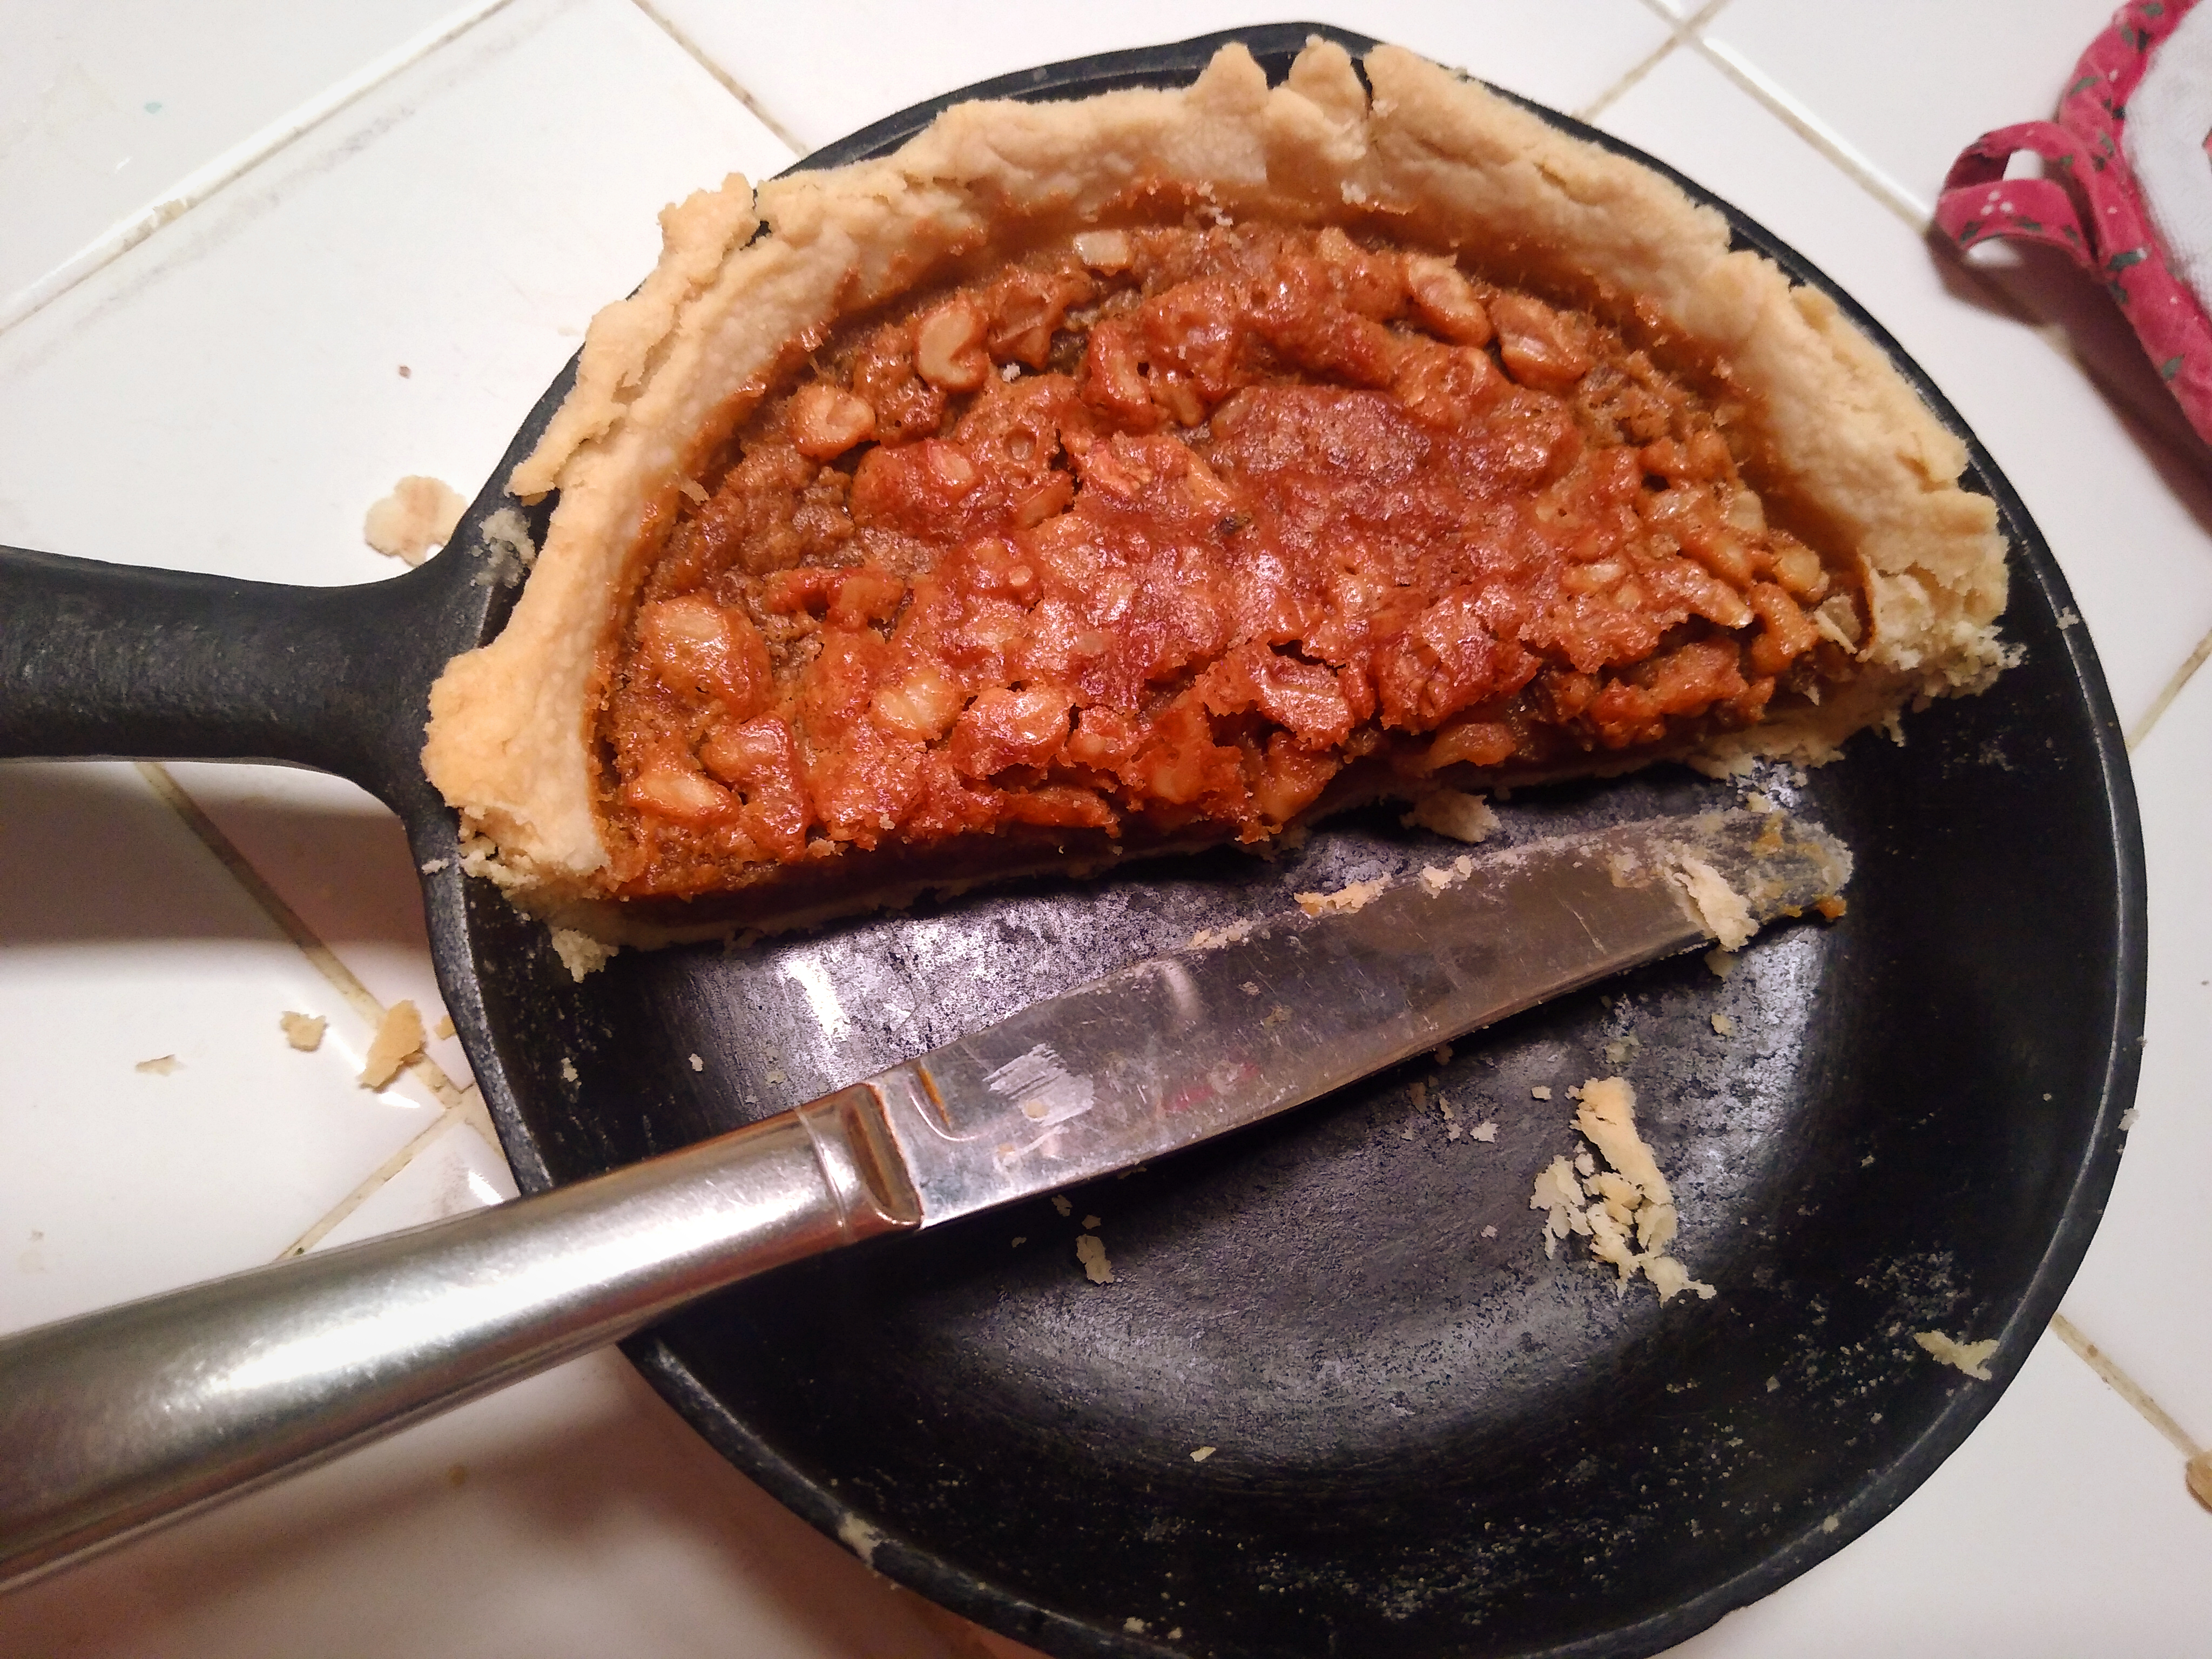
As you can see, the pie is actually runnier without the syrup. You'd think removing liquids would have the opposite effect, but corn syrup is an abomination that defies nature. On a somewhat related note, I think removing the corn syrup makes this pie at least as nutritious as a granola bar.


We cut the recipe down to a third of the original amounts. That is, we cut it down as far as you can go without subdividing eggs. The pie went very easily into the tiny pan I chose for it. You may recognize this skillet from the onion pie we made to compensate for a serious case of onion withdrawal. As aforementioned, the filling was runnier without the corn syrup than with it. The walnuts sank into it a little bit instead of floating on top.


At first, I worried that I had picked too big a pan for the pie, but then it puffed up so much that it filled up all the space given to it.

It fell back down as it cooled, but the extra room up top nevertheless prevented the pie from boiling over as it baked. Have a look at this corn-syrup-free beauty! As you can see, the walnuts all floated back to the top as it baked.


No one was exactly thrilled to cut into this pie (they were wary of a gloopy pan of walnuts like the last one), but at last I managed to badger people besides myself to try some of it. With great reservation, someone took a knife to the pie and said "It cuts well. It's not weeping." He lifted out a slice. "Hmm. No soggy bottoms this time." (I have never seen The Great British Bakeoff, but I understand that "no soggy bottoms" has become something of a catchphrase on the show.)

I have to give Yul Brynner credit. This is the first time I have ever liked eating walnuts. 

We actually kept the syrup-free pie instead of sending it to the municipal hereafter. This pie was so good that one could understand why Yul Brynner tells us it serves six. Keep in mind that for the de-syruped pie, I cut it down to one third of the original amount. Therefore, half of the pie is one serving.


Throw out the corn syrup and the pie is just that good! I still don't like walnuts, but I am willing to make an exception for Yul Brynner's pie. 

In closing, we would like to thank Yinzerella for organizing the Pieathlon! If you haven't yet, go see what pies everyone else has made!


Tuesday, September 27, 2022

More pie impends!

Get out your rolling pins, because the Pieathlon is back! 

It's a wonderful time when a lot of people send pie recipes for some stranger on the internet to make! There's never a boring pie in the Pieathlon. They're either really delicious or utterly dreadful. I'm excited to see what everyone else made!

Thursday, September 22, 2022

Chocolate Frosted Drops: or, Revisiting recipes I forgot how much I like

 Today on A Book of Cookrye, we are fulfilling household requests. Someone wanted chocolate cookies with chocolate icing. I was asked if I have a recipe for that. And do I ever! Today, we are going back to one of my favorite books I have gotten from my recreational thrift-shopping grandmother:


Chocolate Drops
½ c mixed shortening and butter, softened
1 c sugar
1 egg
2 oz unsweetened chocolate, melted
¾ c buttermilk or sour milk*
1 tsp vanilla
1¾ c flour
½ tsp baking soda
½ tsp salt
1 c chopped pecans or other nuts (if desired)

Mix shortening and sugar, beating well. Add egg and chocolate, mixing thoughly. Mix in the buttermilk and vanilla (the dough will look curdled but it's fine). Blend the flour, baking soda, and salt. Then add them to the chocolate. Mix in the nuts if desired.
Chill the dough for at least one hour.
When ready to bake, heat oven to 400°. Grease a baking sheet (we recommend first lining it with paper or foil, then greasing it). Drop dough by rounded teaspoons onto the pan, about two inches apart. Bake 8-10 minutes, or until the cookies spring back when lightly pressed in the center. When the cookies are cooled, make the frosting.

      Frosting:
1½ tsp butter
1½ oz unsweetened chocolate
2 tbsp + ¾ tsp warm water
1½ c sifted powdered sugar

Mix butter, chocolate, and warm water over a double boiler. Or, put them in a microwave-safe bowl. Cook in the microwave for 15 seconds at a time, stirring well after each interval.
Beat in the powdered sugar. Add water a little at a time if the icing seizes up. Spread over the cookies. If the icing gets too firm, put it back over the double boiler and stir it until it softens again. Or, microwave it for 5 seconds at a time, stirring after each interval.

*In a pinch, you can dilute sour cream with water until it's about the right thickness.

Mrs. Clinton Tweedy; Turtle Lake, North Dakota (McLean County Fair blue ribbon winner); Favorite Recipes of America: Desserts; 1968

I used to make these cookies a lot. For a while, I brought them to nearly every party or gathering where I was asked to bring food. I also made them at home when I felt like the day needed a bit more chocolate in it. You can see a batch of Chocolate Drops in this picture of me studying for finals. I partially wanted the chocolate while I was going over notes, but mostly I just wanted to put off facing all the math that's more Greek letters than numbers.

What an innocent yet exhausting time!

Although I didn't have a stand mixer with me when I made these cookies so often I nearly memorized the recipe, today we are doing our cookies the electric way! It feels unexpectedly strange to revisit one's childhood recipes with the power tools you didn't have.

When we got to the part where you add the buttermilk to the rest of the cookie dough, I remembered how the first time I made these cookies, I saw how hopelessly curdled the dough looked and threw it all down the food disposal so I could start over. I still feel bad about sending all those perfectly good ingredients to the city water treatment plant.

Believe it or not, this is fine.

Since I haven't made Chocolate Drops in such a long time, I forgot how thin and runny the cookie dough is before refrigerating it. It looks more like cake batter than cookies (and would probably make very nice bar cookies if you just poured it into a square pan and baked it). 

This brings us to the one thing I don't like about the original recipe: it says to heat up the oven right at the beginning of the instructions-- and then tells us to refrigerate the dough for at least an hour. I don't think Mrs. Clinton Tweedy ran an empty oven for an entire hour while her cookie dough refrigerated. I think the editors of Favorite Recipes of America: Desserts automatically put the oven temperature at the beginning of every recipe. Perhaps the book editors were overwhelmed with recipes and did not read this one thoroughly enough to see that the cookie dough must wait an hour before baking. 

But regardless of whether you've been heating the house with your oven the entire time your dough was getting cold, refrigeration really does change this from cake batter to cookie dough.

When you bake them, the refrigeration time makes a lot of difference in how flat your cookies are. I returned the dough to the refrigerator between batches lest it return to its cake batter state, meaning that the last batch of cookies got an extra half hour of chilling time. This made the dough a lot firmer and almost crumbly by the time we baked the last of it. As you can see, the first cookies spread out thinner and came out flatter than the last ones.

First batch on the left, last batch on the right. As you can see, the last cookies don't even have that crispy ring around the edges there the dough melted a bit.

You should also know that this recipe makes a lot of cookies. This is how many cookies we had after people kept coming into the kitchen and nipping cookies off of the plates while I waited for them to cool down.

And so, it was at last time to crown the cookies with icing! I used to do the icing in a double boiler like the recipe says to, but I've since discovered that the microwave is perfect for things like this. So long as you remember to take the bowl out of the microwave and give it a good stir every ten or so seconds, you absolutely never have to worry about anything getting scorched. The icing came out exactly as it does on the stovetop. At first it looked unfortunate:

But with a bit more careful microwaving, the icing looked creamy and perfect.

My only problem with the recipe (which I don't remember ever having in the past) is that the icing doesn't quite cover all the cookies. I had to make another half batch of it after I ran out. (I have adjusted the amounts in the typed recipe at the top of this page.) But the icing is pretty quick to throw together, so I wasn't too terribly annoyed. I did, however, borrow my friend's typewriter to make a correction to the recipe card:

Once you have enough icing, these cookies are absolutely delicious. When I ate one, I was surprised I let this recipe go unmade for so long. Everyone liked them. The cookies are lovely and light, and the icing is almost-but-not-quite fudgy. In the most disarming way, they're not overwhelmingly rich and dark.

Wednesday, September 21, 2022

Hump-Day Quickie: Summer Coutons: or A Free Oven Stands in the Driveway

Maybe this is unusual, but I like eating croutons like some people enjoy potato chips. When I was younger, the practice of wasting perfectly good croutons on top of a salad confounded me. Which brings us to today's recipe:

Summer Croutons
Stale or otherwise unwanted bread
Seasonings and salt to taste
Cooking spray

Cut the bread into pieces a bit bigger than you want (they will crumble a bit and thus shrink as you get them coated in spices). Lightly spritz them with cooking spray, then toss to distribute the oil a bit more. Shake seasonings over the bread and toss again. Taste a bread piece and add more seasoning if desired.
Place them in a non-reflective baking dish (you can just pile them into a ceramic dinner bowl), and put it on the dashboard of a car in the morning. Leave them in the car all day.
Or, put them in a pan big enough to hold them in a single layer. Bake at 350° until toasted, stirring every few minutes for even browning.

We had the heels of this lovely rye bread, which remained uneaten long after the rest of the loaf was gone.


There's no need to get complicated with the seasonings- especially with a flavorful bread like rye. I just did salt, pepper, and paprika.

I did not wish to run the oven just to toast some cut-up bread scraps, but then I remembered that it has been so hot even people's yard cacti are drooping. Which brings us to how I baked these:


Obviously, many people before us have made use of the inadvertent solar cooker parked outside their domiciles. There are also a lot of people who cook on the engine itself during long drives. (A quick hat doff to Lace Maker for reminding me that Manifold Destiny exists!) I just thought it was silly to run a hot oven just to toast some cut-up bread heels. Furthermore, the car was going to get hot whether I put food on the dashboard or not.


Using the car as an oven ended up working really well. The croutons were crisp without getting hardened like they would in the oven. When I brought these lovely rye croutons in the house, no one else was impressed with them. The general response was to look at the pan, and then back at me with the unspoken question "Is this what we're having for dinner?" 

Granted, I don't think one can make a pan of brown bread cubes appealing without a lot of presentation effort and a hard sales pitch. Since I did neither, no one else wanted to eat the croutons that I had spent literally the entire hot day making. It's their loss.

I was originally going to say that if the thermometer has already reached one hundred degrees (that's 38° for our Celsius friends*), your car is a wonderful way to turn bread into croutons-- or to make bread easy to crumble up if your recipe calls for a lot of breadcrumbs. However, when I got into the car two days later, the smell of herbs and seasonings thwacked me in the nose as the superheated air flew out the driver's side door. 

So if you're going to make croutons or any other highly-seasoned food in your car, you will have to leave the windows down all night to air out the smell. Obviously, most of us cannot realistically do that. So, any future "the sun is my oven" undertakings will not involve my dashboard. You just know that after a few repeated baking attempts, the smell would embed itself in the upholstery no matter how much one tried to air the car out.


*Yes, I know that technically 100°F is 37.7°C, not 38°C. But by the time it gets that hot outside, even the most pedantic of people will not care about a less-than-one-degree difference.

Tuesday, September 20, 2022

Carrot Cake XII: Great-Grandma's Sheep Wagon rolls in with root vegetables

Get out the cheese grater and the root vegetables, because carrot cake is back!

Great-Grandma's Sheep Wagon Carrot Cake
⅔ c sugar
⅔ c water
½ c raisins
1½ tsp butter*
1 large, finely-grated carrot
½ tsp cinnamon
½ tsp cloves
½ tsp nutmeg
½ tsp salt
1¼ c flour
½ tsp baking soda
½ tsp baking powder
½ c chopped walnuts, if desired

Mix sugar, water, raisins, butter, shredded carrot, spices, and salt in a large saucepan. Cook over high heat until they start to boil, then reduce heat to low and simmer for five minutes. Remove from heat, put a lid on the pot, and let rest 12 hours. (Note from the original: Why they get so tired is a mystery, but if you don't rest them, the mixture loses something in taste.)
While you're waiting for the pot of carrots to rest, mix the flour, baking powder, and baking soda.
When ready to bake, heat oven to 350°. Grease a 9" round pan or a loaf pan.
Mix the flour, baking soda, and baking powder into the saucepan of simmered carrots. Then stir in the nuts if desired.
Spread this into the pan and bake 30-45 minutes, or until a toothpick inserted in the center comes out clean.
This is good served warm.

*You can substitute vegetable shortening or margarine for a vegan cake.

"Wonderful Good Cooking" from Amish Country Kitchens, 1974 via Grannie Pantries

This recipe comes from our Pieathlon friend Poppy Crocker, who posted it not too long ago. If you haven't read her blog, go over and have a look at Grannie Pantries! She writes about the many community-compiled cookbooks where half the recipes begin with "open one can (undiluted) of soup" and end with "top with shredded cheese and bake until bubbly." She shows, in detail, the recipes (good and bad) that daily graced countless dinner tables for many years, but that no "culinary expert" ever deemed worthy of documentation. She also writes about the long and lamentable wheat-germ-and-carob years of health foods, documenting the trials and the punitively bland miseries that some blessed people endured in the name of nutrition. And she gets full credit for expounding on the subject of desserts that are also salads if you serve them on a lettuce leaf. 

You may wonder why we're making a sheep wagon carrot cake (whatever that is). After our stovetop went out, we had to remove the oven to fix it. This meant that while the oven was not broken, it was nonetheless out of order. After we got the oven back in the wall, I offhandedly asked what we should make to commemorate its return to service.

I enthusiastically pass the blame for this particular carrot cake onto the person who, staring at the carrots that occupied far too much refrigerator space, said "You know, I've never had a carrot cake..." And no, I didn't prompt anyone. I hadn't even mentioned the existence of carrot cakes to anyone in the house.

The carrot cakes are baaaaaaaaack!

For those of you who aren't familiar with my baking history, for a few years an inexplicable number of carrots appeared in my refrigerator whenever I wasn't looking. I didn't go out and buy them, but they showed up anyway. This led to me shoving them all through a meat grinder and making a long succession of carrot cakes.

The nonchalant solicitation for a carrot cake led to an uncalled-for rant about how I once had an onslaught of carrots and tested more carrot cake recipes than anyone should make. Although I started my little tirade at a normal volume, my voice started bouncing off the walls as I informed everyone in the kitchen and in the house next door that most carrot cake recipes are pasty, gummy, and terrible- which is why there was no pandemic-induced carrot cake craze to go with all the banana bread renaissance. (For the only good "normal" carrot cake recipe I've found, see here. Or try this delightful lemon-carrot cake here.)

Unfortunately, once carrots start taking over the refrigerator, you can't get rid of them with just one cake, although the first one I made was happily short-lived. This brings us to Great-Grandma's Sheep Wagon Carrot Cake.

One carrot makes a lot of confetti.


When I saw the recipe, I thought it looked like a War Cake with carrots in it. With that in mind, I also have a theory about why you're supposed to rest the carrots for twelve hours even though the recipe writer says it's a mystery. The war cake recipe tells you to boil the first few ingredients (just like we're about to do with Great-Grandma's Sheep Wagon) and then let the pot cool all the way to room temperature before adding the flour. The war cake recipe says it's "very important" to cool it completely. Perhaps Great-Grandma decided to make a war cake and also get rid of some unwanted carrots.

I once was impatient and added the flour to a war cake when the pot was still lukewarm. The flour promptly clumped up. Even after I gave the batter an extra-hard spoon-thrashing to break up all the gelatinous flour-lumps, the cake just did not taste right. You really do need your pot of boiled ingredients to be completely cold if you want your cake to come out right.

While the carrot and its new friends simmered, the kitchen smelled like I had a spice cake in the oven and vegetable soup on top of the stove. But as you can see, the boiled carrot shreds looked unpromisingly stringy and sad after taking it off the burner. Perhaps I am a bit wary after making so many dud carrot cake recipes, but I was already preparing to tell Great-Grandma to roll her sheep wagon right back where it came from.


True to the recipe's directions, the pot took about twelve hours to get to room temperature. However, after twelve hours I was ready for repose. While the pot of boiled carrots and raisins may have enough sugar to keep it from going off for an extra day, I didn't want to risk it. So I put the room-temperature saucepan in the refrigerator to wait safely in the cold until baking time.

I hoped the boiled carrots would look better the next day, but they did not. The raisins plumped up and looked a bit jauntier, but everything else looked just as brown, stringy, and ruined as it had the night before. There also wasn't a whole lot liquid left in the pot. While I had earlier thought that the recipe didn't have enough flour, now I wondered if it used too much of it. I expected to have a lot of crumbly flour clay with carrot shreds in it. But after a good stirring, we had a well-mixed boulder of raw carrot cake.

Don't worry, it spread into the pan with some gentle yet firm spoon encouragement.

After baking, the cake was so firm I feared it was ruinously dry. I immediately poured cinnamon icing on top in an attempt to counteract the dryness. I needn't have worried. Upon cutting it, the cake came out perfectly nice, surprisingly fine-grained, and-- wait for it-- moist, once we cut into it.


As we were eating this (the second carrot cake in three days), one person asked me "So what is the point of carrot cake? Because this is basically a spice cake. Is it to get rid of carrots? Like, what do the carrots do?

I don't know the answer to the first question. Maybe the carrots in carrot cake are like the blueberries in muffins, and are present only to help you delude yourself into thinking that a cake is healthy. Or maybe a lot of people wanted to just do something with the excessive carrots that spawned in their kitchen like they do in my refrigerator. 

If you are hoping to turn a bevy of unnecessary carrots into dessert, Great-Grandma's Sheep Wagon Carrot Cake will not help you. This entire cake contains just one carrot. Pick a recipe that will use more carrots per cake. But Great-Grandma's Sheep Wagon Carrot Cake is a really good spice cake. True to its name, the recipe tastes like something you'd have gotten from your great-grandmother.

It's also really good with ice cream.

If you want a vegan carrot cake recipe, you could easily use vegetable shortening or margarine instead of butter in this recipe. Since the cake only uses a small spoonful of butter, substituting it won't change the taste at all. To my own surprise, we're going to add this to the list of good carrot cake recipes. It's not merely  "good as far as carrot cakes go," it's just plain good.