Saturday, April 27, 2024

Turkey Burgers: or, Discount meat leads to strange places

Today, we are having fun with the food processor!

Turkey Brunch Burgers
6 English muffins
Brown mustard
Leafy greens of choice*
6 slices Cheddar cheese (or whatever cheese you like), or ½ cup shredded cheese

Tomato sauce:
1 clove garlic, minced
1 tsp thyme
1 tbsp olive oil
salt and pepper to taste
1 tsp balsamic vinegar
8 plum tomatoes

Turkey patties:
1 tbsp cooking oil
2 tbsp onion powder
1½ tsp dried sage
1 Granny Smith apple, cut into 1"(ish) cubes (no need to peel)
4 slices smoked bacon, cut into 2"(ish) long pieces
¼ tsp nutmeg
1 pound ground turkey
Salt and pepper to taste
¼ tsp liquid smoke

For the tomato sauce:
Blenderize all the ingredients except the vinegar. Put in a small, heavy-bottomed saucepan or frying pan and bring to a low boil. Reduce heat and simmer uncovered for an hour or two, until thick enough to spread. Stir the sauce, scraping the bottom of the pot, every 15-20 minutes. When done, remove from heat and add the vinegar.
This can be made a few days ahead and refrigerated. It also freezes well.

For the turkey patties:
Heat oven to 350°. Line a baking sheet with foil. If the pan does not have raised edges on all sides, fold up the foil on all sides to contain any juice that runs out.
Cut the bacon slices into 1" lengths and the apple into ½"-1" cubes (no need to peel them). Run the bacon and apple through the food processor.
Mix the apples, bacon, turkey, and all remaining ingredients. Form into 6 patties. (The mixture may not be firm enough to hold a shape very well until after it is baked.)
Bake about 20 minutes, or until a food thermometer reads 165°. Place cheese on top of each one about 5 minutes before they're done.
When done, cover with foil. Make sure the foil doesn't touch them or else the cheese will stick to it. (You can put little loosely-crumpled wads of foil between the patties to keep the foil on top from making contact.) Let them rest 5 minutes.

To serve:
Split the muffins. Warm them in the microwave, or spritz the cut sides with cooking spray and toast on a griddle. Spread the tops with mustard. Spread tomato sauce on the bottoms, then place a patty and greens on the bottoms. Close and serve.

*Baby arugula if you want to strictly follow the original recipe. Or, use avocado (mashed and seasoned to taste) instead of leafy greens.

Adapted from Food and Drink, autumn 2016, Liquor Control Board of Ontario

This recipe begins with clearance turkeys. We purchased two of them when the price dropped to 45¢ per pound. Like the ham, I argued it was false economy to spend $25 on two turkeys when no one would actually eat them. I was overruled on this, and the birds spent several months in the chest freezer. While everyone forgot the $25 of unwanted poultry sitting in the chest freezer, it needled at me. The birds bothered me. Their presence irked me. Eventually, I thawed one with no plans for it.

Then, on a night when I was feeling unusually energetic, I pulverized the whole thing. You should know that your average household-use food processor is not meant to pulverize an entire raw turkey in one long slog. The food processor survived, but it made whining noises as we reached the end of the bird. Despite mechanical protestations, we had an entire ground turkey. Unfortunately, no one here likes ground turkey. But somehow, ground turkey seemed easier to work with than a whole bird.

I think this is what they call "having a normal one."

In looking for recipe ideas, I didn't want to (not-so-)secretly swap in turkey for beef. That always ends up tasting like an apologetic "At least it's good for you." With that in mind, I found this in that Canadian food magazine I pinched from the airport the first time I went up north. 


Most of the magazine's pictures are relatively generic, but this recipe's photograph is very Canadian. It could not unironically come from anywhere else. We've got someone in flannels, serving the food on a slab of dead tree. My friend who lives in Canada had only one correction:


This was in a themed article about creative new spins on Thanksgiving ingredients. I don't know about you, but attempting a "creative new spin" on a Thanksgiving recipe is a risky move for most people I know. The tableside fallout could persist for months. But we're not making this for Thanksgiving, so that doesn't matter.

The recipe starts by roasting tomatoes. Since I don't live in Canada where the nightly temperature is still dipping in and out of freezing as I write this, I took issue with baking the tomatoes for four hours at 250°F (140°C). Some online investigation told me that I could put the tomatoes in a slow cooker and leave them all day. 


My only problem with this (which is true for everything involving a slow cooker): it smelled really good several hours before it was done. If I used a slow cooker often, I would plug it in outside so the smell of food didn't follow me around the house all day. 

On a related full disclosure: You will need to soak your slow cooker in bleach water overnight. If you don't have a yard or an apartment balcony, consider using another cooking method.  Otherwise, your house will smell like an indoor public pool.


We were next directed to grate apples. This seemed maddeningly tedious, but it turns out you can shred an apple really fast. Of course, I didn't bother peeling them since I figured the cheese shredder would reduce the peel into tiny flecks anyway.

I don't understand why the recipe tells us to core the apples before shredding them. It's a lot easier to just shred the apple until you've exposed the core on all sides, and then throw it out. Maybe whoever wrote this recipe typed "peeled, cored" after the word "apples" on autopilot.


It's taking a while for this recipe to look normal, isn't it? 

We are now directed to mix our apple shreds with a respectable amount of onions. By the time the juice in the pan evaporated, it looked like I had made a semi-successful attempt at hash browns.


At this point this gets into recognizable burger territory. Mix your meat with whatever you're adding to it, shape it into patties, and take it to the grill. Everyone who has ever complained about a dry turkey burger will love this recipe's solution: adding lots of raw bacon. Either our burgers would be flavorful, or they would set the grill on fire.

I'm not an expert on grilling, but I could already tell that grilling this would be a miserable ordeal. The meat was gloppy and runny. If anyone tried to grill it, the turkey burgers would stick to the racks, fall apart, and land on the cinders. 

I could have wielded a spatula over the flames and gotten more and more angry and defensive as supper ruined itself while complaints arose around me. But even though that is a traditional rite of the summertime, I decided to skip it. Instead, I would bake our dinner.

Doesn't this look manageable?

I managed to shape the meat into patties, but it was like trying to pat extra-sticky fruit preserves into tidy mounds. I didn't know if these would fall apart as they baked or not. But since I wasn't trying to grill them, we wouldn't watch our grocery money crumble through the racks and go up in flames. If our burgers fell apart, I figured I could put the surviving meat-clumps onto a bowl of lettuce and halfheartedly call it a salad.


To my own surprise, the burgers cooked up really nicely. They may have been as gloopy as undrained cottage cheese before baking, but they came out all right afterward. Granted, the random shreds of cheese I sprinkled on top looked bad after they melted. But that would be covered with a bun anyway. Speaking of, I dropped the English muffin onto a hot griddle to make it extra-toasty in the middle.


After final assembly, the burgers were... not bad. However, like the last time we mixed raw bacon into food, the bacon stayed oddly squishy and faintly... un-right. Like, yes, the pork germs were definitely dead, but the bacon didn't seem cooked. And the chopped onions were out-of-place. It was like someone tried to pretend a slice of meatloaf was the same as a burger patty. The flavor was good, but the execution was unimpressive.

But no one liked the roast tomatoes. They tasted all right, but they were slithery and slimy when we ate them. We ended up mashing the tomatoes with a fork, which eliminated the slimy texture problem. The resulting mashed spiced tomatoes tasted a lot like the homemade tomato ketchup we made from Miss Leslie's cookbook. And yes, we used avocados instead of baby arugula. Avocados were 45¢ each, and baby arugula was priced on the other side of the stratosphere.

But as much as I liked these burgers, they were a lot of effort (even if you exclude shoving an entire turkey through a food processor). And so, I decided to simplify things. First, I replaced the onion with onion powder. The fresh onions made the meat too watery anyway. Second, I added a bit of liquid smoke since I had no intention of trying to grill these. 

Third, I tried to let the food processor do all that apple-grating and bacon cutting. On my first attempt, I just dropped everything into the machine in its natural state and turned on the motor. This may have worked if I had a commercial-grade food processor. Instead, I got a lot of tangled, sinewy bacon strings and wads of half-chopped apple. I had to take the whole mess out of the food processor, hack at it with a knife, and put it back into the machine. 

But on a later batch of turkey burgers, I got out the cutting board and gave the food processor a bit of starting help.


We ended up with perfectly pulverized apples and bacon. Even the apple skins turned into tiny speckles that I could pass them off as herb flecks. Unfortunately, our food processor success looked terrible.


I think that pulverizing all the non-turkey components of these burgers makes it easier to see why this meat was never going to hold itself together on a grill. There's too much ground-up produce and too little meat.


I don't know why our Canadian recipe writers were so hesitant to just chuck the ingredients into a food processor. Although food processors are both expensive and frivolous (unless you get lucky at a thrift store), this magazine seems like it's aimed at the sort of people who probably have one.  

And for those who can't imagine eating burgers made with beige paste, they looked perfectly fine after mixing them together. They just would have been hopeless on the grill.


Since electrical pulverization seemed to help a lot with the burgers, we took a similar approach with the tomatoes. Instead of slow-roasting them in the oven (or slow cooker), we blenderized them and put the resulting froth in a small frying pan over a low burner. 


After several hours of simmering, we had a really good tomato spread. Its flavor was concentrated and intense. As mentioned above, this reminded me of making making ketchup like it's 1837.


Having corrected the recipe's faulty handling of its ingredients, these are easily the best turkey burgers I've ever had. They tasted a lot like breakfast sausage, except without the excess salt and greasiness. 

I think they're so much better than other turkey burgers because they're not trying to be hamburgers. Yes, you have a cooked meat patty stacked on a bread bun, but there the similarity ends. So instead of tasting like the absence of beef, they are actually good. I hesitate to recommend them for summer grilling unless you have one of those cage-on-a-stick things people use for grilling fish. But since these aren't even trying to be burgers anyway, it's no loss to bake them instead of grilling. 


Thursday, April 25, 2024

Spekdikkens: or, Dutch meat cookies!

Waffle irons do strange things to me.

Spekdikken(s)
250 g rye flour (2¼ cups)
83 g all-purpose flour (¾ cup)
266 g butter or margarine (1 cup plus 1 tbsp)
166 g light brown sugar(¾ cup)
1 teaspoon salt
1 egg
116 g sliced breakfast bacon (4 ounces), into 1" or 2" pieces
1 hectogram (3½ ounces) dry Drentse sausage in thin slices*
1 tsp ground anise seed, if desired

In a large saucepan, boil the sugar and water to dissolve, stirring constantly. Cook until a spoonful drizzled over a cold plate is about as thick as pancake syrup when it cools off. Remove from heat and stir the butter into the syrup until it melts. Allow to cool completely.
Add flour, salt, eggs, and anise seeds (if using). Whisk everything into a batter (it will be lumpy). Cover the pot tightly and let it sit overnight in a cool place. It will thicken overnight.
The next day, add water to the dough until it is a little thicker than pancake batter. Stir in only a spoonful water at a time at first to prevent having to chase down hard lumps in the bowl. You can add the water more freely as the dough softens.
Heat up a wafer iron. When ready, brush it with melted shortening. (It really does work better than cooking spray.)
Drop a spoonful of batter onto the iron. Use a knife to push the batter off the spoon. Add a slice of bacon and two slices of sausage, close the iron and cook for about half a minute.
The bacon does not become crispy, but remains limp.

*If you, like me, can't get Drentse sausage, pick a dried, cured sausage that is ready to eat without further cooking.
While the batter may have enough sugar and spices in it to keep the egg from going off when left out overnight, I decided to play it safe and refrigerate it. To soften it the next day, I microwaved the batter on the microwave's lowest power setting. I stopped and stirred every 15 seconds until the batter was back to room temperature.

Note: This batter also makes very good cookies. Add cinnamon, ginger, nutmeg, and similar spices when you mix it. Let it sit overnight as directed, but do not thin it out with additional water the next day. Roll the dough into small balls, and pat each one about ¼" thin between your hands. Place on a greased cookie sheet and bake until golden around the edges. They are better the second day- the spices get stronger overnight.
Note 2: If you're not into the whole meat-and-cookies business, these make very good spiced wafers if you add ginger, cinnamon, allspice, nutmeg, etc. They come out very crisp. After baking them, let them rest overnight for the spice flavors to strengthen.

Source: Landleven Magazine via Google Translate

Today, we are once again getting recipes through Google Translate. Because I hate having a waffle iron that only exists for one recipe, I went online and asked what other things I could make on it. Today's recipe, which comes from the Netherlands, was my favorite suggestion. 

Unfortunately, the person simply said "You could try spekdikkens" without saying what they were, much less giving a recipe. So I looked them up. The images I saw were quite mystifying to my uneducated American self. I couldn't imagine how wafers with sausage and bacon on them would taste, so I had to make them.

Speaking of Google Translate, here's how to pronounce today's recipe!


I would love to know what occasions spekdikkens are for. Do people only make them on special holidays? Are they a once-a-week treat that people make at home? Do people make spekdikkens any time they get together with friends or relatives? Or, are they something people make to keep on hand? I'd love to know. If anyone from the Netherlands happens to drop by, do share!

Moving back to this side of the Atlantic, a lot of my friends had reservations about spekdikkens. One said "That looks like a heart attack."

I answered "Well, it's from northern Europe. It gets cold up there."

The hardest part of making spekdikkens wasn't getting the waffle iron, which (as previously mentioned) I simply found on Ebay. No, the hardest part of this entire recipe was finding rye flour. When I checked the baking aisle, the shelf space for the rye was empty. I thought I would simply wait for it come back into stock, that never happened. (Or maybe they got a steady series of shipments over the next few months, and people snatched them off the shelves. Is there some baking fad involving rye that I haven't heard of?)

After several weeks with no rye, I went to the foofy, fancy grocery store to see if they had rye flour. After all, the sort of people who buy organic quail eggs are more likely to dabble in artisan baking than the rest of us. Not only did the store have no rye, they didn't even have any vacant shelf space where the rye should have been. And so, like nearly every time I go into upscale supermarkets, I left empty-handed. At this point, I wondered if there's a rye shortage going on. However, the only news articles I found about rye shortages were from a few years ago.

Anyway, since I'm on greeting terms with most of the late-night stockers at the supermarket, one of them got out her phone and checked when the next shipment of rye was due in. They even offered to put a bag of it on hold for me. That didn't quite work out. I ended up calling my mother and asking her if the stores had any rye flour where she is. And so, she bought a bag and saved it until we next met.

This bowl contains precious rarities.

Having finally gotten the rye flour, we finally had all the ingredients we needed. And so, we begin by boiling a sugar syrup. At first I thought we were supposed to just heat the water until the sugar dissolves. And so, I got out a tiny pot (we're quartering the recipe) and put it on the stove. The sugar was dissolved in about a minute.


After I turned off the burner, I wondered if I understood the directions correctly. After all, today's recipe was translated by a computer which has never baked anything in its entire existence. Our instructions were vague, but it seemed that we are supposed to dump the flour into the boiling-hot syrup. While I've seen a few recipes like that (choux paste comes to mind), usually adding flour to a boiling pot results in miserable gelatinous clumps of failure. And so, I decided to find some videos of people making these things. This would prove more difficult than I thought.

If you poke around YouTube, you can find plenty of videos for spekdikken. Many of them show people lovingly placing batter and meat onto hot waffle irons. A lot of spekdikken-making videos are filmed at various events in big rent-a-halls, and show long rows of people sitting at folding tables happily plonking meat and batter onto hot waffle irons. (I'd love to know how they manage to run like 20 waffle irons without popping a circuit breaker.) So I guess spekdikkens are more of a special-occasion food than an everyday one. Also, people generally seem really cheerful when they're making them, as if spekdikkens are a happy event unto themselves.

I did eventually find a video of someone who started at the beginning of the recipe instead of skipping to the fun part that involves a waffle iron and meat. It turns out I was correct in surmising that we need our syrup to cool off before adding the flour. Also, his syrup wasn't some watery fluid like I had on my hands. Instead, his was almost (but not quite) thick enough to pour onto pancakes. And so, I put our syrup back on the stove. As our sugar water heated up, it reminded me that it needs a lot of saucepan space to boil up. I turned off the stove and got out a bigger pot.

Ahhh, that's better.

I think my annoying habit of using undersized pots and baking pans comes from my many years without a dishwasher. I have to remind myself that I no longer need to worry about cleaning each pan one at a time.

After boiling this until it looked right to my uneducated eyes, I set it aside to cool. Naturally, I tasted the syrup as soon as I turned the burner off (using a tiny spoon so our sample cooled off, of course). It was better than any pancake syrup I have ever purchased. Heck, I liked it even more than molasses (which, as I have sometimes mentioned, I pour onto waffles instead of maple syrup.) If I take nothing else from today's recipe, I am definitely making this syrup again. 

The rest of the recipe seemed pretty simple: dump everything into the syrup after it cools off and whisk it together. As our robo-translated instructions claimed, we had a "lumpy batter" which we are directed to leave overnight in a cool place. 

At this point, I sampled the batter and it was unexpectedly and incredibly good. I've never made cookies with rye, but I'd love to make something like this again. However, I was a bit leery about leaving the batter overnight because of the raw egg. Of course, I have eaten a lot of cookie dough and cake batter, but none of that was left at room temperature for several hours. And so, I decided to put the rye batter in the refrigerator. Maybe I was worrying too much, but I didn't want to create an inadvertent microbe nursery.

The next day, our batter had turned into a surprisingly hard clay. I figured the flour would absorb some of the water overnight. It was physically impossible to shove the beaters of an electric mixer into the dough. I ended up putting it into the microwave (at its very lowest power setting) to soften it.


Before we proceeded to have fun with meat, I wanted to see if this dough made good cookies. And so, I scooped some of the dough out and put it into the oven next to dinner. I didn't know if the dough would spread or not, so I flattened one cookie and left the other in a ball. 


Unfortunately, I forgot they were baking and left them in the oven for a bit too long. But if you trimmed away the overcooked edges, they were really good. They were crisp and unexpectedly light. I didn't think they'd rise at all, but they puffed up while they baked. Between the cookies and the pancake syrup, it appears that spekdikken is the kind of recipe that gives you even more recipes as you make it.

If we crack one of the cookies, we can see that it rose quite a bit. Take a look at all the little air bubbles in it.

And so, at long last, it was time for meat cookies! Although I found very few videos of people mixing spekdikkens together, there are a lot of videos that skip to the fun part where you start putting meat on a waffle iron. I'm sure everyone has their own recipe, but the batter looked about the same from one video to the next. We want something that looks like this:

RTV Noord

From a lot of experience, I knew that if I dumped a lot of water in this all at once, I would end up with hard lumps swimming in slurry. The trick with this is to gradually add the water at first, starting with so little water that it can't even form puddles on top. You want the water to disappear and leave a few soggy spots on the dough, which you disperse through the dough as you stir. (This will involve a lot more spoon-force than you're probably used to using on a bowl of dough.)


After doing this a few times, the dough will have softened enough to add the water more generously. Eventually, you end up with a batter that looks like this. Or at least, I think it's supposed to look like this. Like I said, I can't read Dutch and have nothing but a robo-translated recipe and some videos to go on.


With the batter ready, it was time to bring out the meat. 

I'm sure no one will be surprised that I don't have the means to order a "Drentse sausage" from over the Atlantic. However, I found homemade sausage from last year buried at the bottom of the chest freezer. My aunt and uncle gave them to everyone two Christmases ago, and I froze mine for a special occasion. As often happens with chest freezers, I forgot that it was there and it fell between the containers of leftovers and stayed hidden. The lesson here is don't save the nice food for a special occasion. Just eat it.

At any rate, when I undid the vacuum-packing plastic that encased it, the delicious smell of wood smoke filled the kitchen. I was so glad I got this out of the freezer for this recipe. I didn't want to put cheap meat into our homemade waffles (store-brand bacon notwithstanding).

I can't get over the sight of a meat-and-cookie-dough assembly line. I'd love to hear what everyday foods in America would provoke a similar mildly-dumbfounded reaction in this recipe's home country. Again, if anyone in the Netherlands happens to pop in, do share your thoughts!


I must be getting better at using this iron. On my first attempt, the batter came almost to the edge without oozing out.


After things started to smell toasty, opened the lid just a bit so I could have a peep. I saw that we were going to have some structural integrity problems with our spekdikkens. The bacon clung to the lid of the iron and ripped free of the waffle.


After some angry muttering and spatula-jabbing, we got everything involved in today's recipe to let go of the waffle iron. But the batter had shrunk away from the meat on all sides. Even if nothing had gotten stuck, our first-ever spekdikken would have fallen apart. And so it did.

Our next spekdikken also stuck to the iron, but at least the batter didn't pull away from the meat as it cooked. Things were slowly improving. By now, the kitchen smelled like a breakfast buffet.

After we made a few of these, it became obvious that the meat would stick to the iron no matter what we did. But we developed a working technique for getting spekdikken out of the waffle iron. First, we barely opened the iron enough to slide a spatula in there. Then we ran a spatula directly under the iron's lid to dislodge everything that needed dislodging. Having liberated the spekdikken on one side, we could open the iron and extract the meat cookie. But I should disclose that none of these were sturdy enough to stack or to carelessly drop onto a plate. 


Our spekdikkens' fragility could be the result of my inexperience. But I should note all the spekdikkens I saw in other people's pictures also looked like they could fall apart at any minute. So I think I got these right.

As for the taste: if you have ever slid your breakfast sausages across the plate into the puddle of pancake syrup, these are like that... but a lot more so! The rye part stayed soft, the sausage got crisp, and the bacon... well, it certainly was bacon. I honestly thought that the spekdikkens would be too weird for my ignorant American tastes, but I liked them a lot. But after a while, wondered if the vegetarian version was any good. (Also, I was getting tired of dislodging meat residue from the waffle iron.) But before putting any of the remaining batter on the waffle iron without the meat, we paused to add a lot more spices.


Without the meat in there keeping the iron from shutting all the way, the wafers came out wonderfully crisp. The rye flour added such a good flavor that I wondered why you don't see it in a lot more gingerbread recipes. (Then again, maybe rye flour has always been sporadically unavailable, and therefore a shaky foundation on which to build a culinary tradition.)


In conclusion, once one gets over putting meat in the cookies, these are unexpectedly good. And if one doesn't want meat in cookies, they're very good without it. Also, if you stop after the first few steps of the recipe, you've made the best pancake syrup you can get without tapping a maple tree. 

I've thoroughly enjoyed this trans-oceanic recipe journey. While I couldn't possibly get away with serving these to family with a straight face, I am seriously contemplating bringing a plate of these the next time any of my friends has a gathering.

Tuesday, April 23, 2024

Krumkakes: or, Culinary greetings from Norway!

Today, we are taking our Norwegian wafer iron to its home turf! Or at least, we're culinarily bringing it to its home. I'm not about to jet across the ocean with a waffle iron in my carry-on. Though I would if I had a few buckets of money weighing down on me.

Krumkakes
4 eggs
1 cup sugar
2 cups flour (if desired, replace ½ cup of the flour with whole-wheat)
¾ cups butter, melted
Splash of vanilla
Pinch of salt (if butter is unsalted)
Spices to taste (cardamom,* lemon zest, cinnamon, etc)

Lightly beat eggs. Mix in everything else in order given.
Cook on a krumkake iron brushed with melted shortening (it really does work better than cooking spray).
When done, form into a cone shape by rolling around a wooden spoon handle or (they also make wooden cones specifically for this) as soon as you get them off the iron.
When serving, fill with whipped cream or fruit.

*I am informed by others that these must have cardamom in them.

For those who know as little as I do about basic Norwegian phonics, I should note that you don't pronounce "krumkake" like "crumb cake." If Google Translate is to be believed, you pronounce "krumkake" like this:

I was showing off my pizzelle iron online (as one does), and soon someone said they had a krumkake iron very much like it. This soon turned into several people showing pictures of the various working antiques living in their kitchen cabinets. (It was a good day.) I mentioned offhand that I had a krumkake iron but had never made its namesake recipe, nor did I have a recipe to make. Someone promptly responded with this, saying it came from their "great-grandma's nursing home treasury."

This is the entirety of the the recipe, though the second sentence is a later addition (it came from my great grandma's nursing home recipe treasury and the original is two lines of typewritten text total)

Krumkaker:

4 eggs
1 cup sugar
2 cups flour
¾ cups butter, melted
Splash of vanilla

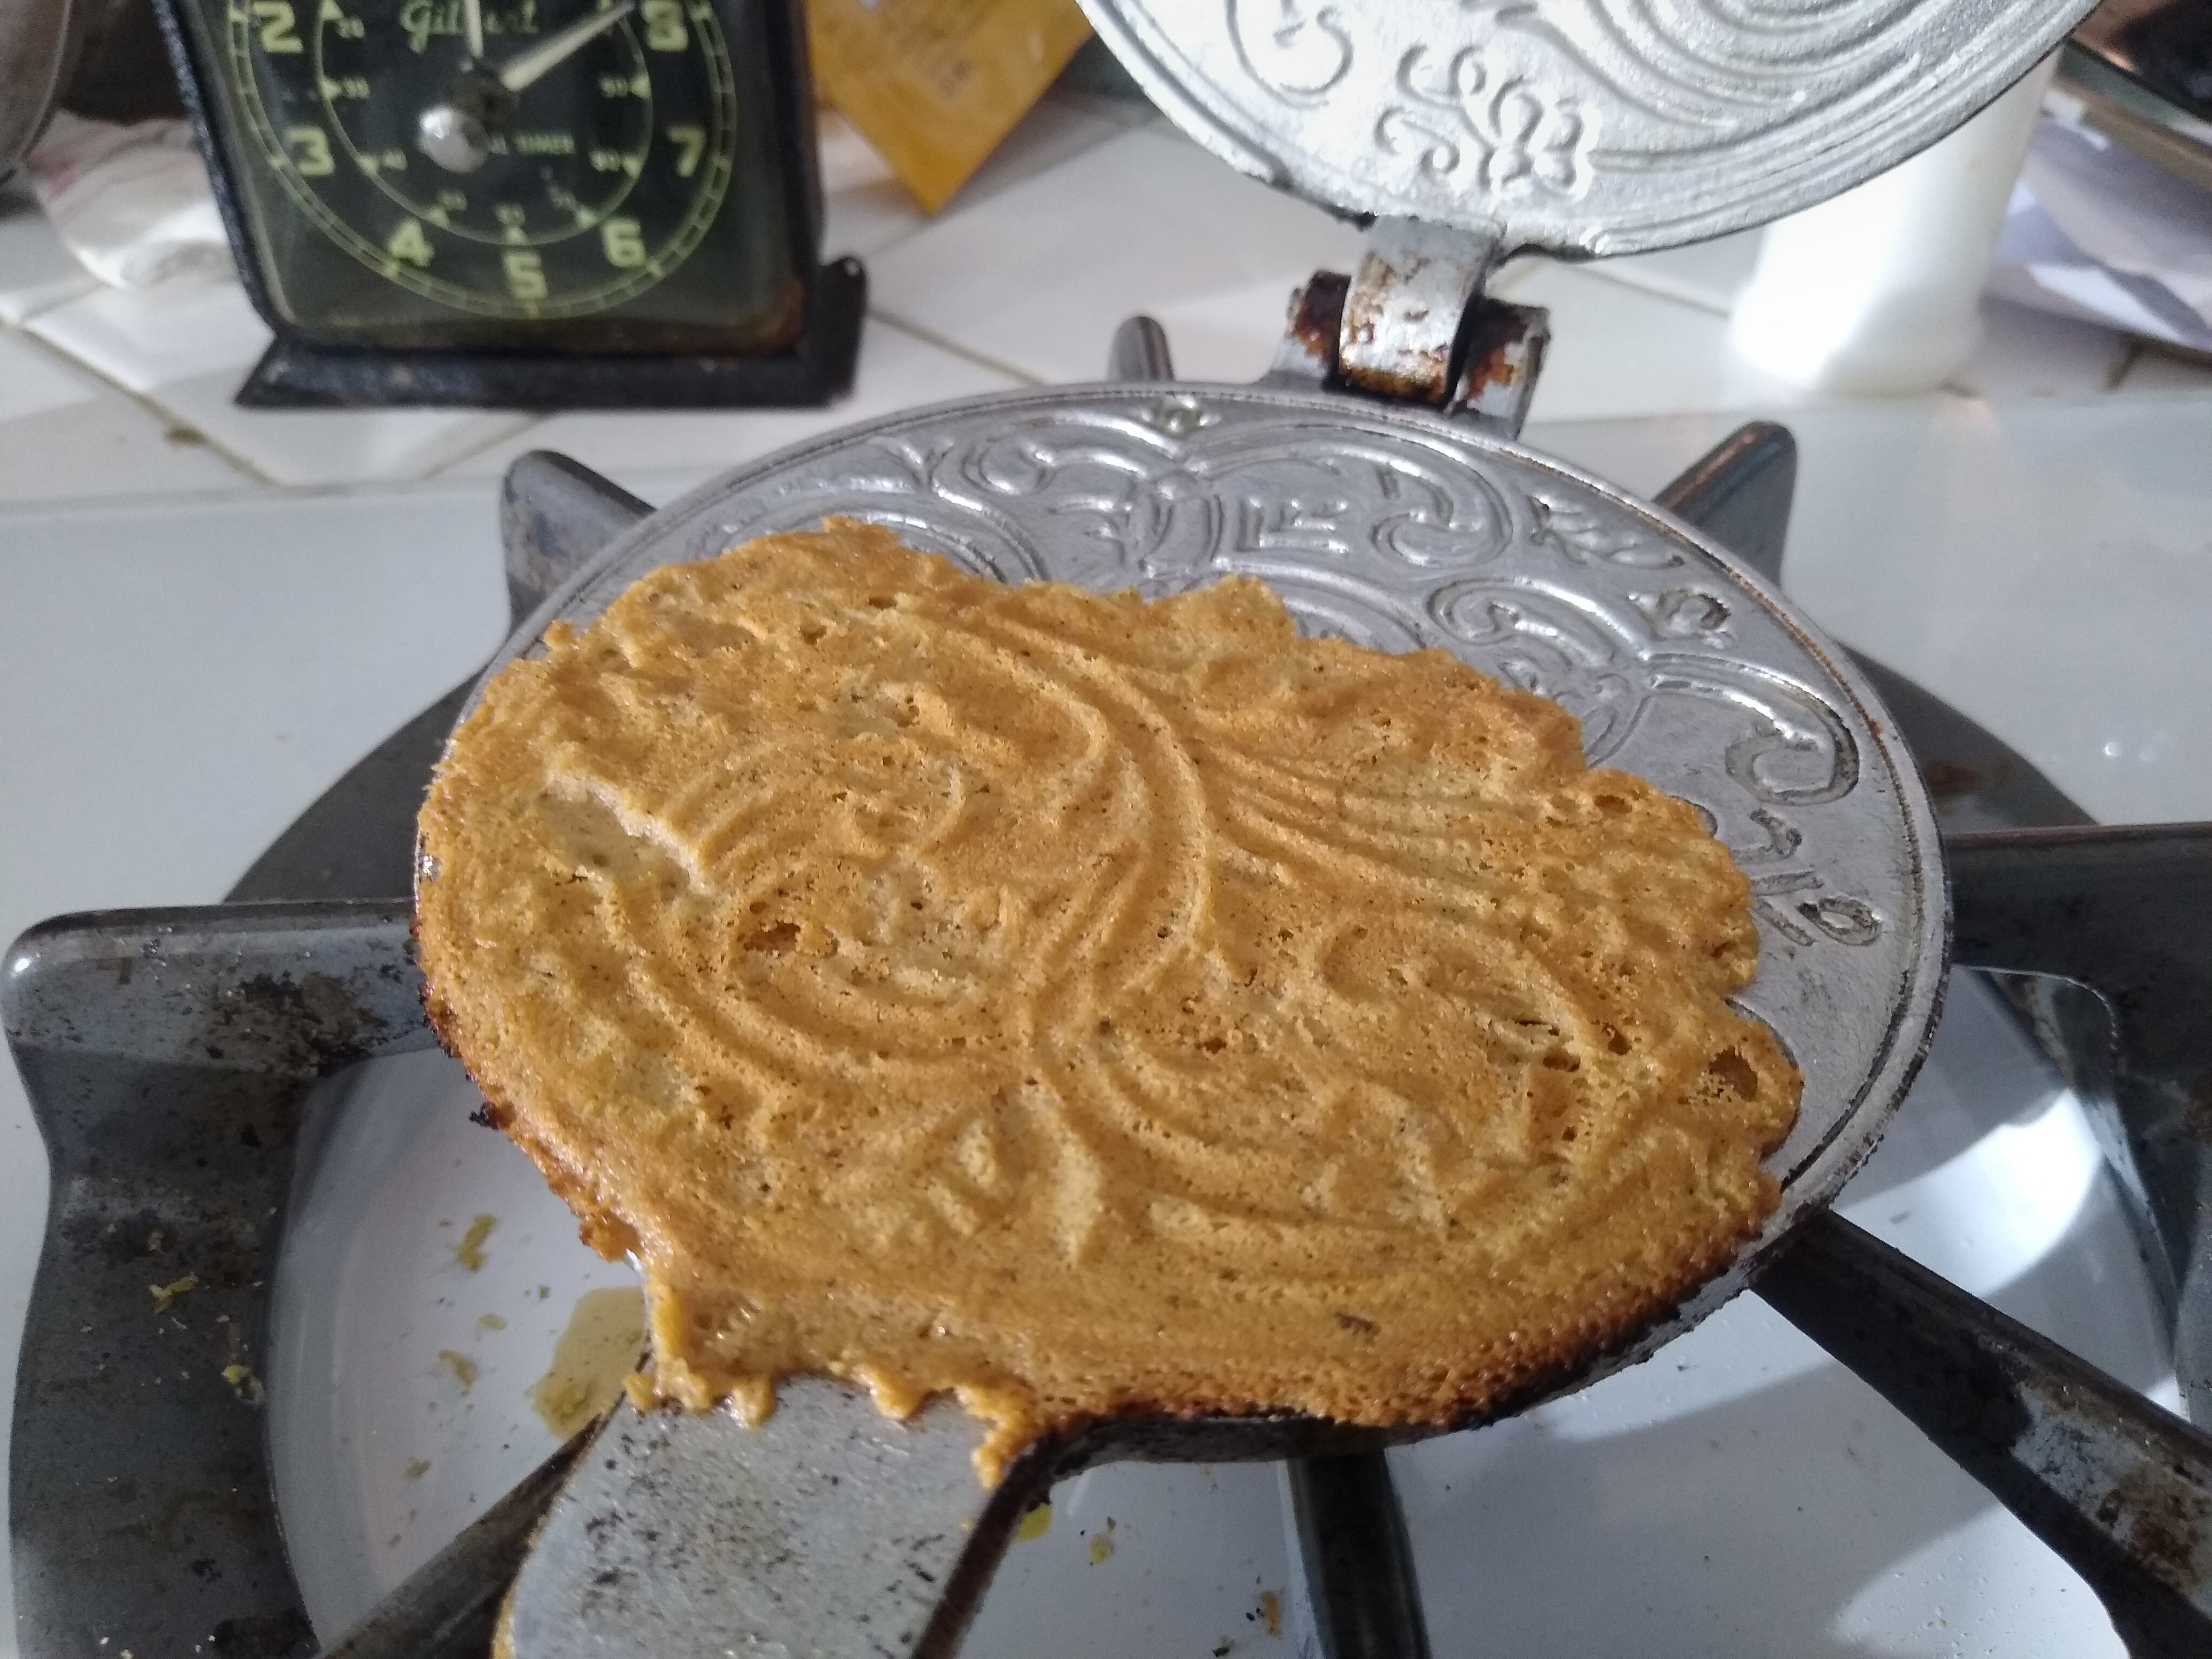
Mix in order given and cook in krumkake iron. When done, roll around spoon handle or wooden cone while still hot, and fill with whipped cream or fruit.

You can also add some lemon zest, cardamom, or whatever else your heart desires, and it's probably a good idea to add a pinch of salt if you're not using salted butter.

Also if you make the pointy end of the cone be the side of the cookie that was closest to the hinge, it rolls up better because that side of the cookie is thinner- so it's easier to get a tight bend radius.

There are probably other pro gamer tips that I'm forgetting.

We decided to start the recipe by cleaning out the pantry. I don't know where this stuff came from, but no one has wanted to use it.You're supposed to mix it with sour cream and use it as a fruit dip. No one around here ever has the patience to set up a presentational fruit tray.


Those ornamental sugar crystals look pretty, but no one wants gritty waffles. So I pulverized it. The resulting powder tasted like powdered raspberry candy, which is not surprising since the main ingredients are sugar and dried raspberries. 

Not all of my friends were impressed by my use of natural fruit flavoring. One person asked me "Are you making food for crested geckos?"


When I was reading the directions, I thought this looked functionally identical to the pizzelle recipe. So I asked the person who sent it: are you supposed to beat the eggs into a cloud of foam as one does for pizzelles, or do you just stir them in? The answer: No, just whisk them for a few seconds.

Without the extended egg beating, our krumkakes were as easy to mix as brownies. You just put everything into the bowl one ingredient at a time, and stir after each. After about a minute, we had some absolutely delicious batter. It was so runny that I looked into the near future and saw a hot ruinous ooze coming out the sides of the iron. But since I know nothing about Norwegian cooking, I figured the batter was probably as it should be. I therefore resisted the temptation to add more flour to correct it.


Having made our batter, we put it to the side so we could clear the counters, heat up the iron, and melt the shortening for brushing onto it. Speaking of shortening, I'll never know why the shortening the clings to the side of the bowl never melts in the microwave.


If you look around online for a pizzelle iron, you inevitably bump into the term "krumkake." A lot of people sell "pizzelle or krumkake" irons, which made me think they were two names for the same thing. I've seen some people say that Italian pizzelle irons have deeper ridges than the shallow grooves cut into Norwegian krumkake irons. In other words, a pizzelle iron makes waffles, a krumkake iron makes engraved cookies. But other people can't see the difference between the two. As for myself, I'm just happy to make the recipe this iron was meant for.

During the few minutes we spent getting everything ready, our krumkake batter hardened into an unexpectedly firm cookie dough. Instead of pouring it out, you could scoop it with a spoon and it would (mostly) hold its shape. You just never know when you'll be glad you followed the directions instead of acting like you're smarter than whoever wrote out the recipe.


And so, in very short order, we arrived at the big moment: getting batter onto the iron. At this point, I would like to thank whoever wrote up Fante's pizzelle webpage, because it has the most helpful instruction I've ever found for making these: "Use a knife to push off dough from spoon." That one sentence, inserted as a parenthetical note on their recipe handout, has spared me from constantly wiping sticky batter off my fingers every time I've made anything on a stovetop waffle iron.


Our first krumkake was nicely cooked, but it turns out that I shouldn't have placed the batter on the center of the iron. It didn't spread backwards at all. So when making krumkakes, you might want to put the batter towards the back of the iron instead of right in the middle of it.


Our recipe tells us to "roll around spoon handle or cone while hot, and fill with whipped cream or fruit." Some quick searching told me that you can buy little wooden cones for wrapping these on. But since I don't have one, I used a spoon handle instead. It turns out you need to get these things wrapped up the instant you get them off the iron. Because the krumkake seemed so fragile, I let it sit for a few seconds to firm up. As a result, the cake cracked when I tried to roll it up.


Our second one, which we rolled up as soon as it fell off the iron, came out much better. But in full disclosure, I must note that the edges were singed.


But with happy practice, we eventually got it right. Behold the tubular perfection! I later found out that these are supposed to be shaped like cones, not pipes. But at least my inauthenticity was photogenic.


At this point, I had the idea of trying to get a more cone-like shape. As you can see, the krumkake cracked even though I had already racked up several minutes of experience in making them. 


The krumkakes may look like it fell apart at the fissure as soon as I tried to move they, but they proved surprisingly sturdy.


The person who shared the krumkake recipe also sent this helpful photo of rolling them on a spoon handle. It turns out that with a little practice, you can get cones instead of cannolis even if you don't have a cone to roll these onto. (And if your first attempts end up torn and malformed, they'll still taste good.)


And so, instead of rolling my krumkakes around the business end of the spoon, I tried using the handle. After all, the recipe says to use the spoon handle (even though the wide end of the spoon seemed more logical to my non-Norwegian self). Counterintuitively enough, you get better cones with the narrow end of the spoon than with the end that is a flared out. But in full disclosure, I had a lot of malformed krumkakes before I got it right.

After getting our cone-rolling technique right, these things were just so darned pretty.


And of course, I wanted to make a few of these as flat cookies just to see what they're like. Anyone following along at home should know that if you're not rolling your krumkakes up, you can't hide when they end up a bit off-center like this:


However, even if your cookies fall short of aesthetic perfection, anyone who complains has either inadvertently offered to make them for you, or has just announced that they don't want cookies.


As I was tasting these, I thought that a bit of whole-wheat flour might go well with the flavor. I'm not trying to pretend we can turn krumkakes into health food-- even if you put fruit in them at the end. I thought that like Mrs. Kahn's Banana Cake, a bit of whole-wheat flour would add a nice flavor undertone. And... it does. The krumkakes with a little whole-wheat flour came out more substantial and just a bit nicer. 

We don't have any cream (whipped or otherwise) in the house, and I didn't think to go to the coffee shop and try to cadge any earlier in the day. And so, we went with fruit instead. Blueberries and raspberries have been one of our more routine splurges. It's easy to say that we need to cut the budget on snacks and chips, but it's hard to argue in favor of eating less fruit. 

However, if I wanted to put fruit in my krumkakes, I would need to find something different to wrap them around. I had to cram and stuff the blueberries in. You might think that the cookies cracked when I was trying to insert fruit with brute force, but they're sturdier than I expected. 

I was telling a friend of mine that I was finally making the recipe that my krumkake iron was meant for. He said that I must put cardamom in them. 

[screenshot of text messages]
  ME: Well after having a krumkake iron for almost a year, I finally had a go at actual krumkakes. No meat whatsoever.

OTHER PERSON: Nice. I associate with krumkake with the holidays. You've gotta put cardamom in it though

ME: It was shockingly expensive at the store near me. 

I've never purchased cardamom in my life, and it cost $10 per shaker at the store nearest to me. And so, the next time I was in a city with a large-sized Asian supermarket, I went to the spices and found cardamom for a lot cheaper. Naturally, I had to open the bag and smell it as soon as I got into the car. I didn't recognize the scent at all. Given how often cardamom shows up in pumpkin spice or in gingerbread or other autumnal foods, I had expected to be like "Oh, that spice!" But this is apparently my first cardamom ever.


I would later learn that there are two main types of cardamom: black and green. I purchased the black kind. When I tried to look up what I had bought, I found that lot of websites have the same copy-pasted paragraph about black versus green. After I managed to machete my way through all the search-engine-optimized garbage, I gathered that apparently you don't generally use black cardamom in sweets or desserts. But although my black cardamom was apparently incorrect, I couldn't return it without driving several hours. And so, I proceeded to make these with our inappropriate cardamom, and they came out just fine. The cardamom added an almost-burning intensity to the other spices.


As for the taste? These are so much better than the short list of ingredients suggests. I thought that they would be identical to pizzelles, but they're sturdier instead of delicate. In terms of texture, they remind me a lot of waffle cones. You can probably use them as waffle cones if you're a little careful when you scoop ice cream in them.


Apparently these are traditionally made around the holidays. But for those of us who have no cultural connection to Norway, I would actually say these are better in the springtime or the summer. You're supposed to put fresh fruits in them, and winter just isn't the best time for that. Anything with whipped cream and fresh fruit is best in the summertime. And the cookies themselves are very light and crisp, which is always nice in the summertime.

Also, you can make a batch of these without starting the oven. If you use an electric krumkake iron, you may not even feel your kitchen heating up. And so, as springtime ensues, we at A Book of Cookrye recommend bringing a bit of Norway into your kitchen.