Tuesday, April 16, 2019

Palmiers, Elephant ears, Orejas, Whatever you call them: A Tutorial of Cookrye

Today, we at A Book of Cookrye are going to deliver on what we assured you was forthcoming when we made puff paste. Yknow those cookies we made at the very bottom of that post?

Well today we're making them ourselves! We've cranked these suckers out a lot in baking classes because they're both easy and insanely good.  They're magical, dainty, flaky, butter-sugar bombs.
To really emphasize how easy they are: our teacher never even handed out a recipe. She just showed us how to make them and that was it. Imagine if you were making cinnamon rolls-- but you already had the dough made and the cinnamon-sugar at hand. So all you have to do is roll them up and bake them.
Elephant Ears/Orejas/Palmiers
Puff paste (buy it frozen or make it yourself)
Sugar
Pinch salt (optional)
Cinnamon or other spices (optional)

Heat oven to 375°. Line a pan with ungreased parchment paper.
Roll the puff paste into a rectangle between a ¼" and ⅛" thick, using sugar instead of flour to prevent it sticking. Sprinkle the sugar on top and lay it underneath before rolling, and use more sugar whenever it threatens to stick to either the rolling pin or the table.
When the puff paste is rolled out, put a very thick layer of sugar (mixed with spices and a pinch of salt if desired) on top. Roll it up from two opposite edges, so it will look like two jelly rolls joined in the middle. Or it will look like a scroll that's been rolled up on two sticks instead of one. Roll it loosely, so that even the innermost rings have room to expand. Dab the center with a little water and press the two rolls together. Freeze just until firm enough to slice.
Slice about half an inch thick. Be careful not to let the sugar fall out as you put them on the pan, and give them plenty of space to expand. Put a little more sugar on each to fill the empty spaces in the spirals. Next, flatten each one down to about a quarter inch.
Bake for about 7 minutes, or until the bottoms are nicely caramelized. Turn them over and bake until the other size is also caramelized.
These are by far at their best when made fresh. But since they're so quick to make (assuming you already have the puff paste ready), this won't be a problem.


As you can see, there's really only two things you need here: puff paste and sugar. You may not want to make own puff paste, or you may find attempting it intimidating. If so, we are pleased to report that the frozen puff paste at the grocery store is quite lovely. Frozen pie crusts always seem to have a cheap chemical undertone to them, but frozen puff paste seems to be just fine. So if you don't feel like getting to know your rolling pin, you don't have to.
I'd just like to point out that I managed to use plastic wrap without ending up with a hopelessly crumpled plastic wad.

For those of you who do wish to make your own, you should know that no matter how long I let it defrost, the puff paste would not unfold without basically tearing itself apart at the crease.

Those of you who seek to avoid this problem can freeze it without rolling it out so thin, and take a rolling pin to it to get it into a sheet when you actually use it rather than when you stash it in the freezer. As for us at A Book of Cookrye, we just cut it in half since it seemed like it'd fall apart anyway.

As you can see, we are about to roll this paste out just a bit thinner. But! This is what makes these so delicious! You know how usually when you roll out pie crust, you scatter flour all over your countertop? Well, today we are preventing the dough from sticking-- not with flour, but with sugar! Even if your puff paste doesn't stick at all, you should definitely scatter a lot of sugar both under and over it so it so that the dough gets nice and coated.

If you're making these, just accept that they will definitely make the Diabetes Fairy get out her book and put another mark next to your name. As we learned in class, you cannot use enough sugar in these. It simply is not possible. Now, let's detour for an optional ingredient:

Since (aside from the fact that we're using puff paste) you make these near-exactly the way you do cinnamon rolls, it makes perfect sense that one might want to add some cinnamon (or in this case, because it's always autumn if you truly believe, pumpkin spice).
All right, back to sugar. In case there isn't enough sugar embedded in the dough already, we're just going to throw more on.

You may think that the previous spice coverage was spotty and woefully uneven. But you can just sort of smear the sugar and spice around with your hands. You could also mix them together beforehand, but that would mean another bowl to wash.

Now, if you want to make these even simpler, you can just roll the dough up like cinnamon rolls. It won't have the sacred-to-those-who-care-about-such-things Traditional Shape, but honestly that doesn't matter. If you do want to make these in the actual elephant-ear shape, just roll the two edges to the center. Now, we at A Book of Cookrye tend to lose sight of just where the center is as we roll the sides in, so we first swipe a quick line down the middle with a fingernail.

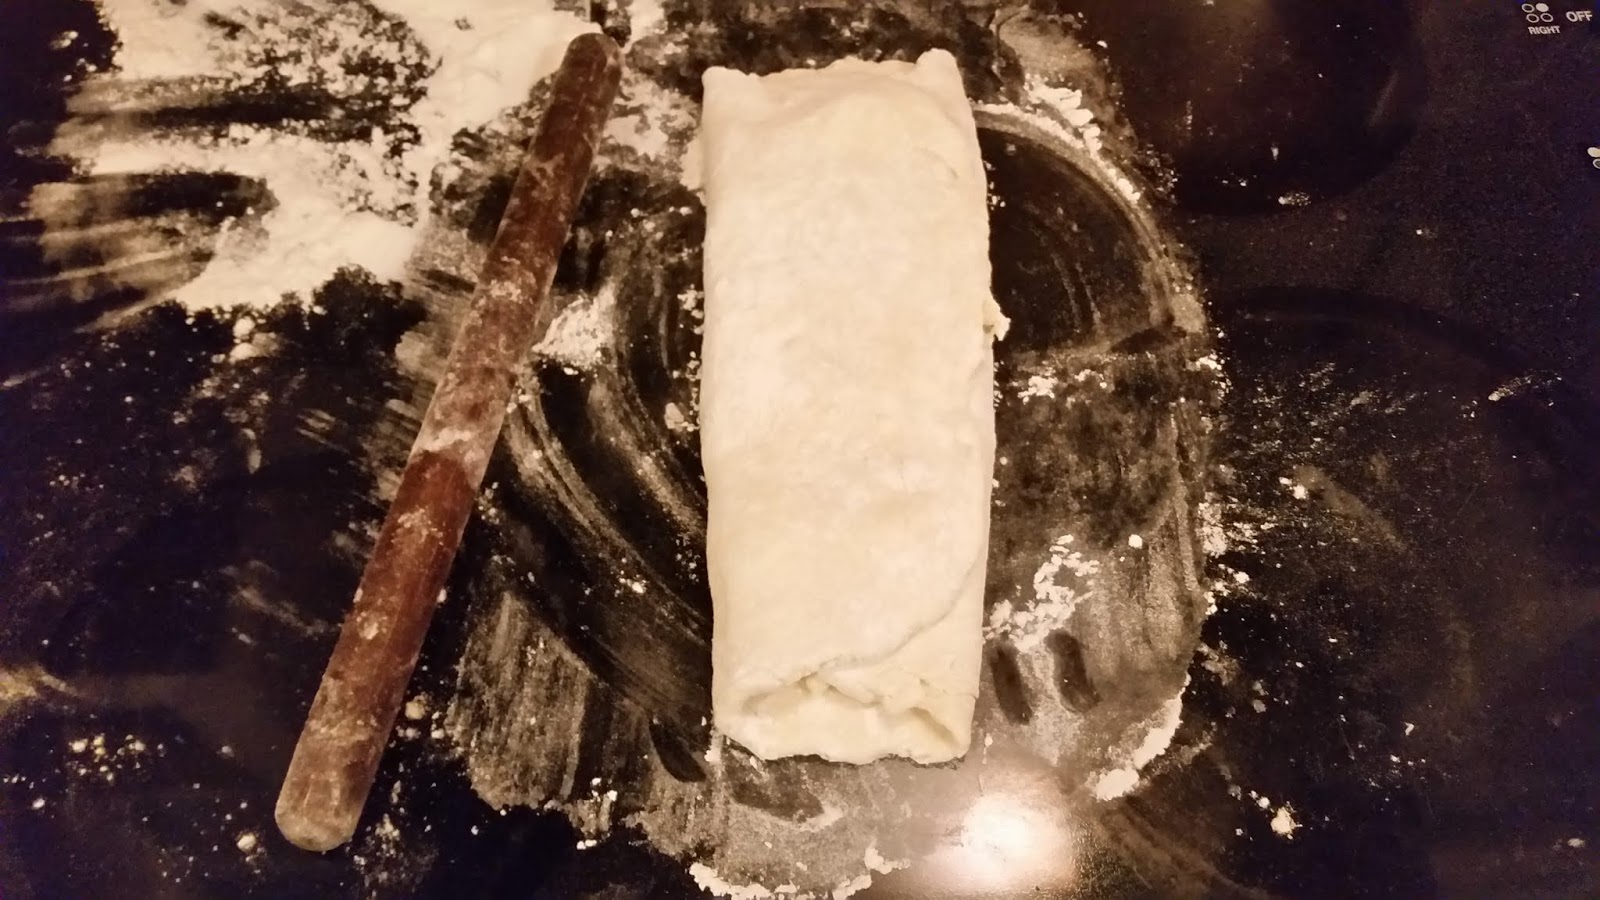
And now, we simply roll both sides in to the center. You want to do this kind of loosely, so that the innermost rings have room to expand in the oven. The sugar's going to want to fall down and out of your nice spirals as you roll, so just, um, sort of try to keep it where it lies as you go. We at A Book of Cookrye don't necessarily roll these things up so much as fold them on themselves over and over.


Kind of looks like a scroll, doesn't it?  Anyway, now we're going to dab a little bit of water where the two rolls touch, and then press them together. You can get out a brush if you don't mind having to wash it, but brushes are infuriatingly difficult to wash because grease and other things just hide in the bristles and will not come out. Therefore we prefer to just finger-dab it the water on.
Does the water keep the thing pressed shut? Eh, sort of. I mean, it helps a little.

As you can see, these are relatively small cookies. You could easily start with a wider sheet of puff paste and make bigger ones. Just be sure to roll them up loosely. As has been said about certain other substances, "If you roll it too tight, it won't draw right!"


Whatever size you have desired to make, they will slice without squishing better if you freeze them for maybe 5ish minutes. Enough to firm them up but not render them rock-hard. Anyway, in class we have bench scrapers (which is basically a hand-sized rectangle of too-thick-to-bend sheet metal that comes with a grip handle) which slice them really well. However, those do not often appear in the average home.
But, do you or someone you know feel insecure about your masculinity? Did that person feel the need to buy a Manly Metal Grilling Spatula For Manly Men because the girly normal-sized spatula in the kitchen makes them feel like the Manly Men Enforcement Squad will totally snatch up their man card if they use the girly spatula already in the kitchen? Well, grilling spatulas may be so big they're a tetch awkward to wield for any practical purpose, but they make bang-up cookie slicers!
I turned a lot of pieces of dead animals while cooking at a sports bar, and we didn't use some massive metal slab like this.

As you can see, these are more than a bit loosely rolled. That is not sloppy, that is deliberate. You see, puff paste really does puff up a lot (or at least it should).  You may think that all we do is slice and bake, but we're going to insert a third word in there: slice, squish, and bake. We'll get to that in just a moment. But while getting them to a pan, keep them upright (viz. don't turn them over to lay flat for baking) until you have set them on the pan. Elsewise all that sugar will fall right out. We further recommend that you sprinkle more sugar on top right after they're all on the pan so it falls into the empty channels.


Now let's get to the second part of "slice squish and bake." It's exactly what it sounds like: Squish the cookies flatter.

You can simply smush them with your hand. Or you can use your friend the absurdly oversized spatula. Or you can put paper/foil/plastic wrap/a cut-open gallon bag on top and then smash them en masse with another pan.

The reason for the paper (or whatever you're using) when squishing the whole batch at once is that the cookies will want to stick to whatever pan you're pressing down onto them. This way, they'll stick to the paper instead of the pan and therefore stay where you put them. Then you can just peel the paper off, and discover that your tiny little wall oven is absolutely perfect for the big baking sheet you're using. Check out the fit!

Rather like pancakes, there's no set baking time. But (and this is why you reeeeeeeally want to put a protective layer under the pan) the sugar will sink down and caramelize underneath the cookies. It's delicious and divine. But we want that on both sides, so when the look like this underneath (which will probably take 5-7 minutes)....

...it's time to take a spatula (even if you're like my great-grandmother and proudly flip tortillas barehanded) and turn them over.
After a bit longer a time in the oven so that both sides get caramelized, you get these!

Let's snap one open and admire the sugary flakiness.

These are absolutely delicious. They're fantastically light and airy and buttery and caramelized, like this divoon cross between cookies and candy. We will conclude by passing on some dire warnings from the teacher: If you freeze them ready-to-slice, the sugar will do weird things in the freezer and they won't bake right. If you freeze them after baking, they will be gummy and not so nice when defrosted. So once you start making them, you must bake and eat them right away. But these are so tasty it won't matter that you can't store them. I brought these to a friend's house. The first person to get one promptly took the entire batch and ate them without sharing. They are that good.

Sunday, April 14, 2019

You must try the garlic bread!: An Endorsement of Cookrye

We were talking to someone online about how great garlic is (believe it or not, I'm not kidding) and naturally the subject of garlic bread came up. After mentioning that my garlic bread technique is different than the usual way, I shared it. This came into Our Inbox of Cookrye shortly thereafter.

It seems that nearly everyone's better at taking pictures of dinner than we, because this garlic bread looks fan-damn-tastic.

Also, it turns out that cheese will brown on top even at as low a baking temperature as we use after spending long enough in the oven.
So garlicky and divine...

Everyone get some bread, butter, salt, and garlic cloves-- and go forth to make garlic bread! Here's the Book of Cookrye way to do it!

Thursday, April 11, 2019

Is puff paste really that hard?

Guess what we at A Book of Cookrye are attempting! Here's a hint: The recipe has three ingredients, but the directions run for two pages.


Puff Paste
2 c flour, plus extra for dusting on the countertop when rolling
Pinch salt, optional*
1 c butter, cold enough to be firm but not rock-hard
Cold water
Note: These are half of the original recipe amounts.

Sift the flour and salt into a big bowl. Then divide the butter into four equal parts. Cut up one of the quarters into the flour; and divide the remaining three quarters in half for a total of six pieces. Then divide each of these into small bits, but keep them in separate piles.
Mix the flour and butter that you already added to it (the original recipe says to use a knife, but honestly you can just use your hands), adding by degrees a very little cold water till you have made it into a lump of stiff dough. Pat it into a disc about 1-1½" thick.
Sprinkle some flour on your rolling surface (Miss Leslie thinks you should have a marble slab). Take the dough from the pan and coat it well on all sides with the flour. Roll it out the paste into a large thin sheet. If you're one of those rare people who can control what shape the dough rolls out to, try to go for a square or rectangle. Or at least something symmetrical.
All right, we've made an ordinary pie crust. Now we're going to turn this into puff paste. With the knife, put all over half of it, at equal distances, one of the six pieces of butter which you have divided into small bits. Fold the dough up and over the butter, flour the dough and the table if the dough even tries to stick, and roll it out again. For some reason, it works better if you only push the rolling pin away from you, instead of rolling it back and forth. Add in the same manner another of the portions of butter.
Whenever the dough even makes the slightest attempt to stick to the table put flour under it or else you will go nuts trying to deal with it. Similarly, dust the top of the dough with flour if it tries to stick to the rolling pin.
Repeat this process till the butter is all in. Then fold it once more, lay it on a plate, and set it in a cool place till you are ready to use it.
Then divide it into as many pieces as you want sheets of paste; roll out each sheet, and put them into buttered pans.
The original recipe says "Bake in a moderate oven, but rather quick than slow" (which is probably about 375°). No air must be admitted to it while baking.
The edges of paste should always be notched before it goes into the oven. For this purpose, use a sharp penknife, dipping it frequently in flour as it becomes sticky. The notches should be even and regular. If you do them imperfectly at first, they cannot be mended by sticking on additional bits of puff paste; as, when baked, every patch will be doubly conspicuous when it rises up and turns into a huge wart of flour. There are various ways of notching; one of the neatest is to fold over one corner of each notch; or you may arrange the notches to stand upright and lie flat, alternately, all round the edge. They should be made small and regular. You can form the cut-off scraps into leaves or other shapes with little cookie cutters.
Puff paste freezes well, but the homemade stuff tends to go a bit stiff in the refrigerator or freezer. You might want to freeze it as a flat sheet instead of folding it up. Also, as Miss Leslie notes in the introductory note to the pie chapter, it comes out better if made in the cold. The butter you're folding in is less liable to melt while you're making it, so it will keep its layers better and then rise better when baking.
If the above directions for puff paste are carefully followed, and if it is not spoiled in baking, it will rise to a great thickness and appear in flakes or leaves according to the number of times you have put in the butter.
It should be eaten the day it is baked.

*The recipe doesn't mention adding any salt, but pie crust without it tastes like nothing.
Or into nine; and roll it in that number of times.
This way looks really cute after baking. The folded-over bits turn into puffy triangles all around the edge.


Slightly adapted from Directions for Cookery in its Various Branches, Miss Leslie, 1837

If you've been reading this blog for a while, you've gotten to witness my progression of pie crust skill- from this:
Back when we made individual fruit-and-kidney pies in a muffin tin.


To middlingly-skilled like this:
It nearly landed in the pan in one piece!


To, finally, this:
My own success terrified me.

In fact, after we'd gotten about as skilled as the last picture, we once semi-accidentally made puff paste with cheese, which (once cut into squares) made lovely biscuits.


And so, we decided to look at one of the longest recipes in the entire book. One that has scared us for a long time. After all, when you can barely roll out a pie crust once without ripping it to shreds, why would you be so stupid as to try to keep folding it--- and then rolling it again?
As we so often do when trying intimidating recipes, we decided to follow absolutely all of the instructions- even the ones that we usually skip in the name of laziness. Things were happening in the Kitchen of Cookrye that never happen.
I don't think I've actually sifted flour when a recipe said to since before I could legally drink.

Following every minute instruction means that whatever happens, we are clear of blame. No one can say something like "Your cupcakes turned into hockey pucks because you forgot to spin the bowl thrice widdershins like the recipe says!" If this fails, we can blame Miss Leslie for faulty recipe-writing, not ourselves for skipping half of the steps. Speaking of steps, let's get to the part of this recipe where all the butter makes the kitchen start looking like Thanksgiving!
As you gaze upon the butter, you should know that we're cutting this recipe in half.

In addition to using a sifter, we got out... this thing! I'm kind of surprised we still have it. When I was a wee tot learning how to cook, I asked Our Mom of Cookrye if we still had it in a drawer. The trouble was I didn't know what it was called. Our Mom of Cookrye didn't know either, which made an interesting experience out of finding what long-abandoned corner of the kitchen it had gotten to.
In case you too are wondering, it's called a "pastry blender."

All right, so far this looks like we're making regular pie crust, doesn't it?

Now, this is the point where it starts to look less like pie crust and more like puff paste. Miss Leslie thinks we should have a marble slab for this purpose. As it happens, we actually have one! Sort of.
Flat-top stoves work great for a lot of purposes. However, heating pots of food is not one of them,

This prompts the question: Was marble cheaper in 1837? Granted, Miss Leslie was from Philadelphia which is near(ish) to a lot of quarries, so maybe marble was cheap where she lived. But how many families embarking on the long journey west carried marble slabs with them?

All right, so here is the last point where we're making a nice, normal, easy(ish if you know what you're doing) pie crust. Note that we've cut the recipe in half and it's still enough to cover a lot of the stove if we were to roll it out as thin as it would be if we were about to bake it. While bulk production makes sense from the 19th century perspective where kitchen sinks didn't have running hot water and a little bottle of soap, where were you supposed to store the extra without a freezer?

And now, we finally get to turning this into puff paste. What we're basically going to do is repeatedly encase butter in the dough. So first, we fold it over into a sort of dough-butter sandwich.
 
And once you've got that rolled out flat again, you keep adding more butter and folding it on itself, again and again and again. It helps to give the dough a quarter turn every time you repeat this. Otherwise, you end up rolling it into an annoyingly long rectangle.

Believe it or not, re-rolling this actually got easier as we kept doing it. The dough got springy and almost rubbery. It seemed a lot more resilient against tearing every time. Like, the first few times the dough as almost like semi-delicate cookie dough, but as we reached the last few butter portions, the dough had gotten so tough we could have hung it off a coat hanger without it tearing.

You may be surprised what a difference repeated encounters with a rolling pin made. The dough got really smooth and kind of elastic toward the end of this. It even looks different. To our own surprise, this entire process (that goes on for two pages in the book) was really fast once we started rolling all those layers of butter in.

And now we've got all the little butter pieces encased in the lovely pie dough! See how you can see them kind of peeping through the translucent layers? That's a good sign. It means the butter's still in separate layers rather than just mixed into the dough.

And that, dear readers, is how to make puff paste like it's 1837! Let's revisit the question we started today's perpetration with: Is puff paste really that hard? Well, if you can roll out pie dough once without cracking and tearing it, rerolling it a few more times to turn it into puff paste is easy. If on the other hand you can't, perhaps this recipe is not good for your sanity.
 You may be wondering what you might do with this now that you've got it made. Now, you can make a lot of super-fancy dessert things easily (the hard part was making the damn puff paste). But our favorite (at the moment) is... these!


As the recipe promised, the puff paste did indeed expand in the ovn, giving us these lovely cookies.


Let's snap one open and BEHOLD THE FLAKINESS!

Assuming you can make the puff paste (or just buy it frozen), these buttery sugar-bombs are surprisingly easy to make. That post is forthcoming!