We at A Book of Cookrye just survived our first practical exam! Everyone in the class had to draw two recipes the week before test day, and I got assigned a pan of cornbread and peanut butter cookies. As you might expect in a baking class geared toward doing it commercially, they have exacting standards for appearance, uniformity, etc. (Also, your baked perpetration should probably taste good, though they don't emphasize that as much as you may expect.) When we made peanut butter cookies in class, they spent more time telling us that they damn well better have visible fork lines on them than they did saying what they should taste like. And so, I went home dutifully cranked out the official recipe from the textbook. It indeed had the visible fork marks and appropriate spread.
You may have noticed they look just a bit pasty-colored. Just to see what other people thought since these are for a grade, I called some friends and asked them to taste-test my midterm practice. Everyone thought they were oddly bland and really dry.
This is consistent with all the textbook recipes, incidentally. They are all curiously bland. The official brownie recipe in class uses only three-quarters of a small bag of chocolate chips, melted into enough batter to fill one of those massive cafeteria baking sheets.
Anyway, with my midterm grade literally riding on a batch of cookies, I decided to fudge things and make... chatters! After all, they tasted really good the last time I made them.
Unfortunately, as I always seem to do, I waited until the night before the test to get out the recipe. Then, that very night, a storm sent several trees through the local power lines. This meant courteously asking some of my nocturnal friends if I may come over on such short notice and borrow someone's kitchen.
However, since there were people sleeping in the house, other arrangements had to be made. And thus did I pack the toaster oven (which I initially got in the name of keeping garlic fumes out of the house) and a bag of ingredients to set up on someone's carport.
THIS IS FOR A TEST, OKAY?
Some people say that the real test of any skill is whether you can do it in terrible conditions. I discovered that I have a lousy memory and forgot to bring peanut butter. For peanut butter cookies. But after borrowing ingredients and repeatedly handing over utensils while asking "lick this clean real quick, wouldja?" we produced a batch of cookies that looked like this!
They may not have the stupid fork marks that we obsessed over in class, but they have adorable crackle tops. More crucially and unlike the official recipe, no one ate them and said "They gave me sour burps."
We then all looked at the big bowl of cookie dough and asked ourselves if we really felt like making that many cookies when only six of them fit on the tiny toaster oven pan at a time. We then decided to make American-sized cookies instead.
Note the attempt to adapt to what we're using: Since the back of the oven is a lot hotter than the front, the back row of cookies is bigger in an attempt to keep them from burning.
And so, remembering at 2:30AM that we also had a written test, I returned home to gather my books. Since the electricity was as dead as ever, I asked myself if I really wanted to study in a hot house by the light of an oil lantern. This happened instead.
Note the drink refills brought two at a time.
And so, worried that my cookies would not be the same when made under the drastically different conditions of indoors and in a real kitchen, I took my scrawled recipe notes, desperately hoped to read my own handwriting under the unforgiving fluorescent lights, and made these.
Whether or not they're good enough, they're as good as they're going to get!
I don't know what TV show this comes from, and prefer to imagine that this one half-second of animation sprang out of the online ether.
Yes indeed, today is the...
First of all, a big salute to Yinzerella of Dinner is Served 1972 for organizing this four times and counting.
Recipe swaps like this always seem to bring out the more, shall we say, interesting things from people's cookbooks. Of course, I say that as someone who caused an unsuspecting Bittersweet Susie eat a pan of dried-out fish and breadcrumbs last year (in my defense, the recipe didn't look that bad when I read it).
This year, I sent in an Italian recipe for pistachio pie which hopefully Battenburg Belle found unusual yet good. Then again, I had the same hopes for the fish pie I sent in last year. I then got assigned this, courtesy of Jenny over at Silver Screen Suppers:
This is the best Pieathlon ever, because this year we get James Cagney for dessert! Hopefully he'll drop the gangster persona (which he reportedly didn't really like anyway) and sweep me off my piecrust-rolling feet.
What, you thought he was just a movie gangster (or haven't heard of him)? You've just got to pause for a few seconds and watch the man tap dance down a staircase without falling. He's not even close enough to the handrail to grab it if he loses his balance while, again, jumping and tap-dancing on stairs.
Tragically yet obviously, we do not get the man himself for the Pieathlon, but instead a pie recipe he sent to a cookbook:
The pie looks like it will be really good... until we reach the very bottom of the page and put one half-pound of "sliced process cheese" in it. Really, it looks like someone took a perfectly normal recipe for apple pie and stuffed it with half a pound of sliced process gimmick and novelty.
To be clear, no one here is bashing apple pie with cheese. As skeptical as I was when first served it, apple pie with cheese on top of it is actually really delicious. There's no reason to believe putting the cheese in the middle of the pie rather than on top wouldn't be good. However, absolutely and literally every apple pie with cheese I've eaten had actual Cheddar (and significantly less than one half-pound per pie). Tragically, the Pieathlon rules strictly forbid substitutions unless you have a damn good reason, and "I really don't like this" is not a valid excuse. The recipe very clearly specifies one half-pound of sliced process cheese. So regardless of how much I think American process cheese tastes like fermented plastic, there is no way for me to fudge the directions and use real cheese.
A lot of my engineering school textbooks used this cover font.
Apple Cheese Pie
Make as directed:
1 box pie crust mix
Roll out half of the dough and line a 9" pan.
Toss in a large bowl until mixed:
7 c pared, sliced cooking apples
½ c white sugar
½ c brown sugar
3 tbsp flour
¾ tsp cinnamon
¼ tsp nutmeg
Put half of this in the pie pan and cover with a layer made of:
½ pound sliced process cheese
Cover with remaining apples, then dot with:
2 tbsp butter or margarine
Roll out the remaining pie dough, cover the pie, and cut steam vents. Press edges to seal.
Bake at 425° for 40 minutes, or until apples are done.
James Cagney, Cooking with the Stars by Jane Sherrod Singer, 1970
All right, let's ask one basic question: Did James Cagney ever make this pie? After all, he didn't seem enthusiastic enough about the recipe to be in the photo that came with it. Or, if he didn't like to cook for himself (after all, attaining enough dancing skill to tap-dance down stairs without tripping can consume a lot of time), did he ever ask whoever he hired as a cook to make this exact recipe for him? If he did, I'd like to think that he would have at least used real cheese. (Then again, Mamie Eisenhower served cakes made from mix during her time as First Lady.)
While many celebrities do indeed send recipes they themselves actually like to whoever's asking for one, other recipes that purportedly fell from the stars are a bit suspect in provenance. Do you really think the Hollywood elite of 1935 loved to turn Bisquick into approximations of cakes and puff paste?). More recently, it seems everyone's favorite crankypants from The Office (American version) did not particularly care for the fast food he was endorsing...
Apparently he backpedaled and tried to claim it was a
joke/hoax, but there was still a spate of articles trying to turn this
into a controversy.
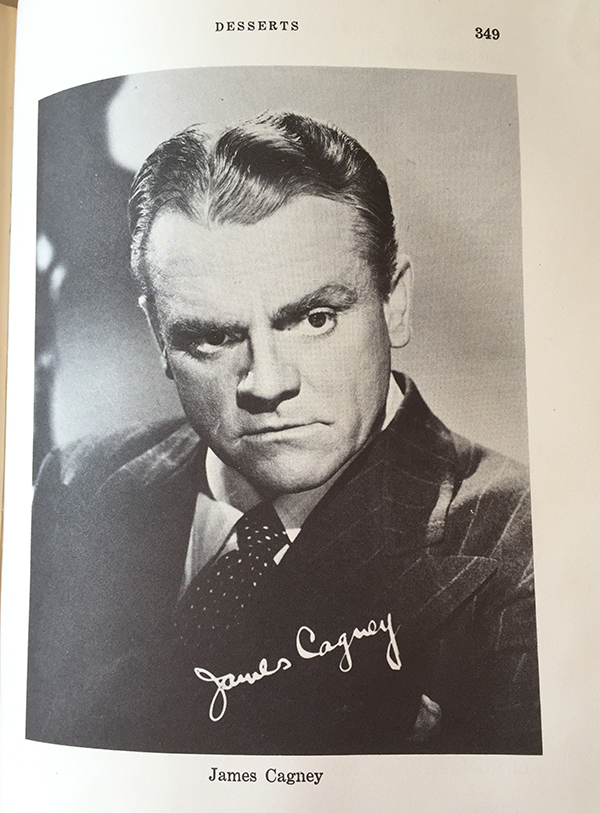
Back to James Cagney and pie. Rather than just mention the photo that comes with the recipe in passing, let's examine it a little more closely.
The caption says we are looking at James Cagney's favorite lunch of pâté, mushroom soup, and apple cheese pie, but I don't see any of those on the table. The bowl may contain mushroom soup, but appears to share the photograph not with an apple cheese pie and pâté but with a casserole and tray of cold cuts. Maybe they baked the pie in a casserole dish and served a tiny amount of pâté on the deli tray?
The photo is "courtesy of BP Singer Features," which shares a last name with the cookbook author (though her last name is common enough that it doesn't show up with a red underline when typing, so that may just be a coincidence). A search for "BP Singer Features" turned up various adventure novels of yesteryear.
All right, enough researching, let's get to pie!
This recipe begins with a lot more work than I usually put into apple pie. By which I mean I had to peel nearly four pounds of apples, where I would normally leave the skins on and claim it added flavor or something like that. But while staring at the recipe and the dauntingly large pile of apples, I had a genius idea! Hasn't there been a doughnut cutter buried in the back of a kitchen drawer even though literally no one here has ever made doughnuts? Wouldn't such a device be perfect for simultaneously shearing off the apple skin and excising the apple cores?
It might have worked had I not overestimated the structural integrity of old cookie cutters.
Instead, I had to get out the knife and do this nine times. You may notice that I missed several tiny skin pieces, but these apples are about to get trapped in a pie crust with one half-pound of sliced process cheese anyway.
By the way, I may have inadvertently given this pie more dignity than its one half-pound of sliced process cheese deserved. As we all know, if it was 1970 and you didn't live in apple-growing country, apples probably came in only two colors: Red Delicious and Granny Smith. However, the supermarket near me has an entire rack of different varieties of apples, and it seems each week they over-order one kind and must steeply discount them just so they sell before turning to bruised mush. This week, they had way too many Pink Lady apples, and thus set their price at like half of what their other apples cost. (In a move to reduce food waste, I bought the ones that were just starting to go soft, leaving the perfect ones for those who didn't intend to bake them.) The absurdly cheap price was a slight consolation upon beholding how much of the apples was going straight into the trash:
I think we all know how I feel about wasting that much food:
At any rate, all that paring and cutting yielded a pot of sliced beige. Incidentally, we're taking advantage of this pot having little measuring marks to skip trying to somehow get apple slices into a measuring cup. Since one quart is four cups, it stood to reason that if the apple slices fell just short of the 2-quart line, we would have seven cups or close enough.
The way all the white sugar sank through the apple slices and disappeared into the depths reminded me of when I used to promiscuously and excessively dump sugar on Corn Flakes in an attempt to make them edible. I know I'm supposed to say that I do not need to bury Corn Flakes in diabetes crystals now that I am (allegedly) grown up, but instead I just stopped eating them.
Moving right along, we are supposed to buy a pie crust mix and make it according to package directions. Here I must confess to and apologize for veering away from following the recipe exactly.
Pie crust mixes are surprisingly hard to find these days (just watch- someone else doing the Pieathlon this year will have found a whole shelf of them in the store right around the corner from their house). My guess is that unlike cake mix, they don't remove much work from what you're making. You still have to roll a lump of dough into a thin sheet and then get it off the counter, all while doing your damnedest not to tear it.
I briefly considered driving 20 miles to the nearest store that stocked pie crust mix- and then asked myself just how much I was willing to drive chasing hard-to-find products when I'm about to dump one half-pound of sliced process cheese on them. Then I bought this.
Store-brand!
I haven't used a premade pie crust in a long time. My first impression after unwrapping one: they are oddly rubbery and smell like those cheap tortillas that have a weird chemical aftertaste that no amount of cheese (or even one half-pound of sliced process cheese) can cover. However, I had this sucker in the pan in less than thirty seconds. It may look sloppy, but again, one half-pound of sliced process cheese.
All right, it's finally time to get to the one half-pound of sliced process cheese! This picture does not properly show just how rubbery and weird it looked. It was like someone started making a pie and tried to turn it into orange, naturally-flavored Shrinky Dinks.
Believe it or not, there are apples under that cheese.
Let's briefly pause and gaze on the huge pile of wrappers that remained after putting one half-pound of sliced process cheese on top of a pan of apples.
All right, back to the pie! One very specific image came to mind when I gazed on the rubbery orange layer that I had voluntarily put in the pan:
Though I did not take the above picture nor do I even know where to find this buffet of despair, it is is an accurate representation of the cafeteria food when I went to college. At least once, they used ketchup instead of pizza sauce. However, since the cafeteria management were either too dimwitted or too apathetic from low pay to serve better food than usual on orientation weekend (when the parents were all present), my parents believed me when I called claiming I was starving and begging for grocery money even though we had surrendered an obscene sum on a mandatory meal plan. And for the record, I never used the grocery money to make things that looked like this.
Actually, the apples coated in spiced sugar were really good. But I was so aghast at the rubbery sight of one half-pound of sliced process cheese that I had the top crust pressed on it before realizing that I forgot the crucial last step:
Thank goodness I remembered to dot the pie with 2 tablespoons of butter or margarine before it was too late! You just know that those two tablespoons of butter or margarine are what will make this pie a success.
This pie spent 40 minutes in the oven, exactly as the recipe said. I usually cook apple pie for longer, but it's been pointed out to me that the apples don't need to be completely cooked soft. Many people like for the apples to retain some of their snap. This seemed as good a time as any to test the idea.
The smell coming out of the oven was... odd. Imagine if you will someone making a box of Kraft Macaroni and Cheese (the kind where the cheese is in powder form) while your mom's Glade apple candle that smells like aerosol bathroom freshener burns on the kitchen counter. Now intensify that smell until it follows you throughout the house. I had to hide the oven odor somehow, so in desperation I decided that I really wanted cinnamon tea. You know, the kind that involves boiling cinnamon sticks for half an hour.
I actually like apple pies that come out lumpy on top from the crust melting into the apple slices before it gets baked hard. It promises the delicious apple chunks you will find inside the pie. However, this particular pie also oozed out some of the one half-pound of sliced process cheese, which now bore a striking resemblance to artificially colored plastic pus.
The cheese splurts looked even worse as they shrivelled while cooling.
And so, I dragged this pie out into public!
No, I was not the only one who ate this.
You know what's really weird? You couldn't taste the one half-pound of sliced process cheese at all. It added a weird, almost-creamy texture to the pie and made it land in your stomach like a concrete ball, but nevertheless you couldn't taste it. Actually, the pie was kind of bland.
This is what a pie impregnated with one half-pound of sliced process cheese looks like.
I don't believe it myself, but the biggest complaint at first was that it needed a lot more
cinnamon. Although any time you got a forkload from the edge of the pie
where it was just cheese and crust, you could taste the one half-pound of sliced process cheese and the preservatives in the crust. It was awful.
After being attacked by a fork, it looked and smelled like the aftermath of Thanksgiving.
Note that I said that the underuse of cinnamon was the biggest complaint at first. Because within only 15 minutes of eating this, we both had a slight yet building feeling that something inside us was not right. Ever had your body try to reject food? Or feel like whatever you just ate should not be inside you? It's not that either of us felt sick, but a little bit of light vomiting might have been quite refreshing. Very soon, we both felt like this:
Although it wasn't nearly as cute as the baby-faced and rosy-cheeked construction worker makes it appear. Imagine this guy's hands are just a bit lower.
You may think "That's what you get for eating one half-pound of sliced process cheese!", but between two people, we only carved out this much pie:
As shown above, we each only had about one eighth of the pie on our plate. Which means we had one sixteenth of a pound of sliced process cheese each. Furthermore, neither of us actually finished the slice. Nevertheless, before we went anywhere there was much discussion of whether we would both survive the car ride without puking. (Also, the rest of the pie somehow ended up in the trash.) If James Cagney actually ate this pie, do you think he also found himself eating dry toast to quell his internal distress and ensuring the bathroom had some light reading?
Well, that's it for this year's pie! Thank you for electronically joining me on this adventure! If you haven't yet, have a look at what everyone else made! If a link's not working yet, check back later. The Pieathlon is a seriously international event spanning time zones, countries, and hemispheres, so links are coming in all day!
Yinzerella of Dinner is Served 1972 organized the Pieathlon and made Betty Crocker's Chicken-Sausage Pies. The recipe comes from Betty Crocker's more questionable period of weird cookbooks.
Jenny from Silver Screen Suppers took the booze I needed after making the recipe she sent- and made a Rum Pie.
Battenburg Belle got to make my recipe- Italian Pistachio Pie. Who knows, maybe it's actually good!
Dr. Bobb of Dr. Bobb's Kitschen made Lemon Raisin Pie. Is it a lemony flea cemetery or something worse? Go to his page and see!
Poppy Crocker of Grannie Pantries made Nutty Caramel Pies. Whether they were good or not, it looks like there were more than one.
Greg at Recipes4Rebels.com got off easy this year! He made Apple Pie.
Bittersweet Susie got to bust out a waffle iron (or maybe a box of Eggos, depending on the recipe) and make Waffle Pie.
Vintage Recipe Cards made Angel Pie. Just what is an Angel Pie? In a recipe exchange like this, it could be anything, and there's only one way to find out...
The Food and Wine Hedonist gave us Savoury Pie. Based on the spelling, I doubt the recipe is American.
Taryn of Retro Food for Modern Times made Fluffy Lime Pie. After few Pieathlons, even innocent words like "fluffy" in a recipe name set off alarms in my mind, so do share her journey of pie discovery!
Are those croissants sticking out of that thing like goat horns?
Yes indeed, the fourth annual Pieathlon is impending! In other news, the fourth? It's really been that many?
At any rate, I thought I might do a little how-to for those who want to make their own pie crust when trying the hopefully scrumptious recipes. If you look at the pie recipes I've done here starting with the oldest, you can actually see me getting better at making them (or you can start with the most recent and watch me get worse). So I thought I'd share what I figured out.
First, a tip I got from Our Mom of Cookrye when I made my first attempt: Don't try to make your own pie crust for the first time and make your own filling from scratch. That will likely be an overwhelming and frustrating effort, and no one wants that. Make a box of instant pudding, get a can of pie filling, or have something else ready to just dump in when you're done. (Or, for a slightly more homemade touch, you can get a half-pint of cream and whip it with powdered sugar to taste. Put it in the pie crust after you've baked it, pop the whole thing in the freezer, and in a few hours you'll have ice cream pie.)
You can also make little mini pies (using a cupcake pan if you haven't got miniature pie pans) if rolling a big pie crust is too hard at first.
Making your own pie crust is actually not hard, though the first few attempts may look like this:
Worry not, because you can still take all the other pieces of dough that fell off and press them in like patches. It may not be pretty, but you were going to hide it with pie filling anyway. Besides, if anyone you're serving this to gets in a snit over the crust's appearance, that person clearly didn't want pie anyway.
While I've tried multiple pie crust recipes which resulted in things that looked like the above photos, this is what actually brought me to pie crust that did not fall apart when I tried to put it in the pan:
A Book of Selected Recipes, Mrs. George O. Thurn, 1934
So, for every one cup of fat, you'll use three cups of flour. If you're making a pie with only a bottom crust and no top crust, ½ cup of butter and 1½ cups of flour will be just right. A lot of people use shortening or lard and swear that what they use is the only thing that works. All my attempts at making pie crust with shortening have been crumbly and sad, and I've never tried lard. But clearly they work for a lot of people, so it must just be my rotten luck with them. At any rate, I recommend using butter because that's what works for me. But you may find that shortening makes for beautiful pie crusts in your hands, and butter makes really sad attempts at a pie crust.
Now, for every cup of fat, you'll want to use a teaspoon of salt. Stir the salt into the flour, then add your butter (or whatever you're using). The butter is straight out of the refrigerator, unsoftened.
Now, get out a pastry blender if you have one and a couple of knives if you do not.I've also done this bare-handed even though all the books say not to, and have noticed no difference. If you do it with your hands, be sure to toss and fluff it up as you force the butter to mix in. What you're going to do is cut and mix the butter into the flour until you get this:
It's now pretty uniformly pebbly-looking. Now, we're going to add water until it makes a dough. Many books say you must use very cold water, often saying to use strictly iced water. I have always used cold water directly out of the tap, and it works just fine.
At this point, I suggest you just use your hands to mix it. A spoon doesn't seem to work very well- it flings little pebbles out but doesn't really force the water to actually play nice and mix in. Add the water a spoonful at a time, thoroughly mixing it in before you add any more. At first, it will look like frustrating modelling clay.
But sooner and with less water than you may think, it will form a cohesive lump.
The above dough has almost got enough water in it
When you've got it right, there are no crumbly bits of dough in the ball or stray pebbly bits in the bowl, and the dough may be ever-so-slightly sticky. When you form it into a ball, you don't have any bits that try to fall off it. If it is still to crumbly, add more water. If it's gone really soft, add more flour.
When you've got it just right, make the dough into a ball. If you're making multiple pie crusts, divide the dough up and make one ball for each crust. For a pie with a top and bottom crust, use a slightly larger portion for the bottom crust since it must cover the bottom and sides, whereas the top only has to flatly cover the whole thing.
And now we reach the step that makes a lot more difference than you may think: Putting the dough in the refrigerator! Don't ask me why, but if you roll it out now, it will fall apart, crumble, and be sad. But if you put it in the refrigerator for a little bit, for some reason it will roll out very nicely. Heck, t might even stay in one piece. So put each portion of dough in a storage container or sandwich bag, and let it spend an hour or so with your leftovers (though you can leave it a couple of days if you're in a make-ahead mood).
After that, we finally get to the hardest part: rolling this thing out! The first thing I've learned is to make sure whatever countertop or table you're using is completely dry. Wipe up any stray water drops and give them a minute to thoroughly dry up. No matter how thoroughly you coat the counter with flour, your pie crust will stick to any wet spots and tear apart. Sometimes like it seems like the dough goes out of its way to find spots to stick to, so be sure you've dried them all.
Now, a lot of people coat the counter and rolling pin with flour, but I find it a lot easier to thoroughly coat the dough instead. Just make a mound of flour in the center of whatever space you've cleared, and drop the dough on it over and over until all sides are coated thoroughly.
As you're rolling the dough, the extra flour will get pushed over the counter and do a really good job keeping the dough from sticking.
All right! Let's get start rolling!
Well that didn't make much difference, did it? But that's exactly as it should be. Especially at first, you want to barely use enough pressure to make a visible difference. Otherwise, your dough ball will crack. And as you roll, those cracks will widen into huge peninsulas as your dough ball flattens into a sheet, and it will not matter how much you try to press them back together. If this happens (and it often does), just wait until you're getting the crust in the pan before pressing them back into one united whole.
If anyone comments about visible seams where you pinched it back together, take away their pie. They clearly didn't really want it.
When you're rolling, it seems to work better if you only push the rolling pin away from you. Going back and forth leads to the aforementioned cracks. And only make one pass with the rolling pin. Then, pick up the dough, give it a quarter turn, and make another pass. Give it another quarter turn, and again go over it just once with the rolling pin. And basically, just keep going in this way until it's big enough.
Picking the dough up and turning it (instead of alternately rolling it forward and sideways) will do wonders toward keeping it from sticking. And if there are any spots that threaten to stick, just tuck a little flour under them. Note: you pick up the dough to turn it. Otherwise, especially as it stretches thinner, it will do its damnedest to stick. (Side note: If rolling the dough into one big sheet is too frustrating at first, you can do what I used to: Roll four or five strips, lay them across the pie pan, and press the seams shut. Obviously it is is a bit trickier to pinch the pieces together for a top crust, but you can just do a crumb topping instead.)
As your dough sheet gets bigger, it will probably be wider than your pin. So instead of just a single pass in each direction, you'll just want to make sure each part of the dough makes contact with the rolling pin once between each turn.
So, when are you done rolling? Bring forth your pie pan and see!
Since it has to go up the sides instead of laying flat across, it should go a little ways past the rim on all sides. Now comes the big moment: We're going to lift this pie crust off the counter and get it in the pan!
Actually, don't lift it. It will tear under its own weight when you pick it up. Take your rolling pin, set it at an edge, and gently hold the edge to the pin as you start rolling across. In other words, wrap the dough on the pin. It may be a bit wider, and that is not a problem at all. You know how you were lifting the dough every time you turned it? And
turning it literally every time you rolled the pin across it? Now that's
going to pay off because you know with certainty that the dough is not
glued to the counter.
Now, holding the encrusted pin very gently, you're going to unroll it over the pan. The trick here is starting placement. Place your rolling pin so that an inch or so of dough will hang over the edge where you're starting. That way, you won't have a lot of dough hanging over one side. Then unroll the dough over the pan, being sure to go straight across. Imagine if you will a line that starts where the pan rim touches the rolling pin, goes through the center of the pan, and across to the point on the rim directly opposite where you started. Keep the center of your rolling pin on that line as you roll it across.
If your crust is off-center, just gently tug it sideways, lifting up any parts that don't want to move.
Now we have a lovely pie crust draped over the pan!
Now, go around the crust, gently lifting the overhang until it falls into the pan. It probably will not settle neatly into the pan in all places. So, while you are holding it just above the rim so it doesn't catch and tear, gently press it into place. As you press, you're trying to bring more dough down from your hand into the pan, not stretch what's already there.
Once you've got that done, get a pair of scissors or a knife and trim whatever's still hanging over the edge. You can use these scraps to patch any holes, or to fix any spots where the crust doesn't quite reach the edge. Just fingerpaint a little water on both the patch and the spot you're pressing it onto. This will keep your repairs firmly glued on.
Now, you want to press the dough so it goes under the rim of the pan just a little bit. Pie crust wants to shrink in baking, so this will help fix that. One way which is both easy and looks really nice is to notch the dough every half-inch, fold each little flap into a triangle, and press the point under the rim:
All folded and ready to hook under the rim!
Done!
Or, you can just press the dough under the rim:
Or you can try to do that bit where you make a squiggly rope-looking or scalloped line around the edge as you press it under. The trick is to pinch it up as you go.
The scalloped one may look super cute now, but it came out of the oven looking just as plain as the one on the right.
Now, if you're baking the pie crust empty, you'll need to prevent it rising up off the pan in one big bubble. You can prick it all over the sides and bottom with a fork (giving the fork a little jiggle just so you can see the pan through each little hole), and that will definitely help. But it seems like I often see a huge air bulge forming in the middle of the pan as the crust bakes regardless of how many holes I poked for the hot air to escape through. If this happens, just grab a fork and immediately stab the crust in the center of the bubble. It will deflate, and should stay flat the rest of the time the crust bakes.
I've baked crusts anywhere from 350°-400°, depending on what else was in the oven. They're done when they're golden in the middle and probably brown at the edges. It tends to be around 15-20 minutes. Watch them carefully-- since they're so thin, they'll go from beautifully baked to burnt really fast.
And that is how you do your own pie crust! If you like cooking, it's actually pretty fun once you've had some practice at it. And though your first ones will probably look raggedy, you can just confidently declare that it is homemade charm.