I can't believe this is the second Pieathlon of the pandemic- after the vaccines came out I thought we'd soon be glad it's over and shudder about how bad it was before science saved us (wear masks and get your shots if you haven't, everybody!). I wonder how many of us would have spent so much time obsessing over how terrible that weird Cats movie was had we known that civilization was about to collapse.
For those of you keeping track of my life based on what kitchen is in the background, I went out to visit friends for a fortnight. That was fifteen months ago. You just never know where life will take you when civilization crashes. One day you're going to cooking school and filling out job applications, the next thing you know you're helping your friends do engine repairs and also filling out job applications.
But enough about me, let's talk about pie! Yinzerella decided we need more pie in our lives! I always appreciate being able to swap recipes with other people who love digging through cookbooks and seeing what recipes everyone thought someone should have electronically dropped in their unsuspecting kitchens. I try to send in a recipe that's a bit weird and unlike anything we would make these days but still pretty good. Oftentimes it turns out I sent a recipe that's not good at all (sorry, Bittersweet Susie and Surly!), but that's the fun of sending and receiving surprise recipes. This year I sent in something called Ozark Pie from a dessert cookbook my grandmother bestowed upon me after one of her recreational thrift-shop treasure hunts. I've been meaning to try it for a while, but never got around to it. Hopefully, Taryn at Retro Food for Modern Times had a good time making it.
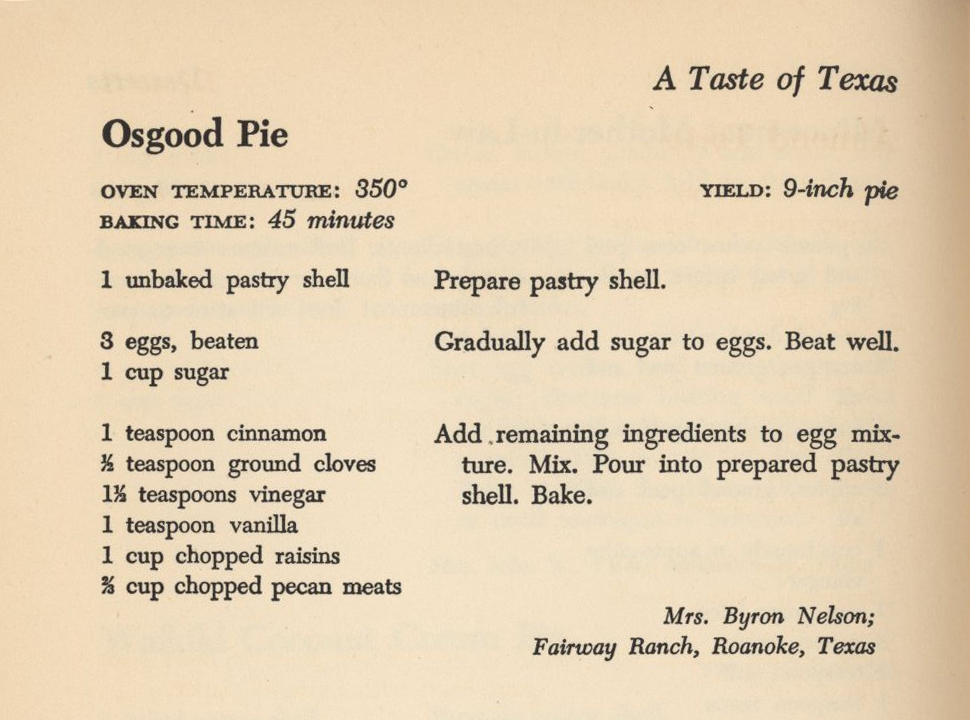
In return, The Nostalgic Cook sent in a recipe for something called Osgood Pie, and I have to say it seems she was very kind when choosing a recipe to send in. I've always sent in something strange that I never made before, but she decided to share something that she liked enough to make multiple times already. She writes:
Here is my submission for Osgood Pie from the cookbook, A Taste of Texas
by Jane Trahey, 1949. I found it at a thrift store a while back for a
dollar and couldn't resist all the cowboy illustrations. Osgood Pie is
favorite of my husband's family (and of mine now, too), but the version
we make uses a little nutmeg in place of the cloves, if the recipient
wants to try that variation.
Osgood Pie
1 unbaked pie shell
3 eggs, beaten
1 c sugar
1 tsp cinnamon
½ tsp ground cloves
1½ tsp vinegar
1 tsp vanilla
1 c chopped raisins
⅔ c chopped pecans
Heat oven to 350°.
Gradually add the sugar to the beaten eggs. Then add the remaining ingredients. Pour into the pie shell and bake 45 minutes.
This is not in the recipe, but it's really good with whipped cream or ice cream.
|
She's not kidding about the illustrations. I would have bought the book just for those too. Have a look:
And so, let's get to the recipe! It's credited to a Mrs. Byron Nelson from Fairway Ranch in Roanoke, Texas. If you're thinking we got a treasured recipe from a farm wife's kitchen, you may be surprised to find out that Fairway Ranch (most of which is is now a subdivision for expensive people) was the property of someone named Byron Nelson (you'll note that the recipe comes from his wife). Most of the news clippings I found about him made sure to call him "the golfing legend Byron Nelson." Perhaps the name Fairway Ranch should have been a clue. Apparently Byron Nelson was a big deal in Roanoke Texas because he has arterial streets named after him.
But enough about golf. Who cares about chasing tiny balls in an adult-sized Power Wheels car when there's pie? A lot of people like to say that the name Osgood Pie comes from people saying it's "oh so good." Or at least, that's a common folklore explanation, which may be too suspiciously perfect to be true. Osgood is also the name of the man in Some Like It Hot who got a lot of comedy mileage (and some tantalizing hints that bisexuality was allowed in Hollywood scripts) out of the line "Nobody's perfect."
Sending in a pecan-loaded recipe seems about right for a recipe from Texas. But before we get to what's in the pie, we must attend to the first thing on the ingredient list: "One unbaked pastry shell." Since we're doing the finest foods of Texas today, it seems more appropriate than ever to start the recipe with this:
Yes, after our previous adventures with beef fat, we started saving it after draining instead of discarding it. We also decided to make the pie crust the modern way: with a food processor. This was a bit of a gamble on my part because the dishwasher has unfortunately up and died.
 |
A lot of people I know prattle on about how much they love hand-washing dishes and how satisfying they find it. None of them wanted my sinkloads of happiness.
|
We went to every store that sold large appliances, failing to find one that wasn't sold out of the good dishwashers that would last longer than two years. After nearly two weeks, we found a store that had our desired model in one of their warehouses and were promised that a new dishwasher would arrive by the next week (in fact, I waited to make this pie until we knew when we would have one again). I made this pie the night before the scheduled delivery. If I won the bet against fate, I'd get the convenience of mixing a pie crust in less than two minutes. If I lost the bet, I'd have to wash all the pieces of a food processor by hand.
Using a food processor brings out an internal conflict in me. On one hand, I love cooking with nothing but a wooden spoon and a bowl. On the other hand, I love gratuitously using kitchen power tools. Also, it's really neat how when you slowly dribble water into the whirling crumbs, it looks like nothing will change until they suddenly coalesce into a dough ball that bounces around on the blades.
I can't recommend saving your beef fat for pie crusts enough (if you make your own pie crusts). You already have it on hand if you had to drain a frying pan of ground beef, and the crust always comes out so well. I wouldn't go out and buy the stuff, but if you were about to throw it away, why not put beef into your next dessert? The dough handled so well that I only needed to patch it in one place.
After our experience last time when the pie crust tightened like a drum skin due to our failure to let its precious gluten strands relax before baking, we put the pie crust in the refrigerator instead of right in the oven (that and the recipe specifies unbaked anyway). I figured it would have enough time for gluten relaxation if I got the pie crust mess tidied away before I started getting out Osgood Pie ingredients. Remembering previous delicious success when I put cheese on top of the extra pie dough and rolled it out like puff paste, I decided to do that again.
 |
Yes, I put the cheese through the food processor. It had the accidental happy effect of cleaning away the residual pie dough.
|
In case you're wondering, the cheese has just enough water in it to puff these up just like butter does in real puff paste. However, I forgot to add salt and lovely spices to the cheese, so these were a bit bland. However, if you remember to add a dash of salt and perhaps a bit of paprika to the cheese, these will be as lovely as they look.
Back to the pie! As long as we're already using kitchen power tools, it's time to attend to the cloves. I know that in The Nostalgic Cook's kitchen they like to put in nutmeg, but we already have an entire shaker of whole cloves (the already-powdered cloves were sold out when we needed them) that has gone untouched since the disastrously mediocre
Sweet Cherry Ham Bake. I didn't know how many whole cloves would make a teaspoon of ground ones, so I just used a half teaspoon of the whole ones and hoped for the best.
The first time we ground our own cloves, we received a helpful suggestion in the comments to take a bit of sugar from elsewhere in the recipe and put it in the spice grinder with them. It prevents them from getting oily and sticky. Instead of stubborn clumps that won't come off the sides of the machine canister, you get a nice cloud of surprisingly pungent white powder.
Anyway, pie was severely delayed because a desire was expressed in the next room that we should make a frozen pizza (as a reminder, the dishwasher is lying dead in the yard, which has caused a temporary drop in culinary standards). And so, Osgood Pie had to wait for Tomato Pie. While waiting for the pizzas to bake, I decided to chop the raisins.

Calling for chopped raisins really dates a recipe. It seems that at some point in the past few decades, we collectively decided that raisins are naturally puny enough and therefore we can just dump them into whatever needed beraisining and move on with our culinary lives. I've always done my raisin chopping with scissors, but my hand got tired from pushing the blades through this big cup of them. Eventually, they turned into some sticky approximation of modeling clay. I then realized that I should have just used the food processor which was already dirty from the pie crust. After all, what's the worst that could have happened from accidentally getting a bit of pie crust into the pie filling?
The pecans were easier, though. Chopped pecans are cheaper than whole ones anyway, so we merely had to dump them out of the package.
And so, with everything all measured out and ready to become united in a cow-based pie crust, we get to the only part of the recipe that caused any confusion: the "three eggs, beaten" that the recipe calls for. Are we supposed to just bash them about a bit, or are we bringing out our inner Mrs. Goodfellow and having at the eggs with our implement of choice until they turn into a bowl of beige foam? I decided that I was overthinking this (and didn't feel like making one pie with lightly beaten eggs and one made with thoroughly whipped ones just to test this). I decided that by the 1970s, people would explicitly write out to beat the eggs until thoroughly suds-ified if that's what the recipe wanted you to do. (I know that this cookbook is from 1949, but I got mixed up and thought the recipe was from the seventies when I was making it.)

This may be the quickest pie recipe I've ever done. After a brief bit of raisin-chopping and egg-beating, everything just gets dumped into the bowl. The hardest part of this recipe is breaking up that tenaciously cohesive clump of raisins. I felt conflicted at the wonderful pie taking shape in the kitchen. On the one hand, it seemed like it'd be delicious unless something very unexpected happened while it baked. On the other hand, where's the adventure in that?
For those of you cooking along to this recipe at home, you should know that you may not be able to just dump the bowl right into the pie pan and bake it. The brown sugary egg liquid stuff will of course fill the pan, but your pecans and raisins may not spread out without some wooden-spoon intervention. I will also note that you know this recipe's easy when that is the worst inconvenience in making it.
You should also know that the brown spiced pecan sugar stuff was so delicious I deliberately did a bad job of getting all of it out of the bowl and into the pie pan.
When we got it out of the oven, someone else in the house said "It looks like a cookie." Which... it does.
You know how brownies get a sort of top crust? Well, this had the same sort of top layer only even more so. When you cut this, you can hear how crisp the top of it is. But I have to admit, my hopes dropped when I saw what looked like a sticky, almost gloppy cross-section. With that said, you can actually cut this pie and lift out slices. And they taste every bit as good as they look.

Well, I served this out to everyone in the house. When one person ate it, he said nothing for a while. Then, when he remembered where his words went, he simply said "Good." Others eating it thought it tasted like Thanksgiving or Christmas. I have to agree that it does. We demolished two thirds of the pie--- and that's after a more-than-good-sized dinner. The next day, as we were eating what very little remained, someone asked "Does anyone else think this tastes like there's apples in it?" And it kind of does! Seriously, make this pie. You have nothing to lose but what's left of your pre-pandemic figure. It's amazing. But if you want your pie to really reach the highest heights of perfection, you can do one more thing....

I love that America is the country that gave us multiple varieties whipped cream in a spray can. Anyway, for those of you who fear that I may have ended up hand-washing all the parts of a food processor and a whole parade of bowls, measuring cups, and spoons, we have a happy ending!
I was really worried it wouldn't arrive in time. It seems like everything gets a surprise delay these days. But it is here and merrily sparing me the bother of handwashing all the parts of the food processor!
I have to tell you, I had my suspicions about it because it barely made any noise. Every dishwasher I've had the pleasure of using has been so loud you could hear it across the house, but this one sounded like it was merely dripping a tiny trickle of water over the dishes. I thought that countdown timer on the door was merely telling me how long I had to wait before I opened the machine and found only disappointment and a lot of hand-washing waiting for me. Where was the noise? Where was the grinding, spraying, splashing racket that tells you that magical cleaning is happening?
But to my ecstasy, at the end of its inaugural cycle I opened the door to find an entire dishwasher full of spotlessly clean dishes! And as you may know, I don't believe in prerinsing-- if you're going to pre-rinse your dishes, I think you may as well squirt some dish soap on them and leave the machine alone. It will take me a while to get used to a dishwasher that doesn't make any reassuring noise, but once again I can put every crusty, batter-and-dough spattered bowl and plate onto a rack and let the machine do the work. You can find me putting lotion on my hands to make up for the handwashing I had to do until tonight and trying not to eat the rest of this oh-so-good Osgood Pie.
I hope you enjoyed this delicious pie adventure! Be sure to see what everyone else made!