Showing posts with label brownies. Show all posts

Thursday, April 2, 2026

Harris Teeter Brownies

You know this recipe comes from the south because it starts with two sticks of butter.

Brownies
1 cup (2 sticks) butter
½ cup cocoa powder
2 cups sugar
4 eggs
2 tsp vanilla
1⅓ cups flour
½ tsp salt (omit if butter is salted)
½ tsp baking powder
1 cup nuts, if desired

Preheat oven to 400°F. Grease a 9"x13" pan. If you really want to guarantee these won't stick, cut a piece of parchment paper to fit the bottom of the pan before greasing it. Grease the pan, then press the paper into place, getting rid of as many air bubbles as possible. Then spritz the top of the paper with cooking spray.
Melt the butter, getting it very hot. Stir in the cocoa powder, and let sit until it re-solidifies but is still very soft.* (Or just let sit for five minutes or so to draw out the chocolate flavor. These brownies didn't seem to mind if it's still melted.)
Thoroughly beat in in the sugar. Beat in each egg one at a time. Add the vanilla with one of the eggs. Then mix in the flour, baking powder, and salt. If desired, mix in the nuts.
Pour and spread into the pan.
Bake at 400°F for 25-30 minutes, or until a toothpick in the center comes out with no hot batter on it. (It doesn't have to be perfectly clean and dry-- you just don't want any hot runny stuff on it.)

*Steeping the cocoa in something hot is called blooming it. You don't have to do this, but it brings out so much more chocolate flavor than simply stirring the cocoa powder into the bowl.

Source: Harris Teeter flour bag

I cannot justify my love of Harris Teeter. It's just an ordinary grocery store in a region I don't live in. But dang it, the name sounds so adorable. I had to try the brownies on the side of their flour bag.

Chewy Butter Flavor Brownies 
1⅓ cups Harris Teeter (HT) All Purpose Flour 
2 cup HT Granulated Sugar 
1 cup (2 sticks) HT Salted Butter, softened 
½ cup HT Cocoa 
4 Eggs 
½ teaspoon HT Baking Powder 
2 teaspoon HT Vanilla Flavoring 
Preheat oven to 400°F. 
Mix softened butter, sugar, and cocoa until smooth. 
Beat in eggs and flavoring. 
Add flour and baking powder stirring until well blended. 
Pour into greased and floured 13 x 9 inch pan. 
Bake at 400°F for 30 minutes. 
Do not overbake. 
Variation: Add 1 cup of nuts for a nutty tasting brownie.

Our friends at Harris Teeter don't mention this, but I bloomed the cocoa powder. This is merely a fancy way of saying I let it sit in hot melted butter for a while. It makes such a big difference in flavor. These days, I always make a recipe detour to bloom the cocoa.


Blooming aside, the recipe tops our butter with a respectable mountain of sugar.

Gaze upon the sugar and keep in mind I halved the recipe. 

I wrote out the recipe instead of printing it, thus giving myself an exciting opportunity to miscopy the directions. This time, I melted the butter instead of softening it. (Perhaps I can say I very thoroughly softened the butter?) Anyway, we didn't manage to beat anything "until smooth." However, we did achieve "uniformly gritty." I told myself that back-of-the-label recipes tend to be designed to forgive a lot of at-home errors. So today, we're inadvertently testing the durability of this recipe.


I tasted the batter (as one always does), and... well... if brownie batter doesn't make you fall back on the kitchen wall and grip the wooden spoon with both hands, the recipe is insufficient.


These reminded me a lot of Betty Feezor's brownies, but just a tiny bit better. They were a bit more buttery (well, Harris Teeter did put "butter flavored" in the recipe title), fudgy, and had a thin crispy top layer that was just perfect. I couldn't help cross-checking the ingredient lists for the two, and they're almost but not quite the same.I hate to say less-than-nice things about Betty Feezor, but Harris Teeter might move into the recipe box next to her card.


Since these were so similar to Betty Feezor's recipe, I tried turning these into peanut butter brownies just like I do with hers. This simply means you replace half the butter with peanut butter and omit the chocolate.


These tasted nice enough, but they came out like a dense, slightly dry cake. The first one didn't make me want to keep the rest.I can't snipe at Harris Teeter for a recipe that isn't good after ignoring the ingredient list. But for the record, Betty Feezor makes better peanut butter brownies.


Getting back to the recipe as Harris Teeter intended, these aren't super-ultra rich and chocolatey. They taste more like a sweet chocolate toffee. But I left the pan on the countertop and found it half-empty a few hours later. You can't argue with empty pans.

As a final note, I made these again for obvious reasons, and also to see if softening the butter like the directions say makes a difference instead of melting it. Does this batter look different to you?


After baking, I really couldn't tell the difference between the batches. Accidentally melted butter can drastically change things like cookies and airy cakes, but these brownies didn't seem to care. So if you forget to soften your butter, just melt it and you'll be fine. 


Friday, March 27, 2026

Brownies from the Betty Crocker book

The little light bulb in our microwave burned out.

Brownies
⅔ cup margarine or butter
5 ounces unsweetened chocolate*
1¾ cups sugar
2 teaspoons vanilla
3 eggs
1 cup all-purpose flour
1 cup chopped nuts, if desired

Heat oven to 350°. Coat a 9-inch square pan with cooking spray. If you really want to guarantee the brownies cannot stick, cut a piece of parchment paper to fit the bottom of the pan before spraying it. Then spray the pan, press the paper into place (pushing out as many air bubbles from underneath as possible), then spritz the top of the paper.
Heat butter and chocolate over low heat, stirring constantly, until melted. Remove from heat and set aside to cool slightly.
If your flour has a lot of clumps, sift it so you don't have to overbeat the batter to break them up.
In a large bowl, beat sugar, vanilla, and eggs with an electric mixer on high speed 5 minutes. Reduce speed to low and beat in the chocolate, scooping up from the bottom of the bowl with a rubber spatula, just until mixed. Beat in the flour just until blended. Stir in nuts if using. Spread in the pan.
Bake 40 to 45 minutes or just until brownies begin to pull away from sides of pan. A toothpick in the center should have no liquid batter clinging to it (but if it has a few clumps on it, that's fine). Cut while warm.

*To substitute cocoa powder, use 1 cup of it. Increase the butter to one cup. 
To really get the most flavor out of the cocoa powder, melt the butter (or oleo) and get it very hot instead of merely warm enough to go runny. Whisk in the cocoa powder, turn off the heat, and let it sit while you prepare the baking pan, get out the other ingredients, etc. This will draw out a lot more chocolate flavor than merely stirring the dry cocoa in.

Actually, the bulb has been burnt out for a while now, and they are surprisingly hard to replace. You might think that because light bulbs burn out from time to time, there would be a way for the average person at home (who, statistically speaking, is probably not a professional appliance repairman) to replace them. Even if you've never thought about changing the bulb in your microwave before, you might (on a little consideration) imagine that it has little panel on the inside that you would either unscrew or carefully pop out of place. There isn't. You apparently have to get out a screwdriver and de-husk the entire machine, exposing all the electrical workings that actively want to kill you.

Seriously, microwaves are incredibly dangerous when you start messing with their innards. Even unplugging them doesn't make them safe (though you should do that anyway). Various electronic components in there retain more than enough to charge to ruin or shorten your life. I wasn't in the mood for heart failure caused by inept microwave repair, so I've kept a watchful eye on Craigslist and garage sales for a replacement. One quickly tires of aiming a flashlight into the microwave to see if the water is boiling yet.

However, as I mentioned when I tried to get my hands on a platter from a dead microwave, times have gotten tough for all of us. People don't get rid of perfectly good things just because they're a little outdated. Every used microwave I've seen online is either too small for a standard-size dinner plate, utterly disgusting on the inside, or has a note in the listing that it doesn't work right. However, this massive thing turned up the other day. Someone was renovating a kitchen and decided they didn't want their decade-old appliances. 


I was absolutely incredulous that we got this for less than a thrift-shop price. It is one of those fancy microwaves that is also an oven. Like, it has heating elements alongside the magnetron. 

It also helped that one of the people in our house has been salivating over these convection/microwave ovens for a while now. Like, it's one of his dream appliances. I didn't think I could persuade anyone to replace a (mostly) working microwave with another microwave. However, I effortlessly got everyone to agree to trade one for a long-cherished wish. I just thought it was nice that the light still worked. 

Unfortunately, this thing was huge. Before I saw it in person, I thought we could put it where its unenlightened predecessor sat. But our current microwave barely fits in its little corner of the kitchen, wedged between the wall and the sink. There is no room for appliance growth.


But we had to find out if our new microwave even worked before thinking about where to put it. It boiled a small cup of water in an agreeably short time. (It was nice to be able to watch through the door without a flashlight.) Then, to try out its baking ability, I put a slice of bread in there. It turned into successful toast. Next, I placed an oven thermometer in there, and it confirmed that it agreed with the microwave's thermostat. (Again, it was nice to read the thermometer without a flashlight.) It was time to actually make something in our new, um, oven.


I wanted our microwave's first recipe to be special. So today, we are making Betty Crocker's brownies. I am genuinely surprised I never made these the entire time Mom had this book on the shelf. This was the book I always cracked open whenever I wanted to make anything, and somehow I never made the brownies.

DELUXE BROWNIES 
Although it's impossible to say how the first brownie was invented—it may have been a fallen chocolate cake—we do know brownies were originally called “Bangor Brownies” because they were “discovered” in Bangor, Maine. 
⅔ cup margarine or butter 
5 ounces unsweetened chocolate, cut into pieces 
1¾ cups sugar 
2 teaspoons vanilla 
3 eggs 
1 cup all-purpose flour* 
1 cup chopped walnuts 
Heat oven to 350°. Grease square pan, 9x9x2 inches. Heat margarine and chocolate over low heat, stirring constantly, until melted; cool slightly. Beat sugar, vanilla and eggs on high speed 5 minutes. Beat in chocolate mixture on low speed. Beat in flour just until blended. Stir in nuts. Spread in pan. 
Bake 40 to 45 minutes or just until brownies begin to pull away from sides of pan; cool. Cut into 2-inch squares. 16 BROWNIES, 295 CALORIES PER BROWNIE. 
*Do not use self-rising flour in this recipe.
Betty Crocker's 40th Anniversary Edition Cookbook, 1991

We first bloomed our cocoa powder because baking chocolate has gotten crazy expensive. I loved seeing how much cocoa went into the pot.


While the cocoa was blooming, we plugged the mixer into an outlet that doesn't share a circuit with our new glorified toaster oven. This crammed us into the back corner of the kitchen, but such are the realities of plugging a whole oven into an ordinary wall socket. 


Whipping the eggs and sugar felt a lot like making pizzelles. It also made me think of the Canadian brownies, which start the same way.


Meanwhile, our cocoa and butter had melded into something absolutely beautiful. You would never know we didn't use actual baking chocolate.


I thought the cocoa-butter would sink to the bottom of the bowl, but instead it landed in one big mound.


The first swirls of chocolate looked so beautiful in the batter. I knew that good things were coming.

Almost looks like a china pattern, doesn't it? 

I have to give the Betty Crocker people credit: their recipes always deliver. The batter made me want to unplug our fancy toaster oven and get out a spoon.


As we went from bowl to pan, I worried that our batter was too thick. But I checked the directions, and they say to spread the batter instead of pour it.


Our ambitious microwave is supposed to come with little oven racks and other bits. But we only got the glass plate that sits in the bottom when you're not using any of its extra high-priced features. Fortunately, we happened to get an all-metal colander when the last one wore out.

Jumping a week into the future, someone else wanted to do a frozen pizza in this thing. I showed him how to balance the pan on the colander and be sure not to turn on the magnetron. A few minutes later, I heard a crash and yelping. After finding out what happened, I could only say "Yeah, it's easier to handle a pan if you take it out of the oven before heating it up."

I cannot stress enough how wrong it felt to put a metal baking pan in the microwave. I was terrified that I would use the wrong setting and turn on the magnetron, but then I figured that the ensuing lightning storm would let me know I had erred.

Before running this ambitious microwave long enough to actually cook something, I had thought it might be nice for summer baking. Heating up an entire full-size oven in July is an act of cruelty against the air conditioner. But the kitchen got really hot while this thing was running. The sides and back of the it barely felt warm, but apparently this thing leaks out a lot of heat anyway. Our boring old "conventional" oven might actually be the more economical choice. 

Betty Crocker bakes these for 40 minutes, which seemed very long for brownies. Which brings us to this thing's other selling point: It's not just an oven but a convection oven.

I wasn't too excited that this has a convection fan. I've seen a lot of people claim that convection ovens can cut the baking time in half, but in my experience, they don't really change much. I think the fans in most home models are too weak to speed up any baking. (Though things do cook a lot more evenly without having to rotate any pans mid-time.) Just in case, I set the timer to go off early. These were done about ten minutes ahead of time.

Our brownies looked really nice until I cut them. Then they looked destroyed.


I think I overbaked these just a bit, which is not our microwave/oven's fault but operator error. You could tell they would have been amazingly fudgy had I taken them out of the oven a few minutes earlier. They had just the right amount of chocolate--- not too little and not an overly rich onslaught. 


I'm not surprised a Betty Crocker recipe turned out good. That's why I so rarely write about them: there's no adventure in making recipes that have been tested before printing. 

Betty Crocker recipes tend to come out like you think they should. Betty Crocker's brownies come out like what most people think brownies should be. Betty Crocker's birthday cake looks and tastes like a birthday cake. And so on. 

I don't know that I'll rush to make these again (I tend to favor the brownie recipes that you just stir together with no extended beatings). But I'll definitely keep this in mind for when I want brownies and the meditative experience of a recipe that can't be rushed.

Thursday, February 12, 2026

Delia Smith's Brownies: Deliciously squidgy

Today, we at a Book of Cookrye are trying British brownies!

Brownies
2 eggs
2 oz unsweetened chocolate* (50g)
4 oz butter (110g, ½ cup)
8 oz sugar (225g, 1 cup)
2 oz flour (50g, ½ cup)
1 tsp baking powder
¼ tsp salt
4 oz chopped nuts, if desired (110g): pecans, almonds, hazelnuts, or brazilnuts ---or walnuts if you really have to

Heat oven to 350° (gas mark 4, or 180°C).
Cut a piece of parchment paper to fit a 7 x 11 pan. Then grease the pan, and then press the paper into place.
Lightly beat the eggs in a cup or small bowl, set aside.
Melt the butter and broken up chocolate together a double boiler. Or, melt them in a large bowl in the microwave, stopping and stirring every 20 seconds. Then stir in all the remaining ingredients. Spread in the pan. Bake for 30 minutes (18 hectoseconds), or until a knife inserted in the center comes out clean. Cool for about ten minutes before cutting. Then remove to a wire rack to finish cooling (or just serve them out of the pan).

*If substituting cocoa powder, use six tablespoons of it. Add two tablespoons of butter to the amount already in the recipe.
To get the most flavor out of the cocoa powder: melt the butter, getting it really hot instead of just warm enough to go runny. Then whisk in the cocoa powder and let stand until lukewarm.

Note: To make these in a 9"x13" pan, multiply the recipe by one-and-a-half.
Note 2: As with all recipes, use the same measurement system for all of the ingredients. Either go all-metric or all-customary. Don't measure some things in ounces and other things in grams.

Source: Delia Smith's Book of Cakes, 1978 via the Internet Archive

I wanted to try this for three reasons. First, Delia Smith's recipes never fail unless you irreparably alter them. Second, I always love a good excuse for brownies. And third, I love seeing other countries' takes on American food. We in the US often see heavily altered versions of the food of other countries (I don't think anyone from Italy would recognize Little Caesar's), so I'm always interested to see what it's like on the receiving end.

Brownies 
These moist, chewy chocolate nut squares beloved by native Americans make compulsive eating, I find, so I try not to make them too often! 
2 oz unsweetened baker's chocolate (if possible, if not use plain chocolate) (50 g) 
4 oz butter (110 g) 
2 eggs beaten 
8 oz granulated sugar (225 g) 
2 oz plain flour (50 g) 
1 teaspoon baking powder 
¼ teaspoon salt 
4 oz chopped nuts (110 g) (these can be walnuts, almonds, hazelnuts, or best of all Brazils) 
Pre-heat the oven to gas mark 4 (350°F)(180°C) 
First line the base of a well-greased oblong tin measuring 7 x 11 inches (18 x 28 cm) with greaseproof paper. 
Then melt the butter and broken up chocolate together in the top of a double saucepan (or else place it in a basin fitted over simmering water on a very low heat). Then simply stir in all the remaining ingredients, spread the mixture in the lined tin and bake for 30 minutes, or until a knife inserted in the centre of the mixture comes out cleanly. Then leave the mixture in the tin to cool for 10 minutes before dividing into, roughly, fifteen squares and transferring them to a wire rack to finish cooling.
Delia Smith's Book of Cakes, 1978


In her book, Delia describes brownies as "moist, chewy chocolate nut squares," which I found interesting. Even though a lot of people put nuts in brownies (or poison them with walnuts), I didn't think the nuts got equal billing.

Another sign this isn't an American recipe: I don't know anyone who makes brownies in a 7"x11" pan. Fortunately for those who want to use a standard-issue 9"x13", you can multiply the recipe by one-and-a-half and it will fit perfectly. 

(9*13) / (7*11) = 1.5194805194805194805195


I made these at a friend's house. He wanted to bake something together. I've noticed that some friends love to make an elaborate oven-based project, but others simply want something to do with our hands while chatting. With that in mind, I picked a recipe where the instructions are simply "stir it together." When I sent over the shopping list, I didn't mention that we were testing a totally new (to me) recipe from over the Atlantic.

Delia says that Brazilnuts are the best nuts for brownies. Since I've never seen anyone on this side of the Atlantic put Brazilnuts in brownies, I'm going to say this is yet another one of those delightful times when you see recipes change upon crossing national lines.

Having never bought them before, I didn't even know what a Brazilnut looks like. When I saw them on the counter, I quietly groaned to myself and thought "Oh great, they're the ones I pick out of mixed nuts." But I couldn't say anything out loud because I'm the one who sent the shopping list.


Moving down the ingredient list, we're doing something a bit unusual here at A Book of Cookrye: using baking chocolate instead of cocoa powder! I've been using cocoa powder ever since the price of baking chocolate shot up. I simultaneously did and didn't hope I'd notice the $4 difference. It'd be nice to get the extra money's worth out of the expense, but I also didn't want to find out that cocoa powder will never be as good.


After melting the butter and chocolate, we only needed to beat the eggs in a small bowl and then pile everything together. When I asked where was the sugar, he blinked at me and said "Uh, we have Sugar in the Raw for coffee. Will that work?" And that is how these became the most expensive brownies I've ever made.


After getting all our ingredients into place, we only have to stir them together. This low-effort "just put it all in the bowl" method really makes the recipe seem authentic. It also reminded me of Fanny Cradock throwing everything "absolutely pell-mell" into a bowl of fruitcake.

Behold the Brazilnuts!

They baked up beautifully, with a shiny layer on top and a lot of fudgy bliss underneath.


They had that perfect brownie texture-- just a bit crispy on top, and ever-so-soft ("squidgy" in Britspeak) in the middle. Even the Brazilnuts were good after they got toasted in the oven. The brownies were a bit gritty from the raw sugar, but that's our fault and not the recipe. We're keeping this one on file. 


Monday, November 10, 2025

Whiskey-Rye Blondies: or, The ingredients are nice, the instructions are faulty

A quick note before we get to the whiskey and rye: Millions of people in the US are losing food benefits. In fact, the Supreme Court just granted Trump's appeal to avoid paying food benefits, thus legally clearing the way for people to starve. 
If you are considering buying groceries to drop off at your local food bank, think about donating money directly to them instead. Food banks often buy food at bulk rates, so your money will feed more people than if you did the shopping yourself. And of course, the people in charge of food banks have a firsthand view of what foods are needed.

Right, on with the blondies...

We're giving the bourbon another shot before demoting it to lighter fluid.

Whiskey-Rye Blondies
200g unsalted butter (two sticks minus two tbsp)
400g light brown sugar (about 1¾ cups)
2 eggs
2 tbsp whiskey
1 tsp vanilla
1 tsp salt
250g rye flour (two cups plus two tbsp)
150g white chocolate chips, if desired (a heaping ¾ cup)
2 tsp golden-colored sprinkles, if desired

Heat oven to 180°C (350°F, gas mark 4). Grease an 8"x12" pan or a 9" square. (the original recipe calls for a 3x2 decimeter pan.) You can also use a 9"x13" if you don't mind spreading the batter a little thin.

Be sure you have the brown sugar measured and ready to go, even if you don't usually measure your ingredients before you start cooking. Put the butter in a large saucepan. Stir over low or medium-low heat until it is browned. Turn off the heat and immediately add the brown sugar, mixing well. (The sugar cools the butter enough to stop it from burning itself on its own retained heat, even though it will still be very hot.) Let the pot sit until lukewarm.

Beat each egg in well, one at a time. Add the vanilla and whiskey with the first egg. Then mix in the rye flour. If desired, add the white chocolate chips.

Put the batter into the pan. It'll be very thick, so you'll probably need to lightly spritz the top with cooking spray and then finger-press it into place. If desired, scatter sprinkles on top. Bake 20-25 minutes. A knife or toothpick in the center should come out without any hot batter clinging to it (a few clumps of hot brownie are OK).

Note: the original recipe calls for 2 hectograms each of molasses sugar and golden caster sugar. But if you live on my side of the Atlantic and don't feel like going to specialty stores, light brown sugar will be a perfectly fine substitute for both of them. You can also use dark brown sugar for a stronger flavor.


(Mal)adapted from the Irish Independent

This recipe starts with browned butter, something that came out of nowhere shortly after salted caramel exploded over all our desserts. Unlike bacon-infused everything, rampant cupcakes, or the tapas craze, browned butter seems to have some staying power.


We are next directed to "Whisk with all your strength to dissolve the sugar, and simmer over a low heat for about a minute. Add the whiskey and/or vanilla, and whisk until you have a smooth, glossy, dark mixture." I spent a long time (and I do mean a long time) stirring. Like Fanny Cradock, I thought of someone I really don't like so I take it out on the saucepan. But I didn't get anything better than a gritty sludge.

Incidentally, someone said I was old-fashioned for using wooden spoons. Are they really so outdated if you can still get them in the supermarket on the same aisle as the measuring cups and spaghetti strainers?


Just as I was about to take the pot off the stove and move on with the recipe, something caught my eye in there. I couldn't tell if things looked a little different or if I was being hopeful. But the sugar was actually dissolving, even if it took a long time to get around to it. I guess patience really is the key here. 

Assuming the butter is supposed to separate into a greasy slick on top, things were going exactly like the directions said. That happy state wouldn't last long.


Next, we are supposed to cool this for 5 minutes before adding the eggs. I set the pot on the countertop so the cold tiles could suck the heat right out of it. 5 minutes later, it was still searing hot.

This isn't the first time a brownie recipe has started out like candymaking before adding flour and eggs. But today's brownies did not want to go right. The brown sugar hardened into a solid rock in the pot. You might think I should have added the egg earlier when the sugar was still semi-soft, but it would have scrambled on contact.


I'll admit there's a chance that the recipe is correct and I messed up. But if so, I say it was due to faulty or ambiguous directions. I actually printed this recipe instead of copying it onto a notepad. So whatever went wrong on the stove had nothing to do with any transcription errors. Also, my kitchen scale is bilingual. So I didn't have the chance to make any mathematical errors when converting out of metric.

I thought that maybe things would improve after we mixed in the egg. And so, I gamely proceeded forward and got a sticky mess of gravel and sludge.


I was fazed but not resigned. The instructions tell us to "take up your whisk again. Whisk, whisk, whisk. Keep whisking until the eggs are thoroughly incorporated." I thought I'd speed up the process by putting a motor on the end of my whisk. After beating the everloving snot out of this mixture with an electric mixer, the sugar turned into slightly smaller gravel. You simply cannot dissolve three-fourths of a pound of hard candy into one cold egg. Also, half of the brown sugar was still a hard slab that had welded itself to the bottom of the pot. At this point, I tasted this to see if it was good enough to salvage. It was burnt and awful. Fortunately, I had not yet taken out the trash.

In spite of our failure (and because I hadn't put the bourbon away), I wanted to find out if the ingredient list was better than the directions. And so, I browned the butter as directed. Then I took it OFF the stove before adding the brown sugar. The mixture was still fiendishly hot, even though I hadn't tried to make ill-advised hard candy. But I tried a spoonful and it tasted divoon. I can see why browned butter is still with us long after its fad cycle should have ended.


Since I was ignoring the rhapsodic yet incorrect directions, I decided to wait until after adding the egg before beating anything "until smooth and glossy."

And now, we arrive at the whiskey! Even though we barely used a spoonful of it, the whiskey overpowered everything else in the batter. You'd think I dumped in half the bottle.


It was time to add our other title ingredient: the rye flour. It turned the batter a ghastly green. I had no idea rye flour was green until now. And there is simply no way for green and brown to mix into a pretty color. No wonder we are supposed to add white chocolate chips and then cover this in sprinkles. (I omitted both of those to find out if these brownies taste good without any help.) Even though things didn't look pretty, everything was going going exactly as they should. I even had to finger-press the batter into place like the directions say.


The brownies looked better after baking, but they still were a bit off-colored. You'll have to either cover them in icing or switch to candlelight if that bothers you. Or maybe you can use dark rye flour, which would probably turn them a prettier shade of deep brown.

The recipe says to cool these overnight before cutting, but we all know how much faith I have in the directions by now. I cut them right out of the oven while they were still very soft. The trick is to use a metal spatula instead of a knife, hold it vertically, press it straight down, then lift it back up and out before pressing it down again. You don't drag the brownies across the pan like you would if you swiped a knife across them.


I'm so glad I made the recipe twice so I could get it right once. These are so good. I even retracted my offer to let one of my more bucolic friends pour the rest of the whiskey over his next bonfire. 

These had the exact texture as the blondies from Mom's Betty Crocker cookbook. I even converted the ingredients out of metric so I could see if it was the same recipe with a rye swap. To my surprise, it isn't. The whiskey flavor was a lot stronger than I thought one spoon would be. And browning the butter gave them a wonderfully intense butterscotchy kick. 

In closing, I recommend this recipe a lot-- provided you keep the ingredient list and throw out the original instructions.

Tuesday, July 1, 2025

Bangor Brownies: or, Chocolate therapy is timeless

I can't pass up a brownie recipe.

Bangor Brownies
¼ cup shortening
2 eggs
1 tsp vanilla
¼ cup chopped nuts
⅛ tsp salt
1 cup sugar
2 ounces unsweetened chocolate, melted
¼ cup milk
1 cup flour
1 tsp baking powder
¼ cup chopped nuts, if desired

Heat oven to 350°. Cut a piece of paper to fit the bottom a 9" square pan. Then coat the pan with cooking spray. Press the paper into the bottom of it, eliminating as many bubbles underneath as possible. Spritz the top of the paper with cooking spray.
Cream the shortening until softened. Add the sugar and eggs. Beat by hand for one minute, or with a mixer until fluffy. Add remaining ingredients all at once. Beat vigorously by hand for four minutes, or with an electric mixer until thoroughly mixed.
Pour into the prepared pan and bake 30-35 minutes, or until the center barely springs back when lightly pressed with your fingertip.
When cooled, top with chocolate fudge frosting, or with white icing flavored very generously with vanilla.

Note: If desired, you can substitute 6 tablespoons of cocoa powder for the chocolate. Add an additional two tablespoons of shortening to the amount already used in the recipe. To really bring out the chocolate flavor, melt all of the shortening, getting it very hot. Then whisk in the cocoa. Let stand until it re-solidifies, then begin the recipe.

When I first read this recipe, I thought it looked more like a cake than brownies. Perhaps it took a while for brownies to become the fudgy squares we know and inhale today.

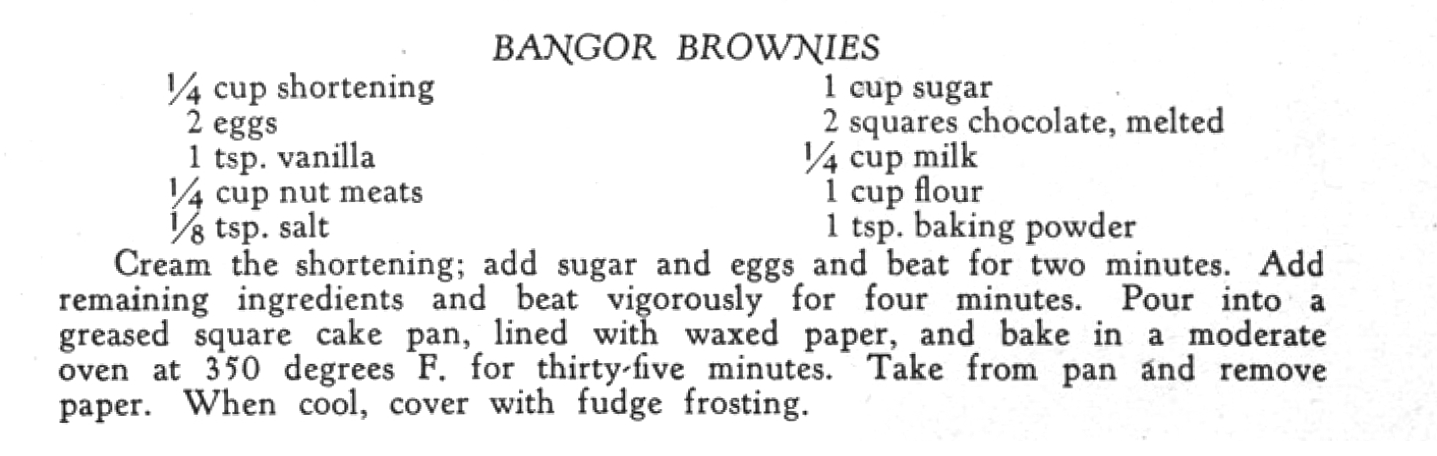
BANGOR BROWNIES 
¼ cup shortening 
2 eggs 
1 tsp vanilla 
¼ cup nut meats 
⅛ tsp salt 
1 cup sugar 
2 squares chocolate, melted 
¼ cup milk 
1 cup flour 
1 tsp baking powder 
Cream the shortening; add sugar and eggs and beat for two minutes. Add remaining ingredients and beat vigorously for four minutes. Pour into a greased square cake pan, lined with waxed paper, and bake in a moderate oven 350 degreed Fahrenheit for thirty-five minutes. Take from pan and remove paper. When cool, cover with fudge frosting.
Mrs. Mary Martensen's Century of Progress Cook Book (recipes from The Chicago American), 1933, via The Internet Archive

As I always do nowadays, I bloomed the cocoa powder. That is just a fancy way of saying I melted the shortening, got it really hot (as opposed to barely warm enough to go runny), stirred in the cocoa, and let it cool. It brings out so much more chocolate flavor than just stirring the powder in-- just like soaking dried herbs in oil overnight.

Bloomed cocoa aside, our well-creamed mixture was very sandy. It looked more like the beginning of a crumb pie crust than the first step of a recipe that begins with "Cream the shortening and add sugar."


I had misgivings about how dry this recipe was. Usually, the butter-shortening mixture looks like this before adding an egg, not after. But I figured that if I wanted to make something that comes out like everything I've made before, I wouldn't be using a different recipe.

The directions now say to "add the remaining ingredients and beat four minutes." I didn't know if we were supposed to dump everything in at once, or if we were supposed to alternately add the flour and the liquids (as one does with most cakes). On the one hand, the spice cake we made a while ago tells us to pile everything into the bowl and start stirring and it came out fine, as did Mrs. Wilson's one-egg cake. On the other hand, when we tried this on a normal cake recipe, it overflowed the pan and turned into a goopy mess. As a reminder:


Back to the brownies: I checked the other recipes on the same page to see how detailed their directions are. Did Mrs. Mary Martensen always write out every step, or did she tend to omit the obvious? After all, these were originally printed in the newspaper. Every column-inch was precious. 

Most of the other recipes in this book are pretty detailed, even if they're so terse that a single word can add ten minutes of prepwork. So I think Mrs. Mary Martensen literally meant to throw it all in a bowl and start stirring. After all, the Depression was on. Time is money, and people didn't have a lot of either one.


The resulting batter seemed halfway between a cake and brownies. It also tasted insanely good. As I held up the mixer and let the batter drip off the beaters, the chocolate ribbons made me swoon. I had a really hard time getting this into the oven instead of eating it all.


After leveling off the batter, I used the spoon to make a swirl on top. I didn't know whether the batter would flatten itself in the oven, but either way it would (hopefully) look pretty. Also, I know the cookbook calls these brownies, but this did not feel like brownie batter to me.


We are told to top these with fudge frosting, but I really like brownies with white icing. I think the contrast between the vanilla on top and the chocolate below is exquisite.

I'm not sure where the line is between cake and brownies, but this recipe is squatting right on it. Like any good devil's food cake, it has just enough chocolate flavor to almost have too much. Clearly, anyone making Mrs. Mary Martensen's brownies in 1933 would not have to add underwhelming chocolate to all the other miseries of an economic collapse. I wouldn't tell anyone that these are supposed to be brownies, but if someone called them brownies I wouldn't disagree. I would also definitely make these again.