Sunday, October 30, 2022

Halloween Quickie: Candy Corn and Salted Peanuts

It's the most wonderful time of the year! A celebration of spiders, graves, skeletons, and lots and lots of candy! This brings us to one of my favorite treats of the season: candy corn and salted peanuts!

You don't need me to write out the recipe for this one.

We had a surprisingly hard time making this because candy corn was unexpectedly elusive this year. Would you believe the supermarket didn't have any? They had happy little cardboard candy corn mascots holding up the price signs, but not a bag of those sugary wax-kernels in the entire building. We ended up getting our candy corn from a pharmacy.

Which brings us to candy corn and salted peanuts. Even if you don't like candy corn, this is just really good. Candy corn by itself is... well, it's okay. But if you mix candy corn with peanuts, you get something far better than either of the two featured ingredients could ever be on their own. The sweet-salty, waxy-crunchy contrast is perfect. Set it out at your Halloween party, or just make some for yourself. Thank me later. 

And so, with fondest wishes on the best day of the year, happy Halloween from A Book of Cookrye! Please enjoy my favorite ode to the most polarizing candy of the season:


Wednesday, October 19, 2022

Man-Sized Double Chocolate Cookies: or, The accidental cake

Today on A Book of Cookrye, we are following the recommendations of Pieathlon friends! As fiendish as some of us get (myself included) when picking Pieathlon recipes, the last time we got a recipe from someone who also did a Pieathlon, it turned out really easy and really good. Today, we are taking a suggestion from Poppy Crocker, who said we really ought to try...

Man-Sized Double Chocolate Cookies
½ c margarine*
2½ oz unsweetened chocolate
1 c sugar
1 tsp vanilla
2 eggs
2 c sifted flour
1 tsp baking powder
½ tsp baking soda
½ c buttermilk

Heat oven to 350°. Grease a cookie sheet.
Melt margarine and chocolate together. You can do this in the microwave (stopping and stirring every 15 seconds until completely melted). Or, you can melt them on the stove over low heat. Whether you use a saucepan or a microwave-safe bowl, use one large enough to hold all of the dough.
Add sugar, baking powder, and baking soda. Mix thoroughly. Add vanilla and eggs, mix well. Alternately add the flour and buttermilk to the dough. Mix well.
Drop by large tablespoonfuls (as in, 2 heaping tablespoons per cookie) onto the baking sheet, about 2 inches apart. Bake about 12 minutes. When cool, frost with the following:

       Chocolate Frosting:
2 tbsp margarine*
3 oz unsweetened chocolate
3 c sifted powdered sugar
4 tbsp milk

Melt margarine and chocolate. Blend sugar and milk in a small bowl. Add the hot chocolate mixture, mix well.
Let stand, stirring occasionally, until it's the right consistency to spread on cookies.
If it becomes too thick, add milk and mix well.

*Use the margarine that comes in sticks, not the spreadable kind that comes in tubs.

   Note:   You can substitute cocoa powder for unsweetened chocolate. For the cookies, use 5 tbsp of cocoa and and add an extra 2 tbsp margarine. For the icing, use 9 tbsp cocoa (that's 1/2 cup plus 1 tbsp) and an extra 3 tbsp margarine.
   Note 2:   If you double the buttermilk, this makes a very good chocolate cake. Bake it in a greased 9" square pan.

Our Best Cooky Recipes by Martha Logan, Swift and Company, 1962 via Grannie Pantries
These cookies come from a Swift and Co recipe handout credited to "Martha Logan." It seems that after General Mills found massive success with a fictitious lady mascot (I refer of course to Betty Crocker), other industrial food companies tried to come up with their own nonexistent women with names carefully designed to sound matronly. Swift and Co gave us "Martha Logan," who definitely sounds like someone I'd get a cookie recipe and borrow an egg from.

I'm surprised the Martha Logan people don't use lard in this recipe since Swift and Co specialized in meat and meat byproducts. Instead we use margarine, which I was only too happy to get because it now costs less than half the price of butter. For once, I remembered to set out the margarine so it could soften before commencing. Then I read the recipe, which says we are supposed to melt it.

Well that was pointless.

You may notice that contrary to the recipe directions, we are not melting chocolate alongside the margarine. Like many people, we at A Book of Cookrye went the more economical route and substituted in cocoa powder. After a quick stir, the proto-batter was as swoon-inducingly lovely as if we'd never fudged the ingredients.

Oh that looks good.

We never use buttermilk around here, and I was not about to purchase a whole carton of the stuff just to use a quarter cup of it and eventually pour the rest of it down the drain after it expired. We still had a bit of sour cream left over from the Piathlon. I figured if I used half that and half water, it would theoretically average out to buttermilk.

Dumping water into chocolate batter looks wrong, doesn't it? Any time I add water to a recipe it feels like a mild transgression. I know that makes no sense. After all, the milk in cake batter is like mostly water. But for some reason, pouring in colorless, odorless, tasteless water feels like I am messing with that which oughtn't be messed with.

Oh, the ruination.

Well, it turns out adding the water was wrong. Due to mathematical carelessness, I halved all the ingredients except the buttermilk. Watering down the cookie dough made it uselessly runny.

Never has something so wrong looked so right.

With the cookies already ruined and the oven already heated up, we had 4 choices. Our first choice: put the "cookie dough" in the refrigerator and hope it hardens like the chocolate frosted drops. Second: hastily mix all the non-buttermilk ingredients, combine the two batches, and hope it averages out. Third: throw out the whole business and deny everything. Fourth: put what we have in a cake pan, which might turn out terrible but would at least be contained from spilling in the oven. 

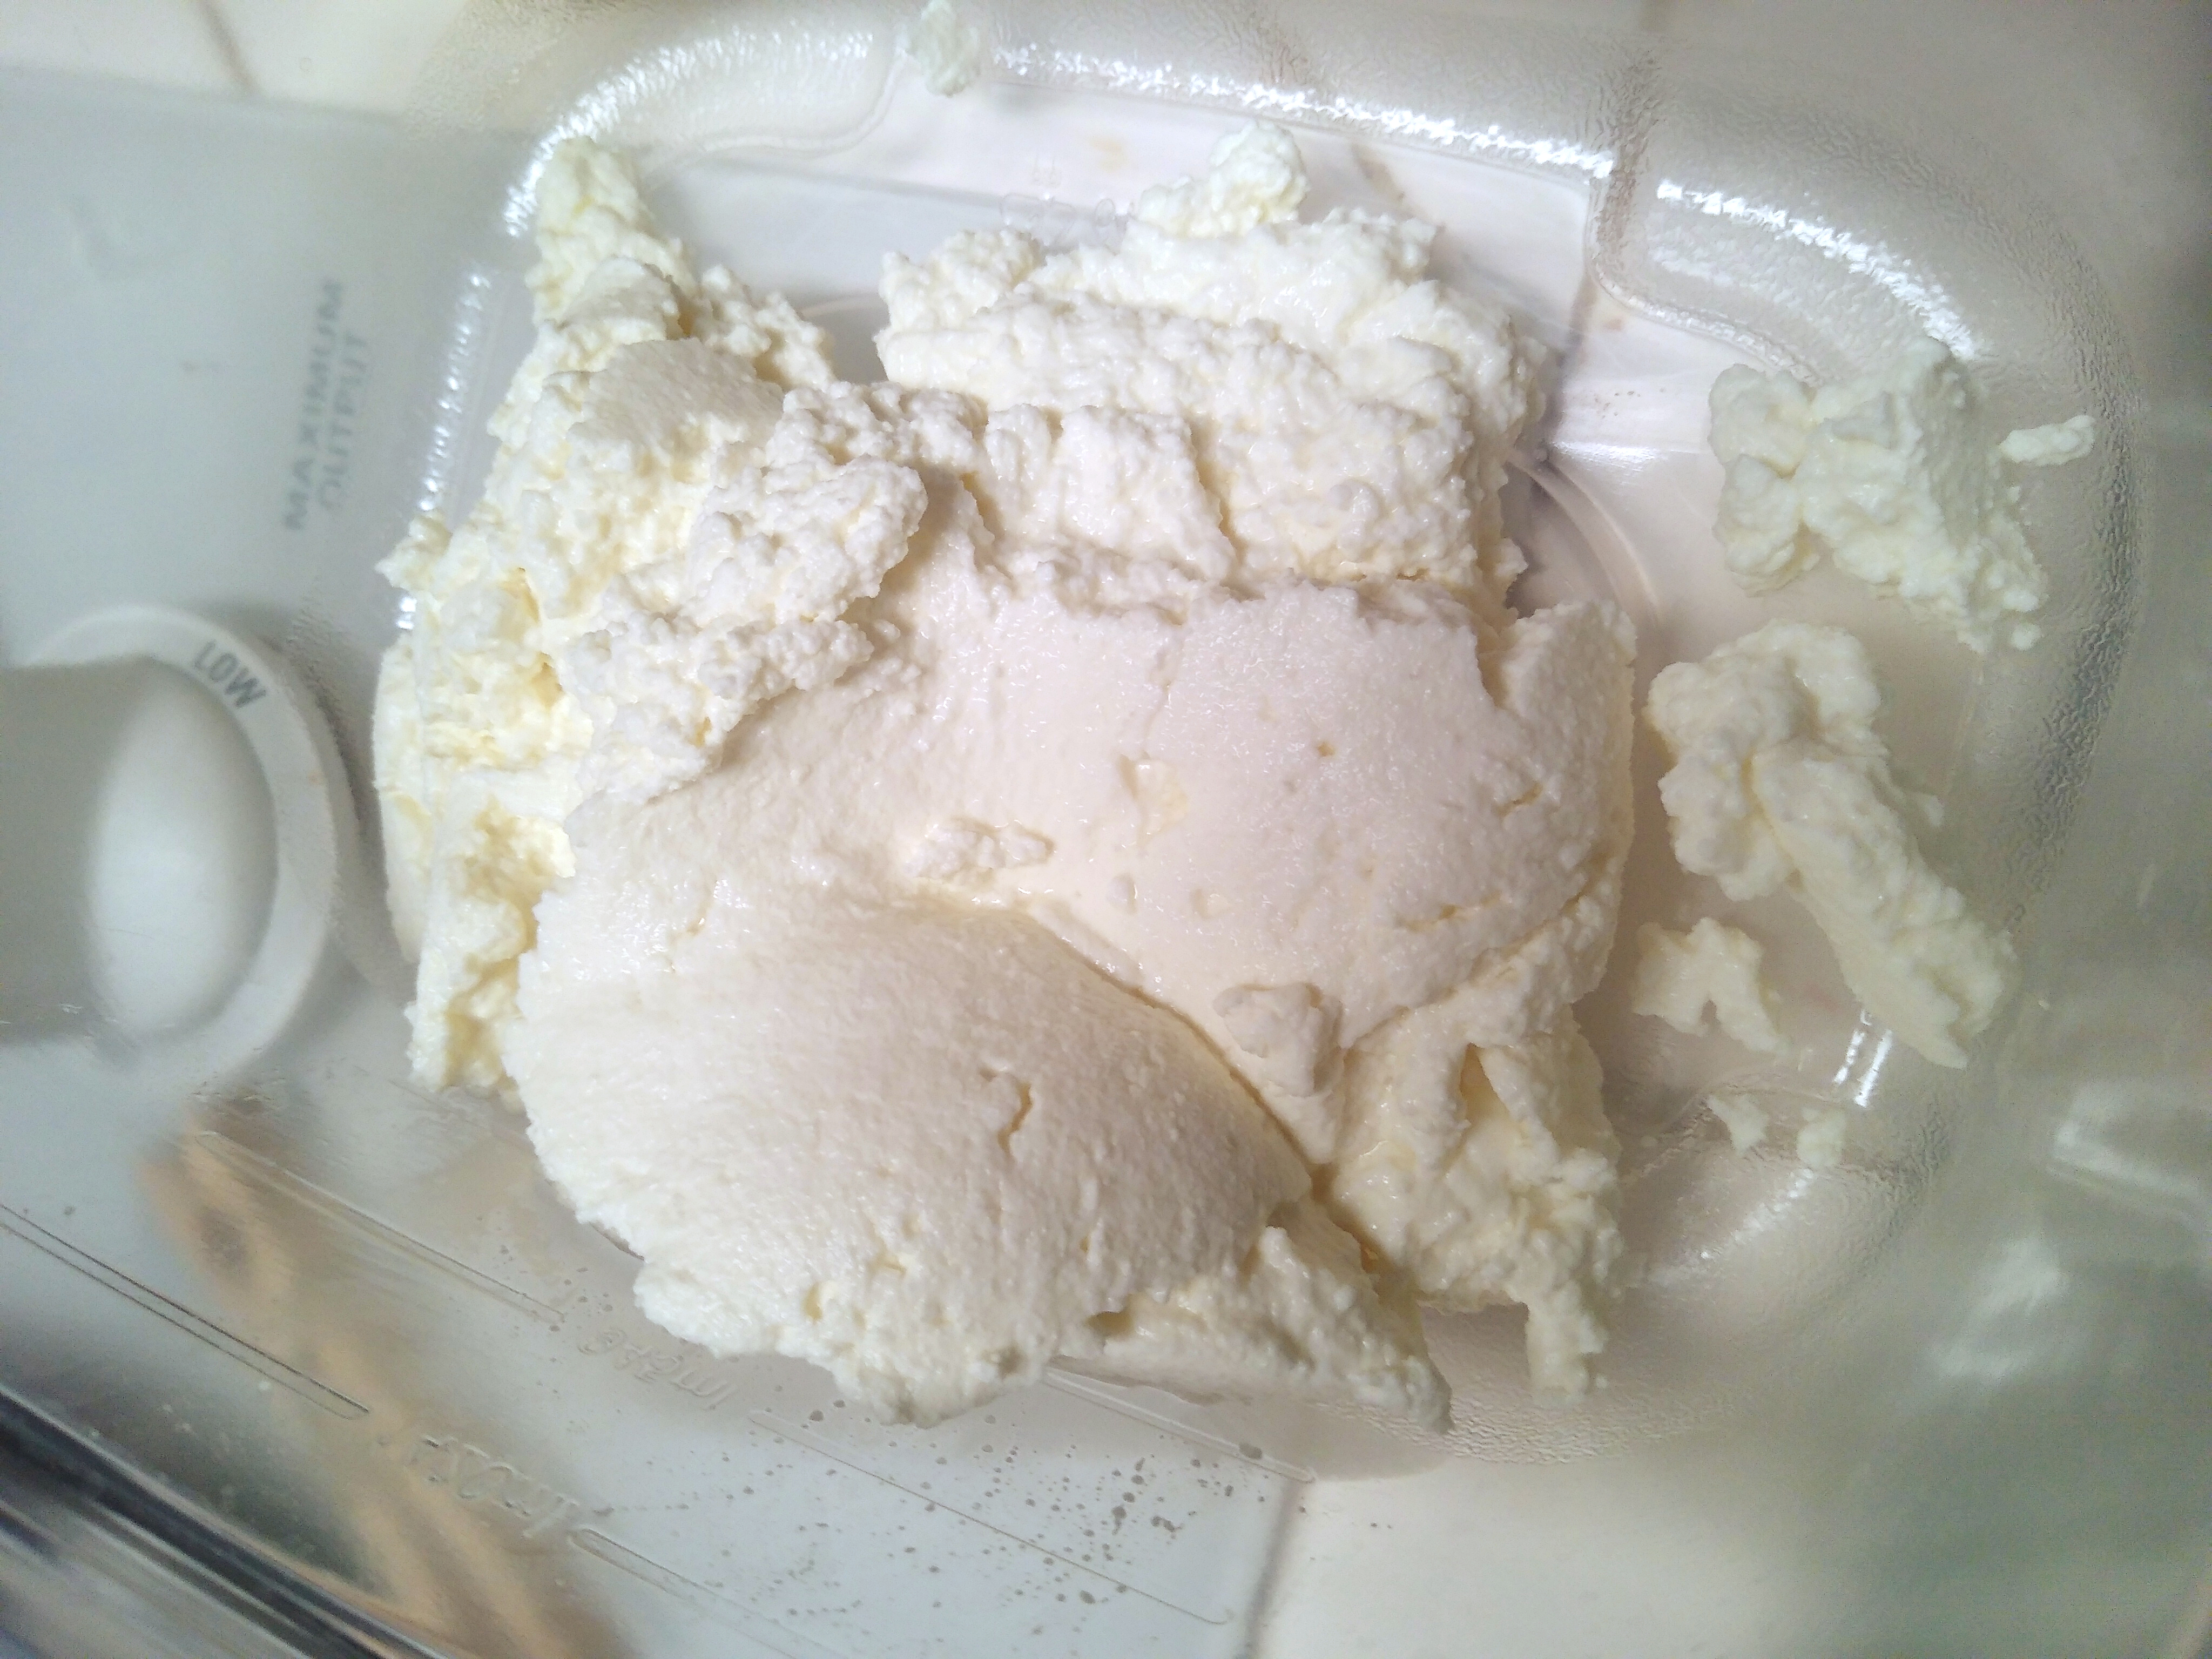
I went ahead and commenced the icing as soon as I closed the oven door on our impending failure. In theory, the icing could "let stand, stirring occasionally, until of right consistency" while the not-cookies baked and cooled. When I mixed the powdered sugar and milk in bowl #1, I began suspecting that the icing would need no standing time. The icing already stood on its own before we added the chocolate to it.

Kind of looks like soft-serve, doesn't it?

The finished icing reminded me of the boiled blackberry pudding. Its instructions tell you to add flour "enough to make the spoon stand in the batter." 


Meanwhile, the "cookies" had defied my expectations. I thought we would get a dense, brownie-ish chocolate thing, but instead we got a puffy, airy-looking chocolate cake.


As I waited for the surprise cake to cool, a number of people approached the icing bowl with spoon in hand. I have never seen anyone look so happy from a tiny spoonful of icing. This tasted like the best fudge you ever made. I think it would be amazing spread between two yellow cake layers, or on top of cupcakes. But since I didn't have any of those at the moment, I spread the icing on this chocolate cake instead.


The icing was hopelessly, unworkably thick. You may as well try to smear modeling clay on top of a cake. I know the recipe says to thin it with a little milk if needed, but the icing was so rich, so fudgy, and so creamy that I couldn't tamper with perfection. Instead, I microwaved the icing until it melted a bit.

This is the most diet-friendly chocolate cake I have ever made. By "diet-friendly" I mean large pieces of cake kept disappearing whenever I wasn't looking. Chocolate cake cannot tempt you when it's already gone. You would never think such a delicious cake was a recipe error. It was light and airy in texture, but marvelously rich and dark in taste. People were asking when I will make the cake again. Because I can never keep my yap shut when I nearly ruin food, I of course blabbed that this delicious cake was supposed to be cookies until I did not correctly halve all the ingredients. The response: "Well, you need to make that mathematical error again!"


But we weren't sent a cake recipe. We were sent a cookie recipe. And I wanted to see what happens if we make the recipe again, but actually follow the directions. The resulting cookie dough, if you actually use the measurements given in the recipe, was ever-so-slightly runny. Like, it could almost hold a shape, but it drooped if you held it on a spoon for very long.

I contemplated refrigerating the cookie dough, but the recipe does not tell us to. Presumably the staff at Swift and Co's test kitchen thoroughly tested this recipe, and determined that we need not involve the refrigerator. But in case these cookies spread out a lot, I gave them far more space than I usually do when baking. I also deliberately used a cookie sheet with raised edged on all four sides because I was almost certain that a hot drippy mess awaited after a few minutes in the oven. I know that drop cookies are a bit runnier than the ones you have to properly shape before baking, but these seemed... well, too runny. Or maybe I was just worrying too much after I ruined the previous attempt at this recipe.

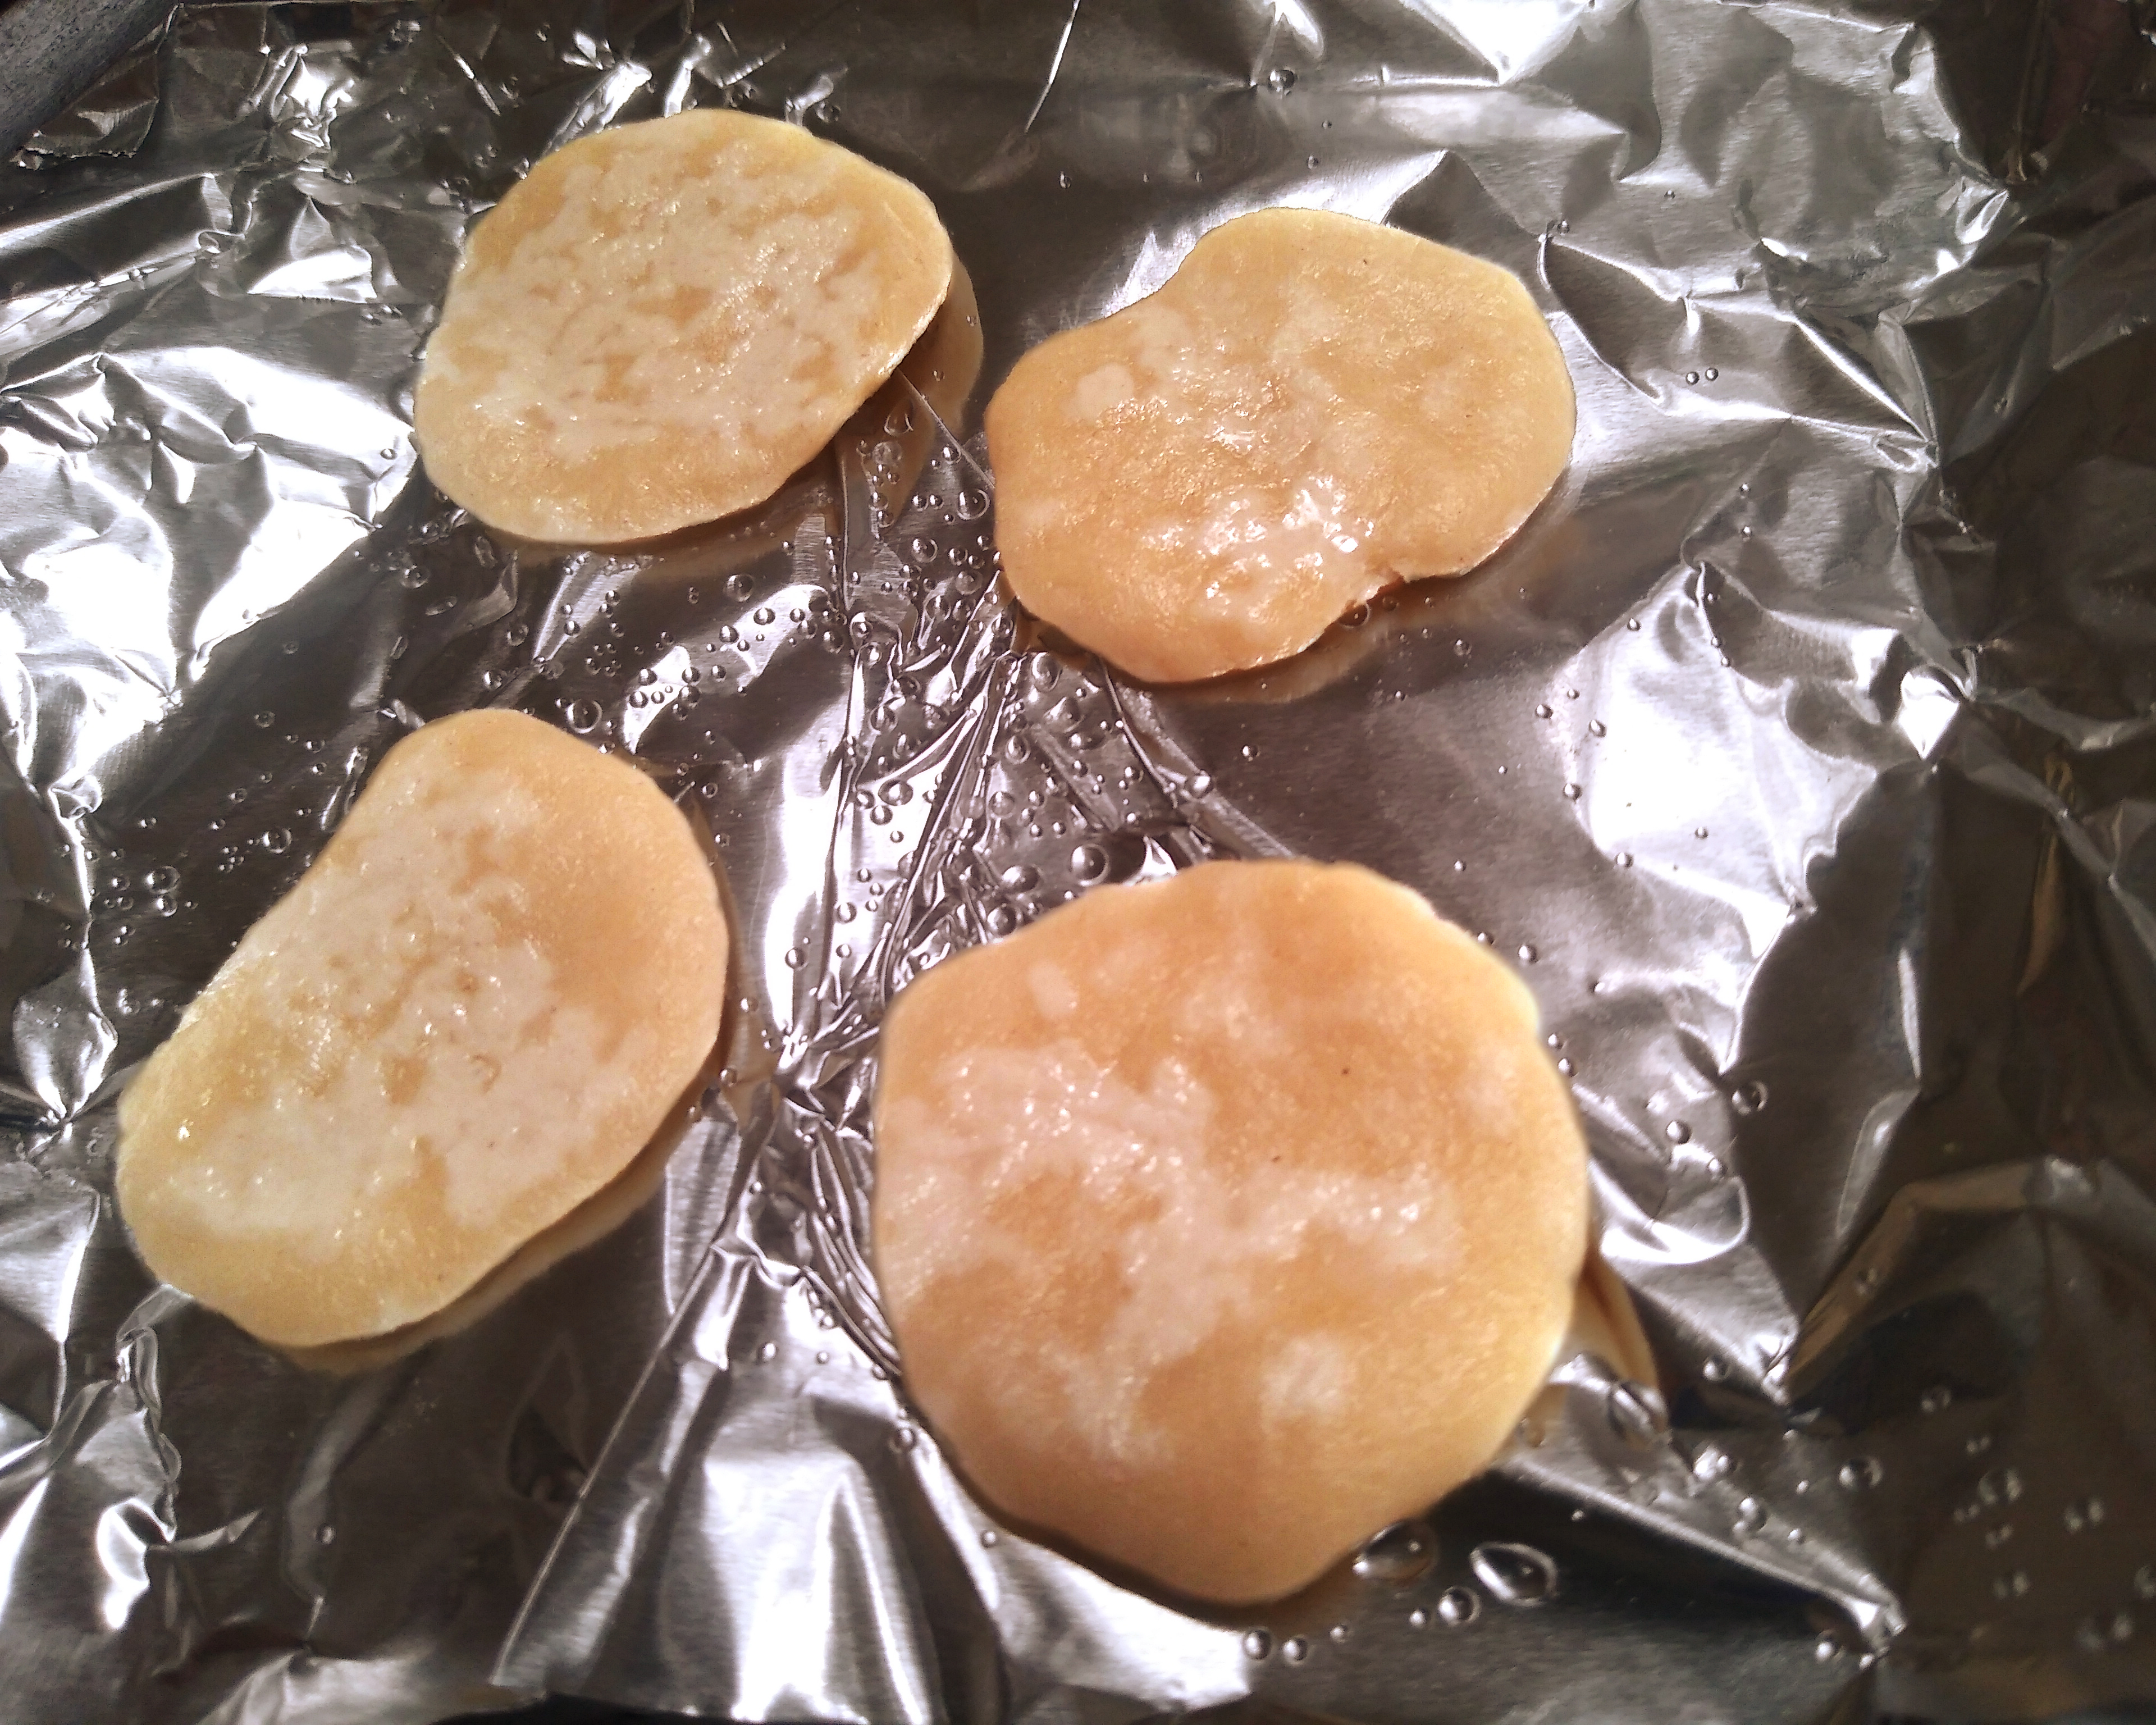
The cookies didn't even slightly slump in the oven, much less spread out. I would say you should flatten these a bit if you want them to look more cookie-like, but you would probably end up with a sticky mess instead. If I felt fancy, I might pipe this cookie dough out instead of just spoon-dropping it.


They're such near-perfect domes, aren't they? I was a bit disappointed they didn't spread out and look a bit more, well, cookie-like. But we have to discuss something about the recipe results. Here is our lovely tray of cookies right after we turned off the oven and put away the pan. You will note that we had to get out the big platter.


We have 17 cookies on this tray. Keep in mind that we halved the recipe, meaning we should only have nine of them. This is a rare moment at A Book of Cookrye. Between my deliberately terrible bowl-scraping (if you don't leave batter on the bowl to lick, why did you even start baking?) and my habit of measuring portions of cookie dough with a far more generous hand than recipes tell me to, I almost always get far fewer cookies than the purported yield. However, I got nearly twice what this recipe says I should have. Clearly my cookies aren't man-sized enough, and I will have to make them big enough to use as dinner plates next time.

You should know that I doubled the icing recipe and figured any extra could go into the freezer. This is all the icing that was left after the last cookie was properly dressed. Note that I had to get out the rubber spatula before instead of after finishing the cookies.


So if you're going to make this recipe, I suggest you double the icing (I already doubled the amounts when I typed out the recipe). You can just put any extra in a plastic bag, squeeze out the air, and freeze it until you want it. But unless you spread it very thin, you may not have to worry about surplus icing any more than I did.

But enough about that. Look at how delicious these are!


As we ate them, one person said "Yeah, I can see how these turned into a cake last time." These cookies are like eating the tops of cupcakes. 

The only thing I didn't like was that I didn't have anywhere to go and give these away (keep in mind that we accidentally made twice as many cookies as we planned). But these were just as diet-friendly as the cake made from the same recipe. One person said "Great. Now I'm going to keep stuffing my face with these until they're gone." Another person ate one, immediately looked blissful, and simply said "Good cake-cookies."

I very likely will make these again. It's nice to know that I can make delicious chocolate cookies without endangering the wreckage of my pre-pandemic figure because everyone else likes them as much as I do.

Sunday, October 16, 2022

Plum and Feta Tart: or, Adventures in Unimaginable Pies

This recipe is so classy they photographed it on an artistic floor tile instead of a plate.

Food and Drink, autumn 2016, Liquor Control Board of Ontario
 
Plum and Feta Tart
6 sheets of phyllo*
3 tbsp (45 mL) melted butter
6 ripe red plums
1 cup (¼ L) plain Greek yogurt or sour cream
2 eggs
¼ cup (6 cL) flour
¼ cup (6 cL) sugar
1 c (¼ L) crumbled feta
3 tbsp (45 mL) honey or maple syrup

Heat oven to 375°F (190°C). Grease a shallow 9x13 (23x33cm) pan.
Lay a sheet of phyllo on the pan and brush with melted butter. Lay another sheet of phyllo on top, matching the corners as well as you can. Brush with more of the melted butter. Repeat with all the remaining phyllo sheets, but do not butter the last one.
To make the edges nice and neat, tightly fold the dough on one of the long sides into the pan. Then fold in the other long side, then the two short sides. Then tuck in the corners. Brush the tops of the edges with butter.
Slice a plum in half along the indented side, then twist the plum apart. Remove the pit. Take each half and cut it in half again parallel to the first cut, so you have one oval with skin on the back and one ring-shaped shaped slice with skin on the edges. Repeat with all the remaining plums.
Blenderize the yogurt, eggs, flour, sugar, and feta. Be sure to stop the blender and scrape the sides with a rubber spatula a few times. Pour into the crust.
Brush each plum piece all over with maple syrup or honey and place cut-side down in the filling. When placing the plums in the pie, leave space between them. That way, you can cut around the fruit when serving instead of trying to cut through it.
Bake 25-30 minutes (15-18 hectoseconds), or until the filling jiggles but is set.
Serve in squares. It's best the day it's made.

* Quick note from my half-Greek friend who gets very twitchy about this: It's pronounced feel-o, not file-o. I didn't know that either.
If you don't want to deal with phyllo, I used a plain unbaked pie crust and the tart came out fine. Well, the crust came out fine at least. You can also purchase premade mini phyllo shells, cut the plums small enough to fit, and make plum-feta tartlets.

Note: As with all recipes that give both metric and nonmetric measurements, pick one measurement system and use it for all of the ingredients. The amounts differ slightly between metric and customary. So, either use all liters and grams, or use all cups and tablespoons. Don't measure some things in metric and some things in customary.
Note 2: If you cut this recipe in half, it will make one 9" or 10" (23cm or 25cm) pie. To help the plums fit into the pan, cut them into wedges instead of horizontal slices as in the original recipe.


Source: Food and Drink, autumn 2016, Liquor Control Board of Ontario

I like to flip through this magazine that I found on a chair at the Ottawa airport back in the days when international travel was still a thing. The glossy-paged peep into the finer foods across the northern border fascinates me. This brings us to the Plum-Feta Tart.

I couldn't even try to imagine the taste of a dessert pie with feta cheese. Therefore, the plum-feta tart dug itself into my mind. Every time I looked over the recipes, I kept coming back to this photo of a pie on a floor tile loaded with fruit and a non-dessert cheese. What would it be like? What would happen if I made it? Would I live the plum-feta tart down?

I decided that perhaps some plums and feta cheese wouldn't be the most extravagant thing ever put into the grocery cart, and eventually got the Plum-Feta Tart added to the week's list. This led to the first carton of feta cheese I've purchased in quite some time. Did you know they sell pre-crumbled feta cheese just like they sell already-shredded cheddar? I thought I would need to figure out how to crumble it for myself. For some reason I thought feta was dangerously expensive, but it costs about the same as the cheddar, parmesan, and mozzarella that sit on the same supermarket shelf. I'd forgotten that feta looks like packing foam.

Everyone to whom I described the plum-feta tart was like "You're putting what in a fruit pie?" No matter how many times I said that no one finds anything odd about a fruit and cheese course, the general reaction was... unconvinced. You'd think I was putting chopped raisins in the peanut butter cookies. But just like trying to explain that quiche is "a savory custard," some people can't understand a concept until they eat it. 


While we're making expressive use of the blender, let's look at the recipe. I love the note at the top about how this is super-healthy and protein-packed, and therefore we can eat as much as we want with impunity. Why should anyone in Canada worry about eating too much pie when parka season is here? After spending the whole summer worrying about how we look in a single layer of clothes, autumn is that magical time when we can hide our loosening figures under jackets and proudly say "Put extra whipped cream on that!" 

But in case one is already preparing for next year when we must again put our coats and toques away, the plum-feta tart is not as sugared as most desserts on the American side of the border. (Though perhaps Canadians don't need as much sweetness as Americans do. More Canadian dessert research is needed as soon as I can go back.) The plum-feta tart looks like it can join banana bread and blueberry muffins in the category of foods that are both a breakfast and a dessert.

The phyllo crust be a thematic match with the feta cheese since both are Greek. However, the recipe only uses six sheets of phyllo, and I do not want the rest of the box to sit in the freezer until it gets freezer-burnt and must be thrown out. We made a normal pie crust instead. Since they used phyllo in the recipe photo, I have to ask: How did they get that entire 9x13 pie out of the pan in one piece?

The recipe tells us to "pulse and whirl until smooth," but the feta did not liquefy. Instead, it turned into little hard granules suspended in light beige goo. When I sampled a spoonful of the freshly-blenderized filling, the feta tasted out of place and wrong. It added an uncalled-for soapy undertone to what otherwise tasted like a mild yogurt. I know feta is one of the featured ingredients in this recipe, but I began to think adding it was a bad idea.

Getting all the dairy and raw egg ready for the high-wattage blade-whizzing reminded me of those people who take up exercising and start putting questionable things into their blenders. We only lack a scoopful of that weird supplement powder that comes in 20-pound plastic jars.


Moving on to plums, I have never purchased or eaten plums before. I just never thought to buy one. Apparently no one else in the area buys plums either because the store didn't have any. Aren't plums supposed to be an autumn fruit? Well, as much as I was curious what plums taste like, the closest we could get was plumcots. Apparently plum-based hybrid fruit have superseded plums, because we had our choice of plumcots, pluots, and a few other plum-apricot crossbreeds. In what I am sure is a move to make this recipe easier, the recipe has us cutting the plums as shown below. Not only do we only need a quick minute to cut the plums as specified, the plum slices look so darn pretty.

Well that was quick.

You finish making a plum-feta tart a lot faster than the fancy title and high-dollar photography suggest. When you read the recipe instructions, you can tell that they actually wanted people to make this pie. The directions are so... feasible. We merely had to get everything into a blender, pour the liquefied results into a pie pan, and plop in the fruit. This is where things went awry.

Attempting to fit these aesthetic plum slices into the pie brings us to where I ruined it. I halved the recipe (the original amounts make a lot of plum-feta tart). However, I underestimated how much pie the half-recipe would produce. Therefore, I selected a pan that was too small for the pie we ended up with. We couldn't fit more than one plum our pie when we cut them as directed, and I didn't want to waste the others. By the time I realized my error, I had already made the pie crust, placed it into the small pan, and didn't feel like making another one. 

Instead, I hastily cut the plums into smaller pieces and jammed them in there as best they would fit. They kept slipping and sliding out of place. The pie ended up looking like I just took some fruit slices and smashed them in there. I blame myself and not the Ontario liquor board for the fruit-fitting difficulty. Had I used a correctly-sized pie pan, this would have been a marvelously easy recipe (aside from the phyllo business).


Just for a foretaste of pie to come, I tried dipping one of the plum wedges into the sticky surplus of blenderized cheese. The two went together surprisingly well. The creamy cheese mixture was a perfect contrast to the plum's acidity. However, the feta alternately hid and popped up with the subtle yet out-of-place flavor of fermented soap. My high hopes for a lovely new experience fell into the disappointed expectation that once again, people would try the pie, squint suspiciously at it, and ask "What's in this?"

On a chemistry note, I took the extra pie crust and made little crackers with salt on top to bake next to the pie. Keep in mind that I made the crust the day before. When I got out the little extra crackers, the salt had gone hygroscopic on them, forming these little water-blisters on top. (You couldn't tell the difference after they baked.)

Despite the pie tasting (to put it graciously) unpromising, I figured it was already assembled and the oven was already preheated, so I may as well bake it. As the plum-feta wreck cooked, I started to think we might not throw it away after all. The kitchen smelled so good. First, a marvelously cheesy fragrance drifted about. Then the oven sent out tantalizing wafts of toasted butteriness from the crust. It was enough to make someone forget that they just had supper. To my own surprise, I couldn't wait to cut out a big piece of this pie.

However, we soon discovered that you can't cut this pie. You know how with apple pies, the knife just goes right through the fruit? The plums are too hard for that to happen here. They just popped out of the pie and made it look worse than it already did. This is the best-looking slice I could manage. Again, I blame my too-small pan choice for this, not the recipe. You need a bigger pan so you can leave plenty of space between the plums for the knife to pass through.


As for the taste, the feta melted into the rest of the pie filling as it baked, eliminating the hard cheese pellets that had interspersed the pie when it was fresh out of the blender. The custard was a lot more mild-flavored than before baking. I almost thought I had put vanilla in it. The whole thing reminded me of the Sour Cream Apple Pie Deluxe that we saw a while ago.

Those of you trying this at home should know that the plums did not soften while baking. They remained juicy and tart, which contrasted very well with the filling. However, the big pieces of firm fruit make this a pie that requires a knife and fork. Also, as aforementioned, you can't cut through the fruit without making a plum-feta mess of it. To make serving and savoring this pie easier, I suggest cutting the plums into smaller pieces. You could also skip that tedious honey-brushing business and just toss the fruits and honey in a bowl for a few seconds before putting them into the pie.

Because few pies vanish in a single day, we should note that the feta flavor intensified after leaving the leftover pie in the refrigerator overnight. Since it had nicely melted and melded with the crust, it wasn't discordant like it was before. With that said, the pie might have passed for dessert right out of the oven, but the next day it was decidedly not. So if you want a strong feta taste in the pie, make it the night before. If you want a milder and mellower flavor, make the pie the day you serve it.


In closing, I liked this pie a lot. It's less of a dessert and more of a one-pan fruit and cheese platter. However, you definitely have to tell people what's in it when serving. Since it has a lot of cheese and very little sweetening aside from the fruit, you can easily feel less bad about eating leftovers the next morning. It's unusual, interesting, and something I would definitely make again.

Saturday, October 15, 2022

Second-Stab Saturday: Delayed Cheesecake

We have a quick second stab today! Did you know that apparently you can just freeze cheesecake batter?

Make-ahead Individual Cheesecakes

Line a cupcake pan with papers.
Use the cheesecake recipe of your choice. Press a bit of the crumb mixture into each cupcake. Then pour the batter among all of them. Fill each cupcake about ⅔ full. Put the whole pan in the freezer.
When they are frozen, remove the cupcakes from the pan and place in a sealed container. Leave in the freezer until you want to bake them (you can freeze them for at least 3 months).
When ready to bake, heat oven to 350°. Put the cupcakes back into a cupcake pan (you don't need to defrost them). Bake until set and jiggly, about 30-45 minutes. Refrigerate, then top as desired.

When we made the Saint Patcaken, we had a bit of extra cheesecake batter that didn't quite fit into the pan. So, we pressed the extra crust into a cupcake liner, poured in the batter, and put it in the freezer. 

We all agreed that after eating far more Saint Patcaken than anyone should, even this tiny bit of cheesecake would be far too much. The freezer let the last of the cheesecake wait until we recovered.


Obviously, anyone who's sauntered down the frozen dessert aisle would know that we are not the inventors of the frozen cheesecake. Furthermore, a lot of people put already-baked homemade cheesecakes into the freezer, where they keep better than most other desserts. But we wondered what happens if you don't bother baking one first.

While you can purchase a frozen cheesecake and bake it at home, I wondered if you can just freeze an unbaked cheesecake batter you made for yourself. Do they have to add extra chemicals or perform laboratory-grade cheesecake processing at the Sara Lee factory before they freeze it and ship it out? Or can you just take any recipe and freeze it?

A few months after we had recovered from Saint Patcaken, we popped this little cupcake into the oven next to dinner, and 45 minutes later it had puffed up until it looked like a cauliflower. At first I thought 45 minutes is a dreadfully long time to bake a cupcake, but then I remembered that usually cupcakes aren't frozen solid before introducing them into the oven.


It's so cute and puffy, isn't it? I don't know if it's the alcohol in the cheesecake evaporating while it baked (you may remember that we put Irish cream in it), whether cheesecakes just puff a lot when you freeze them before baking,  or if it's something to do with this particular recipe. Perhaps the cheesecake would have looked more "correct" and flat on top had I baked it at a low temperature the way most people do with cheesecakes. Unfortunately for this little cheesecake pouf, I baked it at a heathenishly hot 350°. (I didn't think setting the oven the slightly too hot for cheesecakes would matter since the this one was so tiny. Also, as previously mentioned, I just put it in the oven next to supper which was baking at 350°. We were not running the oven just for one cupcake.)

If the cheesecake had retained its adorable cauliflower-like appearance, I would bake a lot of cheesecakelets like this. Unfortunately, like a souffle, it fell down as it cooled. By the time the cheesecake was cool enough to eat, it was no longer photogenic. Although, if I were inclined to do this again, I could easily make use of that crater in the center, filling it with an artful blob of whipped cream and some thoughtfully-placed fresh fruit.

That crater is not a visual defect but an opportunity to get creative in hiding it.

But even if the cheesecake looked a bit less than presentational on the outside, it was perfectly fine when we cut it open.


If you didn't look at the unsightly collapsed top, you would never know we froze the cheesecake. The texture was precisely the same. We cut this little cake up so everyone could have a bit, and it was most warmly received.

So if you want to make cheesecakes ahead of time, you can freeze them and then bake them at your leisure. This one was in the freezer for a few months before we baked it. And if they look far less than perfect on top, just hide the unsightly imperfections and craters with your toppings of choice.

Monday, October 10, 2022

Molasses Crinkle Cookies

This recipe has been staring at me ever since we bought the molasses.

 
Molasses Crinkle Cookies
¾ c softened butter
1 c light brown sugar
1 egg
2 tsp baking soda
¼ tsp salt
½ tsp cloves
1 tsp cinnamon
1 tsp ginger
¼ c molasses
2¼ c flour

Mix sugar, butter, baking soda, salt, and spices. Beat well. Add eggs, one at a time, beat well after each. Thoroughly mix in the molasses, then work in the flour. (If using an electric mixer, you can just put everything except the flour into the bowl all at once, beat until mixed, and then add the flour.)
Coat a large serving platter or two dinner plates with cooking spray.
Shape into 1-inch balls, then set them on the plate. After they're all shaped and on the plate, sprinkle them with sugar. Refrigerate until thoroughly cold.
When ready to bake, heat oven to 375°. Grease a baking sheet.
Set each cookie about 3 inches apart on the baking sheet. Sprinkle 2-3 drops of water from your fingertips onto each one.
Bake 10-12 minutes. As with anything that uses a lot of molasses, watch carefully and remove them from the oven if they start to blacken around the edges- molasses is prone to scorching.

Source: Grandma's Molasses jar

Whenever I get anything out of the pantry, the recipe for Molasses Crinkle Cookies sits on the shelf, quietly whispering to me from the back of the molasses jar. You might think I should turn the jar so the recipe faces the other way, but 1) I am not so good a housekeeper that I always make all the labels in the pantry face the correct direction, and 2) I would know the recipe lurks on the back of the jar anyway.

As we got everything into the bowl, I had my doubts about the recipe. First, the directions call for "softened shortening." I know no one who keeps their shortening cold enough to necessitate softening. Perhaps the recipe writers couldn't decide between shortening and butter. Or maybe they wrote this recipe in the days when "shortening" meant "any solid fat" and never updated the words as English changed over the decades.

Second, we are directed to just dump everything into the bowl all at once.


I decided that since food manufacturers (theoretically) test the heck out of recipes before allowing them onto the back of their products, I would set aside my misgivings that the (softened) butter would resist mixing if I followed the directions. Surely the people at B&G Foods, makers of Grandma's Molasses, would have made sure you can follow the recipe as written before printing it onto the back of the jar. As I suspected, we ended up with butter lumps in sludge.


You might think I shouldn't bother using a spoon when a stand mixer is at hand, but the Mixmaster is having some problems lately.

We found out why it landed in an antique store with a low price handwritten on the tag. A few decades of flour and other cooking detritus have clogged the motor up until it just couldn't cope. We will have to purge the Mixmaster's innards of countless cookies and cakes before it can mix again. Fortunately, we have a little handheld backup!


I didn't want to use the handmixer for cookie dough lest it burn itself out. But I figured the mixer would be fine is we only used it to force the lumps of softened shortening to mix in, and put it away before we got to the flour. 


I fault the recipe writers for failing to tell us we needed an electric mixer for this recipe. One finds vague instructions often enough in community cookbooks, but this recipe was (theoretically) written by professionals. Did they test this recipe at all? After I got the flour into the bowl, everything looked hopelessly crumbly. I gave up on the spoon and got in there with my hands like Fanny Cradock making a fruitcake. After some forceful squeezing, everything came together into a surprisingly sticky dough.


The directions tell us to refrigerate and then shape the dough, but I prefer to do those steps in reverse order. The dough may be sticky and annoying to work with before it gets cold, but it's hard and crumbly after. You just have to pick which one you mind less. I should also note that I made these a lot bigger than the recipe says I should. I think getting the expected yield out of a cookie recipe often means the cookies are too small.


I was curious what all this business of sprinkling water over the cookies before baking was supposed to accomplish. The recipe says the water creates "a crackled surface." So naturally, I sprinkled some of the cookies and baked the remaining ones without getting them wet. It turns out that the water makes the sugar grains on the outside of the cookies meld into a sort of glaze. I may start doing this every time I make cookies get rolled in sugar.

No water-sprinkles on the left, water-sprinkled on the right.

Like anything with lots of molasses in it, these cookies were prone to scorching around the edges. If you overbake most cookies, they get a little extra-toasty on the edges and a bit crunchier than usual. But if you overbake something with molasses, it quickly gets burnt.


These came out really soft, and the crisp glaze on the outside from getting water on them was a really nice touch. As someone else said, "These are kind of like gingerbread." But as delightful as these are, they weren't quite as good as Aunt Babette's molasses cookies. The cookies from the back of the molasses jar were a bit blander. Even those in the house who've never heard of Aunt Babette said "That other recipe was better."

Saturday, October 1, 2022

Making ricotta cheese at home for the first time!

Ever wanted to make your own cheese?

Microwave Ricotta
4 c whole milk
¾ c plain yogurt
1½ tsp lemon juice
½ tsp salt

Line a colander with a clean, thin, undyed cloth. Set it over a large bowl.
Mix the ingredients in a different, microwave-safe large bowl. Make sure the milk has plenty of room to boil up in the bowl. Milk is prone to boiling over, and you want to make sure all the boiling foam has plenty of space to be contained rather than spilling all over the microwave.
Cook for 60-90 seconds at a time, stirring well after each cooking interval, until the mixture curdles. Watch carefully to make sure it doesn't boil over.
Curds will form on the edge of the bowl first, but keep microwaving and stirring the milk until all of it is curdled.
Pour into the cloth-lined colander and let drain 5-15 minutes, depending on how dry you want it. This may be cheesemaking heresy (as if doing this by microwave isn't already sacrilege), but if you drain the ricotta too long and it becomes too dry, you can just stir some of the runoff back into it.

Note: Instead of ¾ cup yogurt, the original recipe uses ¼ cup yogurt and ½ cup cream.

This foray into cheesemaking started with a batch of spinach manicotti I made. Everyone like them, but started "subtly" hinting that perhaps spinach wasn't their noodle-stuffing of choice. I got comments like "So, what if you tried making those spinach things but you used meat in the sauce?" or "We should try those spinach noodles again, but don't you think stuffing it into those pasta tubes was kind of annoying?" Eventually they came out with it: spinach manicotti may be nice, but they wanted a lasagna.

Manicotti may not be lasagna, but the near-empty state of the pan speaks for itself.

Lasagna isn't the cheapest thing anyone ever made, but demand persisted. I eventually wrote out the entire ingredient list, with rough guesses about the price of every item, and said that if no one objected to how much all of it costs then I would put it onto the grocery list. (Though in an interesting turn of fate, we would end up using a lot less meat in a massive pan of lasagna than we do on spaghetti night. In these pandemic-altered grocery prices, lasagna may be cheaper than plain noodles and sauce.)

Lasagna in this house comes with one problem: one person in the house is lactose intolerant, and apparently there's a limit to how much cheese you can eat before those dairy pills stop working. And while I'm sure someone makes lactose-free ricotta, they did not have it at any store near me. (Well, maybe the health food store had it, but they're so expensive I didn't bother to look.)

I hazily remembered reading somewhere that making your own ricotta actually isn't that hard, and decided that I wouldn't mind having a go at it for myself if we purchased lactose-free milk for the purpose. I poked around online and found out that you simply curdle the milk with a bit of lemon juice and then strain it. 

I should note that a lot websites I looked at thought I should pay for specialized cheesemaking equipment, which wasn't going to happen. It was a big day at A Book of Cookrye when we got a kitchen scale. I couldn't handle the excitement of a cheese hoop.

To my surprise, I found a simple recipe that required no weird specialized tools in a New York Times article. I have skimmed through a copy of The New York Times Cookbook, whose writers seem to think that you have a lot of specialty food purveyors and maybe a few custom metalworkers in your Rolodex. Therefore, I was surprised to find that the newspaper had a cheese recipe that seemed like it's meant for ordinary people to try making. Cheesemaking is a very specialized activity, so I was surprised that the Times didn't try to tell me I would need to purchase an commercial dairy farm's worth of cheesemaking equipment before daring to attempt ricotta.

It seems pretty simple: Mix everything, heat it up, pour it in a strainer, and let it drip for a few minutes. After reading the recipe, we realized that this is perfect for the microwave. When you heat milk over the stove, it really wants to stick to the pot and scorch. So you have to turn the burner down to a very low temperature and constantly scrape the bottom of the pot with a rubber spatula while the milk ever-so-slowly heats up. But in the microwave, milk doesn't scorch unless you cook it far too long. You only need to worry about it boiling over, which can be prevented by using a very big bowl.


I think the lemon juice in the recipe makes the milk curdle, and the yogurt replaces the cheese-forming bacteria in the milk that got pasteurized away. If I am right, adding yogurt to the milk introduces a happy group of microscopic cheesemaking helpers without risking diphtheria, brucellosis, and whatever else gets into raw milk. 

I saw a few people online who swore that you must use raw milk for ricotta, which didn't irk me but pissed me off. While cheese enthusiasts can get deep into passionate debates about the flavor merits of raw milk bacterial cultures vs reintroducing bacteria into pasteurized milk, we at A Book of Cookrye don't want to end up in the hospital because of cheese snobbery. Have you heard about any milk-borne disease outbreaks in the last few decades? Exactly.


I decided to microwave this for about 90 seconds at a time, stirring it around every time the microwave beeped at me. Little curds formed around the edges pretty quickly, but they disappeared as soon as we stirred the milk. I was surprised at how long this milk needed to cook, since I'm used to only scalding maybe a half-cup or so at a time for a bread recipe. But after about ten or twelve minutes of cooking time, our milk had gone from a white liquid to a greenish-yellowish translucent fluid with little white larvae floating in it. When the recipe said to cook the milk until it curdled, I expected something like cottage cheese. I nearly overcooked the milk because I thought my curds were too small and that more time in the food-zapper would fix that.

Yes, we have curds and whey just like Little Miss Muffet.

To be realistic, I don't think microwaving your ricotta cheese instead of cooking it on the stovetop will save you time. But as aforementioned, in the microwave you don't have to worry about the milk scorching on the pot and infusing your cheese with a burnt flavor. So microwaving the cheese is easier than slowly and carefully heating it on the stove, even if it takes just as long.

After heating up the milk, the recipe would have us pouring it into cheesecloth to drain. I wasn't about to go out to the craft store and purchase new fabric just to get cheese all over it. Commercial kitchens (and the sort of people who use cheesecloth in the kitchen) purchase cheesecloth in dispenser-boxes like the ones waxed paper and aluminum foil come in. We at A Book of Cookrye have never before needed cheesecloth at the house. Unless we start making ricotta every other week, going to a restaurant supply store for a box of cheesecloth is an extravagance of funds and kitchen shelf space. We got out a clean rag instead. Those of you following along at home should know that unless you plan to immediately launder your cheese-rag, you should rinse it in the kitchen sink as soon as you're done making cheese.


After we strained the whey out of the cheese, we discovered that we had hardly any cheese left. An entire quart of milk (that's about 1 liter) yielded this puny little scoop of cheese.


Apparently this is a mild rite of passage for cheesemakers: finding out that you barely get any cheese out of a large vat of milk. Most of your milk gets drained away. Fortunately, we purchased a half-gallon of lactose-free milk. Therefore, we were able to make two batches of ricotta which (barely) produced a pint of cheese. As you can see by my storage container of choice, I thought we would get a lot more cheese out of a big carton of milk.


I didn't mind how little cheese we got out of a half-gallon of milk. (For our metric friends, that's a scant half-liter of cheese out of 189 centiliters of milk.) However, I was annoyed at myself because I was unprepared for all the whey. I thought we might get a cupful of whey or so out of this cheesemaking adventure, and thus planned to just pour it down the sink. I was not psychologically prepared to waste 3 quarts (that's 3ish liters) of perfectly good whey. I don't know what whey is good for, but I damn well would have found out had I known how much of it I was about to waste.

All of this went down the drain, and one day I may stop feeling guilty about it.


As for the ricotta itself, it tasted just like the ricotta you purchase at the store. So based on my single cheese experience, I don't think ricotta is better if you make it yourself. 

However, I didn't get into cheesemaking because I was fed up with the subpar quality of supermarket ricotta. We made ricotta for ourselves so that even the lactose intolerant in the house can eat lasagna without internal peril.


It looks like I'm spackling the noodles, doesn't it? In case you're wondering, I got my lasagna recipe from my aunt, who told me she just uses the directions on the noodle box.


So while homemade ricotta isn't magically better than the stuff you can just purchase on the cheese aisle, it's a nice introduction to cheesemaking. You don't need to buy any special kitchen tools, and the cheese is ready to eat in less than an hour after you started making it. But like shaking a jar of cream until it forms butter or making pita bread, making your own ricotta is more about the joy of edible kitchen crafts than the food you get afterward. 

Or you might make your own ricotta if you're making lasagna for your lactose-intolerant friends and can't get any de-lactosed ricotta cheese to put in it. Granted, we generously topped the lasagna with cheese we had not made ourselves, but anyone who can eat a slice or two of pizza could safely dig in. And did they ever! This unfortunately means that lasagna is now feasible for everyone in the house, but if they're willing to spring for a half-gallon of milk, I'm willing to turn it to cheese.