Monday, July 23, 2018

Schmaltz: or, The chicken fat you never knew you (maybe) needed in life

We at A Book of Cookrye present the biggest cooking change in our lives that cooking school has wrought: Chicken fat! As aforementioned, we had to learn how to cut up a raw chicken. Feeling bad about how much skin and bones we were throwing away, we dumped them in a slow cooker full of water to make stock. We then found a lot of chicken fat had floated to the top of the pot as it cooked, and we have too many Jewish friends to throw it away. And so, we at A Book of Cookrye, with more enthusiasm than we would ever have expected, present how to do your own chicken fat!
Now, a lot of people will separately render off the chicken fat, but we at A Book of Cookrye think that is more bother than it should be. After all, if you just drop your chicken scraps and skins and bones into the stockpot, the fat will float to the surface on its own anyway.

Granted, seeing the fat floating atop the bowl of cold chicken stock may not be the most enticing way to sell it. So let's have a look at it when you've separated it out!

Seeing a picture of what looks like dirty sludge may not be the best sell ever. But various Eastern European amd Jewish cookbooks will emphatically swear that chicken fat should be in every kitchen. Apparently chicken fat (or schmaltz) is everything you liked about butter only even better.
Now, a lot of the instructions online will say that it keeps a week or so at most in the refrigerator, but I would posit that it's because it still has little pieces of chicken meat and other perishables in it. Most other fats have long shelf lives. Butter can stay in the refrigerator for an astoundingly long time. Shortening can live forgotten in the back of your cabinet for about 1.25 eons.
Operating under the theory that it's various little bits of chicken meat and other detritus suspended in the fat that expire and make the whole thing taste rotten, we at A Book of Cookrye postulated that if one can thoroughly remove them, the remaining fat should last quite a long time in the refrigerator. And so, bumbling in our own I'm-too-lazy-to-look-this-up way, we have figure out how to get all the tiny little food particles out of the fat! You just wash it. Yes, really. What you do is dump a pretty good amount of boiling water on the chicken fat and stir til it's melted. All the impurities will dissolve into the water, leaving the clean fat to float to the top. Do this a few times until the water's clear, and presto! All the little food bits that would have expired and turned smelly while embedded in the fat are washed away.

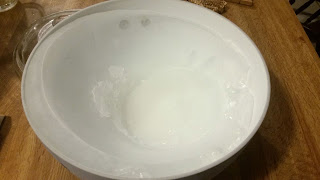
See how cloudy the water is? That's all the random meat pieces and other stuff that would have otherwise stayed suspended in the schmaltz. But that's just the first time we've mixed it with water. After a night in the refrigerator, you can lift the fat out of the water and mix more boiling water with The water will be.... well, not clear, but closer to it than before. But after a few times you will find the water remains as clear as when it came out of the faucet.

Now, it is true that there seems to be some sediment that just sticks right under the fat. As you can see with this batch, right after stirring in the hot water it looks like all the sediment has been removed.

But after settling on the counter for a few minutes, a lot of stuff kinda sinks down between the fat and water to form this barrier. It kind of reminds me of centrifuged blood (I have a surprising number of friends in nursing).

But the scum is very easy to get rid of. See how we deliberately put the container is upside-down? Well, that means that the next day we can just dump out the water and wipe the crud right off. Granted, that does mean you'll have to open the jar and see... this.
Oh, yum.

But worry not, you're only a paper towel away from perfection!

Admittedly, that's not all of the stuff that could have been wiped off. Some of it got pushed down into the fat instead of getting wiped away. So let's dump yet another round of boiling water into the container and do it again.

As a brief note, if you're going to store the container upside-down for easier sediment removal, fill it with cold water, hold it upside-down, and shake it first. A lot of food storage container lids are not as watertight as you might have otherwise thought. You don't want to discover this when you flip the container upside-down and then find boiling-hot water and grease running down your hand. But if the container is not watertight, you can just lift the entire hockey-puck of fat right off the top and wipe it with paper towels. It's not as easy, and you have to do it really fast because chicken fat melts really easily, but it'll work.
The essence of good cooking starts with a wad of fat on the counter.

All of this looks like hard work, but really all you're doing is putting a little jar in the refrigerator and putting a fresh change of hot water in it every day or two. After that, it'll keep for quite a long time in the refrigerator.
Now, you may be wondering what the heck you'd do with chicken fat. Like, why bother? Well, we're going to start with one of the easiest things you can do:

It will make some fan-damn-tastic grilled cheese! Perhaps because it has a lower melting point than butter, the grilled cheese will come out deliriously crispy.

Closely related to grilled cheese, schmaltz instead of butter will make some amazing garlic bread. The slight chicken flavor, when mixed with the garlic and salt, turns into something divoon. Honestly, it adds a really nice flavor to all manner of things. Vegetables cooked in a spoonful of schmaltz instead of oil have a marvelous richness to them. Really, you can use it instead of butter in a lot of recipes and be amazed. Or at least pleasantly surprised. Lastly, borrowing a line out of a Czech cookbook, try using schmaltz in bread recipes instead of whatever fat the recipe calls for.

Saturday, July 21, 2018

As long as you've cut up your own chicken, why not make stock?

Today on A Book of Cookrye, we're going to talk about something that comes up in a lot of recipes: Chicken stock! I know, you're excited already.
Anyway, since we recently did a brief dissertation on carving your own chickens,  we figured we might do a favor to whoever read our writings and decided to try it for themselves. We're going to talk about what to do with the massive pile of skin and bones that's left over. Because there's going to be a lot.

There are a lot of recipes that make doing your own broth look like an awful lot of work, but it really isn't hard. Just add cold water to your pot of chicken parts (I usually add enough water to cover them by about an inch or so), put the pot on a low burner so it heats up slowly, and let it sit for about a full day.
This is also a great way to use up unwanted extra produce in the fridge that's looking kinda squishy but is still technically edible, and various scraps like celery roots, onion peels, pepper cores, and stems from parsley or (whatever fresh herbs you used for some recipe). Just drop them in the pot.
You'll know the stock is ready when the bones just about crumble to mush in your hands. We at A Book of Cookrye prefer to add no seasonings at all, not even any salt. That way we can put it in any recipe we like with no clashing of spices.
Anyway, you may notice I'm not putting this in a pot on the stove but in a slow cooker. That is because by the time the broth has cooked long enough, the smell will take over your house and drive you nuts. And it will stay in your house for days. And it won't even smell like good chicken- it'll smell like chicken you overboiled until quite dead. (Which, technically, you did.) If you use a slow cooker (or a hot plate and stockpot), you can just put it in the garage (or outside if you are sure it's safe from rain, sprinklers, or raccoons) and then not have to live with The Smell.
As soon as it's done, you'll want to strain out the meat (which, as many older recipes would say, "has been reduced to rags") and cool the broth off.
This stringy overcooked mess still looks better than that time I used caned chicken.


Now, I've put still-steaming bowls of broth directly in the refrigerator. While it does cool them off overnight, your entire refrigerator and freezer will smell like overcooked chicken for weeks. You really want to get it down to room temperature before you put it in the refrigerator- but if you just leave it out on the counter it will take forever to cool.
An quick way to cool the stock off is to put the bowl into an even bigger bowl (or stewpot) of ice water and stir it for a few minutes. It will come down to room temperature really quickly. But perhaps, as with me, your ice maker has broken, you don't have a lot of ice cube trays, and you don't want to pay for a bag of ice just to near-immediately melt it making chicken stock. Don't worry, we at A Book of Cookrye have you covered! After you have put the stock on to cook, just take the bowl you were planning to strain it in, put it in a much bigger bowl/pot filled with water, and put something in the inner bowl to make it sink into the water. Then pop it into the freezer until the stock is ready.

But maybe you don't have the enough  freezer space to squeeze in a big pot. Well, don't worry. You know how you needed to put some weight in the bowl so it can sink into the water? You can take whatever is occupying the freezer space intended for your ice pot and just drop them in the inner bowl to weigh it down (after all, since it's going back into the freezer immediately, you don't have to worry about thawing whatever you took out).


Anyway, by the time the stock's finished cooking, you'll have an ice nest to surround the bowl of steaming broth on all sides.

And thus, whether you had ice in the refrigerator or not, you can totally get the stock cold enough to not steam up the refrigerator! When your stock's done, just strain it into the inner bowl and stir it for a few minutes. After a surprisingly short time, your stock bowl will be bobbing up and down in a pot of freshly-melted water, and the stock will be room temperature if not a little cold.
So let's take a brief aside and talk about the grease that will inevitably have come off the various chicken pieces. There may be rather a lot of it. While it's true that few people actually want soup with a thick grease slick on top, just leave it when you put the stock in the fridge. A lot of people try to obsessively skim the fat off right away, but we find it easier to leave it in the refrigerator and pick it off the next day when it's solid. You'll save so much time and tedium. Instead of carefully trying to skim the fat off which could take forever, why not let it harden overnight and then just spend a minute or two lifting this off with a slotted spoon instead?

Now, a lot of people would just throw away the chicken fat, which is a real shame because it can make so many dishes amazing. We will discuss the many uses of chicken fat another time. But for now, you have a big bowl of cold stock with the fat taken off! Now, the standard advice in nearly every recipe book I've seen is to freeze it in ice cube trays. Supposedly it's the just so easy to just pop out broth cubes as you want them. But we at A Book of Cookrye feel that is ridiculous. You would need a medium-sized army of ice cube trays to freeze the broth from just one chicken, and said army would conquer all the space in your freezer. Instead, just use any old storage containers you like. You can freeze it in one big container if you think you'll be using it all at once in one big pot of soup. Or, if you tend to use it one cup at a time in various casseroles or rice or what have you, freeze it in containers of that size (or in baggies).

As a final note, did you know that cooking shows in the 90s used to glibly say that if you didn't have chicken scraps lying around the kitchen, you could just run out and buy a bag of wings to boil? Time and food fads do change, don't they?

Monday, July 16, 2018

Schnitzel: or, The classiest, European-est way to make one steak feed five

Do steaks rarely happen in your house? Do they only appear when you find them in the discount bin, priced so that they leave the store before they soon expire? Today, on A Book of Cookrye, we proudly present a way to turn one steak into at least five! See this little piece of meat?

Well, by carefully directed impacts (read: whacking it with a mallet), we're going to turn it into something... bigger. Something more. Something greater than itself. Now, you may not have a meat mallet, which is totally fine. You can bash the meat with an unopened soup can for the same result. (Hold it in a thickly folded cloth to be nice to your hand.) To avoid waste, you can just wash the can and put it back when you're done.
You may be wondering, when is the meat thin enough? Believe it or not, you're going to keep beating your meat until it's about an eighth of an inch thin. That previously dainty small meat slice is now big enough to drape off the edge of the cutting board.

Anyway, the rest of this recipe is really straightforward. You season the meat, dip it in egg, then in breadcrumbs. It'll hold together better if you then let it just sit out for 20 minutes or so instead of putting it directly in the pan. I mean, if you're in a rush you can just cook it right away, but half the time the breading falls off without this extra time to set. I guess you can use this extra time to clean up the meat splatters from all around the kitchen.
This was originally one pork chop.

Now, the traditional, very German way to do this involves a frying pan and (obviously) a lot of butter. You can use cooking oil in a pinch, but you owe it to yourself to do these in butter at least once. I mean, these are already about equal amounts meat and breading, so you don't need to even try to pretend this'll be a dinner made for dieters.

Especially if you're cooking on cast iron, you can turn the burner up extremely hot. The meat is so thin that you really don't have to worry about it burning on the outside while staying raw in the middle. And the way the butter browns while cooking into the breadcrumbs will make this utterly amazing. If your kitchen has good ventilation, I would suggest keeping the pan hot enough to smoke just a little- the breading gets marvelously crunchy. However, if you have one of those stupid recirculating stove vents that doesn't actually take the smells out of the kitchen, you may well decide that cooking in a butter-smoke haze isn't worth it and turn the heat down a bit.
If you accidentally tear the meat while clubbing it, worry not. You'll just be eating meat with little windows.
 
Now, you may think to yourself that you really don't want all the gratuitous butter-derived calories in your dinner. Well, we at A Book of Cookrye, where a love of food is forever colliding with a desire to be pretty, have already tried to bypass the butter and can tell you the results.
This George Foreman grill was a re-gift from a friend of mine- named George.

And honestly, the meat comes out rubbery and sad. You may think it's because overcooked it, but I was obsessively watching it and took it off the grill as soon as it was done. So yeah, just give in to the butter. Embrace its buttery goodness. It is your friend.

Actually, that is a really ugly picture to end this with. It doesn't do schnitzel justice at all. Luckily, I made it again at a friend's house, where we served it on top of spaghetti (which you really oughta try).

It is so good.

Sunday, July 15, 2018

A Book of Cookrye cuts up chicken!

Today, we at A Book of Cookrye present not a recipe but a guide! Well, sort of. One of the biggest things we had to learn in cooking school so far is how to turn a whole chicken into.... this!


Now, our teachers have oft repeated that cutting up your own chicken is so much better than buying it in pieces. It's cheaper! Furthermore, it's... um, cheaper! Anyway, should you decide to try this yourself for the first time, here are some handy tips that no one seems to mention when doing those tutorials that make it look it infuriatingly easy. (Note: we're not going to try to show how to do it in pictures when there are scads of videos that do it better than non-moving pictures can.)
First of all, you'll probably have to do this a few times to get the knack, so prepare to have a small frozen flock of chicken pieces in the freezer.  
Second, if you are a bit squeamish, you might buy two or three rotisserie chickens (for why you're buying more than one, see the sentence immediately above) from the supermarket and cut them up instead of starting with a raw one. That way, you're at least a little prepared for when you get a raw chicken and find yourself facing... this.


Now, while cutting you're inevitably going to get this squelching sound that, if you're like me, will make you go "eeeeurghhhh..." the whole time. If this bothers you as much as it did me, put on some music before you get out the knife.
We at A Book of Cookrye recommend having two bowls ready: one for the meat you're saving, and one for all the bones and such. Then you can just drop various pieces of bird into a waiting receptacle as you go.
When you cut a chicken the first few times, you're probably going to end up with really sad, mangled-looking pieces. That's totally fine! It's what happens when doing something new for the first time! Just like how my first pies tended to look like this picture right here, my first attempts at cutting up a raw chicken were really sad to look at.

But worry not- no matter how badly you may have cut them, the chicken pieces still taste like chicken. Just have a few recipes ready that call for chopped chicken. Tacos, casseroles, soups-- there are many ways to turn even the raggediest chicken pieces into something tasty.
And if you really can't get over how mangled and sad the chicken looks, you can just take the meat and grind it. No one will ever know.

Once you've got the chicken cut up, if you don't want to cook it on the spot, you can obviously freeze it. If you want to separately freeze the breasts, thighs, and other pieces instead of just putting in a big package that says ONE CHICKEN, be sure you label what's in each little container or bag. When rummaging through the freezer, it is harder than you may think to tell whether you have found the legs or the breasts.
All right, so now that you've cut all the parts you wanted off the chicken, you've got a big bowl, of... um...
Now doesn't that look divine?

You could throw the skin and bones away, but since it's already in the kitchen (and you did pay for it), why not turn it into broth?
There are a lot of recipes that make doing your own broth look like an awful lot of work, but most of the fuss and bother is unnecessary. Just add cold water to your pot of chicken parts, put on a low burner so it heats up slowly, and let it sit for about a full day.
What all those happy tutorials never mention about this is that long before the stock is done, your entire house will absolutely reek of overcooked chicken. And the smell will stay with you for days, especially if you have an open kitchen and therefore can't shut the door and open a window. To prevent this, if you have a slow cooker, you can just put it in the garage (or outside if you are sure it's safe from rain, sprinklers, or raccoons) and then not have to live with The Smell.

One day later....

So, now you may be wondering: is all this bother worth it? Well, if you wanted a full set of chicken pieces (as opposed to, say, a tray of chicken breasts) it might be. Certainly the broth you make from the throwaway parts will taste a lot better than anything made from bouillon powder or bought in a carton, but if you don't make soup or have a lot of recipes that call for chicken broth, that won't matter to you.
But once you cut the meat off the bones and take the skin off of it, you will find that one-third to half the weight of the chicken was throwaway pieces. So when doing price math at the grocery store, you might want to keep that in mind. And so, we at A Book of Cookrye give an enthusiastic shrug as to whether we would do this voluntarily instead of just buying the chicken already cut and shrink-wrapped.

Wednesday, July 11, 2018

Hump-Day Quickie: Those weird things that look like bananas

Have you ever eaten plantains before? They're like bananas, only bigger, harder to peel, and you have to cook them first. I hadn't ever tried one until a Cuban friend sliced some and put them in a frying pan. You know what's weird? They taste more like bananas than actual bananas! Imagine if you will artificial banana flavoring, only with no fake taste to it.
This got us thinking.... is there a way to do these when we're too lazy to push things around a frying pan?

Plantain Chips
1 plantain
Salt
Cooking spray

Slice the plantain into quarter-inch pieces. Sprinkle with salt if desired. Cook on a well-greased waffle iron until soft all the way through, like you would a baked potato.

Indeed there is! Furthermore, since these are getting heat pressed onto them on both sides, it's actually faster than doing them in a frying pan! And these are so, so good.

Happy Wednesday!

Wednesday, June 6, 2018

Hump-Day Quickie: Toasted Cheese!

It's been a while since we had a hump-day quickie, hasn't it?
Do you like grilled cheese? If so, do you think the best parts are the cheese that oozes out onto the griddle and gets crispy and brown? If so, we at A Book of Cookrye have a recipe for you!

Toasted cheese

Heat a waffle iron. Cut or break string cheese into pieces of the desired size. Spray the iron really well, and put the cheese on for about a minute or so, or until dark brown on the outside. Carefully remove with a fork, or tip the iron over so they fall out.

I'll admit, I never really got into cheese the way a lot of people do. And I especially never liked  string cheese. No matter how many smiling mascots they put on the wrapper, 8-year-old me was firmly unconvinced that cheese was better than candy. But just this once, we can make string cheese actually... good.

Yes indeed, the one ingredient in today's recipe is string cheese! Now, in theory one can use any mozzarella, but string mozzarella seems to have that extra resilient rubberiness that makes this work. Do you have non-string mozzarella in your refrigerator and a waffle iron? If so, do try this and share the results!
Now, the weird thing is that at first the cheese just turns into something oozy and sticks to the waffle iron. But if you leave it long enough to get good and toasty-brown, it turns into... these!

Let's admire the lovely, sizzling crispiness up closer!

Now, you can eat these things hot and right off the waffle iron, or if you feel like being fancy they lend themselves beautifully to being handed around on crackers.

That's right, we at A Book of Cookrye just technically featured our first appetizer recipe! And I tells ya, it's delicious.

Saturday, June 2, 2018

Second-Stab Saturday: Lemon-Coconut Treats with everything in them

The last time we made Lemon-Coconut Treats, we bowed to the preference of others and left out the coconut. And while they were really good, they also were missing half the ingredients named in the title. We at A Book of Cookrye couldn't help wondering what they might taste like if we actually followed the recipe.


That's right, so very soon after making these the first time, we're making them again! That alone should tell you how good these were.

Lemon-Coconut Treats

    1½ c flour
    1½ c brown sugar
    ½ c butter or margarine
Heat oven to 275°. Grease a 9"x13" pan. We really recommend lining the pan, either with parchment on the bottom, or with foil on the bottom and sides.
Mix flour and sugar, then cream with the butter. Pat into pan, and bake 10 minutes. Increase oven heat to 350° when you remove the pan.

    2 eggs
    1 c packed brown sugar
    1½ c grated coconut
    1 c chopped nuts (if desired)
    ½ tsp baking powder
    ¼ tsp salt
    ½ tsp vanilla
Stir together the sugar, baking powder, salt, and flour, making sure there are no flour lumps. Mix in eggs, and beat thoroughly. Add everything else. Spread on top of the crust (you may find it easier to tilt the pan than to try to use a spoon without gouging the crust), and bake for 20 minutes at 350°.

    1 c powdered sugar
    1 tbsp melted butter or margarine
    Juice of 1 lemon
While the bars are baking, whisk together the icing ingredients. Spread over the bars while they are warm (it may be easier to just tilt the pan around until all is covered than to try to use a spatula or knife).
Cut while warm, about 10-15 minutes after removing from the oven.

Source: Favorite Recipes of America: Desserts, 1968 (submitter: Mrs. Robert T Brown, Sr. of Brookville, MD- blue ribbon winner of Montgomery County Fair)

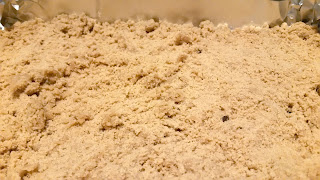
Oddly, these didn't look the same as the first time we made them. You know how the crust was like Play-Doh? Or, to make a more edible comparison, exactly like slice-and-bake dough if you let it get too warm to slice? Well, this time it was like crumbly sand.

It looked fine after we pressed it flat, but this had us seriously doubting whether this recipe would work. And even though the crust contains only three ingredients, we kept re-checking the recipe to see if we might have forgotten something.
However, this is exactly what the recipe said to do. How one can take the exact same recipe and get this dry-looking stuff one day and something like this another time is a mystery.

Well, that's the crust, which hopefully will come out all right! Why not move on to the actual coconut layer?
Now, we at A Book of Cookrye have often dissertated on our dislike of nuts in cakes and brownies. But we couldn't help to wonder: was Mrs. Robert T Brown, Senior on to something when she put them in? After all, she won a blue ribbon. But we didn't like huge nut pieces in these, so our dear kitchen friend was once again brought in to help.

I do so love that meat grinder. I never thought I'd use it as much as I have. Right- onward to the coconut! And this recipe uses a lot of it.

As I was dumping the coconut out of the bag and into the batter, it occurred to me: I've never actually eaten a fresh coconut. I adventurously bought one once, and once we busted it open, the inside was rancid. Does fresh coconut taste drastically different from the dried shreds?

Looks like we're making German chocolate cake, doesn't it?
Now, the first time we made this, this stuff was so runny, we merely dumped into the pan and could put it back in the oven. It appears that actually doing the recipe exactly(ish) as written means extra work. It was a bit tricky getting that stuff to lay flat in the pan without breaking the crust underneath or burning myself on the hot pan edges.

Now it really looks like German chocolate cake.

It came out of the oven looking like a sadly dried-out German chocolate cake. The tricky thing with recipes like this is there's no way (I know of) to tell if they're done baking or not. So you just have to hope that the timer's exactly right. But given how this recipe looks nothing like the last time we made it, how do we know that the baking times would stay the same?

It was very obvious that it would be impossible to actually spread the icing on this without mutilating the coconut stuff every time a spatula touched it. So we drizzled it all over the pan and then tilted the pan back and forth until the coverage was complete. You have to do this kind of fast, since the icing keeps sinking and soaking into all those little holes. We didn't manage to keep the icing even, but just go with it.

Don't judge the wobbly and crooked cutting lines. It's not because I always was terrible at cutting a straight line. I just wanted to have a variety of sizes so everyone can have as much lemon-coconut treat as they want.

As for the taste? Astonishingly good!

These are really rich. Unless you're making them for a lot of people, you might want to cut the recipe in half and get out a smaller pan. With that said, they are a lot sweeter than you'd think. Honestly, they use about the same amount of sugar and butter as a 9x13 cake (if not a little less, believe it or not), but somehow they taste like buttery candy. The finely chopped nuts add a really nice undertone to the flavor, and the thin layer of extra-tart lemon icing is a perfect complement to the sweetness underneath it. I've already been asked to make these again.