Wednesday, June 11, 2025

Electric Pizzelles: or, Stepping away from the stovetop for the first time

I let modernity seduce me.

Pizzelles
1 cup margarine
1 cup sugar
4 eggs
2 cups flour
1 tsp. baking powder
1 tsp. vanilla*
Pinch of salt

Beat margarine until soft. Gradually add sugar, then beat until light. Add eggs and vanilla, beat well. Sift in the flour, baking powder, and salt. Dough should be soft and sticky.
Cook until golden on a hot pizzelle iron. Pizzelles will harden and become crisp as they cool.

*If desired, you can substitute 1 teaspoon lemon extract or anise oil.

The recipe title says it's "Authentic Italian." I don't know if it came directly from Italy, nor do I care. If I was an authenticity snob about Italian food, I would have missed out on garlic bread.

PIZZELLE RECIPE — AUTHENTIC ITALIAN 
Makes 3 Dozen 
1 cup shortening (Margarine) 
1 cup sugar 
4 eggs 
2 cups flour 
1 tsp. baking powder 
1 tsp. vanilla 
Pinch of salt 
Beat shortening until smooth. Gradually add sugar and beat well. Add eggs and vanilla and beat. Stift flour, baking powder, and salt into egg mix. Dough will be sticky soft. 
For best results, make a soft batter. 
Pizzelles can be made in advance will keep indefinitely. May be frozen if desired, without loss of flavor. 
One of the following flavors may be used: 
1 ounce pure lemon extract; 
1 tsp. pure anise oil; 
1 tsp. pure vanilla extract.
Black Angus pizzelle iron instructions

My Italian friends (of which I have surprisingly many) have given me semi-slackjawed looks for making pizzelles on the stovetop. So, I decided to try the modern, electrical way. This turned up at a price so low that I barely felt it. Also, you can take the metal plates out for washing, which is a maddeningly rare feature in waffle irons. It's nice to know that if I have a horrible, burnt-on mess, I can soak the waffle grids overnight.


First, I had to ask "What is a company with a name like 'Black Angus' doing making Italian specialty items?" You'd think they'd make grilling accessories or meat smokers or something. I did some trawling online, and found various Black Angus-branded countertop cooking devices like toaster ovens, electric rotisseries, and waffle irons. But I couldn't find any information, not even a vintage ad. I then sent an email to the library in the town that Black Angus was apparently based in, asking for anything they could tell me. Three days later, one of the librarians sent me this note:

I received your inquiry about the Black Angus company and I have been looking into it, but I am sorry to say I have not found much. I have been able to determine that it was located at 41 Meadow Street and that it operated there from around 1970 until sometime between 1988 and 1996. I have been asking some of the folks who have lived in town awhile if they know anything, but they either don’t remember it or can only recall that it made countertop kitchen appliances.
I’m sorry I don’t have more to give you, but it seems the company did not leave much for us to reconstruct its history. If I come across anything more I will pass it along to you.

I was really appreciative that this person went out of their way to ask people on my behalf.

Setting aside historical inquiry, I was amused that our new impulse purchase proudly proclaims on its nameplate that it is a combination pizzelle iron and sandwich grill. I can't tell you how many times I've said "I really want a grilled cheese but all I have is this specialty waffle iron!"


From the look of this thing, at least one previous owner made a lot of pizzelles on it. This was part of why I decided to let myself risk purchasing it.

I had to make grilled cheese on it before committing any pizzelle batter. 

I can't ever get a grilled cheese to cook right on a frying pan. No matter how low I set the stove, the cheese never melts before the bread burns. I know that grilled cheese is so easy that kids can do it, but for some reason I cannot. And so, I flipped the metal plates over and found that apparently no one has ever toasted a sandwich in this thing.

I plugged the iron in, and the little status light soon glowed bright orange. I should note that they didn't tuck a little light bulb in there. It's just a clear piece of plastic, lit from behind by the heating elements. So if you like, you can say that it is a wildly inefficient 1100-watt night light that also makes pizzelles.


And so, it was time to modernize my sandwiches! 


Because I underestimated how hot this thing gets, I burned my first grilled cheese. I like knowing that I can fail at grilled cheese whether I use a griddle or an electric sandwich press. It's a sign that the universe isn't breaking its own laws.


The next time, I made sure to watch it more closely. Our resulting grilled cheese was perfectly golden, beautifully melted, and very flat.


Anyway, I didn't buy this for the production of grilled cheese. (However, if the grocery store ever puts corned beef on discount we will feast on Reubens.) I wanted to make pizzelles the modern, electrified way.

This didn't come with instructions, but I found the sheet online. I decided to make the recipe that originally came with this iron. After all, the people at Black Angus theoretically chose one that would show their products to their best advantage.

Like most cake recipes, Black Angus' pizzelles start off with creaming the butter and sugar. I even followed the direction to separately beat the margarine until smooth, so that if the recipe came out badly I could say I followed every step. (Also, it only took like twenty seconds with an electric mixer.)


This recipe went together as easily as any yellow cake. I ended up adding a lot more flour after it looked hopelessly runny, but I attribute that to the ongoing butter moisture crisis. After one taste of the finished batter, I knew that the immediate future would be delicious.


And so, with great happiness and a preheated iron, we prepared to make our first electric pizzelles! I didn't know if I needed to and preheat the iron for fifteen minutes to season it (like the instructions said), or if you only need to do that when the iron is brand new. Just to make very sure I was doing this right, I plugged it in and gave it a hot, well-greased quarter of an hour. When I opened the iron, it put out a huge puff of smoke. I had to hastily take down the kitchen's smoke detector.

As directed, I cooked these for three seconds only. I then opened the iron to find that the pizzelles were fully cooked and slightly golden, just as promised. They also looked quite bad.


I'm not saying these pizzelles were hopeless, but they definitely looked like it.

I managed to remove the pizzelles off intact and lay them flat before they cooled off. I thought that perhaps the next ones would come out more easily, but I had to gently pry out every pizzelle out of this iron. No matter how well I greased it, I always opened it to find something like this.


I really this iron to work because the design looked unexpectedly pretty when the waffles came out. But no matter how hard I squeezed the handles, the pizzelles just weren't thin enough to be nice and crisp. (Or are they supposed to look like this, and mine have been wrong all this time? I still don't know.) 

Anyway, if I managed to grip the handles tight enough to make these crispy on one side, the batter pushed up the iron on the back. At best, they were nearly burnt at one end and Eggos on the other.


And so, I unplugged the iron and cooked the rest of the pizzelles on the stove. They came out so delicate that light passed right through them. And when they cooled off, they tasted like I had put cake batter on a waffle iron. They were so good that I quickly mixed another batch of batter before the iron could cool off. 


I didn't want my new, non-returnable electric iron to be a waste of money and counterspace. After giving it some thought, I decided that various parts of the iron must have loosened over the years. And so, I got out a screwdriver and tightened every single wobbly bit I could find. The iron felt a lot better after making all of its parts snug again, but it didn't make a bit of difference. Eventually I realized: this really isn't made for pizzelles.

If we look at the other pizzelle irons, they all have really sturdy hinges.


However, this thing only has stamped sheet metal joining it at the back.


Moving to the front, the handles are also attached with sheet metal. When I squeezed them as firmly as I could, I could I could actually see bending as the hot pizzelle batter expanded. 


And so, I had to reluctantly admit that this brief foray into modernity gave me nothing but an interesting recipe.


But even though this can't live up to its own pizzelle hype, I don't think it was a complete waste of money. For one thing, it does a perfect job of toasting the heels from a loaf of bread. You know how whenever you put bread heels in a toaster, they always curl up and blacken at the edges? Well, take a look at this!

Golden. Perfect. I'm still deciding if it's worth every penny.

And so, instead of reluctantly using the bread heels for sandwiches, they can become really good avocado toast!

I never even thought of putting avocado on toast until that one rich guy claimed that $19 avocado toast was keeping me from buying a house. I read that and thought "What an economical snack! Avocados are less than a dollar each!"

And when I was in the mood for baked potatoes but didn't want to heat up the oven or wait half an hour, this iron made crisp golden spud slices in about three minutes. By the time I had the dishwasher loaded, the countertop wiped, and the tea poured, they were ready.


Granted, they were very unevenly cooked on top. I can't slice potatoes with robotic precision, so the thicker ones got toasted and the others stayed pale. But if you flipped them over, they were all perfect.


 I'm not saying I needed a sandwich press. But I'm not in a rush to get rid of it either.

Tuesday, June 3, 2025

Velvet Cookies: or, Not bad, but not enough peanut butter

This is the first peanut butter cookie I've seen that doesn't put it in the recipe title.

Velvet Cookies
¾ cup shortening
2 tbsp peanut butter
¾ cup powdered sugar
1 tsp baking powder
¼ tsp salt
1 egg
1 tsp vanilla
2 cups flour

Heat oven to 400°.
Cream the shortening, peanut butter, powdered sugar, baking powder, and salt. Beat in the egg and vanilla. When all is well-mixed, sift in the flour and combine.
Load into a cookie press, and pipe onto an ungreased cookie sheet. Bake 10-12 minutes, or until golden on the edges. (Mine were done in seven minutes.) When you take them out of the oven, immediately take them off the cookie sheet with a metal spatula and put them on a cooling rack.

Source: How to Make Fancy Cookies: Recipes from the Mirro Test Kitchen (undated, probably mid-1940s or early 1950s)

VELVET COOKIES 
Time 10-12 minutes 
Temperature 400°F. 
¾ cup shortening 
¾ cup sifted confectioner's sugar 
2 tablespoons peanut butter 
1 egg 
1 tsp vanilla extract
2 cups sifted flour 
1 tsp baking powder 
¼ tsp salt 
1 — Cream the shortening and add sugar slowly. 
2 — Stir in the peanut butter, egg, and extracts. 
3 — Sift flour, baking powder, and salt. 
4 — Gradually add dry ingredients to creamed mixture. 
5 — Fill a MIRRO Aluminum Cooky Press. 
6 — Form into desired shapes on ungreased MIRRO Aluminum Cooky Sheets. Yield 7 dozen.
How to Make Fancy Cookies: Recipes from the Mirro Test Kitchen

Today, we are playing with our cookie press again! Unusually for a recipe on the Mirro cookie press instructions, we don't start with a bowl of all-white ingredients. It seems like every Mirro recipe begins with creaming the sugar and shortening into an unnaturally colorless fluff. But today, we are adding a little bit of peanut butter which will hopefully make our starting mixture a little more colorful than mayonnaise.


After mixing everything together, it was the color of light honey. Even though we barely added enough peanut butter to lightly tint the the mixture, it had a surprisingly strong flavor .


Our dough was almost the same color as unbleached flour before we added any. 


I gave the it a final taste before baking, and had a few polite misgivings. This is the first time I actually measured the vanilla in who knows how long, and I already regretted my level teaspoon.

Now, I have previously mentioned that the Mirro cookie press has given me nothing but vexation. I may or may not have checked the listing details after a particularly bad experience to see if the seller takes returns. Well, I decided to give it one last chance before getting it back out of the house. I carefully followed every step in the directions (which I printed out so I could make very sure I was doing right), and this happened.


That's the end of the Mirro press in this house. They put some really good recipes on their instruction sheets, but I am not impressed with their products. (Well, I say that. I still like my Mirro percolator.)

I transferred the dough to our cheaper, flimsier press. Even though it feels like it could fall apart at any minute, I'm starting to call it "Old Reliable" because it always works. Instead of cursing at the cookie press, I could once again happily play with my kitchen toys. Peanut butter hearts sounded really cute, but they ended up looking kind of bad. However, unlike the Mirro press, every single cookie stayed where I put it.

Same dough, same pan, same room temperature. The only variable we changed was the press.

I really want to like this cheap press. It's easy to use, and it makes perfect cookies that actually stay where I squirt them. But every time I use it, it feels closer and closer to falling apart. However, it survived making an entire pan of peanut butter--- rings? flowers? I'm not sure what these are supposed to be. But whatever they are, they stuck to the pan and not the press.


As is rapidly becoming my way, I couldn't resist trying out the other shapes. The flowers came out really cute. Even what one of my friends has dubbed the "cosmic horror of boobs" stencil came out nicely (second from right, top and bottom rows). In full disclosure, I had to gently nudge some of the, um, nodules closer together after pressing them out. But, again, all of the cookie dough stayed where the press put it. You can't say that for certain other cookie presses that were sitting on the counter waiting to be hand-washed.


I found out that the segmented-ring cookies don't look very good when piled on a plate. They just look like a mound of cookie nubs. But (and I cannot say this enough) they are a mound of cookie nubs that released themselves from the cookie press without any problems.


These had nearly the same texture as Mexican wedding cookies. If you were to plunge them into powdered sugar right out of the oven, they would be fantastic. They were like extra-fine, very delicate shortbread.


Even though these cookies had a perfect texture, they were bland. They weren't tasteless, just underwhelming. If you feel the urge to make these, I suggest being a little more heavy-handed with the vanilla than the original recipe suggests.

Saturday, May 10, 2025

Sweet Potato Pudding

Today, we're trying one of my great-grandmother's recipe clippings! We have made a few handwritten recipes from her binder, but this is our first time making something that she pasted in from the newspaper.

Sweet Potato Pudding
1 tablespoon (or one ¼-oz envelope) powdered gelatin
½ cup water
1 large sweet potato (big enough to yield at least 1 cup when mashed)
½ cup brown sugar
2 tsp cinnamon
⅛ tsp nutmeg
½ tsp salt
1 cup heavy cream
½ cup coarsely ground hazelnuts*

Sprinkle the gelatin over the water and set aside.
While the gelatin is soaking, cook and peel the sweet potato. Then firmly pack it into a measuring cup. You want one cup of potato. (Reserve the extra potato for another use, or season to taste for a quick snack.)
In a large mixing bowl, lightly break up the hot potato with a fork. Add the gelatin and stir until it is melted. Then mix in the brown sugar, cinnamon, nutmeg, and salt. Insert an immersion blender and blenderize until completely smooth. Let stand to cool and thicken.
When the sweet potato mixture is about as thick as whipped cream, whip the cream and fold it in. Pour into gelatin molds or a large serving bowl. Refrigerate or freeze overnight.
Serve chilled or frozen, with the nuts sprinkled on top.
Store in an airtight container. This will keep in the refrigerator for at least a week, and in the freezer for about as long as any other ice cream.

*Use black walnuts if you really want to stick to the original.
In the old days, you would have needed to boil or bake the sweet potato until it was done. We recommend using a microwave instead. Simply prick the potato a few times with a fork or knife, and microwave it until it's soft when you stick a fork in it, about 6 to 8 minutes.
You can do this in a normal blender by putting the soaked gelatin in the bottom and adding the potato. You'll need to stop a few times and use a rubber spatula. When it's almost thoroughly blenderized, add the sugar (it will help the blender finish its job). Or, if you have no blender of any kind, you can do it the old-fashioned way: force the sweet potato through a sieve. Then, while the potato is still hot, mix in the gelatin.

Source: Undated newspaper clipping (Chicago area), probably 1930s or 1940s

Sweet Potato Pudding. 
Another new dessert which I am sure you would like to try is made with sweet potatoes. 
Boil enough sweet potatoes to make one cup of pulp when they are run through a strainer. To one cup of hot pulp add one tablespoon of moistened gelatin and stir it until it is mixed through the pulp. Then add one-half cup of brown sugar, two teaspoons of cinnamon, and one-eighth teaspoon of nutmeg. Whip one cup of heavy cream, and while the potato cream is still soft but not warm fold the cream evenly through the pulp. Add one-half cup of finely grated black walnuts and place in molds and chill. This dessert may be frozen, but I think the chilled cream is as delicious as the frozen.

 Whoever wrote this loved the word "pulp."

The same recipe image as above, but every occurrence of the word "pulp" is highlighted.

I really wanted this recipe to be good. For one thing, if you microwave the sweet potato, you can make this in the summer without heating the kitchen. Furthermore, it is egg-free, which is really nice as the price of eggs keeps rising. (And given the recent mass-firings of government scientists, bird flu is probably not going away.)  

The directions tell us to add "moistened gelatin" with no further explanation. I assumed this means to sprinkle it over water and let it sit, as one usually does. 


While our gelatin was moistening and our potato was microwaving, I measured out our brown sugar and spices. I had cynically assumed this recipe would be underspiced, but look at the massive mound of cinnamon on top of the sugar!

I soon discovered that one cup of sweet potato requires a bigger spud than the fist-sized one I bought. But I decided to just go with what we had. I'm sure that anyone else who clipped this recipe did the same.

My mistakes are period-correct.

At this point, we were supposed to mix the still-hot sweet potato and the moistened gelatin. The pulp smelled like steaming dog food.

It's been a long time since I got a hard whiff of hot hoof powder.

I had initially thought this would be a long, laborious recipe. But at this foul-smelling moment, I was already halfway done. And so, with strong hopes that the brown sugar and spices would obliterate the gelatin's stink, I dumped them in. I didn't realize how much cinnamon this recipe uses until the smell of it unclogged my nose. 


Because I don't hate myself, I used a potato masher instead of forcing the pulp through a sieve. I am not persnickety about presentation, so I figured that I didn't need perfectionism. But after mixing everything together, my pulp was unpleasantly lumpy. 


I got out an immersion blender and made our pulp smoother than anyone with a sieve could have done. Heck, it was velvety. Unfortunately, it was also the color of a well-splattered bathroom.


Questionable color aside, the blender also whipped the potato unexpectedly well. I wondered if I could have run it long enough to aerate the pulp and make the whipped cream unnecessary.

Before adding the cream, I paused to taste our pudding-in-progress. It wasn't bad, but the flavor lacked something. Also, the cinnamon was unexpectedly harsh. But, I thought, maybe the spices would meld and mellow in the refrigerator overnight. After all, my great-grandmother wouldn't have clipped and saved a bad recipe... right?


I may have let the pulp sit and cool off for too long. Because it had gotten so thick and heavy, I'm not sure if I carefully folded the whipped cream in, or if I did an unusually tedious job of deflating and stirring it. But even if the cream added no fluff at all, it changed our pudding from an ugly brown to a cute orange. And it made the pudding's flavor complete in a way I can't explain.


Some readers may notice that I didn't add any walnuts to the pudding. As we learned with the cranberry-celery salad, nuts turn soggy when they spend the night in gelatin. Also, walnuts are terrible. I've heard that walnuts are delicious when they're fresh off the tree, and I'm willing to keep an open mind. But no one in my area has a walnut tree, so I am restricted to the walnuts on the supermarket shelf. They always taste bitter and slightly rancid, regardless of how far in the future the expiration date is. 

I have a theory that people back then didn't mind the taste of bitter supermarket walnuts because everyone smoked. Even nonsmokers probably smoked a pack a week secondhand. Why else would people freely contaminate everything from gelatin to brownies with walnuts? In all seriousness, I think the more bizarre flavors of older recipes make more sense when pre-seasoned with nicotine.

Walnuts aside, the directions end by saying this is good both chilled and frozen. So, I put half in the refrigerator and froze the rest. We are also told to "place in molds and chill." Since I don't have any, I put a serving of pudding into a measuring cup. I wanted the complete recipe experience-- except the walnuts.

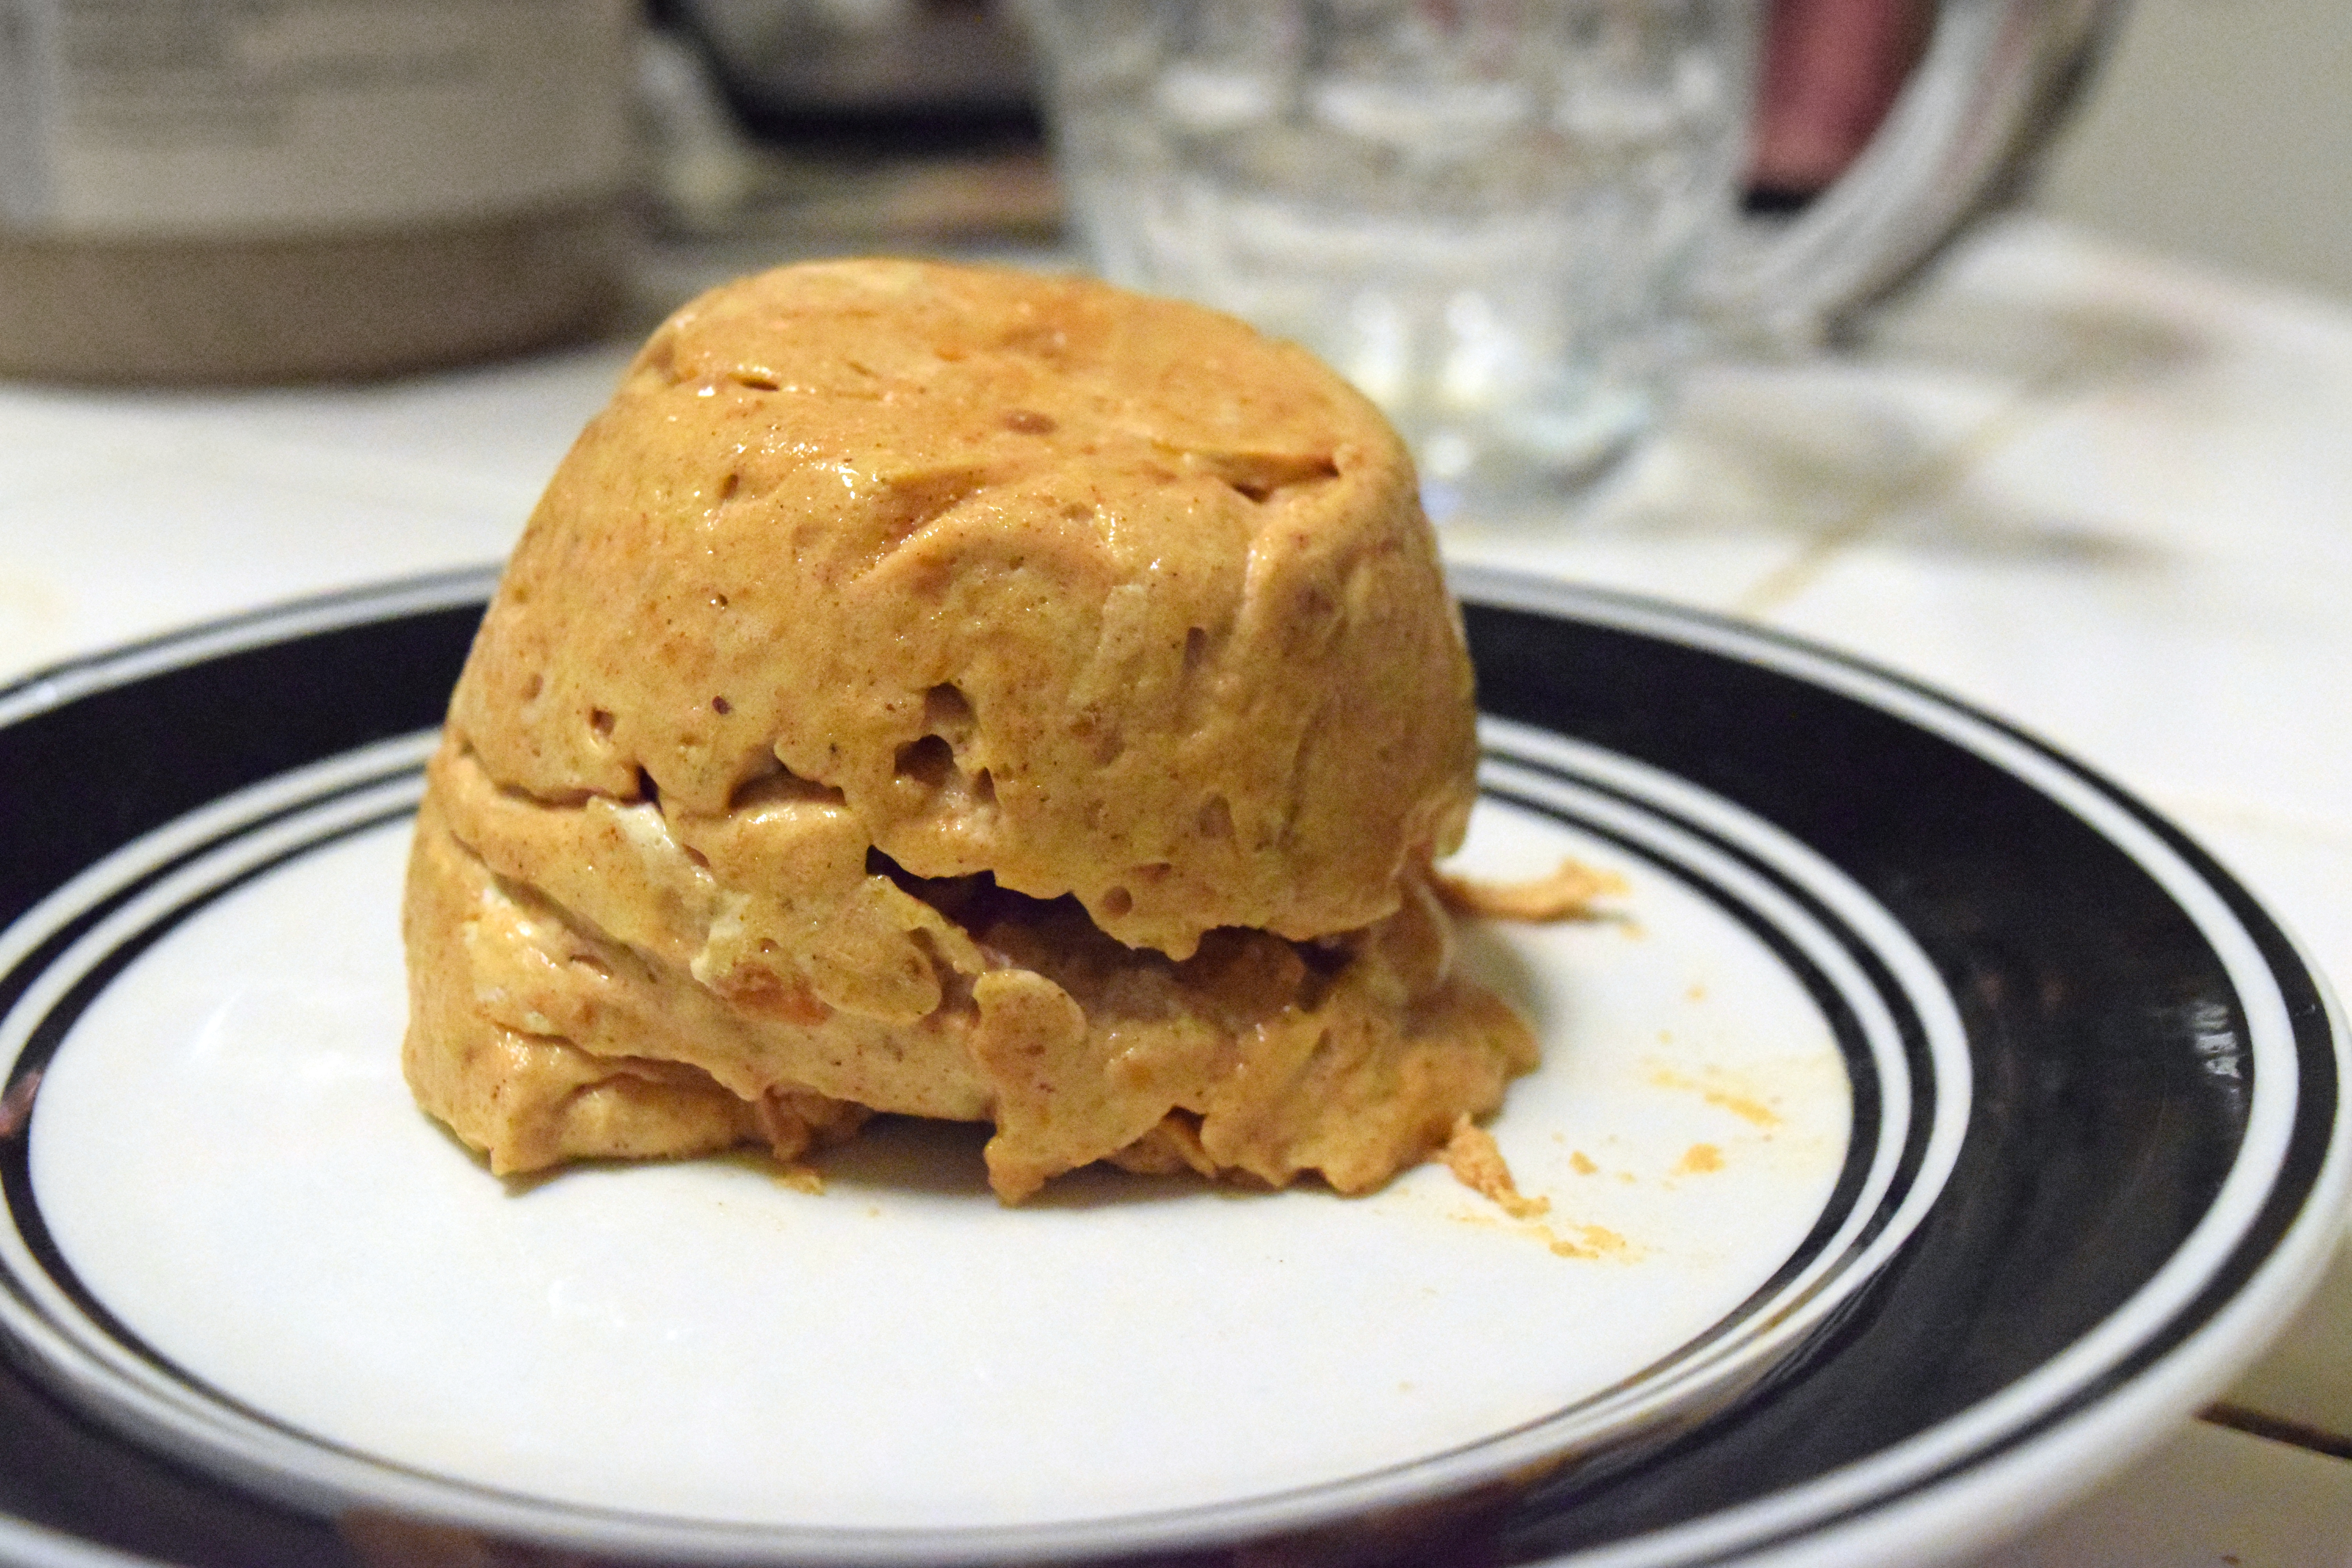
By the next day, the pudding had become astonishingly resilient. It's always strange when your dessert can bounce. When I finally got it to fall out (which involved a lot of spoon-thwacking and hot water), I saw that my gelatin molding skills are quite bad.


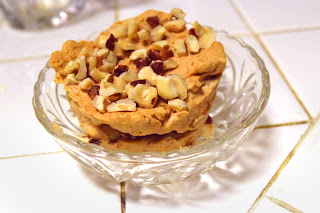
In order not to ruin this dessert's appearance with my own ineptitude, I put it in a cute bowl and sprinkled hazelnuts on top. Unlike walnuts, hazelnuts taste good. Also, hazelnuts are called "filberts" in some places, and walnuts don't have such a cute-sounding name (nor do they deserve one).

When you taste this, it is surprisingly hard to tell whether it has sweet potatoes or pumpkin. But I do like how using a sweet potato instead of pumpkin lets us drastically reduce the sugar (and therefore the grocery money) going into dessert.

When I made this again, I decided to heat the cream, add the spices to it, and let it infuse while it cooled. But it turns out that scalded and spiced cream refuses to whip. I don't know if heating the cream denatured something, or if the spices reacted with something in it. Either way, the cream looked like this after ten minutes with an electric mixer. It didn't turn to butter, it didn't whip, it just wasted my time.

There's a science lesson here, but I don't know what it is.

I felt terrible about the waste, but at least everyone reading this will know not to repeat my mistakes. So hopefully my cream didn't go down the drain in vain.

But I don't want to end a good recipe with a mistake. So I'll by close by saying this is really easy to make, and very sating after a light supper. Since you have to refrigerate it overnight anyway, it's perfect for making ahead. And just as the directions say, it freezes really well. If you refrigerate it, it's like a mousse. If you freeze it, it's like ice cream.