Wednesday, February 23, 2022

Hump-Day Quickie: Soda Cake (literally!)

Sometimes an idea gets dumped on me that sticks in my mind. I don't constantly think about it, but it will sit in the back of my mind and sporadically remind me of its existence, like a splinter that you can't decide is worth finding the tweezers over.
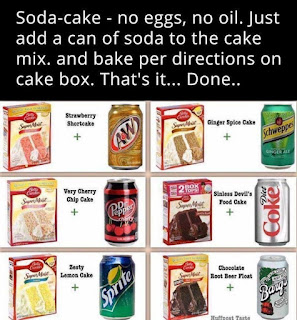

The pixelation of this image makes it look like it has made the reposting rounds a lot before someone semi-automatically forwarded it to me. It's got a HuffPost Taste watermark on it, but I suspect it started as a Betty Crocker advertisement. One will note that only Betty Crocker's cake mixes appear in the allegedly helpful infographic. 
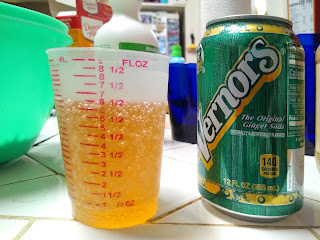

Anyway, I had to admit that this recipe got to me. Therefore, we're making the ginger spice version we see at top right. We didn't want a full 9x13 pan of cake mix reconstituted with soda, so we measured out half of the soda can. Halving the cake mix should have been trickier. If I wanted to be precise, I would have either poured all of the cake mix into a large measuring cup and then put half back in the box. Instead, I just eyeballed what looked like half of that synthetic-smelling powder and dumped soda on top. 

One vigorous whisking later, we had a surprisingly convincing facsimile of cake batter. The taste of the ginger ale completely hid in the other spices. I expected perhaps a bit of extra pepperiness from the extra ginger, but it just tasted like spice cake. It seemed to retain a bit of fizziness even after an unnecessarily-thorough beating.

At first I thought a whole can of soda would make this batter ruinously runny. Previous experience strongly suggested that I would do nothing but waste the cake mix. But this time the batter at least looked fine, perhaps because the soda was the only liquid in the batter.

The resulting cake looked almost as thin as a pancake, but keep in mind that the initial cake batter barely coated the bottom of the pan. Manufacturers have long been shrinking cake mix boxes in that insidious a-snip-at-a-time way. Ten years ago, half a box of cake mix would have filled this pan without the aid of a rubber spatula to coax it to the edges.


 The cake was a little spongy when we cut it, but it didn't seem unnervingly rubbery. Honestly, it appeared pretty normal.

I'm surprised to say this, but you get a perfectly normal cake out of a box of mix and a can of soda. I thought the cake's texture was just a little bit off, but others in the house said it was perfectly fine. It's not the best cake I've ever had, but it's not bad either. As you can see above, it's only thin because the batter started out so thin. What batter we had rose to a nice, fluffy height. The cake is a bit fragile and crumbly, so I would definitely just pour a glaze on top instead of icing it.

I can see how it'd be amusing to experiment with different combinations of cake mix flavors and different types of soda. Also, if you check the ingredients label on the cake mix, this could be a decent in-a-pinch vegan cake. 

This got me to thinking: What is in cake mix that apparently allows you to reconstitute it into a reasonable approximation of cake with any liquid you can dump into it? I've never thought about the components of cake mix before. Like most of us, I've always thought of cake mix as a homogeneous compound that smells like artificial flavoring. I checked the ingredient label, and it's mostly flour, sugar, a bit of powdered milk, leavener, and a lot of other ingredients that I couldn't identify but I assume to be various flavorings, preservatives, and a few other things that presumably alter the texture. It looks more or less like the ingredients for a yellow cake if you left out the butter, milk, and eggs. 

You probably already guess where this is going. We started with this yellow cake recipe from my friend's mother's Better Homes and Gardens Cookbook. It looks like the sort of thing that would have been made year after year for birthdays and various holidays, assuming you don't think you can substitute soda for butter and eggs. Anyone who actually followed all of the directions instead of going off-book before you've gotten halfway through the ingredient list would get a very nice cake. Unfortunately I am too daft for that.


We commenced, of course, by putting all the ingredients that are neither liquid nor perishable into a bowl.  


I would like to say that it looked a lot like cake mix after a quick stir, but it didn't. The texture wasn't quite right. It didn't have that powdery-yet-gritty consistency of cake mix when you dump it out of the box.


By request of others, we are putting root beer into this attempted cake. The resulting batter tasted surprisingly acidic in a way that the cake-mix-based batter did not. The root beer tasted like it went from mildly tart to corrosive upon contact with flour. 

I've never thought of root beer as particularly acidic. If anything, it tastes like fizzy vanilla to me. But this tasted less like cake batter and more like I should be scouring the floors with it instead of passing it off as edible. The "homemade" version of today's cake tasted more synthetic than the one that started with that mysterious powder loaded with natural and artificial flavors.

The resulting cake batter had the same color as the literal coffee cake we've made before. But unlike our various caffeinated cakes, this batter tasted terrible. Sometimes (usually) I deliberately do a lousy job of scraping the cake batter into the pan because it tastes too good not to eat. But this time, the batter was so weird I had to keep tasting it to see if it was as... unsubtly incorrect as I thought it was three seconds ago.


The batter looked totally normal going into the pan. But despite the harmless appearance, I suspected that I would be discreetly throwing this into the trash without letting anyone try it. I was getting comments from kitchen observers about how (barring a miracle in the oven) this was a waste of perfectly good root beer.


The resulting cake was oddly shiny on top, but otherwise it looked relatively acceptable. 


If we examine the alleged cake in cross section, we see that it has managed to leaven itself. But it does look a bit... not right to anyone else? It looks less like a cake and more like a beige kitchen sponge.

After baking, the cake was still unnervingly acidic from the root beer. It had the same paste consistency as the Diet Coke cake, except this time it has air bubbles trapped in it. But you could knead it into a clay ball just like that time. While few cakes look good after you squish them in your fists, you should not be able to press a cake into a translucent ball like this:

This cake is of course not at all healthy, but it has that peculiar disappointment one gets from unrelentingly nutritious facsimiles of cakes and pies. You know, the hard cookies, carob brownies, and dusty pies that are infuriatingly close to the real thing but also flavorless and just wrong enough to go from mediocre to slightly depressing. This cake was so paste-like that I thought I had underbaked it. So, I put it back in the oven for so long that it should have hardened into one big crouton. This made no difference except to slightly dry the exposed edges. 

We thought we might figure out what other little things we might add to correct the texture of this almost-viable cake, but then we all agreed that we would just be reverse-engineering a box of cake mix. It's easier and cheaper to just go out and buy one.

So, in conclusion, yes. You can pour a can of soda into a box of cake mix and get a decent cake. It's not the best cake you'll ever make, but it's not bad either. It's fun to make, and the results taste just fine albeit not all that great. 

But you can't dump a can of soda into a previously normal cake recipe after leaving out the butter and eggs. If you're going to try a soda cake, you must embrace the box of prefabricated petrochemical magic. You should also use a smaller pan than you probably think. 
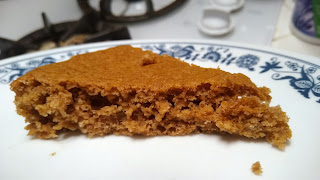
Instead of closing today's (mis)adventure with disappointment, we're saying "au reservoir" with a photo of surprising success.

Friday, February 11, 2022

Butter Finger Dessert Bars: or, Three-fourths of the recipe name is a lie

Sometimes, when one cleans out a pantry, a quasi-pie ensues. This box of powdered sugar turned up in the far back corner of the top shelf, still half-full of powdered sugar.


I thought that this recipe, with the name Butter Finger, predated the candy bar. But Wikipedia tells me that Butterfingers date back to 1923. Also, did you know Butterfingers are Italian? They're from the same company that makes Nutella. I haven't been this surprised about confectionery since I found out that Kit Kats are British.

Butter Finger Dessert Bars
   Crust:
1 c butter or margarine, room temperature
2 c flour
¼ tsp salt
2 tsp sugar
Heat oven to 375°. Grease a 9x13 pan. (Even if you normally don't, we recommend lining the pan with foil for this recipe.)
Mix butter, flour, salt, and sugar until crumbly. Press into the pan.
Bake for 10-15 minutes. Leave the oven on when you remove the pan.

   Filling:
4 eggs, well-beaten
¼ c flour
2 c brown sugar
¼ c flour
2 tsp baking powder
1 c shredded coconut
2 c chopped pecans
Whisk together the eggs, sugar, baking powder, and flour,* beating well. Then stir in the pecans and coconut.
Spread over the crust.
Bake at 375° for 15 minutes. It should be golden on top. It should also jiggle like gelatin instead of sloshing like a pan of liquid. Cool completely before frosting.

   Icing:
6 tbsp butter or margarine†
2-3 tbsp milk or cream
2 tsp vanilla
3 c powdered sugar
Beat together the butter, milk, vanilla, and about a half cup of the powdered sugar. When it's all well-mixed, beat in the remaining powdered sugar.
Spread on the bars. Let sit a few hours before cutting.

*I also added a pinch of salt.
†If using margarine for the icing, you'll want to use stick margarine. If you use the spreadable margarine from a tub, the icing will be too drippy and runny unless you also add a spoonful of shortening.

Source: Imperial powdered sugar box

Moving on to today's recipe, this is the first Butter Finger recipe I've seen that neither imitates nor incorporates the candy bar. This recipe is also a lot more, shall we say, involved than the other recipes I've seen. The Butterfinger recipe I have encountered the most is a "Butterfinger cake," which has graced many a potluck I've gone to. The recipe seems to be "Make one box of cake mix according to directions, then put a layer of crushed Butterfingers on top instead of icing." 

I don't get why today's perpetration is called "butter finger" at all. The only butter in the recipe (assuming you put oleo in the icing) is in the crust. It doesn't resemble the candy at all, and it doesn't look particularly buttery. It looks like the recipe writers started with a pecan pie. They then replaced the pie crust with one that you finger-press into the pan (which agreeably simplifies things), and put icing on top so they had an excuse to put it on a powdered sugar box.


Before I made the recipe I thought this was going to basically be a cookie crust. Then, upon actually reading the recipe (as one often does when making it) it looks more like a pie crust. However, things were not going according to the instructions. The bowl of (what I thought should be) pie crust didn't look crumbly like the recipe claimed it should be. I did not expect this because back-of-the-box recipes are (theoretically) tested by a passel of kitchen staff before they get printed on any food labels. I checked the ingredient list to see if I had either mismeasured something or made a mathematical error when halving the recipe. I had not.


This allegedly crumbly crust was the stickiest mess I have tried to press into a pan in a long time. I tried spritzing my hands with cooking spray, but it only helped for a few seconds before the dough stuck to my fingers anyway.


When I first examined the recipe closely and saw that we weren't doing a cookie dough crust, I was afraid it would be really bland and a waste of time in this recipe. Then I saw how much sugar we're putting on top of it. So aside from suspecting that this would be a failure of a crust because it didn't look like the recipe claimed it should before baking, I was ready to move on to the pecan-coconut affair that goes on top.


I thought I would whisk the flour in first to really bash out any lumps, but a few little ones persisted until I added the sugar which broke them up. Therefore, I think this separate whisking step was a waste of time. You can probably just dump the flour and sugar into the eggs and beat everything together at once.

Since we're cutting this in half, I was able to measure out the coconut and pecans into one cup which I then set aside until things were ready for them. They reminded me of those cute layered cookie mixes that were a popular gift for a while. You know, the ones where you put sugar, flour, chocolate chips, and whatever else into a jar, making cute-looking stripes of all the ingredients instead of just dumping them in. 


Extremely observant people will notice that I accidentally used twice as much coconut as I should have. I am very glad I made this mistake because it only improved this quasi-pie.


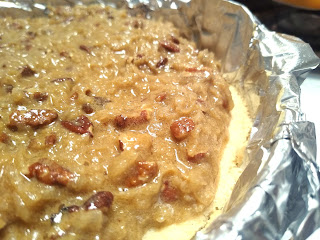
See? It looks like we're making a pecan pie except with coconut shreds. Granted, the round pan is definitely adding to the pie-like appearance. However  I wouldn't be at all surprised if I could find this exact recipe for pecan pie in a very old cookbook. I wondered if someone at the Imperial Sugar test kitchen added the coconut to make the recipe different enough to avoid plagiarism.

Anyway, this is one of the thickest pie fillings I ever made. They don't often need a spoon to force them to spread.


I had imagined this recipe would produce a thin layer of this candy-nut stuff on a crust, but this is a lot of pie filling. And let's just go with calling this a pie. It looks like a pie, it's acting a pie, the only thing we're missing is a crust that goes up the sides of the pan.

See? After baking, it looks like pecan pie. Or maybe it looks like we replaced the raisins with coconut in an osgood pie.


The recipe instructs us to cool the pie completely before icing it. Fortunately, it is miserable outside.


I put a sheet pan on top to keep further sleet off, and the pie was ready for icing after just 10 minutes in the snow. Using the weather for culinary purposes reminds me of when I visited a dear friend/relation in Olympia (that's in Washington state) during the winter. The way the house was cut into the ground, her bedroom window was right at ground level and tucked under the second-floor patio. We would set cases of (store-brand) Diet Coke outside, and the upper deck hid them from view. It was amusing in its own little way to open the window for a can of Diet Coke as easily as normal people would open the refrigerator.

Moving on with the recipe, I thought I would avoid using the electric mixer for the icing because it always kicks up powdered sugar dust no matter how carefully I try to beat things at slow speed. This was a waste of time. Instead of icing, all I got was a whisk filled with ingredients that lodged themselves in there and would not come out. Therefore, if you have an electric mixer I definitely recommend you use it.


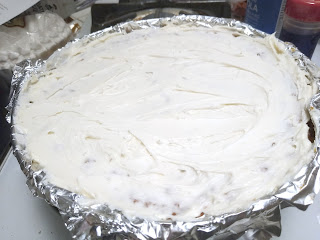
I spooned the icing into little mounds around the pie instead of just plopping it in the middle. It seemed like it would make covering the pie easier. I had even considered putting the icing in a bag and squirting it out, but then decided I didn't feel like it. But even though the pie looked like it would release a lot of crispy golden crumbs into the icing, it didn't. 


The top appears interspersed with broken-off pieces of pie, but that's actually where the icing is so thin that the pie shows through. I think the thin icing was for the best. This pie is so sweet that a thick slathering of icing on top would have overwhelmed even the most sugar-happy six-year-old.

All right, let's go back to the illustration on the back of the box and see what these, um, dessert bars should look like.


And let's get a look at what we actually got.


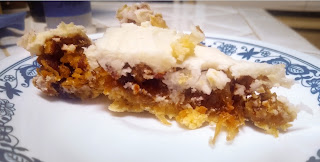
This is the best-looking piece we got out of this. I think we can safely say that if you tried to cut this into tiny squares like the recipe claims, they would all crumble to nothing. I will also add that despite our promiscuous use of cooking spray, the crust stuck to the pan. However, I do have to give the recipe writers credit: the crust may not have been crumbly during mixing like the recipe thought it should have been, but it was certainly crumbly after baking. It fell apart and left fragments behind, no matter how skillfully one operated the pie spatula. You don't lift pie slices out of the pan; you scoop this out like cobbler.

With those quibbles aside, I served this out and everyone really liked it. This is not a dessert bar recipe. It is a pecan pie with coconut in it. It's a very good pecan pie with coconut in it. If you try this, you will wonder why no one has ever thought to unite pecans and coconuts in a pie before. 

I thought the icing was superfluous, and really only an excuse for using enough powdered sugar to print the recipe on a powdered sugar box. Others disagreed, thinking it improved the pie a lot. The extra layer of concentrated vanilla on top did make the flavor more complete. However, in the future I might use a light drizzle of glaze with extra-concentrated vanilla instead of icing.


So, I highly recommend making this, with a few changes. First, cut the recipe in half and bake it in a pie pan. It's really rich anyway, so a big pan of it is excessive unless you're bringing it to a big party. But don't cut the amount of coconut in half. Second, ditch the crust that came with recipe and use an actual pie crust (bake it before putting the pie in it). You might roll the crust a bit thicker than usual if you make it yourself, so that it really holds together when you lift out a slice. Third, I wouldn't bother with the icing. Put a lot of vanilla into a small batch of glaze- much more than you normally might. Then lightly drizzle it on top.

Saturday, February 5, 2022

Jacket Potatoes: or, Baked potatoes when you want to run your oven for a very long time

 It's cold out here, which means that we at A Book of Cookrye are getting excited about baked potatoes! I've seen a lot of people rhapsodize about "jacket potatoes," which I had not heard of. I imagined it to be a cute dish of miniature-sized potatoes served in their skins with herbs all over them. I looked them up and found out that the term is simply Britspeak for baked potatoes. However, people across the Atlantic they seem to get a lot more excited about baked potatoes than we do here. This prompted us to ask: do they bake their potatoes differently over there? 

Turns out, they do!

Jacket Potatoes

Heat oven to 400°.
Cut a cross into the top of each potato. Set directly on the oven rack. Bake for about 1½-2 hours. When the potatoes are baked soft and the skin is crackly, remove from the oven and re-cut the slits on top. Bake 10 minutes more. Serve with whatever you like on your baked potatoes.
If desired, rub the skins with cooking oil and salt before baking to make them even crispier.

Source: Cup of Jo

For obvious reasons, we would not ordinarily fire up the oven to 400 degrees (that's around 205° for all our Celsius friends) for two hours just for some potatoes. It's an energy extravagance that perhaps makes more sense in the UK, where it's apparently chilly enough that trophy kitchens often display a half-ton cast iron stove that's always turned on and heating up the place. 

However, the temperature outside recently dropped to well below freezing, and it seemed like the perfect time to run the oven to unnecessarily high temperatures for far too long a time. Instead of putting the oven in battle against the air conditioning, we would cozy up the kitchen. Also, in Texas you just never know if you'll still have electricity when it snows, so you have to enjoy it while it lasts.

The instructions are very short, but they are a few sentences longer than my customary method of perforating the spud with a fork and then microwaving it. The baked potato is truly one of the simplest foods in existence. Therefore, people can get hilariously religious about the One True Way to make them. 

If you think people get snobby about the correct preparation of things like with extravagantly long French names and corresponding prices, you need to read the surprisingly angry arguments about the correct way to make cheap and easy foods. For example, people get passionate the right and wrong way to make a grilled cheese. The cheddar vs. processed cheese fights can go on for pages, and that's before we get to the bitter dispute on whether an errant slice of tomato turns it into a melt or if it's still grilled cheese. Where I live, people will say they're above such bickering.... and then launch into sermons about proper barbecue techniques. It's almost as fun to read as the everlasting debate on whether a hot dog is a sandwich. 

Bringing this back to today's venture, people can have very passionate feelings about the correct way to insert a potato in the oven. The "floury vs waxy" dispute can go on longer than it takes to actually bake a potato. Indeed, people can argue about correct versus blasphemous spud-baking methods for longer than it takes to bake a potato in a woodstove, and that includes the time required to build the fire yourself.

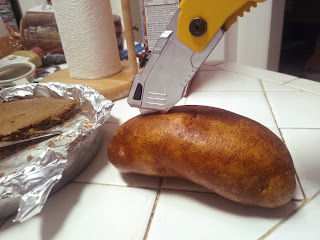
We are instructed to first cut a cross on top of the potatoes. A paring knife would of course be perfect for this, but I left mine in my other purse. 

We started keeping it in the silverware drawer because it's surprisingly convenient.


Well, that was quick enough! I guess now we merely put them into the oven. Normally I wouldn't heat up an entire oven for a few spuds, but I've been wanting to try this method ever since I read a lot of improbably enthusiastic prose about them. I don't know anyone who gets that excited about a baked potato around here, so perhaps we are doing it wrong. Also if you realize that you're actually excited about a new (to you) way to bake potatoes, you just embrace the fact that your entertainment doesn't cost much sometimes.

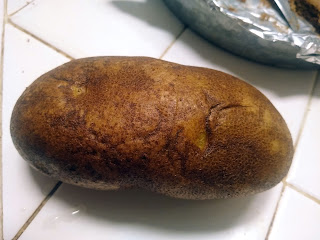
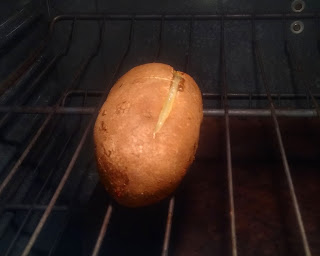
If you look very closely, you can see the cuts.

After a very short time, the cuts began to widen as the spuds shrank.

Ever since we found the baking stone and put pita bread on it, we decided to just leave it there.

Don't the potatoes look lonely in such a big, empty oven? It seems foolish to heat up an entire oven for spuds. Even if you have a smaller oven in the wall, it's a lot of empty space to heat up. Baking your potatoes in a more moderate oven, as we generally do on this side of the Atlantic, allows you to put the rest of dinner in there with them. 

One of the spuds started foaming a little. I do find it strange that the others did not.


We are instructed to remove them from the oven when they're practically done, re-cut them, and return them. Which I did, but I don't know if it made any difference. I thought that maybe the starchy interior of the potato melts back shut under the skin or something, but that didn't happen. Nevertheless, the hot cross spuds were crispy and done.


If you're going to do these for yourself, I suggest you cut them from end to end instead of just in the middle like I did with these. However, if we carefully lift up the flaps and pull these open, we are first struck by how the potato skin nearly isn't crispy and crackly but crunchy. Second, I've heard people wax poetic about fluffy baked potatoes, but this is the first time I've seen one.

You can better see the inner fluffiness when you really split the spud open. 

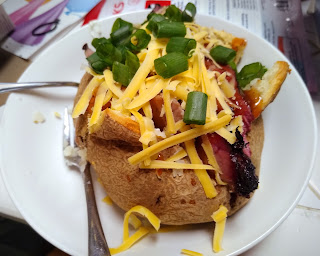
Apparently it's customary to serve these with a lot of butter and suchlike on top. However, on this side of the Atlantic we have invented the loaded baked potato.

There's meat somewhere under all that cheese.

I would only make these in the winter when the oven heat would improve the house. But with that said, I definitely recommend making these! It's so simple but so, so good. We made them again with a bit of oil and salt rubbed on them before baking, and they were even better.

Monday, January 17, 2022

Pecan Rolls: or, Baking with Elizabeth Dole

Today's recipe begins with a request. 

Usually in the weeks after Christmas, I'm in the mood for nothing but green salads and light vegetables until I recover from the delicious onslaught. Other people in the house disagree, and there was an overall droop in household mood after the last of the Christmas cookies vanished. (I don't even know where the cookies came from, they just appeared on the counter in the days leading up to December 25.)

One person said in particular he liked the pecan balls that had made an all-too-brief appearance in a gallon bag of assorted cookies that, as far as I can tell, appeared anonymously in the kitchen while I was asleep. I half-lied and said I had a recipe. The lie here is that I implied that I had actually made the recipe before. In reality, I decided this was as good a time as any to dredge up the remains of First Lady Bakeoffs.

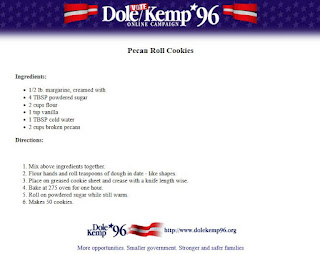
In 1996, you had to stare at a blank screen while this slowly filled the page.

Pecan Roll Cookies
1 c margarine
4 tbsp powdered sugar
2 c flour
1 tsp vanilla
1 tbsp cold water
2 c broken pecans

Heat oven to 275°.
Cream the margarine and powdered sugar, beating until very light. Stir in the water and vanilla. When mixed, add the flour. Lastly, mix in the pecans.
Coat your hands with flour and roll teaspoon-sized pieces of dough into date-like shapes. Place on greased cookie sheet and crease with a knife length wise.†
Bake at 275 oven for one hour.* While they're baking, put a thin layer of powdered sugar in a medium-sized container.
Set the cookies on top of the powdered sugar as soon as they are baked. Cover them in additional powdered sugar and leave to cool. (You can do the cookies in layers instead of covering a big tray with powdered sugar.)
Remove from the powdered sugar when they are completely cooled off.
Makes 50 cookies.

*We suggest 45 minutes instead.
†We prefer half-tablespoon sized balls instead of shaping them as the original recipe says. If your measuring spoon set doesn't have a half-tablespoon, just make them a little smaller than bite-size.

Source: Dole Kemp '96, archived by 4President

In 1996, the First Lady Bakeoff still got a lot of space in the newspaper, Bill Clinton was running into his second term, and Hillary Clinton's recipe was about to defeat yet another political cookie. We've previously discussed the history of the First Lady bakeoff, and will only note that you can see the winner of the 1996 cookie contest just from the name of today's recipe. You will not beat chocolate chips in a bakeoff if you bring nut rolls.


It appears 1996 was the year of the butterless bakeoff. Hillary Clinton would once again ride a victory train on shortening-greased rails. Elizabeth Dole would use margarine to become, as they euphemistically say, first runner-up. Though perhaps she was just as uninterested in a cookie contest as Hillary was. Her Wikipedia page shows a very long political career which suggests that regardless of whether enjoyed baking, she likely had little interest in a public domestic-science contest.


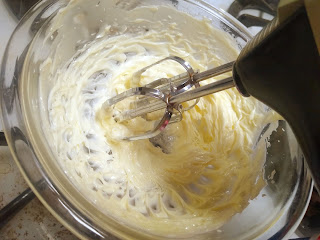
At first I beat the butter and rather small allotment of powdered sugar with a spoon for a little bit. Then I looked at the recipe to see what's next and saw that we have no leaveners in it. That means that, like the waffle iron cookies before them, the only leavening in this recipe is your effort. To properly aerate your dough-in-progress, you could take inspiration from Fanny Cradock. She would stare at the television camera and tell you to think of someone you've never really liked (but you're too well-bred to say anything) so you take it out on your cooking. Or, you could get out the power tools.

I've spent a blissful year with a dishwasher, and yet I still have to remind myself that I no longer need to ask myself if it'll be worth the bother of hand-washing the beaters. 

And here we get to the ingredient that gave me pause in this recipe: tap water. Granted, it's only a little spoonful, but I'm not used to seeing people add water to cookies. I'm guessing that the dough was a bit crumbly without it. 


There. Now that it's all mixed, you'd never guess that we watered down the cookies.


After adding the flour, the cookie dough was surprisingly bland. I'm guessing it's because I used butter instead of margarine. We purchased margarine for the cookie recipe on Maxine Menster's grave, but no one cut today's recipe into stone.  This may have been a mistake, because butter just doesn't have that artificially intensified butter flavor that margarine does. I had added a bit of salt to make up for its absence in our margarine-free cookies, but they still tasted a bit blank.


Well, as promised, we put pecans in these. The chopped pecans cost less than the intact ones, meaning that for once I could economize while also doing less work. At this point, the person who instigated this recipe came into the kitchen. It was so sweet to see his face light up and say "Ahh, my wish is being granted!"

And now we get to the shaping of them. The original recipe tells you to basically shape teaspoons of this into little pecans. I made a few according to the original specification, but I like these better when they're shaped like spheres. They just seem to have a nicer texture after baking. You can see that after making a few teaspoon-sized balls, I got tired of dealing with all these tedious teaspoons and got out a tablespoon instead. (For those of you who live in metric countries, a tablespoon is three teaspoons, meaning I tripled the cookie size.) 

I suspect that Elizabeth Dole used generous teaspoons of dough rather than carefully-measured ones. You can see that we got two dozen cookies here, which is just about half what the recipe told us it would yield. Given that we cut the recipe in half, you would think that we would have far fewer cookies since we made about half of them triple-sized.


Long before the cookies were done, the smell was already taking over the house. They also already had that distinctively toasty overtone that tells you your cookies are no longer hot dough. Honestly, they smelled like they were done long before the specified one hour of baking time elapsed. But who am I to argue with would-have-been First Ladies? I figured these are probably supposed to dry out like biscotti, and therefore they should stay in the oven the whole time. They puffed up a lot more than I expected for cookies with no leavening. Maybe the water turned to steam early enough to puff out the dough a bit before it all baked and hardened.

Figuring that they very likely would not burn at such a low temperature unless I baked them overnight, I did my best to ignore the wonderful intermingling smells of roasting pecans and nearly-baked cookies. The house smelled a bit like those nut roasters you see at carnivals who sell barely-cooled candied nuts.

I should note that the recipe claims to yield 50 cookies. We're halving the recipe, so in theory we should get 25 cookies (minus however much cookie dough mysteriously disappears before it can get baked). We made about half of the cookies to the original specified one-teaspoon size, then decided we could be done baking a lot sooner if we tripled the cookie size by using a tablespoon instead. 

Nevertheless, we got two dozen cookies, which is one short of the 25 cookies we should have gotten had we made all the dough into the tiny size from the original recipe. In other words, the recipe says "one teaspoon" but I think that you're supposed to make them a lot bigger.

The recipe has us rolling the cookies in powdered sugar. In case you didn't know, that is absolutely not the way to make these things right. What you really want to do is bury them in powdered sugar immediately out of the oven and leave them there until they cool off. Anyone who does anything less is totally missing the point.

Yes, you will find that powdered sugar is the culinary equivalent of glitter- it gets everywhere and you can never clean it from every last corner and crevice it got into. And you will probably use half a bag of the stuff properly immersing the cookies (I sift it and then put it back into the bag afterward). But it really is the only way to get these cookies to be absolutely perfect. You will, however, have a surprisingly hard time finding all of the cookies when it's time to gently lift them out of their sugar bath.


---I couldn't resist the tantalization after the long wait. When the timer went off, I entered the kitchen to find that the whole room smelled powerfully like those burnt-sugar pecans you can get at outdoor festivals. After dropping them into the powdered sugar, I waited barely a minute before plucking out one of the smaller ones and tasting it. Where the cookie dough had been a bit bland, the cookies were a crispy burst of delicious toasted nutty flavor that almost crumbled to flavorful powder as soon as you bit into them. 


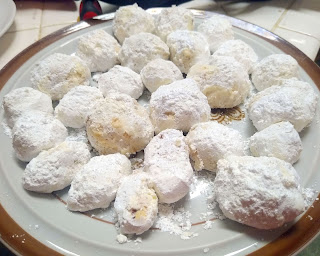
Above, we see a few of the cookies shaped according to Elizabeth Dole's specification (those are the more oval-looking ones on the front left of the plate). We then have some balls, measured out with the same teaspoon as I used to make the pecan-shaped ones. And of course, we have the big mega-cookies when I got tired of making so many little ones. 

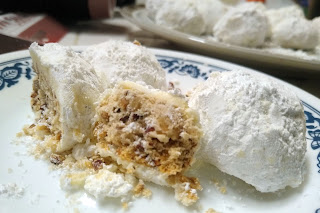
Below, we see some cookies baked exactly as specified. I tried to break one in half to show the middle, and this happened.

So yeah, these cookies are a bit more delicate than I thought. After an hour of drying out in the oven, I expected something a lot harder- like cookie croutons or something. Instead, you get these delicate cookies that just barely hold it together until you eat them- and I mean that in the best, we-are-making-this-recipe-again way possible. However, the consensus was that these cookies, while delicious, were perhaps a bit dry. If we (more carefully this time) break one in half, we see that they didn't just brown on the outside like most baked things do. They turned the color of medium toast from outside to center.

Despite the dryness, everyone kept pecking at the cookie plate until it emptied in far less time than it should have. However, one person noted that perhaps I could make them a bit smaller. However, one teaspoon was a bit puny. I used the half-tablespoon instead. 


Ah, perfection! I also baked them a bit shorter. At 45 minutes, the cookies are baked through and crispy, but not so dry. For this batch, the more finely pulverized pecans were on sale, so that's what we got. But I'm going to suggest you treat yourself and get the pecans that are broken up rather than finely chopped. 

In sum, I can tell why Elizabeth Dole sent in this recipe. It's so good I already made it multiple times--- by request/demand of others. I can also see why Hillary Clinton won the bakeoff. No amount of powdered sugar can beat chocolate chips in America.


On a closing note, last month on the 17th, we finally brought music into the kitchen! It's so nice to be put on lively tunes when making supper.


It turns out that a lot of record stores will just let you take home large boxes of 78s with the purchase of a phonograph. I came into the living room to see this stunning example of the "attention, students" type of record player and a shoebox of lovely music waiting to be played on it. After decades of grinding out the audio tracks to filmstrips about the life cycle of earthworms and the history of Wisconsin, it's now playing actual music that people like.