Friday, December 15, 2023

Pumpkin Spice Latte Bars: or, The autumn dreams I hoped for

As stores start aggressively shoving Jingle Bell Rock into our ears with a tinsel-covered spear, we at A Book of Cookrye will valiantly carry the nutmeg torch of autumn against the relentless flood of canned festivity!

"Pumpkin" Spice Latte Bars

Heat oven to 350°.
Grease a 9" square pan. Cut a square of parchment paper to fit the bottom, Press it firmly into place, eliminating as many air bubbles underneath as you can. Coat the top of the paper with cooking spray.

"Pumpkin" layer:
  • ⅔ cup cooked and cooled carrots (firmly press and squish them into the measuring cup to measure)*
  • ⅔ cup milk
  • 1 egg
  • ⅓ cup white sugar
  • 2 tsp dark brown sugar
  • ¾ tsp cinnamon
  • ½ tsp cloves
  • ¼ tsp salt
  • ¼ tsp ginger
Place the carrots and the milk into a blender, and thoroughly liquefy. Add the egg, and blenderize until completely mixed.
In a medium bowl, mix the sugar, salt, and spices. Be sure to break up any spice-clumps. Then pour in the blenderized carrots, and mix thoroughly. (If you have a large enough blender, you can simply add these to what's already in there and then blenderize everything some more.)

Brownie batter:
  • 4 tsp ground coffee
  • 1 tbsp white sugar
  • ½ cup butter or shortening
  • 1¼ cup brown sugar
  • 1 tsp baking powder
  • ½ tsp salt (omit if using salted butter)
  • 2 eggs
  • 2 tsp vanilla
  • 1½ cup flour
Place the coffee and white sugar in a spice grinder, and grind to a fine powder.
Melt the butter. Stir in the brown sugar, coffee-sugar, baking powder, and salt. Mix well. Then beat each egg in thoroughly, one at a time. Add the vanilla with one of the eggs. Then beat the whole mixture very well. Add the flour, stirring just until mixed.

    To assemble:
Spread the brownie batter into the pan. Get it as flat and even as possible, because it won't level itself out the way brownies usually do. (You may find it easier to lightly spritz the top of the batter with cooking spray and then pat it smooth with your fingertips.) Then spread the "pumpkin" pie filling on top.
Bake for 40-55 minutes, or until a toothpick inserted in the center comes out with no liquid on it. Your testing-toothpick may have little clumps of brownie clinging to it. As long as there's no hot liquid on it, the brownies are done.
These are better the second day. The coffee flavor becomes stronger.


*You can boil or steam the carrots, but I suggest you microwave them instead. Cut them small enough that they fit inside a small bowl, add a spoonful of water, and cover with a wet paper towel. Microwave until fork-tender. Two carrots ended up being exactly the right amount for me, though results will vary depending on carrot size.

If you don't have a spice grinder, you can use 1 tablespoon instant coffee instead. Put it in a small bowl and press the granules with your thumb until they are a fine powder. (This shouldn't take more than a minute.) Omit the white sugar, and increase the brown sugar to 1⅓ cups.

We at A Book of Cookrye dearly love both brownies and iced pumpkin-spice coffee. We also had a surplus of carrots. These we shoved into a blender in the name of our pumpkin-spice dreams. (The pie filling is from our new favorite pumpkin pie recipe.)

Our original idea was quite simple: we would make pumpkin pie filling, and a batch of brownie batter with coffee in it. We would then swirl the two in a pan like an autumn-themed marble cake, and bake until done. I considered that perhaps the pie filling and the brownie batter may not be done at the same time, which would either lead to dried-out brownies or overdone pie filling. (I'm actually not sure what happens to a pumpkin pie if you bake it too long without burning it, but I'm sure it's less than good.) But we decided to try this anyway.


Anyway, we started with the blondie recipe that came from Mom's Betty Crocker cookbook. We then added coffee, which dyed it an unexpectedly dark color. You'd almost think we added chocolate. We also took out a third of the sugar, but we've been doing that for years.


Although today's perpetration involves essentially making two separate recipes, both of them are of the very simple "dump things into the bowl and stir" variety. The coffee brownies were ready in a short time, as was the "pumpkin" pie filling. The oven had barely finished heating up when we were done mixing everything. 


And so, we reached the point where we unite the two parts of this recipe into one autumnal whole! I started by irregularly dropping splats of brownie batter into a pan that ordinarily would have been too big for it. The coffee-infused batter was a particularly unfortunate shade of brown. It made me think of what a lot of people dramatically called "the world's ugliest color" a few years ago. You know it looks bad because the Pantone people slapped on some French in a futile attempt to make it seem nicer. They may call this color "opaque couché," but it's still an ugly shade of brown. As were the coffee brownies.


We poured in the pumpkin pie filling and immediately wondered if I made too much. It nearly covered the brownie batter, which sharply reduced our chances of enticing swirl patterns.

I soon wished I hadn't decided to try to make pretty, swirly, marble brownies. This looked perfectly fine, but it was not what I had hoped for.


The two components of these brownies were surprisingly indistinguishable after baking.


While the top had browned to a nearly uniform color, I hoped to find some enticing swirls under the surface. But after cutting out some samples, we saw that the brownie and the pumpkin had become disappointingly homogeneous in the oven. 

But while they were not the aesthetic triumph I hoped for, they tasted exactly like what I wanted. Eating these was as joyous as going to Starbucks when someone else is paying.


However, as much as I liked these brownies, I really wanted a multilayered appearance. I wanted them to look as multifaceted as they tasted. So instead of swirling the batter and the pie together, I decided to pour the pumpkin on top of the brownies.


Here you can see why I chose to use carrots instead of canned pumpkin (aside from the unwanted surplus of carrots). The same recipe made with actual pumpkin was almost watery before baking (though it came out perfect after). After substituting in carrots, our pie filling was thick enough that it wouldn't turn the brownie batter underneath into a soggy mess.


Our PSL brownies took a surprisingly long time to bake- especially given that we spread the batter far too thin before putting the pumpkin on top. After thirty minutes, the pan still sloshed when I prodded it. I guess the pie filling insulated the brownies from above. At any rate, these were in the oven for almost an hour. I was almost certain that the brownies that lay below the pumpkin would be dried out and ruined, even though they were still wet when I tested them only 5 minutes earlier.


Before I let anyone try these, I took out a corner piece to make sure I wasn't serving dried-up brownies with leathery pie filling on top. (The overly long baking time unnerved me.) As I said to my mother, "If these aren't any good, this is our last chance to dump them in the trash and pretend nothing happened!"

And... they were perfect. Given that we spread the brownie batter almost as thin as a pie crust, it rose to an astonishing height. I've never seen brownies so fluffy. I think that like the Blitz Forte, the stuff on top of the batter insulated it from above, giving the baking powder extra time to puff it up.

The pumpkin spice latte bars are sharing a plate with the Lemon Loves (see recipe here).

There was a bit of consternation at the table when people saw the missing corner piece (even though three remained). Then there was consternation for the sake of the consternation. But after the shouting subsided, these were so good that I was not permitted to take any of the leftovers.

But as a quick baking note, I must suggest that you line the bottom of the pan with a sheet of paper-- even if you normally don't. This is what we found underneath:


If you put paper in the bottom of the pan, this is no big deal. You simply cut around the sides to liberate them, and then it's easy to lift out the dessert. After all, your lovely creation can't weld itself to the bottom of the pan if it never even touches it. And if you can get dessert out of the pan, it doesn't matter what gets stuck and left behind. You can soak the pan overnight, and eat dessert instead of fretting. 

Because I hate to end a post with a dirty pan, let's look at the delicious slice of autumn again!


As Christmas encroaches, we at A Book of Cookrye would like to remind everyone that the holiday is optional. If you feel that any aspect of the festivity is too much work, ask yourself: "What will happen if I don't bother?"

Will your ceiling cave in if without a fully decked-out tree under it? Will your nearest and dearest abandon you if you don't spend an entire week preparing an elaborate feast? (Related: will they help clean the kitchen afterward?) Will the neighbors organize a circle of shame if you fail to drag all the decorations out of the boxes and devote an entire day to arranging them?

No one will ever thank you for being a holiday martyr. If you ever feel that no one else is putting in the work required for Christmas, simply rest your tinsel-covered hands and join everyone else on the couch. If anyone squawks that Christmas will be ruined, invite them to either join you in the chores or shut up. 

Happy holidays, everyone!

Saturday, December 2, 2023

Caramel Dessert: or, The real pudding was the bowls we used along the way

The recipe was so disjointed that I saw it as a challenge.

CARAMEL DESSERT. Put three-fourths of a cup of brown sugar on a pie tin and melt. Scald one pint milk. Mix one tablespoon butter, melted with sugar, two tablespoons cornstarch dissolved in a little milk, one egg and a half teaspoon vanilla. After milk is scalded add rest to it and one fourth cup nut meats and serve with a dash of whipped cream on top.
A Book of Selected Recipes, Mrs. George O. Thurn, 1934
 

Caramel Dessert
1 egg, beaten
2 cups milk
2 tbsp cornstarch
¾ cup light brown sugar (or ¼ cup white sugar and ½ cup dark brown sugar)
1 tbsp butter
¼ cup chopped nuts
½ tsp vanilla

Beat the egg in a large heavy bowl, set aside.
Take out about 2 tablespoons of the milk, dissolve the cornstarch in it, set aside. Scald the remaining milk,* cover it with a lid (or suitable-sized dinner plate) to keep hot, and set that aside too.
In a medium saucepan over medium heat, melt the brown sugar and butter together. Use a flat-ended spoon and scrape the bottom of the pot constantly. The sugar will first turn clumpy and gravelly, and then gradually become what looks like a thick sauce.
Turn off heat and add the scalded milk, one spoonful at a time, stirring very hard as you go to prevent it from clumping. (Watch out for steam when you add the first few spoonfuls of milk.) Turn the heat to medium-low, and stir until all is dissolved.
Slowly pour this onto the egg, whisking very hard the whole time. If you have no one to hold the bowl, you really want to use a heavy one. That way the weight of the bowl will keep it from tipping or wandering as you whisk everything with one hand and slowly pour steaming-hot custard with the other.
Return the egg mixture to the pot. Stir up the cornstarch mixture to dislodge anything that settled to the bottom. Then stir it into the pot along with the nuts. Cook over medium heat until thickened. The mixture should coat a spoon. Remove from heat and add the vanilla.
Pour into your storage container of choice, and cover it with plastic wrap. Press the wrap directly onto the custard so it's in contact (this prevents a skin from forming).
If desired, you can cool the custard faster by setting the container in a large bowl of iced water. Stir the pudding until it is lukewarm. (If you don't have ice, you can use cold tap water. You may need to change the water a time or two as it absorbs the heat from the pudding.) Then cover it with plastic wrap, pressing it directly onto the custard so it's in contact.
Refrigerate until ready to serve.
If you make this a day or two ahead, you may find that some water has separated out and is sitting on top (rather like a container of yogurt or sour cream). Just stir it back together.
Serve with whipped cream on top.

*While you can scald the milk on the stovetop, we recommend doing it in the microwave. It's faster, and you don't need to worry about scorching. Just put the milk in a bowl that has a fair bit of room on top in case it boils up. Then microwave it until you see it start steadily simmering around the edges. Turn off the microwave before it starts boiling all over.

A Book of Selected Recipes, Mrs. George O. Thurn, 1934

That's right, today we are returning to our sporadically-successful attempt to make a recipe every month that I've been wanting to try for a while. This one comes from Mrs. George O. Thurn, whose recipes have made regular appearances here at A Book of Cookrye. 

In her (apparently only) book, Mrs. Thurn's recipes are somewhat unevenly written. Some have tidy lists of ingredients at the top and crisp, clear instructions below. Others, like today's caramel dessert, read more like a note-to-self. But while many of the recipes seem like quick notes instead of explicit directions, this is the only one in the entire handout that is so indecipherable. I had to reread it several times and then write out the steps in actual chronological order. (Maybe the recipe would have made sense upon the first reading had I attended one of her demonstrations and brought a notepad.)

After reworking the instructions into what seemed like a logical order of steps, we could proceed. I have to admit that I was less interested in the results of the recipe than I was in making it work. I imagined that after turning the recipe's four scrambled sentences into something usable, we would get an ordinary yet lovely brown sugar custard.

I've done a few recipes like this before. They require patience. You will spend an inordinately long time stirring a pot of sugar that looks resolutely unchanged.

After a while, the sugar starts to turn into gravelly brown clumps. You may wonder if you've ruined everything as they scratch against the sides of the pot. The sugar will continue to look like this for a long time, which likely will make you wonder if it's ever going to melt like the recipe claims. But eventually, you will see the slightest hints of a sludge seeping across the bottom of the pot. 


This first signs of melting will disappear as you keep stirring, but eventually you'll have a pot of sludge-soaked rocks.


And after a very long time, you will have what looks like the sauce you'd pour into a pan if you were making pineapple upside-down cake. (But it's scorching hot. Keep your fingers out.)


After reducing the sugar to sludge, we reach the point in the recipe where I have ruined it so many times before: adding some form of liquid to this near-candy. If you dump it all in at once, your sugar instantly hardens into big rocky shards and you've ruined the recipe. So you have to beat the contents of the pot very hard while you carefully pour the first small splash in. Also, watch out for the steam!


It may end up looking like steaming-hot paste, but that's fine. As long as you don't have any extra-large shards of hard candy in there, it'll come out fine. Just keep beating the dessert really hard so that any hardened sugar doesn't have a chance to turn into big chunks. As Fanny Cradock would say, think of someone you've never really liked but you're too well-bred to say anything so you take it out on the dessert.


Despite your best efforts, you'll probably still have small granules of hardened sugar, but they'll dissolve after a minute or two over a hot stove.


And so, we reach the other tricky part of the recipe: tempering an egg. In other words, pouring this boiling-hot stuff into the bowl of beaten eggs without making a syrupy egg-drop soup. Once again, one must beat furiously. Use a bigger bowl than you think lest you slosh your half-made dessert all over the counter.


At this point, the recipe is a simple matter of stirring it until thickened. It occurred to me that I could probably do this part in the microwave, but I didn't want to risk turning this into a bowl of scrambled eggs in syrup.


We put the custard away to cool, but it stayed quite sloshy and runny. However, a test spoonful tasted almost exactly like the the candy coating on Cracker Jack. I was very annoyed at having something so delicious yet so gloppy. Then I noted that I mismeasured a crucial ingredient. Instead of using 2 tablespoons of cornstarch, I added only two teaspoons of it. (For those who only speak metric, I only added one-third of the cornstarch that I should have.)

I thought that perhaps I can add the missing amount of cornstarch, reheat the whole custard, and fix it. That didn't work. No matter how careful you are with a thermometer in one hand and a spoon in the other, an egg custard absolutely will turn into a curdled mess if you try to cook it twice. However, it was the perfect thickness. If you get your ingredients right the first time, it's a really good pudding. 

Unfortunately, it looks terrible if you cook it twice and curdle the eggs. The little chunks of chopped nuts suspended in it didn't help.


Whipped cream would have solved the unfortunate appearance, but we didn't have any. But this tasted too good to leave a bad visual impression. Instead, here is an attempted rendering of what it could have been.

I don't like wine and therefore love to use to use wineglasses for everything else.

I thought the caramel dessert would be pleasantly bland, but it has a very nice burnt-sugar undertone that makes it better than it has any right to be. However, it seems like it should be on top of something, or perhaps served in little tartlet shells. 

But as much as I liked the caramel dessert, I only recommend making it if you have a dishwasher. You'll have a lot of dirty bowls when you're done. But if you do have one of those wonderful machines under the kitchen counter, then I would definitely make this. After all, what effort is washing dishes when you merely put them on the rack and push the magic button?

Friday, December 1, 2023

Whiskey-Pecan Pie: or, Unexpected normality

As Thanksgiving ends,  we at A Book of Cookrye go into winter hiding until the holidays are safely over. However, it was very amusing to see the retail industry frantically begging people to come out for Black Friday. After the industry stretched Black Friday into a weekend and then into half a month, people simply lost interest. 

But in the precious final weekend before every grocery trip comes with 5 versions of Santa Baby over the PA system, we went to a friend's gathering and brought this!

Whiskey-Pecan Pie
1 unbaked pie shell
1 cup sugar
1½ tsp cinnamon
1 pinch salt
3 eggs
¼ c whiskey
1 tsp vanilla
10 oz chopped pecans or pecan halves

Heat oven to 350°.
Whisk together the sugar, cinnamon, and salt, breaking up any spice-clumps. Then add the eggs all at the same time, and whisk very hard. Then beat in the whiskey and vanilla. Lastly, stir in the pecans.
Pour into the pie shell. If the pecans land in a pile, spread them evenly with the back of a spoon.
Bake 45 minutes. It's very good with whipped cream.

Adapted from A Taste of Texas by Jane Trahey, 1949

This year seems to have brought on a wonderful shift in Thanksgiving: the spread of Friendsgivings. Until the last year or so, it seemed that people tended to promote Friendsgiving as an alternative holiday when one has deliberately severed oneself from one's rotten relations. However, the idea of Friendsgiving has apparently broadened to having a Thanksgiving gathering of friends at some point within a few days of the official holiday, regardless of whether one has a good family or not.

I think the pandemic caused the idea of Friendsgiving to expand beyond those fleeing their family. After a few years where people rarely managed to see each other, we are all collectively grabbing at the nearest excuse to feast with friends again. 

And so, a lot of my friends gathered together the weekend after Thanksgiving. I took the opportunity to revisit something from the Saint Patcaken: a Fireball pecan pie. It's not like I could bring such a pie to my family.

After we cut away the extra pie crust that hung over the edges of the pan, the rerolled trimmings were exactly enough to fill this miniature pie pan. I don't know what I will do with it, but it's reassuring to know that the freezer holds a single-serving pie shell for when the need strikes.


The baking aisle hasn't recovered from everyone frantically trying to figure out how to cook from scratch. Relevant to today's pie, the pecan pieces were sold out. But in a peculiar turn of events, the pecan halves were cheaper than the pieces would have been. Usually it's the other way around, probably because it's mechanically trickier to get pecans out of their shells intact.


As I hoped, the pie tasted like Fireball and pecans. The combination is better than you may think, and I don't even like whiskey. I was so happy to take this pie out from under a massive tower of cake and let it be its unfettered self.


As the pie baked, it formed a very nice, crisp-looking, crackly crust. I couldn't decide whether the pecans looked like an enticing promise of what lay within, or whether they looked like a pie full of beetles. Both options appealed to me.

Despite our previous lessons in properly resting a pie crust made in a food processor (lest the gluten in it cause the whole crust to tighten like a trampoline as it bakes), I only gave this crust about half an hour in the refrigerator after rolling it out. That proved insufficient, and half of the pie pulled away from the pan. But the crust was sturdy as it was springy. Note how it didn't crack or leak at all.


As many of us know, you must remove a piece of a pie when setting it on a dessert table. People often hesitate to be the first to plunge a knife into an intact dessert. But once it's already been cut, no one minds helping themselves. This was as good an opportunity as any to taste-test the pie and see whether I was about to discreetly take it back to the car.

I said "Hmm. It tastes more normal than I thought it would." I then found out that people get nervous when one says that about one's own pies.

I don't know that I would have tasted the whiskey had I not already known it was there. It was a very lovely pecan pie, but it wasn't what I set out to make. With that said, a large chunk of it was gone by the time I left.


I only have one minor postscript to add. For my family's Thanksgiving, I took Gabby's advice that "Lemon bars are always good." Well, it seems lemon is always the most popular thing on any Thanksgiving dessert table. One person brought a lemon meringue pie that was completely demolished. You can see its nearly-empty pan above and slightly to the left of mine. (Another person brought two apple pies that were still warm from their oven, which is a level of last-minute haste I may someday rise to.) 

Happy Thanksgiving, everyone!

Thursday, November 23, 2023

Happy Thanksgiving from A Book of Cookrye!

Happy Thanksgiving! This year, we at A Book of Cookrye are thankful for libraries.

In our little household island of introvertedness, the holiday season almost ceases to exist. Last week, I stopped at a gas station and wondered why they had Christmas muzak in mid-October. While Mom and I had talked a tiny bit about Thanksgiving plans, I thought the holiday was still a month away until last Tuesday. In other words, I had only two days to figure out what I was making for Thanksgiving.

Our Mom of Cookrye asked us to bring desserts. I wasn't sure what to make this this year (one tires of making the same things every year). So I reached out to friends for advice. Gabby (who has fearlessly shown up for three Pieathlons) solved my indecision immediately.


I knew just the recipe to use: the Lemon Loves from The Cotton Country Collection. I only remembered them because of the charming name. (Also it's hard to go wrong with recipes from a southern Louisiana community cookbook.) Unfortunately, the book's spiral binding failed, and it was summarily discarded. I should have saved out the pages with recipes I use. Then I thought to myself "I'm sure I wrote about it..." And it turns out I did!

But as I was rereading the ingredients, I thought to myself "That baking powder measurement seems.... off." The recipe, as I typed it up, called for half a tablespoon of baking powder in a tiny little layer of lemon filling. I also added in a footnote that I forgot to add the baking powder and the lemon bars came out fine anyway. However, I wondered: If one measurement is (probably) off, did I type anything else wrong in the recipe?

Unfortunately, I could not check the book since (as aforementioned) it fell apart and was then sent to the municipal hereafter. Nor did the local library have a copy. And so, I looked up the book on WorldCat and called the first library listed that had a copy. The librarian who answered very kindly went to the shelves, pulled down their copy of The Cotton Country Collection, and read the recipe for Lemon Loves over the phone. She was very professional and mercifully didn't ask "Is this a prank call?" Truly, we do not deserve librarians.

I said "Thank you! It seems like Thanksgiving snuck up on me this year!"

"It does that every year," she replied.

Most of the recipe that she read by telephone was identical to what I posted. But turns out I made a tiny yet crucial error back when I typed it up: 

One stray letter B can ruin a recipe.

I cannot believe I've had a booby-trap recipe lurking on A Book of Cookrye for nine years! What if someone made them as written, adding half a tablespoon of baking powder instead of half a teaspoon, and ended up with weird, chemical-tasting Lemon Loves? A half-tablespoon is three times as much as a half-teaspoon! I often say that I follow recipe directions so I can blame the writer, and this time I must blame myself!

Now that we have corrected the original recipe, if you want to make the Lemon Loves you can be assured that the recipe was double-checked and will come out just right.


And so, this Thanksgiving, I'm sure my entire family will be thankful to the librarian who answered the phone, whether they know it or not.

The Lemon Love is sharing a plate with a pumpkin spice latte bar.


Tuesday, November 21, 2023

Pumpkin-Spice Bars: The secret ingredient is carrots

When carrots multiply in the refrigerator, it's time for pie!

"Pumpkin" Spice Bars (made with carrots)

Before beginning, cut the carrots for the filling into 2 or 3 inch pieces (no need to be precise). Place in a microwave-safe bowl with about 2 tbsp water. Cover the bowl with a plate. Microwave until tender, and set aside to cool.

Heat oven to 350°. Line an 8" round pan with foil, then coat with cooking spray.

Crust:
  • ¼ cup butter or stick-type margarine
  • ¼ cup brown sugar
  • ¼ cup oats
  • ½ cup flour
Thoroughly mix the sugar and margarine (add a pinch of salt if using unsalted butter). Add oats and flour, mix well. Sprinkle evenly into the pan, then pat and press firmly into a flat crust.
Bake 15 minutes. Make the filling and topping while it bakes.

Filling:
  • 8 oz cooked and cooled carrots (weigh after cooking)
  • ¾ cup (half of a 12-ounce can) evaporated milk*
  • 2 eggs
  • ¾ cup sugar
  • ½ tsp salt
  • 1 tsp cinnamon
  • ¼ tsp cloves
  • ¼ tsp ginger
Place the carrots, evaporated milk, and eggs in a blender. Blenderize thoroughly. (If the carrots are still hot, blenderize them with the milk first, then add the eggs and blenderize them some more.) Pour them into a bowl and add the remaining ingredients. Mix well. (If your blender is large enough, you can simply add the sugar and spices and then blenderize everything together.)
Pour onto the crust, and spread it evenly into the pan.
Sprinkle with topping and bake 15 minutes, or until set. Like a cheesecake, it's done when it jiggled but doesn't slosh.

Topping:
  • 2 tbsp stick-type margarine
  • ½ cup brown sugar
  • ½ cup nuts (we recommend pecans)
Mix the margarine into the brown sugar. Then add the nuts.

*If you don't know what you'd do with the remaining half-can of evaporated milk and don't want to freeze it, use a 5-ounce can and add 2 tbsp of regular milk.

Note: When you first pour the filling into the pan, it should be thick enough that the topping sits on it rather than sinking in. If not, bake the filling for about 15 minutes. Then sprinkle on the topping and bake 10-20 minutes, or until set.

Adapted from a handwritten recipe card


Today on A Book of Cookrye, we are bringing out a charming recipe card I've been wanting to make for a long time! It looks like a nice recipe for pumpkin cookies, doesn't it? While I could have used the ingredients listed, we have carrots breeding in the refrigerator. And so, instead of pumpkin, we're using these!


In the comments under our recent carrot tarts, Freezy noted that apparently carrot pies are a bit of a trend at the moment. Apparently people are flipping through vintage cookbooks and discovering the tasty recipes that lie between the gaudy gelatin horrors, and carrot pies have been brought back from between the pages.

I'm not at all surprised at the rediscovery of carrot pies. For quite some time, making terrible-looking recipes from old cookbooks has been a popular video genre on social media. It was only inevitable that a few "content creators" would read the rest of the book and find the good recipes. Since swapping pumpkin for carrots has been a popular "cooking hack" since the days when they were called "household hints" (and even before then), you see it suggested in a lot of cookbooks. And of course, in the days before you could simply buy a can of pumpkin, you had to butcher an actual fresh pumpkin and stew it yourself. Doesn't dropping whole carrots into a pot of water sound wonderfully easier?

Speaking of easier, we decided to microwave the carrots instead of simmering them. Not only is the microwave a lot faster, but I think it tastes better. You don't lose half the flavor when you drain off the cooking water. 

While the carrots were merrily spinning on the microwave's glass platter, we could begin the crust. Like so many cookie recipes, it starts with a delicious and sticky mixture of butter and sugar.


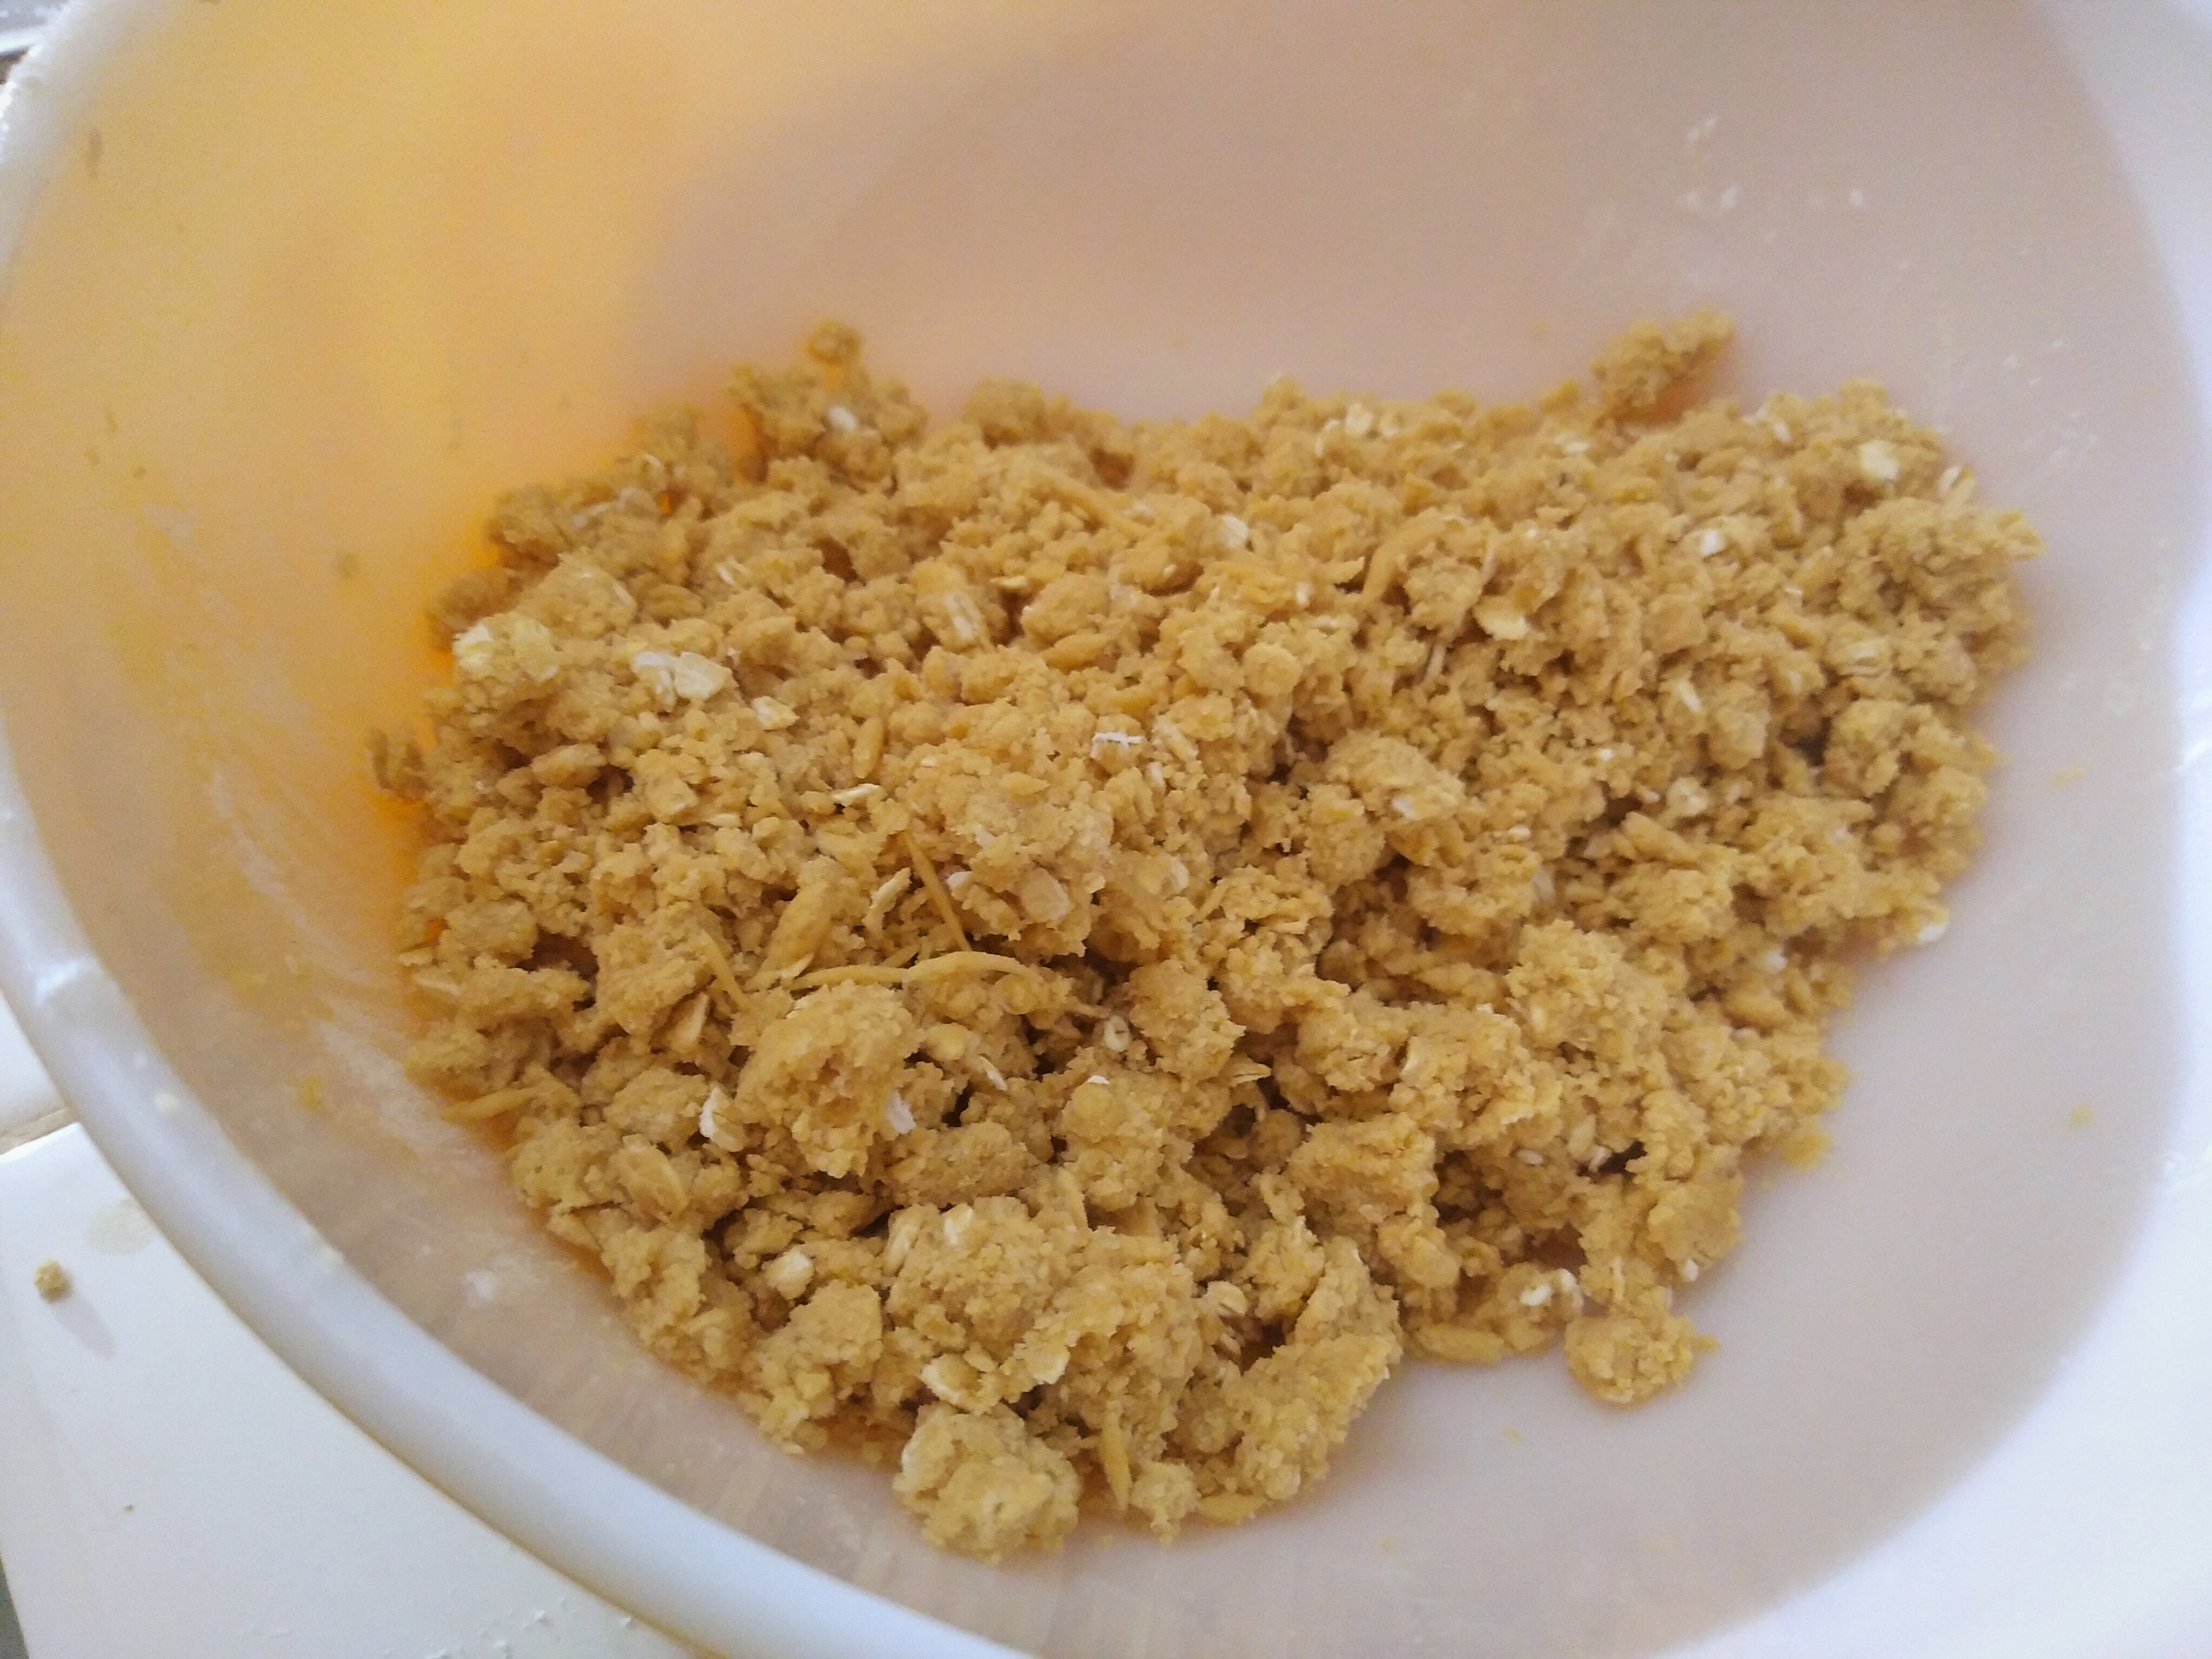
I thought that perhaps I should mix in the flour first and then separately add the oats (as is customary when making cookies), but then I figured that I could probably just dump everything in with no ill results. I was right.


Our resulting dough tasted, unsurprisingly, like oatmeal cookies. They were perhaps a tiny bit bland, but I wasn't worried about that. After all, this is the foundation on which our pumpkin-spice filling will rest. Too many flavors could start clashing in the completed cookies. After all, how many of us season our pie dough before putting a pie in it?


Like the sour cream pecan coffee cake, this recipe looks a lot longer than it is. The instructions take up both sides of the index card, but we were already putting the crust into the oven before we knew it. I thought our carrots would have time to cool before we got around to using them, but they had barely finished their time in the microwave.


Pumpkin pies have superseded carrot cakes as my preferred method of getting the damn things out of the refrigerator. A carrot cake uses one or two carrots in a whole dessert. But with a pie, you will pulverize at least half a dozen of them into your recipe. Until I can put a stop to the carrots that apparently breed like rabbits, we will have a lot of I-can't-believe-it's-not-pumpkin pies.

I was going to put the milk, eggs, and carrots into the blender all at once. But since the carrots were still hot, I instead blenderized them with just the milk first. The resulting carrot paste was too thick to properly liquefy, but the milk cooled the carrots down enough to avoid prematurely cooking the eggs.


Our resulting spiced mixture was a lovely bright orange and tasted understated yet nice. Like our previous batch of carrot tarts, the pie filling was a lot thicker than the pumpkin pie made with actual pumpkin. As you can see, the sugar and spices sat on top of it instead of sinking in.


Not only does this recipe go by a lot quicker than the long instructions suggest, when you use carrots instead of pumpkin it also bakes very fast. The recipe says to bake for fifteen minutes and then sprinkle on the topping. I found that at the end of those fifteen minutes, the "pumpkin"-spice bars were already completely set. I sprinkled the nuts on top and returned the pan to the oven for the butter and sugar to melt into place. While I was concerned that the eggs would curdle, I told myself that in the original instructions, our pumpkin bars would have spent over twice as long in the oven with no ill effect.


So... this recipe doesn't make bar cookies, even though that's what's written at the top of the card. It makes a pumpkin pie with an oatmeal shortbread crust. If you doubled the recipe back to its original quantity and made it in a 9x13 pan, you still wouldn't get pumpkin-spice bars. You would get a rectangular pumpkin pie.


But with that said, it's really good. The oatmeal crust wasn't as sweet as cookies, and therefore it was a perfect counterpoint to the pie filling. The toasted pecans on top (I refuse to voluntarily eat walnuts) were really good. The pie filling itself, while perfectly fine, wasn't quite as good as the pumpkin pie recipe I clipped out of the newspaper (well, screen-grabbed from the newspaper. It was a bit bland. I would swap out the filling with Louise Bennett Weaver's recipe from the 1933 newspaper. Simply cut the pie filling down by a third (that is, reduce the eggs from three to two, and adjust the other ingredient amounts to match).


I really like the idea of this recipe a lot. It's delicious, and really easy. If you can't roll out a pie crust (or don't want to bother), it's a great way to have pumpkin pie without a rolling pin. I don't know why this recipe was called "bar cookies" instead of a pie, but it's a really good pie and so easy to make.

Monday, November 20, 2023

Coffee Icing: or, Fun with percolators

I made these as an excuse to use the percolator.


Coffee Icing
1½ cups granulated sugar
¾ cups strong black coffee
1 tsp butter

Cook coffee and sugar until they form a soft ball when tested in cold water (about 240°F with a candy thermometer). Drop the butter on top without stirring it in. Then allow to cool until lukewarm.
Beat the mixture until it thickens and lightens in color. Quickly spread onto the cake (it sets very fast).
This is very good on spice cakes.

Note: The original recipe was for fudge icing. If you want to make it as written, stir three tablespoons of cocoa powder into the sugar before you begin (eliminating any lumps), and use milk instead of coffee.

Source: A Book of Selected Recipes, Mrs. George O. Thurn, 1934

A Book of Selected Recipes, Mrs. George O. Thurn, 1934

I don't like coffee, but I just find percolators so entertaining in their own understated way. And so, I wanted an excuse to use the one I have lying around the house. First, we revisited Mrs. George O Thurn's mocha cake. I have let that recipe lie dormant for too long. Good recipes should not be pressed into the pages of a book, they should be splattered with errant eggs.


But that was only one batch of coffee. And obviously, we can't drink quarts of iced coffee just as an excuse to operate the percolator again. You may think I'm daft just because I love the burbling sounds of this thing, and seeing the water splash up in the glass knob in the lid and gradually get darker. Also, it looks like an 1800s silver teapot with a power cord coming out the back. As things get tougher and tougher, sometimes it's nice to take pleasure in the little things without worrying about how silly you look. 

Anyway, we've made a few attempts at boiled icing, and I thought that today was the perfect day to try making it with coffee. If it came out right, it would be like topping a cake with a delicious cup of iced coffee made to A Book of Cookrye standards. As a reminder, a cup of coffee in my happy world looks like this:


I took a boiled fudge icing recipe from Mrs. George O. Thurn's book. At first I was like "Why does she have six recipes for boiled icing?" But actually, having six icing recipes allowed us to pick the one that matched what ingredients we had on hand. Five of them used egg whites, and I didn't want to waste egg yolks. One called for heavy cream, which never buy unless I have specific plans for it. And so, only one recipe remained to suit my percolator-related needs.

And so, we took Mrs. George O. Thurn's recipe for fudge icing,  omitted the cocoa powder, and replaced the milk with coffee. As an aside, boiled icings use a lot of sugar. Just like the last time we dabbled in boiled icing, we are putting more sugar on top of the cake than we put in it.


In other words, after adding the coffee to the pot, I could have either made a batch of icing or drunk this as-is. I should note that I reduced the recipe to two-thirds its original quantity because I couldn't imagine putting nearly a pound of sugar on top of a small square cake- even though I only made the cake as a vehicle for said icing. Even after getting out the tiniest thing that was stovetop-safe, we barely had enough coffee to coat the bottom of it.

For the longest time, nothing happened in the pot. I began to wonder if the stove was defective or something. (I have a bit of a combative history with flat-top stoves.) But after a long time, the coffee boiled up so much that I wished I'd used a bigger pot.


This mixture took a surprisingly long time to reach the soft-ball stage.  I began to wonder if the milk used in the original recipe was crucial to making this icing work. But eventually, after a lot of stirring, the icing formed a soft ball when tried in iced water. And so, we set aside our syrup to cool down to nearly room temperature. I would have forgotten to add the butter had I not measured it out at the beginning and left it conspicuously waiting right in front of me.


And so, we left the coffee syrup out to cool, just as we did when we made Louise Bennett Weaver's spice cake. Then came the long beating. And I do mean the long beating. I must have spent a solid fifteen minutes with a wooden spoon before seeing anything different in the pot. I began to wonder if I needed to return it to the stove for further boiling. Then, at long last, we began to see the slightest suspicion of a color change. After beating the snot out of the icing for still longer, it finally lightened to about the color of peanut butter.

I've seen a lot of candy instructions that say "beat until it loses its gloss," and decided that made sense for today's icing. We were again bitterly reminded of (what apparently is) a fundamental truth of boiled icing. You may have to beat the icing for half an eternity, but once it's ready you have at most 45 seconds to hastily smear it onto the cake. As you can see, I was not fast enough.


Indeed, while the icing had been obstinately runny for a long time, it completely solidified onto the pot while I hastily tried to scrape it out and smear it onto the cake.


However, an easy solution to our icing ineptitude was at hand: the presentation platter! We could cut away and conceal all the unsightly edges, even if it meant no one (besides those who did the baking) got a corner piece.


The cake, of course, was fine. But I was more concerned with the icing on top..... which was absolutely delicious. You may think that boiling coffee for so long would ruin it, but it was just fine.

Imagine a cake topped with coffee-flavored fudge on top, because that's what we got. I would definitely make it again. However, in the future, you shouldn't beat it too firm. As soon as it barely begins to lose its gloss, get it onto the cake- and fast. I wouldn't try to use boiled icing to cover a layer cake. The icing would probably set in the saucepan before you were halfway done. But it's great for when you're serving a cake out of the pan, or for drizzle topping. 

Also, this kind of icing requires patience. But on the bright side, you may offset the calories with the arm workout that comes with making it.