Thursday, January 18, 2024

La Gougère: or, The high class cheese pouf!

I've been holding onto this recipe and waiting for winter.

French Yorkshire Pudding or La Gougère Bourguignonne
4⅜ fluid ounces milk (½ cup plus 2¼ tsp)
1 oz butter (2 tbsp)
2 eggs
¾ teaspoon salt,
2½ oz flour (½ cup plus 2 tbsp)
2 eggs
1½ oz diced Gruyere or Emmenthal, divided into 1 and ½ oz

Before beginning, beat the eggs in a small bowl. (This will let you leave save a smidge of beaten egg for brushing on top later on.)
Select a small saucepan that can handle using an electric mixer in it. (You can beat this by hand with a whisk, but if you use a mixer you'll be glad.)
Put milk, butter and salt in the saucepan. Heat slowly until butter melts and the milk boils. Toss in flour all at once. Allow to boil for a few seconds until the milk begins to bubble over the flour.
Turn off heat, insert an electric handmixer, and beat on high speed until smooth. Slowly pour in the eggs, leaving about a spoonful in the bowl, beating the entire time. Continue beating until smooth again. Stir in 1 oz diced cheese. Spread mixture into buttered shallow cooking dish (mine was about 5" x 7"). Brush with the reserved spoonful of beaten egg, then sprinkle on remaining diced and grated cheese.
Set aside until it gets completely cold (you can refrigerate it to speed this up).
When ready to bake, heat oven to gas mark 8, 450°F, or 230°C. Bake for 20-25 minutes, or until the top is a deep golden brown.
Allow to cool for a few minutes, and serve warm.
Leftovers can be placed on an uncovered pan and reheated at 350°F (180°C, or gas mark 4).

Note: You can assemble this ahead of time and put it in the refrigerator until ready to bake. If wrapped airtight, it should keep for at least a day before baking. There's no need to bring it back to room temperature. Just take it directly from the refrigerator to the oven.

Source: Fanny Cradock via Keep Calm and Fanny On

When not wrapped in blankets and looking like an ambulatory fabric bale in the house, we at A Book of Cookrye have been recreationally baking. When it was merely freezing, we lit the stove burner and made pizzelles. When the daytime temperature dipped to 12 degrees (that's -11° for our Celsius friends), it was the perfect time to bake in a ridiculously hot oven.

It turns out that this recipe is easy to shop for. There aren't a lot of ingredients, and most of them are cheese.

I first saw this recipe on a TV show about the history of TV cooking. One episode focused on Fanny Cradock and Graham Kerr (aka The Galloping Gourmet). I skipped through all the non-Fanny parts. 

Fanny Cradock got very mixed reviews when they asked other chefs to talk about her. One person said that her cooking style was outdated although "in terms of cooking she was on the money." He gave this recipe a special mention and said he still makes it. This was immediately followed by a demonstration. 


For some reason, they didn't give any ingredient amounts or oven temperatures, but I found the directions on the utterly delightful Keep Calm and Fanny On. At first I didn't read the instructions very closely and therefore didn't know what I was getting into. It turns out that we're basically making choux paste with cheese. I was not daunted by choux paste. If you watch Fanny Cradock make it, choux paste is so easy you wonder why people reserve it for fancy foods.

As aforesaid, I didn't closely examine the recipe when I first decided to make it. It turns out that whatever a gougère is, we're not making very much of it. The beginning of our recipe barely covered the bottom of the smallest pot in the kitchen.


Although choux paste is easy to make, you want to have everything measured and ready before you start. With some things, it's no bother to pause every so often and measure out the next ingredient. But with choux paste, you need everything ready to dump into the pot when its time comes. Perhaps I was a bit excessive to pre-crack my eggs into individual bowls, but that's because I always end up fishing out eggshell fragments. (Also, sometimes I am a bit too excited about having a dishwasher to put all those tiny bowls into.)

Fanny Cradock's original instructions were to toss in the flour all at once and "beat violently." I could have gotten out a whisk, but I was taking full advantage of the power grid's miraculous avoidance of another Texas-sized failure. Even though the trees were crackling with frost and the power could go out at any minute, I let our electric handmixer beat the flour violently for me. 


This could be the mixer that broke Texas.

In short order, we were ready to add the first egg. As soon as our mixer resumed its assault on the Texas power grid, the choux paste entered what Fanny Cradock gracelessly calls "the globule stage."


If you've never made choux paste, I can easily imagine how you might think you failed when it looks like this. But if you keep beating it really hard (or grinding away with the electric mixer), eventually the globules give way to a smooth paste.


Then you add the second egg and it goes back to globules again. But after a long and stubborn beating (or about thirty seconds with an electric mixer), you have what almost looks like somewhat elastic mashed potatoes. Our choux paste was ready to receive the cheese.


Because I didn't know what pan size we would need, I waited until we had our choux paste before getting one out. It turned out that the smallest pan in the kitchen was just a smidge too big. But after lightly spritzing cooking spray onto the top of our cheesy choux, we gently persuaded it to reach the edges of the pan. It later occurred to me that this would probably be really good baked in a (well-greased!) cupcake pan. (Because the oven is hot enough to ignite paper, I would either use foil cupcake liners or none at all.)


In less-than-freezing circumstances, I would have felt singularly stupid to run the oven to 450° (230° for our Celsius friends) for something so small. However, I did not feel compelled to halt production of our cheese pouf as the weather got colder by the minute.

I had been debating what to do about the egg wash that we are directed to put on top. I didn't want to crack open another egg for this and waste most of it (or put the rest of it back in the refrigerator and try not to forget to use it later). But my extravagant use of tiny bowls solved my egg-use problem. Since I did an accidentally terrible job of cracking one of them and broke the yolk, I simply did a deliberately bad job of pouring the egg into our batter. The remaining egg residue was exactly enough for brushing purposes.


As a side note, between our recent pizzelle phase and the increased application of various egg washes, the single brush in the kitchen drawer has been used a lot more in the last month than its entire previous year of existence. It's already falling apart. I sometimes have to remove bristles from food before baking, and a few have stayed hidden long enough to get cooked. If I'm feeling extravagant, I may get one of those silicone brushes that you can can drop into the dishwasher.

Molting brushes aside, our cheese pouf was ready to bake in a very short time. The instructions don't mention cooling our still-warm choux paste before baking, but I watched the the Fanny Cradock episode about petits fours in which she went into a long rant about how it's absolutely essential to get your choux paste completely cold before you cook it. She says it's "the most important point, the really VITAL point" in making choux paste. 


I can also say from experience that if you don't let choux paste get all the way to room temperature (if not colder), it doesn't cook right but instead stays gooey in the middle no matter what you do. I'm going to assume that when Fanny Cradock gave the recipe, she had already introduced us to choux paste in an earlier episode. Therefore, anyone following Fanny Cradock's program (you were following the program and not picking recipes willy-nilly, right?) would know that the choux paste should cool before baking.

I should have waited to heat up the oven until the choux paste had gone completely cold. Even after putting it in the coldest part of the refrigerator, it needed 10 minutes before the last of the warmth had gone out. I felt kind of bad about running an empty oven at 450° for so long, but given the cold I didn't turn it off.

Eventually, we put our cheesy choux into the oven, wondering if it would rise at all. It looked so puny in the pan. But before it was halfway done baking, it almost looked like I'd crammed a tiny chicken into a small dish.


I wasn't prepared for our cheesy pouf to look so good. You'd think I spent hours on it instead of a minute or two with an electric mixer. That beautiful deep golden crust, the gooey puddles of cheese on top, the almost unnatural height to which it rose... I couldn't believe I made this myself.


I know that the underside of bread is rarely worth noting, but look at that beautiful golden dough interspersed with shiny pieces of toasted-brown cheese. It's like a mosaic of deliciousness.

Our entire gougère had risen to an impressive height despite the nearly cracker-thin state of the dough before baking. I really wanted to see what happened under that massive off-center mountain that rose out of the pan. It turns out, the entire thing lifted off from the bottom of the pan and made a bread-tent.


We tasted this and.... it's cheesy bread. It's the best cheesy bread I've ever had. Don't be distracted by the fancy-sounding French name, it's cheesy bread and it's also really easy to make. With that said, I want to branch out with future cheese selections. Some quick internet searching tells me that gruyère is the customary cheese (or as food snobs say, "the classic preparation"), but I want to try this with provolone or really sharp Cheddar.


After my cheese stupor wore off, I had a grim suspicion that as amazing as this was right out of the oven, it turns into a gummy sad mess as soon as it gets cold. But some poking around on the internet said that you can just put it back into the oven and reheat it. I was suspicious of that. Most of the time, when you reheat bread in the oven, it gets dried out and hardened- and no one wants that unless they're making toast. 

But emboldened by the freezing heat and telling myself that I wasn't just making up excuses to stand in front of a hot oven, I unceremoniously threw the last leftover piece of cheese pouf into the oven the next night. Our fancy French bread looked tragically undignified sitting on the baking stone that occasionally makes pita bread but mostly gets used for frozen pizzas.


To my surprise, the cheese pouf reheated really well. I won't say that it was exactly the same as when it was fresh, but it was respectably close. It didn't dry out like I feared (though it was a bit crunchier than the first time). Also, I have to note that since you reheat this at 350° (or 180°C), you can easily put something else in the oven alongside the leftover cheesy bread.

Since you need to make this early enough for the dough to completely (and I do mean completely) cool off before baking, a cheesy choux pouf is a really good choice if you have friends coming over. You can get it ready to bake at your convenience, completely clean away the mess at a leisurely pace, and let the cheesy delight wait in the refrigerator. Instead of cooking when your friends are here, you can simply put pop this into the oven and make sure you can hear the timer from wherever you are. Or, you can make this for yourself and whoever is lucky enough to wander into the kitchen when the cheese smell drifts to them.


Sunday, January 14, 2024

Fante's Pizzelles: or, The recipes keep getting better

After more than a decade of trying, Ebay's suggestion algorithm finally got me.


Fante's Special Pizzelle Recipe
3 eggs
6 oz (¾ cups) sugar
5 oz (1 cup plus 2 tbsp) melted shortening
1½ tsp anise seeds*
1½ tsp vanilla
Juice and grated rind of ¼ orange or lemon
11 oz (2 cups) flour

Beat eggs and sugar until they become light and foamy.
Add the melted shortening, a little at a time. Add the anise seeds, vanilla, grated rinds and juices. Gradually add the flour until a light dough is formed; light enough to drop onto the iron with a spoon. You may have a little bit of flour left over.
Drop spoonfuls onto the center of a hot pizzelle iron. Use a knife to push the dough off of the spoon.
Cook until golden, following to the manufacturer's directions.

*Use ground anise seeds, anise extract, or anise oil if desired.

Note: This may be totally inauthentic, but our favorite way to flavor these is to add a near-excessive amount of cinnamon.

I'm impressed that Ebay sold me another pizzelle iron. After all, I already have one. Furthermore, I hate when clutter piles up around me. On top of that, I don't give Ebay a whole lot of shopping history to work with. About two-thirds of my purchases are out of necessity (such as tracking down replacement interior bits as my car ages). About half of the remaining purchases are not for myself, but for various friends and relations who ask me "Could you go online and find me a _____?" This leaves a tiny amount of recreational splurges for Ebay's computer to work with. Nevertheless, they sold me this thing.


Before we get to the recipe, I wanted to get to know this iron in the most low-stakes way possible. And so, rather than making anything from scratch, I reconstituted some instant waffle mix. I don't particularly like instant waffles, but they do make it easy to mix a small serving without measuring impossibly tiny amounts of baking powder. Heck, if you want a single pancake the size of a coaster, you can easily pour out a tiny allotment of powder and then stir in a half-splash of water.

Because I'm not an idiot, I gave our iron a good spritz of cooking spray. After putting the batter on it, I closed the lid and held it tightly shut as we have done for our previous pizzelles. I opened the pizzelle iron and immediately knew that I had failed. 

After giving it some thought, I remembered that you're supposed to put little cooking oil in waffle batter instead of just adding water. (Well, the directions on the back of the box call for melted butter. But we're economizing until we are competent.) And so, we reconstituted another single waffle's worth of batter (this time with cooking oil in it), put it on the iron, and.... 


Although the waffle didn't stick, it was too thin to lift intact. It easily let go of the iron with some gentle prodding, but the end results looked like this:

The first one is always for the fairies anyway.


At least we were improving. The first waffle had to be gouged off of the iron with a toothpick, this one flaked off without any cursing whatsoever. 

Anyway, this failure was very informative. It told me that with this particular iron, one must be very careful how thinly one presses the waffles within. With our first pizzelle iron (shown below), the actual waffle part is a little bit recessed inside a raised rim. And so, if you hold it tightly closed, your pizzelle will come out perfect. Or at least, it won't be squished to death.


However, the iron we're using today has no raised rim. So apparently, you want to press it sort-of closed so that your pizzelles are thin and crisp-- but you don't want to hold the handles too tight lest you squeeze your pizzelles out of existence.

I also gave this some thought and realized that I wasn't making pizzelles. I was making instant waffles. You're not supposed to squeeze those flat, but let the batter push up the lid as much as it wants. And while we might cook waffle batter on a pizzelle iron, it will never turn into a pizzelle. We needed to let the batter be its fluffy self instead of trying to make it act like Italian cookies. And so, for our third attempt, we put the batter onto the iron and then let go of the handles. 

Because I'm daft but not an idiot, I also drenched the iron with cooking spray. As the batter lifted up the iron, you could see the heavy coating of oil bubbling and sizzling within.


Upon opening the iron, we found a lovely-looking, totally-not-stuck waffle! However, I had no idea how to get it out. It's not like you can just slide a spatula under this thing. But after carefully pushing a wooden skewer under each ridge one at a time, we achieved liftoff!


At this point, I was getting tired of barely managing to get waffles off of this iron. Clearly there was a technique I was missing. I decided to reach out for help again. 

You may recall that when I first tried to cook pizzelles on the stove, I called Fante's Kitchen Shop in Philadelphia to ask how hot the burner should be under the pizzelle iron. Well, I poked around their website until I found an email address. I then sent an email with photos of the iron, more or less begging for help. The owner herself answered, advising that I grease it generously. I told her that I'd used plenty of cooking spray, and she replied that spray "is not always the best choice for these irons." She recommended brushing it with melted shortening.

She also asked "Is your iron is hot enough?" As far as how to pry them off the iron since a spatula was useless, she wrote "Pizzelle should slide right off."

Well I had no idea if my iron was hot enough. I had been getting it about as hot as I do a frying pan when I'm about to put dinner in it. Then I considered that I had been advised that one should be able to say one Hail Mary for each side of the pizzelles. But I couldn't say the Hail Mary slowly enough for how long mine needed to cook. 

I asked myself "What's the worst that can happen if I overheat the iron?" A burnt waffle would be disappointing but insignificant. A stuck-on waffle would be irksome, but I'd already scraped stuck-on batter out of this iron and we had only been together for one afternoon. We were in no danger of blackened cinders welding themselves to the metal because I was not going to put the iron onto the stove and then wander off to let it burn unattended. (And if things got really bad, I could cadge some of the more hazardous solvents from my friends who like working on cars.) 

With that in mind, I got the iron searing-hot. When I flicked some water-drops off my fingers, they didn't land with a sizzle. They vaporized with a harsh-sounding SPAT! 

During the surprisingly long wait for the iron to heat up, I melted shortening in the microwave and got out the marinade brush that gets used a lot in grilling. Usually, greasing the pan is one of the most forgettable parts of cooking. I was not mentally prepared for where today's pizzelles were taking me. Despite using a stovetop waffle iron, I wasn't ready to get so old-fashioned as to forsake the cooking spray. It felt like crossing a bridge over which I could never return.

Of course, greasing waffle irons with shortening is a very old technique. In the days before you could quickly melt it in the microwave (or set the shortening over the stove's pilot light), Miss Leslie directed cooks to rub their hot waffle irons with a small cloth bag of lard. 

I was telling a friend who is a chemist that I had forsaken my beloved cooking spray and gotten more archaic than I planned. He noted that shortening "has some uncanny nonstick properties more comparable to Teflon than a natural oil."

I should also note that a while ago, I asked an environmental scientist friend of mine whether shortening biodegrades or not. I said "I know that's not your area of study, but I figure you must be up the hallway from someone with an answer." A day later, he responded "She said 'under the right circumstances.'"

When the iron was finally hot enough and also hand-brushed with melted fat, I placed another dab of reconstituted waffle mix onto it. Our waffle required a lot longer than a single Hail Mary per side, but I figured that it was fluffy instead of thin and crisp. Therefore, the heat had a lot batter more to penetrate.

After the iron started to emit a toasty smell, I raised up the lid to see what we had inside. To my astonishment and delight, our waffle flapped around a bit as I lifted the top of the iron. In other words, the waffle let go of the iron of its own accord. I then held the pizzelle iron over a plate and flipped it upside down. The waffle fell right out, and landed on the plate in golden perfection. I didn't even use the spatula I had gotten out. In happy surprise, I returned it to the drawer instead of dropping it into the sink with the other dirty dishes. The waffle itself was fluffy in the middle, and crispier on the outside than any waffle I've ever made. Or maybe it was the same as the many other waffles I've made, and the secret ingredient was the sweet feeling of success. But whatever the reason, this was the best instant waffle I've ever had. It didn't even need syrup.


This brings us to today's recipe. Since the people at Fante's had been so helpful in my journey towards pizzelle competence, why not use the pizzelle recipe from their website? The note they typed above it was a decisive sales pitch: "This recipe has been around since the beginning of the century, and has been enjoyed by the thousands upon thousands of our customers who have, over the years, purchased pizzelle irons from us."

Established 1906
Telephone WA 2-5557
Fante's
Furniture • Home Furnishings • Importers
1004-06-08 South 9th Street 
Philadelphia 47, Pennsylvania.
______________________________
FANTE'S SPECIAL PIZZELLE RECIPE
6 eggs
¾ lb. of sugar (1½ cups)
10 oz. of melted shortening (1¼ cups)
1 tablespoon of Anise Seeds
1 tablespoon of Vanilla
½ orange or lemon
1 lb. 6 oz. of flour (4 cups)
Beat eggs and sugar until light and foamy. Add melted shortening a little at at a time, then add anise seeds, vanilla, grated rind and juice of either orange or lemon. Gradually add flour to make a very light dough, light enough to drop on the Fante's pizzelle maker with a spoon.
(Use a knife to push off dough from spoon.)
If more information is desired please call Mrs. Fante, WA 2-1066.
Source: Fante's Kitchen


I love that the original handout recommends calling Mrs. Fante herself "if more information is desired." 

As I got ready to make today's recipe, I decided to ask an Italian friend what to flavor them with. (One of the beautiful things about the modern age is that you can talk to people across the world much faster than the speed of pen pals.) I'm not obsessed with "authenticity," but I thought it might be a neat cultural insight. And I certainly got one when he answered "Do you know I have never heard of it?"

He went on to state "Being from northern Italy, it's not our tradition to make them." But he did a bit of internet searching for me, and came back with the most surprising (to me) part of the entire conversation: there are two kinds of pizzelles. Furthermore, the lacy-looking, waffle-iron cookies that appear in every Italian-American home I've ever been to are the "less known" (his words) kind in Italy. Apparently the word "pizzelle" more often refers to miniature pizzas stacked on top of deep-fried crusts. 

So pizzelles are more Italian than garlic bread, but they're not ubiquitous throughout Italy. I wasn't prepared for that answer, but I should have been. In America, it's easy to forget that Italy has multiple regions with different types of food. What we tend to think of as "Italian food" is (mostly) from southern Italy, because that's where most Italian immigrants came from. My friend, however, lives in the northern part of the country. To put this into American terms, it's like asking someone from New England how to make Southwestern food. They may not even recognize the names.

Because I sometimes have the foresight to plan ahead, I measured out the ingredients while supper was simmering on the stove. I only say this because our tiny mint cake looked very cute next to them.

(I made the mint cake just to find out what it tastes like to put mint extract into an otherwise unassuming cake. Turns out mint and butter go together unexpectedly well.)


The recipe directs us to beat the eggs until foamy (well really, the single egg because we're not cranking out 6 dozen pizzelles). I turned on the mixer and let it run while I finished tidying up the counterspace. By the time we had everything ready, our egg was so well-beaten that even Miss Leslie would have approved.

The bowl contains one egg and nothing else.

Unlike our previous pizzelle recipe, this one uses no baking powder at all. The only leavening is what you beat into it. With that in mind, I sifted the flour to break up any lumps before stirring it in. That way, we could do minimal stirring and thus deflate the batter as little as possible.

As a final recipe note, even though I was about to put copious amounts of shortening on the iron, I had reservations about putting it into the pizzelles themselves. And so, we dug into the freezer and pulled out the beef fat. You couldn't taste any meaty difference. It's like we're using lard, only we rendered it at home instead of buying an unnervingly heavy can of it. Also, I've been saving beef fat ever since the price of hamburger shot past the moon. It's been sitting in the freezer for ages. I had no idea what to do with it, but felt guilty about throwing it out.

And so, sooner than I expected, we were ready to try and cook these on the new zigzag pizzelle iron! This is our first real recipe on it, and I had high hopes. 

Well, we brushed on the melted shortening(!) and dropped on a tiny spoonful of pizzelle batter (better to go too small than too big when your excess batter burns when it oozes out). I then cooked it for a little over a minute per side, and then opened the iron to find that its first "real" pizzelle was stuck. No amount of striking the iron from the back with a wooden spoon would free the cookie. I think that after carefully and excessively dousing every notch and groove on the iron, I forgot to brush anything onto the flat circle in the center.


I barely (but successfully) managed to pry the pizzelle off in one piece. For our next one, I made sure to brush the entire iron, including that flat spot in the middle of it. After our next pizzelle had cooked, we raised the lid and hopefully wondered: "Does it look a little looser?" Well, we held the loaded iron over the cooling rack, turned it upside-down, and the pizzelle fluttered downward like a beautiful snowflake.


I started gradually increasing the pizzelle size, hoping to find that perfect amount of batter that fills the iron without dripping out of it. Our results were erratic. I frequently had to use the spatula to scrape off any oozing excess from the sides. 

Also, our first successful pizzelles looked like a pair of owl eyes on the cooling rack.


In full disclosure, a lot of our pizzelles had singed edges. I tried to convince myself that they were "rustic," but my powers of self-delusion can only go so far.


My friend's comments about the "uncanny nonstick properties" of shortening proved correct. If we hold one of these up to the nearest light, check out how wispy it is between the ridges. I can't believe it fell off the iron intact.


I thought that brushing on melted shortening would be a miserably messy ordeal. But while it is a very drippy process, it doesn't have the same blast radius as a can of cooking spray. All of our dripping fat was confined to one small zone instead of sprayed onto everything on the countertop. There were some stray shortening drops that get flicked off the brush, but the cleanup was a lot less greasy. Also, it's about as quick as cooking spray. You just flick the brush across the iron for a second or two. 

After the last of the pizzelles had been cooked, I had to stop and just stare at what we had done. I don't know if I've ever done cookies that looked this good before.


These tasted so good. I may end up adopting this pizzelle recipe instead of the one from my ex's grandmother's basement. In terms of flavor and texture, our my ex's grandmother's tasted professional, but these tasted homemade. If you want to try making your own pizzelles, I definitely recommend this recipe. Also, nutmeg is a surprisingly good spice for these. It goes really well with the toasty flavor that comes from cooking these to that rich golden brown. It's not authentic, it's not traditional, but it's delicious anyway.

And with this purchase, I am officially immune to any algorithmic attempts to sell me another waffle iron. In the unlikely event that the price doesn't ward me off, I only need to remember how crowded it's getting on top of the fridge.


I really hoped to end this with a short, jaunty paragraph demystifying stovetop pizzelle irons, or maybe a handy numbered list of tips for anyone who wants to try using one for themselves. But I'm still getting the hang of cooking on these myself! 

The only useful advice I can suggest is to put a paper mat down on which to grease the iron and apply the batter. In an earlier time, I would have suggested using old newspapers. These days, I've been saving the brown paper that pads a lot of mail-order boxes. 

Maybe someone out there can grease a waffle iron without any mess at all, but I am not that good. 

Anyway, if one of these stovetop irons seems daunting, you can always get an electric pizzelle iron. You just put your batter in there, shut it, and wait for the ready-light. A lot of them even have little dials that let you set how brown you want your pizzelles to be. And of course, they all come with instructions.

But regardless of whether one uses a stovetop pizzelle iron or an electric one, this is a really good recipe to put on it.

Monday, January 8, 2024

Ham Loaf: or, The recipe was fine except for the directions

I'm kind of impressed that today's recipe came so close to success and failed so hard.

Ham Loaf
3 cups chopped ham
1 cup breadcrumbs
2 eggs
3 tbsp chopped celery
2 tbsp chopped onions
½ tsp salt
½ tsp poultry seasoning*
½ tsp paprika
⅓ cup milk

Heat oven to 350°. Grease a square pan.
Mix everything together. Place into pan and form into a loaf. Add half an inch of water.
Cover the pan with foil if it doesn't have a lid. Bake one hour. Baste while baking.†
Allow to rest 10 minutes before uncovering and serving.

*Didn't have that, so I used sage instead.
†I absolutely did not baste this.

Source: "Helping the Homemaker," Fort Worth (Texas) Star-Telegram page 6, January 6 1934

"Helping the Homemaker," Fort Worth Star-Telegram page 6, January 6 1934,

You may think I'm about to write that we still had leftover ham from the holidays, but in reality we bought a ham on clearance... twelve months ago. My objections of "We'll never eat this thing!" got drowned out by "But it's 45¢ a pound!" The ham has reposed in the chest freezer ever since. But apparently, this is the season for leftover ham. "Helping the Homemaker" published this recipe only a few days before we made it. 

The freshly-defrosted ham was peculiarly mushy after a year in the bottom of the freezer, but the main problem was the unrelenting brine. I say this as someone who likes salt far too much that I cook spaghetti in literal seawater when I get the chance. One can blame the prolonged freezing for the less-than-optimal texture, but I know of no chemical process by which salt spontaneously forms in frozen meat. I would have been irked because this ham was supposed to be one of the "good" brands, but it was 80% off when we bought it. Perhaps no one else at the store wanted to buy a 20 pound hunk of bone-in salt pork.


At any rate, this seemed like a perfect chance to shove the ham into a meat grinder and try one of these "ham loaves." You see them a lot in old cookbooks, but people seem to have stopped making them a few decades ago. I guess we all stopped having a serving hams throughout the year. If you think about it, most of us only bring out a ham for Thanksgiving, Christmas, and maybe Easter. But a short glance through old recipes and refrigerator ads suggests that leftover ham was a more frequent option back in the day.

Anyway, since no one wanted to brine themselves from the inside out by eating this ham, no objections were raised to pulverizing a sizable hunk of it. The ham loaf in progress generated a moderate amount of interest. When I handed over the recipe to curious inquirers to read while I shoved ham into the meat grinder, one person said "So you're basically making homemade Spam?"

Our ham loaf immediately lost a lot of its appeal.


The recipe calls for bread crumbs and milk. We had neither stale bread nor a canister of crumbs, so I decided to use the milk from the ingredients list to soak the heels of our sandwich bread. I always economize by making sure to eat rather than discard the bread heels, but it was nice to forestall at least one future heel sandwich. This would be the only time today's edition of "Helping the Homemaker" lived up to its title.


After our ham was pulverized and the rest of our ingredients were chopped, this recipe went the same as any other meatloaf. You put everything into a bowl, get your hands in there, and act like Fanny Cradock making a fruitcake.


I had reservations about this recipe after it was ready to bake. First, our loaf really wanted to fall apart. I doubted that the single alotted egg (we're halving the recipe) would miraculously bind it in the oven. Also, for reasons I do not pretend to understand, we are directed to flood the pan with a half-inch of water. While this step mystified me, I decided that the people behind "Helping the Homemaker" added it for a reason and I wasn't going to dispute their directions.


Since our unbaked loaf contained no raw meat, I saw no harm in tasting a small sample. Despite "Helping the Homemaker's" best attempts at seasonings, you couldn't tell that I had gotten out a single spice shaker. I thought that perhaps the spices would get drawn out as this baked for a whole hour.

"Helping the Homemaker" directs us to cover the pan and also to baste it. I made the executive decision that I'm not the sort of person who bastes a log of leftover ham. I figured that the steam dripping from the foil would automatically baste the loaf for me. After the loaf's hour was elapsed (plus additional resting time), we peeled back the foil to reveal... this.


After recovering from the initial disgust, I took the time to truly behold my creation. I was surprised at how much fat rendered off as the loaf baked. I thought I had gotten all of the fat off the ham before putting it into the grinder. Perhaps all the water was there to render out the fat. (After all, who wants a greasy ham loaf?)

To my complete lack of surprise, this log of compressed meat fell apart as soon as I tried to lift it out.


The people behind "Helping the Homemaker" got all the right ingredients together, but didn't know what to do with them.The ham loaf tasted better than it looked. All of the ingredients go well together. If this didn't look so terrible, I would have said this was a perfectly nice, reasonably economical supper recipe to serve in 1934. However, loafing our leftover ham was pointless. I would have dumped the entire mixture into a frying pan and cooked until hot. 

I can only speculate that in 1934, hot hash was old-fashioned and "messy." The 1930s were the early days of entrapping one's hitherto untidy salads into geometrically perfect gelatin molds. Perhaps loafing everything was the most modern, aesthetically-pleasing way to force your sloppy-looking ingredients into rectangle-shaped order.


Ugliness aside, I didn't throw the leftovers away. They seemed like they'd be really good served with eggs. And so, I microwaved a bit of our disintegrated ham loaf and then put it into an omelet (with cheese, of course). The remains of our featured recipe looked like they landed on the eggs by accident, though.


The ham got a lot less frightful after unloafing it, and it's hard to go wrong with ham eggs and cheese.

If you have leftover ham you want to unload, this isn't a bad way to repurpose it. Just ignore all the instructions that come after you've mixed everything together. Instead of baking a soggy loaf, put your pulverized ham into a frying pan instead.


I'm surprised that "Helping the Homemaker" had such a bad recipe. Everything else we've made from that column has been plain but good. Although our ham loaf tasted perfectly fine, I hate to imagine any woman in 1934 pulling this out of the oven and grimly realizing she has to convince her family that yes, this really is what's for dinner. 

So, while I don't recommend compressing your ham into a loaf, the ingredients are pretty decent if you put them in a hot frying pan instead- especially if you have them with scrambled eggs. If you insist on following the recipe directions instead of simply using the ingredient list, no amount of dim candlelight will make this ham loaf look pretty.

Tuesday, January 2, 2024

Ijzerkoekjes: or, Dutch cinnamon waffle cookies: or, Delicious adventures in recipes I can't read!

Sometimes, it's easier to do things the right way.

Ijzerkoejke (Waffle Iron Cookies)
81g white or brown sugar (about 5 tablespoons plus 2 teaspoons)
75g butter (a sliver more than 5 tablespoons)
Cinnamon to taste
⅛ tsp salt (if butter is unsalted)
115g flour (about 1 cup--- you probably won't use it all)

Cream the butter, sugar, cinnamon, and salt, beating until light. Add enough flour to make a dough that is firm but not dry. If you add too much flour, you can add water or milk (one spoonful at a time) to fix it.
Cover the dough and let it sit in the bowl for 30 or so minutes- it will be less crumbly and easier to work with.
Heat a heavy-bottomed griddle or frying pan over low heat (or very slightly above low).* Roll the dough out a little thicker than a quarter inch (for those who prefer metric, roll it to about about 7 or 8 millimeters). Cut with a round cookie cutter.†
Lightly grease the pan. Place the cookies on it cook each side until golden, about 3-5 minutes per side.

*If you want to be totally authentic, these are cooked on a stovetop waffle iron that has shallow ridges (like the ones on ice cream cones). If you have a wafer iron with shallow-cut designs, it will work also. But if you have neither and do not fear the authenticity police, a good heavy frying pan will be just fine.
†Apparently these are traditionally cut with a cookie cutter shaped like a circle that was cut in half and spread apart. However, they will taste the same if you use a round cutter (or if you repurpose the small circular object of your choice). You can also use use a knife to cut the dough into brownie-sized squares or rectangles.
Maladapted from Wikipedia

When last we saw the ijzerkoekjes, I was making them in a wafer iron the way anyone does: insert dough, shut lid, wait until baked. We previously noted that they seemed very European if you're someone who has never been to Europe. As someone who has never been to Europe, I suspected that I was making them wrong. And I was correct.

Purely for the heck of it, I searched YouTube for "ijzerkoekje." I couldn't pronounce it, I couldn't spell it, but I successfully copied and pasted the word. ("Ijzerkoekje" translates, more or less, to "waffle iron cookie.") While I found a fair number of videos, none of them are in English. (This may mean that I am introducing ijzerkoekjes to the English-speaking world, an honor I am surely not up to.) 

I watched a charming video of a grandfather and granddaughter making them together. Because they were so good at showing all the steps with a well-aimed camera, I didn't need to understand a word they said to follow what they were doing. It turns out that I had the method right except when it came to baking our dough.

Unlike every other waffle recipe I've seen, you don't press these cookies in a waffle iron that has a lid. You cook them on a stovetop. Rather than the waffle irons we're all used to, imagine if you had a griddle with a shallow waffle grid cut into it. After using a rolling pin and a cookie cutter on your dough, you put it onto this lidless stovetop waffle iron and cook it one side at a time like you're making pancakes.

I don't know how many times I rewatched that video. Purely for the heck of it, I turned on the captions and let YouTube do its best to translate the video into English. As I expected, I only got sentence fragments. (But it's nonetheless impressive that I got even two words of English captions. The pace of technology can be frightening, but sometimes it's wonderful instead.) As the two people onscreen were pouring ingredients into the bowl, the grandfather was saying something about how everything in the Netherlands was spiced in the old days because the country basically controlled the world's spice trade.

While they briefly showed a copy of the recipe in the grandfather's handwritten notebook, they didn't show an ingredient list. Instead, they had a link in the description to a recipe page. This page had no directions, but it had a list of ingredients that I could copy and paste into Google Translate. This may not be the best way to learn recipes from other countries, but sometimes the adventure lies in bumbling for yourself.

Their recipe is nearly identical to the Wikipedia one, except they add half an egg. "Ah," I thought, "They are people after my own heart!" When you want to cut a recipe in half (or a third, or even less), there's no need to let little problems like "that means I need two fifths of an egg" get in the way. I've gotten so used to subdividing recipes that splitting an egg in half is almost as easy as cracking one open. 

For today's recipe, they halved the egg and still made a lot of cookie dough. This meant that we were going to take the unprecedented step of splitting an egg into fourths. Ever seen a quartered egg?


I really should start buying the eggs that you pour out of a carton instead of getting them in the shell. Then I could easily get out a tiny measuring spoon and dispense precisely two sevenths of an egg if I wanted.

The recipe went along just fine until the time came to add the flour. I watched and re-watched that part multiple times just to confirm, and they just dumped the flour in all at once. A bit of onscreen mixing yielded something like brown Play-Doh. And so, armed with the confidence that I was following along exactly with the video, I tipped the entire bowl of (pre-measured) flour right into the mixer. Our dough turned to sand.


I should have waited a little bit longer to make these. When we got the same cookie-sand on our previous ijzerkoekje attempt, Lace Maker commented that "Thanks to a little googling I found that European flour is made from soft wheat which has a lower gluten content. Lower gluten flour absorbs less water...."

In other words, the recipe was correct. My measurements were correct. But the American flour dried up our cookie dough a lot more than a European flour would have. The recipe I grabbed from Wikipedia calls for "if possible the Zeeland type of flour, i.e. flour from wheat grown in an oceanic climate zone." I had dismissed that note as unnecessary ingredient snobbery, and apparently I was wrong to do so. 

Unfortunately, Lace Maker's comment arrived after I had already made these again. So instead of making this recipe forearmed with the knowledge of regional differences in ingredients, I had to add little spoonfuls of milk until the dough looked like what they had in the video. All was well in the end, but it took a while to get there.


At this point, we get to the part of the recipe that this semi-ignorant American really got wrong: cooking these. You don't just put them into a waffle iron and shut the lid. You do them on a stovetop (or a griddle). Imagine a waffle iron, but one that only has shallow lines cut into it (like the ones on ice cream cones). Now remove the top half of it, leaving you with a griddle that has a grid etched in it. 

Since I have no such thing, I decided to put these onto the Norwegian iron. While our cookware is from the wrong country, it's always nice to use what's already at hand. And so, I put the iron onto the stove with the lid open, treating it like a frying pan that is in constant danger of tipping backwards.

We then put our first cookie on, and after a few minutes flipped it and saw that it would soon hit the trash.


When I cracked it open, it was still raw and melted in the middle.

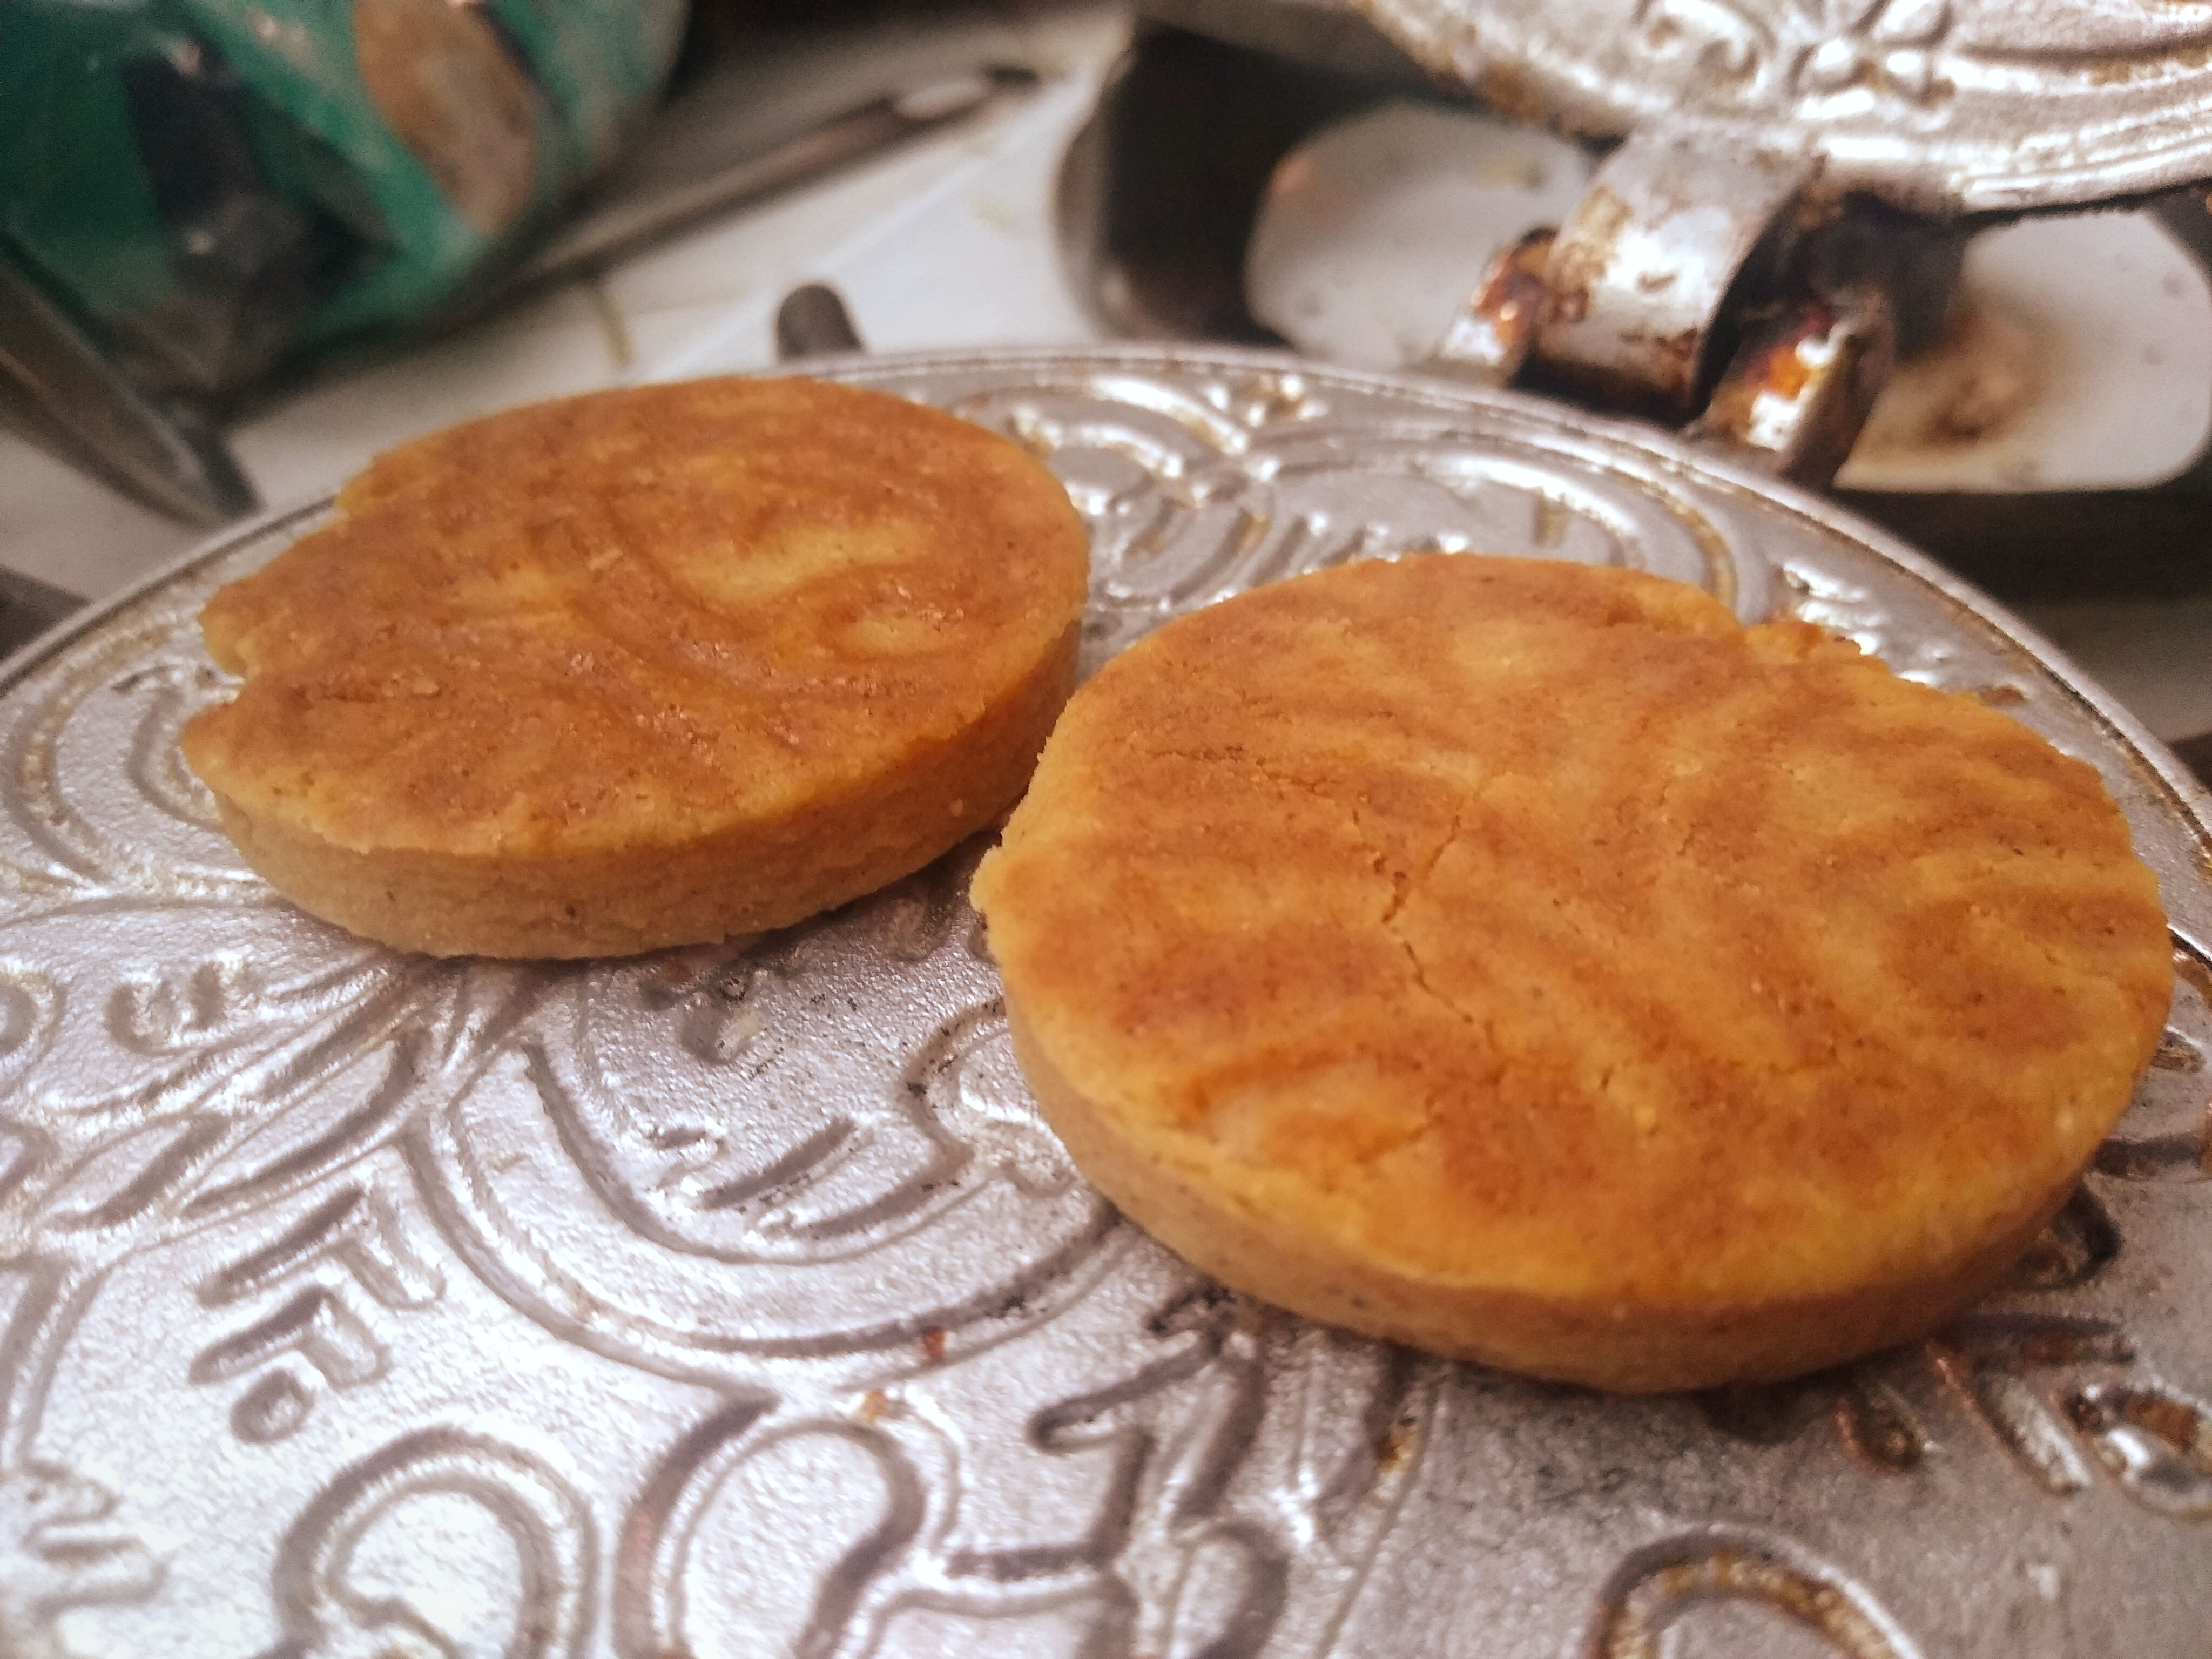
We tried a few more cookies "the authentic way," but they were no better than the first. Eventually I decided that I would not waste all of this dough trying not to burn it. Instead, I put the rest of it on the wafer iron and closed it like I had been doing all along. I also put some on the pizzelle iron. I love how sparkly they looked. We may be making these cookies wrong, but rarely has wrong worked so well.


But I couldn't stop thinking about our failure to get these cookies right. And so, I rewatched that charming video again. I had previously skipped over the parts where they were chatting without doing anything. What's the point of watching people talk when you don't understand a word? But I figured that I might be able to get a small bit of advice out of their conversation as delivered by voice-recognition and auto-translation. Among the half-finished phrases, the captions managed to find several repeated mentions of "patience" and also "or else they will be black."

I also did a little bit of poking around on the internet. Of course, every page I found about ijzerkoekjes (except for the Wikipedia article) was in Dutch. But, after carefully keeping in mind that automatic translation is a technological miracle but also fallible, we managed to figure out that you're not actually supposed to cook these all the way through. Instead, they should be golden on the outside but doughy in the middle. (This is the perfect place to note that I like cookie dough more than cookies.)

We also found out that these come with a traditionally-shaped cookie cutter that I don't have. But I also don't have the correct kind of stovetop iron. We decided to make ijzerkoekjes again anyway.

When those nice-looking people in that video talked about having patience, they meant it. If you turn the stove up hotter than a simmer, the cookies will become charcoal-encrusted dough. And so, I turned the burner as low as it got. I didn't know if I was cooking these or merely warming them up.

Given the long, slow cooking time, I have to speculate that these made more sense before we had modern gas and electric stoves. Putting these over a low burner for so long seems very odd. But I can easily imagine setting a waffle iron on one of the colder parts of a cast-iron stovetop while cooking everything else. Or, in the pre-stove days, people may have put a cookie-loaded waffle iron in the corner of the kitchen fireplace while the rest of the food was in progress.


After carefully lifting up one of the cookies, we found it had indeed turned a lovely color underneath. 


Things were looking promising enough to flip them over and cook the other side instead of throwing them out with the other failures. (By this point, the trash can contained a lot of burnt cookie dough.) I can't guarantee that these cookies came out the way they do in the Netherlands, but they certainly looked successful.


With that said, I hate to give a recipe that demands special-order kitchen supplies. And so, I got out a griddle and put a few cookies on it. I saw no reason this wouldn't work, but wanted to make very sure before telling other people to try it for themselves. 


Since the cookies didn't have any waffle-ridges, they didn't have as much of a crispy outer surface area. But that is a tiny nitpick that is not worth bothering with. Obviously, ijzerkoekjes cooked on a frying pan aren't "authentic," but anyone who complains has already made up their snobby mind.


But having made the cookies (somewhat) like they do in their home country, how do they taste?

They are cinnamon-y, buttery bliss. I was furious at how many times I have scraped half-burnt cookie dough off the wafer iron when the easy (and correct) way was so much better. I would have never thought of making stovetop cookies, but these are fantastic. As they cool off, the carryover heat gets to the center and firms them up just a little bit. They turn into something halfway between cookie dough and brownies.


I almost want to say these are ideal for summer when you don't want to fire up the oven. But they're so deliriously rich that I think they're better when it's cold out. And if you have the patience to wait for them to cook over almost maddeningly low heat (or if you just let them sit in the background while you do other things), they are well worth the wait. And if you have the dough already rolled and cut out, it'd be relatively easy to put these on the back burner and let them cook in the background while you make other things.

I will leave off with a quick aid for anyone who wants to make these and tell people what they're called. For those who, like me, don't speak a word of Dutch, here is Google Translate showing us how to pronounce the name of today's recipe.