Saturday, August 13, 2022

Belgian Onion Pie: or, I've wanted this for far too long

It has been far too long.

 
Belgian Onion Pie (Tarte à l'Oignon)
1 8" baked pie shell
4 tbsp butter
3; large yellow onions
3 tbsp flour
(up to) 1 cup half-and-half*
Pinch of nutmeg
2 eggs, well-beaten
Salt and Tabasco sauce to taste
4 tbsp Parmesan or Romano (or a mix of both)
Green onions if desired, finely cut

Heat oven to 375°.
If making your own pie crust, add the same spices as the filling and a spoonful of onion powder to the dough. Or add part of a packet of onion soup mix- but only a quarter or half of it because it's very salty. If you put the pie crust in the oven right as you start making the filling, it will probably be baked and ready at about the same time the filling is ready to go in it.
Cut the onions lengthwise into quarters. Then slice thinly.
In a frying pan that comes with a lid, melt the butter until it foams. Cook the onions until translucent. Cover, reduce heat, and cook until slightly colored. Stir them occasionally.
When the onions are ready, sprinkle the flour over them through a sifter, stirring constantly to prevent lumps. Gradually add the half-and-half, stirring constantly to make a smooth paste. Add only enough to make everything the consistency of mashed potatoes. Remove from heat.
Add the eggs, seasonings, and cheese. Mix well. Taste and correct seasonings as desired.
Put into the pie shell. If desired, sprinkle with finely-cut green onions.
Bake 20 minutes, or until set in the middle.
You can make this pie ahead, but wait until baking time to put the filling into the crust.

*The original recipe used equal amounts of milk and cream, so you may as well just get a single carton that already has both.

Source: The Cotton Country Collection, Junior League of Monroe, Louisiana, 1972; as adapted by Retro Food for Modern Times

There are some things you miss more than you ever thought. You see, others in the house just do not like onions at all. Only the most discreet eighth of a teaspoon of onion powder is permitted before discouraging words are far more than seldom heard. And fresh onions? That's fresh onions plural? Absolutely not. 

The deprivation drives me to madness. I miss the tear-jerking pungency of raw onions. The mellow sweetness of gently-sauteed onions. The almost-acrid kick of onions so browned they're nearly black. Eventually, one snaps and makes an entire pie full of onions. This brings us to Belgian onion pie.

Unlike nearly everything else in The Cotton Country Collection, the Belgian onion pie has no Mrs. Her-Husband's-Name under it. Whoever wrote it down used rhapsodic language. Clearly, someone delighted in taking the time to gently warm the milk and cream- and all the other many fussy steps in the recipe. Half-moon onions? A pie the color of delicate straw? I also love the "real, please" that goes with the butter on the ingredients list. It's at that perfect intersection of polite and yet witheringly nagging.

I used the same spices in the pie crust as the pie itself, plus thyme and a generous shake of onion powder. The dough was so good that I wanted to make crackers out of the extra dough I cut off the sides. But no one came here for pie crust. We're all here for the pungent things in life. Does this look like a half-moon onion to anyone?


The onions barely fit in the pan I first tried to cook them in. Was I going to regret my choice of pie pan? I couldn't go back and put the crust into a bigger one; I had already started baking it.

After a bit of time pushing the onions around with a wooden spoon, we covered the skillet to let them cook "until slightly colored." Since I couldn't see through my lid (which was actually just foil), the onions cooked well beyond "slightly colored" and ended up firmly in "taco platter" territory. I had to pluck out the ones that threatened to go from caramelized to burnt. Apparently onions cook a lot faster than I thought.


I should here note that I am not making this recipe with nothing but the book to guide me. Taryn from Retro Food for Modern Times made this for the Pieathlon (I'm the one who sent it). She noted that this recipe uses, and I quote, an "Everest of butter." She went on to note that she cut back on the butter before she started cooking, and that she still had to drain off a lot of surplus grease. So, following in her footsteps and experience, we used only one-fourth of the butter the recipe demands- though it is "real, please." You will notice that the severe butter reduction has not injured the onions.

You may think that I cut the onions into appallingly unrefined chunks. But I didn't want delicately minced onions in this pie. Also, I didn't want to spend a long time working over a cutting board.


For the longest time, I thought this recipe looks too daunting to attempt. I'd read and reread the instructions when flipping through the book, wondering if I would ever be good enough to make a Belgian onion pie. In reality, once you look past the gushing-yet-persnickety tone of the instructions, you're just making white gravy with onions in it, adding an egg so it sets in the oven, and then baking it. 

I thought sifting the flour over the onions seemed a bit unnecessary, but it really did forestall a lot of hard-to-get-rid-of flour lumps. So I'm glad I got out the tea strainer for this step. For that matter, I'm glad a tea strainer is at hand. As I told myself as I got it out of the drawer: when you do all the extra little steps that seem pointless, you can blame someone else if the recipe goes wrong.

Yes, I went out of my way to find where the tiny strainer was hiding.


At this point, I started to wonder just how much they tested this recipe before committing to the ever-so-lyrical instructions. First, we didn't just halve the butter, we quartered it. Then, we had to double the milk and cream before the onions turned into the "smooth paste" the recipe claimed we should have. Granted, I was too lazy to warm the milk and cream before adding them, but I figured they would get heated up near-instantly in the pan anyway. 

The point is, we drastically changed the amount of every ingredient except the onions and eggs. Did someone send the recipe in, hoping the cookbook Committee (always capitalized) would print it in the book and thus do a slow-burning act of kitchen sabotage on anyone who made it?

After the stovetop excitement subsided, we only had to stir in the egg and seasonings, at which point I managed one of the best feats of domesticity I've pulled off in a long time. I'd placed the crust in the oven right before I started this whole butter-and-onion business, and the crust was perfectly baked as I removed the frying pan from the burner. I only had to remove the pie shell from the oven, dump the pie filling in, sprinkle some uncalled-for green onions on top, and return the now-filled pie to the oven before the pan had a chance to get cold.


The recipe's direction to bake until the pie is "a delicate straw color" was useless since we had already browned the onions to the color of rude hay. Instead, I baked the pie until I could shake it without anything moving. I also put the crust scraps on a pan next to it in the oven. If you're going to do this with the extra crust (since it's already seasoned and everything), don't forget to shake some salt on top of them before baking. If I had remembered, they would have been so good I would have made them on purpose without bothering with the rest of the pie. But since I forgot to salt the aspiring crackers, they were unfortunately bland.

A salt shaker away from perfection...

Meanwhile, the pie itself had puffed up a lot in the oven. To my surprise, it stayed puffed after it cooled. It also cut a lot more neatly than the onion-paste had suggested it would before baking.


If you like onion soup, this pie is absolutely made for you. Imagine a sliceable onion soup encased in seasoned crackers. Between to stovetop cooking and the long baking, the pungency bakes out of the onions, leaving a mellow, sweet flavor. 

However, this pie is very rich. When Taryn made the recipe, she made little cupcake-pan pielets instead of one pie, and that honestly is what I would suggest. This is too rich to serve up in pie slices unless you cut very narrow triangles. But if all of your friends have gotten the vaccine and you're all getting together, little baby onion pies would make for some very nice cutlery-free food. Most people would be sated after just a little bit anyway. 


I was told that I should not rush to make this pie again, but nevertheless we might want to keep the recipe on file. It's kind of how like how even if one likes cheesecake, one probably wouldn't want a big piece of it every day. 

With that said, the real credit here goes to Taryn of Retro Food For Modern Times who realized that this recipe was grossly overbuttered. I would have just made the recipe as written, pressing on in the face of surplus grease, and thinking it would be all right in the end. I would have then blamed myself when the finished pie turned out to be nothing more than a mess of onions and drippy melted butter. But forearmed with the knowledge that most of the butter should just not go in this recipe at all, we actually got a really good pie out of this recipe.

I will close by noting how everyone else was confounded by the notion of an onion pie--- not because it seemed like an overwhelming amount of onions, but because the idea of a non-dessert pie was utterly foreign to them. Based on their responses when I proposed it, you would have thought I had asked if anyone else would like me to stir chopped onions into a vanilla cream pie. When I served it, everyone who tried it (and nowhere near everyone was interested in a pie full of onions) ate the first bite with trepidation. This was quickly followed by relief. "Oh, so it's not a dessert!" 

Wednesday, August 10, 2022

Carrot and Peanut Butter Sandwiches: or, Well-mannered blandness cut into triangles

This may be why no one asks me to do a sandwich tray.

Source: Mid-Century Menu

Carrot/Peanut Butter Sandwiches
1 c grated raw carrots
1/4 c finely chopped salted peanuts
2 tbsp mayonnaise
Lettuce
8 slices whole-wheat bread

Mix carrots, peanuts, and mayonnaise. Spread on four bread slices. Put lettuce on each, and then put the other bread slices on top.

Source: Mid-Century Menu

An interest was expressed in getting the makings of sandwiches. And so, on the next grocery expedition, everyone else was excitedly selecting an extravagance of cold cuts and cheeses. Meanwhile, I was unjustifiably excited to put carrots into a cheese shredder.

Anyone looking at the recipe name may have frightening visions of stirring mayonnaise and carrots into a jar of Jif. However, this recipe has us using salted peanuts which we are meant to grind for ourselves. Therefore, there won't be any nauseating clash of mayonnaise and sweetened peanut butter. 

I thought to myself that there's nothing particularly offensive about uniting carrots and salted peanuts. Furthermore, while mayonnaise is deployed in these sandwiches, the recipe does not use a huge glob of the stuff. We're not about to create a suspension of carrot shreds in a gelatinous mayonnaise ooze. I was therefore cautiously optimistic about this recipe. 

Also, given that we're only using carrots, peanuts, and a small blob of mayo, this is extremely cheap.

This looks less like I should be assembling them into a sandwich and more like these should be rolled up into pinwheels and served on toothpicks. To the recipe's credit, you are allotted a generous amount of carrots per sandwich.

Flavor-wise, these were as polite as a ladies' luncheon. The carrot-mayo-peanut filling didn't really taste like anything. You know a sandwich is bland when the lettuce overpowers everything else. They're not bad, they're not good, they're merely inoffensive.

I tried to improve with a generous spoonful of radish relish, reasoning that the radish relish couldn't possibly clash with flavors that weren't even there.

The color-striping certainly adds visual interest, but the relish didn't save our carrots. The sandwich went from flavorless to merely bland. Though I have to admit, pulverized radishes are such a rare ingredient in sandwiches that at least a few people might at least be politely curious about what's in these.

Carrot-peanut butter sandwiches are a perfectly acceptable way to stave off hunger-induced crankiness during the reading of the club minutes, but I can't say these are particularly good. I'm actually disappointed. If these sandwiches were going to be underwhelming, they could at least have the decency to be amusingly revolting. 

We at a Book of Cookrye don't exactly dis-recommend these. But if you want to make vintage sandwiches for your next gathering, you'll get a lot more pizzazz out of a good old-fashioned peanut butter and pickle.

Friday, August 5, 2022

Cinnamon Buns: or, These are not what you probably think

Today on A Book of Cookrye, we are revisiting the ever-delightful "Efficient Housekeeping" by Laura Kirkman! I first saw this recipe and thought it "cinnamon buns" was a quaintly outdated name for the spiral cinnamon rolls we know and slather in cream cheese icing today. Had I read the recipe before deciding to make it, I would have known better.


"Efficient Housekeeping" By Laura A. Kirkman, Fort Worth (Texas) Star-Telegram morning edition p. 10, November 24 1921

Cinnamon Buns
1 c milk
½ scant tsp salt
1½ tsp sugar
1½ tsp lard (or shortening)
1½ tsp butter
1 egg, well beaten
¼ cake compressed yeast*
½ c tepid water
½ c raisins†
About 3¼ c flour, divided into 2½ c and ¾ c

       Topping (adjust amounts to taste):
2 tbsp melted butter
2 tsp ground cinnamon
2 tbsp white sugar
2 tsp milk (the recipe merely says to use "a little")
1 pinch salt (add this if the butter is unsalted)

Scald the milk, then stir in the salt, sugar, lard, and butter. When all is dissolved, set aside until lukewarm. Dissolve the yeast in the tepid water, then beat it in along with the egg. Add enough flour to form a stiff batter (about 2½ cups), stirring in the raisins (and currants if using). Add just enough flour to make a dough that is only just firm enough to knead.
Cover the top of the bowl with a wet cloth and let rise overnight, or until it is bubbly and has at least doubled in height.
In the morning, knead well, form into buns, and place the buns side by side in a well-greased square cake pan. The dough will be sticky.
This is the easiest way I found to shape the dough: lay it onto a well-floured surface, and sprinkle more flour on top so it can't stick to anything. Pat it out to somewhere between ½ and 1 inch thick (this dough is so soft that you really don't need a rolling pin). Then cut it into squares about 1½-2 inches on all sides- you don't need to be precise about this unless you want exactly uniform buns. Then roll each of these into a ball, pressing firmly with your hands as you roll them.
Let rise until doubled in size.
When ready to bake, heat oven to 350°. Mix the topping ingredients and brush over the buns. Bake for 35 minutes. The heat dissolves the sugar and gives a glaze to the tops of the buns.
If desired, pour cinnamon icing or white icing on top while still warm.
These go stale quickly, so wrap any extras tightly. Or, cut them into thinner slices, soak them overnight in a thin batter, and make them into French toast.

*or ¼ envelope dry yeast, or ½ tsp dry yeast.
†Use ½ cup of mixed raisins and currants if you want to scrupulously follow the original recipe.

Note: This recipe is halved from the original.

Source: "Efficient Housekeeping" By Laura A. Kirkman, Fort Worth (Texas) Star-Telegram morning edition p. 10, November 24 1921

If we look at the ingredients, we can see that this is not a sweet dessert item like the cinnamon rolls of today are. These look more like you would serve them with tea. I think the yeast eats the tiny allotment of sugar in the dough long before baking. (Also, a question for my fellow Americans: Did you know that most of the world thinks cinnamon rolls are a dessert?) Out of curiosity, I went to see if these made it into Laura Kirkman's only book (that I know of): Bridge Refreshments. These buns seem appropriately dainty for a ladylike bridge afternoon. However, they did not make it into the book.

It's funny how things have changed as the pandemic rolls relentlessly on. You may recall that we started saving beef fat to in the name of economizing. I even brought cow cookies to the last family gathering because beef fat was cheaper than butter (and if the recipients noticed anything different, they were too restrained to say anything). But now, that little spoonful of melted beef fat may be the costliest part of this recipe.


Meanwhile, we looked ahead in the recipe directions and saw that we need to turn the just-cracked egg into a beaten one. Even though a dishwasher lives in this house, I saw no need to soil a clean bowl when I could use the measuring cup that already needed cleaning.


Laura Kirkman called her newspaper column "Efficient Housekeeping," and the cinnamon buns were certainly living up to the premise. Excluding the time we spent finding where the flour and cooking spray were hiding, we had the dough mixed together in less time than it takes to explain to people that these will look nothing like what they hoped for upon hearing "cinnamon buns." 

However, I wish she had given flour measurements. Would if it ruin the recipe if I think a "stiff batter" looks different than she does? The next instruction is even less comprehensible. Telling us to add enough flour to make a "soft dough" is about as helpful telling someone to dress "semi-casual." I interpreted "soft dough" as "capable of holding a shape for a few seconds, but still a little gloppy."


At this point, Laura Kirkman takes us to the peak of efficient housekeeping. Instead of taking the time to make a cozy nest for the bread dough so that the yeast is at its happiest, Laura Kirkman directs that we just leave the dough out on the counter and thus make bread in our sleep! Perhaps the all-day rising time compensates for the parsimonious allotment of yeast in this recipe. Leaving the dough out all day gives that tiny pinch of the yeast a long time to breed in the bread, thus allowing us to economically save most of our yeast granules for another day. Also, the longer bread rises, the more flavorful it is. Some people who are seriously into baking will special-order extra-slow-rising yeast for this very reason.

In full disclosure, we left this out over-day instead of overnight. The temperature hit an unspeakable 112° (that's 45° for our Celsius friends). Even those aggressively perky people who chirp "Don't worry, it's a dry heat!" have quietly given up and gone indoors like the rest of us. Not wanting to be behind the oven that broke the power grid, we made the buns wait until long after they were ready to bake. 

The dough sat out all day, filling the kitchen with the smell of bread to come. Every time you approached that part of the house, the subtle yet persistent smell of yeast wafted to you. After always lovingly making a warm and draft-free nest for dough to rise, I didn't know if the yeast could do its yeasty business if we just left it exposed on the kitchen counter all day. But then again, you sometimes hear about discarded pizza dough rising right out of the dumpster behind the restaurant-- which suggests that perhaps yeast is more adaptable than I thought.


When the temperature outside finally got cool enough for the air conditioner to keep up, the dough was past its prime. I have made all manner of failed breads: tooth-breaking doorstops, gummy crackers that were meant to be neither gummy nor crackers, tough leathery bread that extracted tooth fillings, and any other type of flour-based embarrassment you can think of. Today we add a new bread failure to the list: overfermented dough. In baking class, we were warned about overfermentation caused by leaving bread to rise for too long, but I have never seen or tasted such a thing. 

But after the weather was finally cool enough to bake the bread without imperiling the electricity, the dough had a subtly bitter taste to it. I don't mean a few nuanced flavor notes, the bread just tasted wrong, like beer that sat out all night. I decided to bake it anyway because it represented a costly outlay of raisins and a $90 half-tablespoon of beef fat.

Laura Kirkman only gives three words about how to shape this dough: "Form into buns." If you, the lady newsreader of 1921, don't know how to form a bun, you must have skipped home economics class and ignored your mother's kitchen lessons. In our era where cookbooks give detailed instructions and photographic illustrations, it's always a mild surprise to see a commercially-published recipe with such vague instructions. Those of you trying this at home should know that you will need a generous amount of flour on the countertop to shape these. My first, underfloured attempt looked like this:


I don't mind that Laura A. Kirkman didn't give us a bun-forming tutorial, but I wish she had told us how big to make the buns if she was going to give us an exact-to-the-minute baking time. What if my buns are larger than hers and thus still doughy in the middle after the specified 35 minutes? What if my buns are too puny and turn into dried-out bread pebbles while I'm outside beating the rugs or getting arms-deep in the washtub?

Laura Kirkman tells us to place the buns "side by side" in the pan, presumably to force them to rise upward instead of outward. Not only did I do as she directs, but I had to force them to all fit in the pan. I thought perhaps shoving too many buns into too small a pan is bad baking practice, but they looked almost commercially perfect after they rose.


The glaze for the top is devoid of measurements, but Laura Kirkman does say to make "a paste." So, I mixed the ingredients to be just thin enough to spread onto the buns without squishing and deflating them. As another recipe note, I added a tiny pinch of salt because the topping tasted rather bland. It really brought out the flavor and turned it into a bowl of delicious cinnamon-buttery goodness. Unsalted butter was still a rarity when Laura Kirkman was writing "Efficient Housekeeping" columns, so I don't think I was correcting a flaw in her recipe so much as adapting it to the contents of a refrigerator from this millennium.


I also used only half of the glaze I made because it looked like any more would boil over and char on the oven floor. This proved incorrect; the cinnamon mixture soaked into the rolls as they baked and left (as promised) a glaze that formed as the heat dissolved the sugar. I should have just dumped all of the glaze on them so it could soak into the rolls and imbue them with even more cinnamon flavor. Since we now know that the buns absorb the glaze like little cinnamon sponges, we will be more generous with it next time. I should also note that the original recipe makes a lot of cinnamon buns. This pan is only a half-batch.


At the point where we were about to finally taste the (possibly overfermented) cinnamon buns, we got a rude interruption of the recipe test. Others in the house had reached the end of a more stressful day than mine, and therefore our supper plans were replaced with pizza delivery. To the ruination of an impartial tasting of the cinnamon buns published in "Efficient Housekeeping," an order of prefabricated cinnamon rolls was also obtained.

Laura Kirkman can't compete with these.


With that said, these very good. But even if you gob on the white icing, these are not cinnamon rolls, nor are they trying to be. They tasted almost exactly like the panettones that show up in drugstores every year- except with raisins instead of those waxy fruit pieces. These would be right at home with a pot of tea. 


With that said, this is not a sweet bread at all. You may have noticed that we're barely adding enough sugar to keep the yeast in the dough happy and lively. In this millennium, it's a very out-of-our-time experience to eat bread that is glazed on top like a dessert, but it is not a dessert. I almost want to say this recipe seems to come from a different country altogether, but it was published in a syndicated American newspaper column.

Everyone liked them, though it was mentioned that I ought to pour cinnamon icing on them after baking. As someone else phrased it, "The bread is a perfect foundation but it needs a little more on top." This is the first time anyone has specifically requested an icing by name. What could I do but give in to the demands of the adoring public? 

That mushroom-looking spillover is cute, but I'll probably use a bigger pan next time.

But as good as these are, they are very rich. One or two of them will sate you. So, while these were delicious, we had a lot of leftovers- and these go stale very quickly. After slicing the buns horizontally, they made some fantastic French toast. Purely for the heck of it (and because the pan was already hot), I went ahead and dumped the slurry of batter and crumbled bread onto the pan with it. It turned into a pretty decent pancake.


 I know a lot of us say "this bread makes good French toast" when we're trying to come up with a way to avoid putting rock-hard bread into the trash can, but Laura Kirkman's cinnamon buns have the perfect flavor and texture for this. 


With that said, this is a delicious bread recipe. You know it's good because I've already made it twice.

Tuesday, August 2, 2022

Sugar Cookies: or, Nutmeg is the key to antiquing any recipe

You should know that the recipe printed immediately below this one is "frizzled dried beef."

Helping the Homemaker, Marian Manners, Fort Worth (Texas) Star-Telegram morning edition p. 5, October 28 1933

Sugar Cookies
⅓ c butter
¾ c sugar
1 egg
1½ tbsp (or 4½ tsp) cream
½ tsp nutmeg
½ tsp vanilla
⅛ tsp salt (or a small pinch)
2 c flour
½ tsp baking powder

Cream the butter and sugar until light. Add egg, vanilla, and cream, beat well. Add the rest of the ingredients, mixing lightly. Roll the dough into small balls, and press each one flat in your hands. Place on greased plates. Chill the cookies thoroughly before baking.
When ready to bake, heat oven to 350° Have greased cookie sheets ready.
Set the cookies about three inches apart on the baking sheets. Bake 12 minutes, or until slightly golden on the bottom.
This recipe is halved from the original. If you double it back to the original amounts, beat the eggs in one at a time.

Note: If desired, you can set aside about 1 or 2 tablespoons of sugar. Put this in a spice or coffee grinder with the nutmeg until all is a fine powder. Then put it back with the rest of the sugar before making the cookies.

Source: Helping the Homemaker, Marian Manners, Fort Worth (Texas) Star-Telegram morning edition p. 5, October 28 1933

I always found the name "sugar cookies" to be very nondescript. Don't (almost) all cookies have sugar? Calling these "sugar cookies" is like calling a recipe "flour cake" or "sugar candy." But today's cookies have another ingredient that almost automatically dates this recipe to well before the turn of the millennium:


You just don't see nutmeg in latter-day recipes unless you're making something heavily spiced. The nutmeg we purchased was as coarse as coffee grounds, so we decided to use power tools to turn it into a nice, grit-free powder.


I'm sure "Helping the Homemaker" was not aimed at the sort of homemaker who could afford an electric mixer in 1933, but if I was a competent homemaker I would have remembered to soften the butter. Since we live in a time when mixers turn up in thrift shops at prices that don't require a lady to convince her husband that the monthly payment is worth it (especially since we presumably would already be sending Singer a monthly payment for the sewing machine), I just let the mixer bash the cold, hard butter pieces around until they gave in.

Now, we move on to the cream. We don't keep cream on hand from which to draw the occasional culinary spoonful. And since milk is homogenized nowadays, we can't just carefully pour cream off the top of it like someone presumably would in 1933. So, the last time we bought cream I froze a tablespoon of it away for this recipe. There is some online dispute about whether freezing cream is advisable. Many people in various forums and comment threads get very anguished at the thought. But, I figured such a small amount of freezer-ruined cream would not be the downfall of this recipe. Did you know that when frozen cream melts, it turns into curds and lumps?


I decided to quietly hope that the unexpected cottage cheese would dissolve into the cookie dough. After adding the egg and then letting everything mix for perhaps far too long because I like watching the bowl spin, we still had little curdules that looked like they might never go away. I usually don't fret over this. When we only have half the ingredients mixed together, you're going to have a sweet sludge instead of a cookie dough. Besides, most miscellaneous tiny lumps seem to dissipate when you add the flour. Our lumpy cream-curd soup did taste really good, though.

Moving on to other ingredients, I think grinding the nutmeg into an extra-fine powder helped release the flavor and disperse it throughout the dough. It also eliminates spice grit and prevents unnerving-looking dark flecks that make your cookies look like you accidentally knocked the pepper shaker into the mixing bowl.

After we've gotten the flour mixed in, the instructions tell us to chill the dough and then break off small chunks of it to bake. No doubt this is the perfect way to make these cookies if you are a busy homemaker and have a million other things to do, but we at A Book of Cookrye decided to make them look a little nicer and neater. The recipe claims to yield thirty cookies, which means we should get fifteen since we halved it.


Because I suspected this dough would become rock-hard in the refrigerator, I shaped the cookies before baking them. To keep it simple, I rolled them into balls and then flattened them with my hands. This cookie dough had the same consistency as Play-Doh, which made me wonder why we're supposed to chill it first. Usually you chill cookie dough if it's a bit drippy at room temperature, lest it melt into a hot dough puddle while baking. But I wasn't going to argue with "Helping the Homemaker." They're the ones who got a newspaper distribution deal with their recipes.

"Helping the Homemaker" tells us to bake these for 12 minutes in a moderate oven. How can they give us such precise down-to-the-minute baking times? I know this recipe is from 1933 when most of us could only dream of an oven with its own thermostat and temperature dial, so I'm not mad about the relatively unspecific instruction to bake in a "moderate oven." But since giving an exact oven temperature would alienate most of the homemakers who are seeking help on the Fort Worth Star-Telegram's women's page, the recipe writers could have at least helped a homemaker by telling us how the cookies should look when they are done. Are they supposed to be golden on top, or remain the same color? Are they supposed to puff up and then fall a bit? Are they baked as soon as they stop spreading?


I have an unfortunate history of baking cookies far too long because I can't trust that they're done. With that in mind, I decided to prevent dried-out disappointment by removing them from the oven at twelve minutes sharp, regardless of how underbaked they appeared. The cookies looked a little pasty, but I thought perhaps they're meant to. After all, the Reese's chip cookies looked raw after baking as specified, and they turned out perfect after cooling down. 

Then I broke a sacrificial test cookie open and found a doughy, almost-baked interior. So, I put them back into the oven until an ever-so-slightly toasty smell came from the oven. They may look unchanged on top, but they were just a teensy bit golden underneath.


Maybe my oven wasn't the right type of moderate. I've always thought "moderate means 350°" ever since I saw this chart in the Dormeyer book:

Preheat oven to the temperature required before placing the cake or pie into it; the amount of heat necessary is stated in each recipe.
A slow oven requires heat of 250-350 degrees F. A moderate oven requires heat of 350-400 degrees F. A hot oven requires heat of 400-450 degrees F. A very hot oven requires heat of 450-500 degrees F.
All Electric-Mix Recipes Prepared Specially for your Dormeyer Mixer, 1946

Perhaps for cookies, I should have twitched the oven dial up to 375° or so. Since cookies are so small, you can bake them hotter than big things like layer cakes. But since I didn't think to bake these a bit hotter, extending the baking time made them perfect. Or, if they were not perfect, they at least were baked properly.

I really did like these cookies, and so did everyone else. One person ate a cookie, paused for a really long time, then finally came up with the words "Yeah these are really good."

I liked the subtle addition of nutmeg. It was just enough to add a bit of extra flavor, but not so much that it announced itself in a blaze of pumpkin-spice glory. If you want to make any recipe taste like you got it from your (great-)grandmother, apparently all you have to do is add a soupçon of nutmeg.

The cookies were really soft, but firm enough to just drop into a cookie jar without crumbling. This is a theme I've noticed with cookie recipes of a certain age: apparently well-stocked cookie jars were a real thing and not just the stuff of rose-tinted fiction. A lot of cookies today are either so soft they turn to a pulp if you squeeze them too hard or so crispy they shatter into crumbs if you shake the package. But a lot of cookie recipes that I've clipped from old sources, whether crispy or soft, are sturdy enough to just drop into a bag and give away-- or dump into a cookie jar without worrying about the ones on the bottom getting squished and crumbled under the weight of more cookies on top.


So, I really recommend this recipe. If you do not keep cream in your icebox (or electric refrigerator) and do not wish to purchase a carton of it just to use a spoonful or two in a cookie recipe, why not mask up and go to the nearest coffee shop? They might be so bemused at the request for one table of cream to go that they may let you just have it.

A few weeks later, someone did me a very big automotive favor, and I knew just the recipe to make in thanks. However, since we had no more cream, I substituted in a spoonful of Irish cream from the Saint Patcaken. While the raw cookie dough tasted like the liquor, the flavor almost completely baked out of the cookies. What tiny whiskey flavor remained wafted out of the cookies overnight; you couldn't tell the difference unless someone told you beforehand that the cookie dough was lightly spiked. I put a dozen cookies on a paper plate which I then put in a gallon-sized bag (this kind of packaging ensures that no one will feel even slightly guilty about returning the container). The answer: "I'll help you next time if you bring more of those cookies!"


Wednesday, July 20, 2022

Chocolate Chiffon Pie: or, Payment for Services Rendered

We at A Book of Cookrye are no strangers to paying for services with the fruits of the oven. Heck, I may have only graduated high school because I kept bringing in pastries when teachers were finalizing grades. When one of the people in the house gave us an automotive assist, I asked what his favorite pie was. The answer was "something with chocolate." 
I thought to myself that I own a whole book of chocolate recipes in which the perfect pie waited to be made, even if I don't have the book at hand. But with great pleasure, I can tell you that my dearly beloved chocolate book, Maida Heatter's Book of Great Chocolate Desserts, is available for free on the Internet Archive! Granted, you have to "borrow" their copy for one hour at a time instead of just opening the book page you want and propping your laptop up in the kitchen while you cook. But one hour is plenty of time to do some recreational recipe browsing and write down the one you have in mind.

It may be daunting to see a recipe that runs for three pages, but that's because Maida Heatter writes out her instructions in very fine detail. Her recipes read like she's patiently explaining everything to someone who's nervously making their first ever batch of cookies. You get the idea that even if your most ambitious baking attempt so far was a birthday cake made from a box of mix, you could easily follow her thorough instructions and make the seven-layer Hungarian torte regardless of whether you've seen the word torte before.

Chocolate Chiffon Pie
1 baked 9-inch pie shell
7 oz semisweet chocolate
1 c milk
1 tbsp (1 envelope) unflavored gelatin
⅔ c sugar
2 eggs, separated
1 tsp dry instant coffee (optional)
1½ c heavy cream
Pinch of salt

If you do not have an ice maker or a lot of ice in your freezer, refrigerate a large bowl of water the night before (or at least a few hours ahead).
Finely chop or grind the chocolate, and set it aside.
Place the milk in the top of a large double boiler. Sprinkle the gelatin on it and leave for 2 or 3 minutes. Add ⅓ cup of the sugar (reserve remaining ⅓ cup), the yolks, and the chocolate. Stir to mix thoroughly. Place over hot water over medium heat and stir constantly until the chocolate, sugar, and gelatin are dissolved. Do not overcook or the yolks will curdle. Add the instant coffee and stir to dissolve. Remove from the hot water.
Place the top of the double boiler in a large bowl of ice water (or the water you refrigerated earlier). Stir it until it reaches room temperature. Remove from the water (but don't pour the water down the sink yet) and set aside.
In a small mixing bowl, beat the egg whites until they have increased in size and started to thicken. On medium speed, while beating, add the remaining ⅓ cup sugar gradually. Then increase speed to high and beat until they barely hold a peak when the beaters are raised, or when the whites are lifted with a rubber spatula. (Do not beat the whites too stiff and dry or it will be difficult to fold them in.) Set them aside. Whip the cream until it barely holds a shape (if it is too stiff it will make the filling heavy). If you beat the egg whites first and the cream after, you can just use the same mixer without even rinsing the beaters. Set aside.
Fold about one third of the chocolate into the egg whites, then fold another third of it into the whipped cream. Then fold the whites and cream into the remaining chocolate. Do not handle the mixture any more Put the chocolate back into the ice water and stir constantly with a rubber spatula, scraping around the bottom and sides of the bowl, until the mixture barely starts to thicken. You want to have the chocolate, egg whites, and cream all at the same consistency. If the chocolate overthickens and begins to set and congeal on you, you can put it in the microwave for 10 seconds at a time, stirring well after every interval.
Pour the pie filling into the crust. Put the pie extra pie filling in the refrigerator until set. Any extra pie filling is very nice poured into cute little glasses or bowls and then refrigerated along with the pie.
Serve with whipped cream on top.

Source: Maida Heatter's Book of Great Chocolate Desserts, Maida Heatter, 1974

Maida Heatter sold me on the recipe with the first sentence: "This is a beautiful and important pie." That makes the pie sound perfect as compensation for services rendered, don't you think? The last time we made a gelatin pie that involved folding whipped things into the filling, it was unnervingly bulletproof. But this recipe is from the most sacred book of chocolate, and therefore more likely to be edible. I've previously mentioned that I asked a friend of mine who makes duct tape art to make a cover for this that says THE HOLY BIBLE.

The brown textured tape is meant to remind one of swirls of delicious brownie batter.

I've never had a recipe from this book go wrong. So I wasn't unnerved when the gelatin turned into this wrinkled skin on top of the milk when I scattered it as directed.


We don't have a double boiler, though I've been meaning to check the thrift shops for some decent stainless steel bowls you can just set on a pot. But we do have this diffusion thing, which I've often used under vats of spaghetti sauce.

 I actually think this part of the recipe would be perfect for doing in a microwave, but I wasn't going to risk all these ingredients for that kind of experimentation. But I think the microwave is ideal for a lot of delicate saucepan operations that would easily burn. For example, these days I always scald milk in the microwave because it simply cannot scorch onto the sides of the bowl like it would in a pot. (It does boil up a bit high though, so one needs a large bowl to prevent a mess.) 

But for now, the stovetop diffuser would have to suffice.


I haven't read Maida Heatter's recipes in a while, and sometimes her writing style sometimes seems a bit persnickety. She begins with "The chocolate must be finely ground." Like, she's not telling you, the cook, to grind up the chocolate. She just imperiously decrees in the first sentence that someone had better come up with a grinder before proceeding with the recipe. I did not do that. Yes, we have a food processor, but it's a bit of a dishwasher primadonna. All the pieces of it demand a lot of rack space. I just used chocolate chips instead.


I thought the chocolate chips were small enough to easily melt, but maybe I should have listened when Maida Heatter said I should grind them. They soon coalesced into one chocolate wad. I feared that the egg yolks would be long scrambled before the big blobs of chocolate melted.


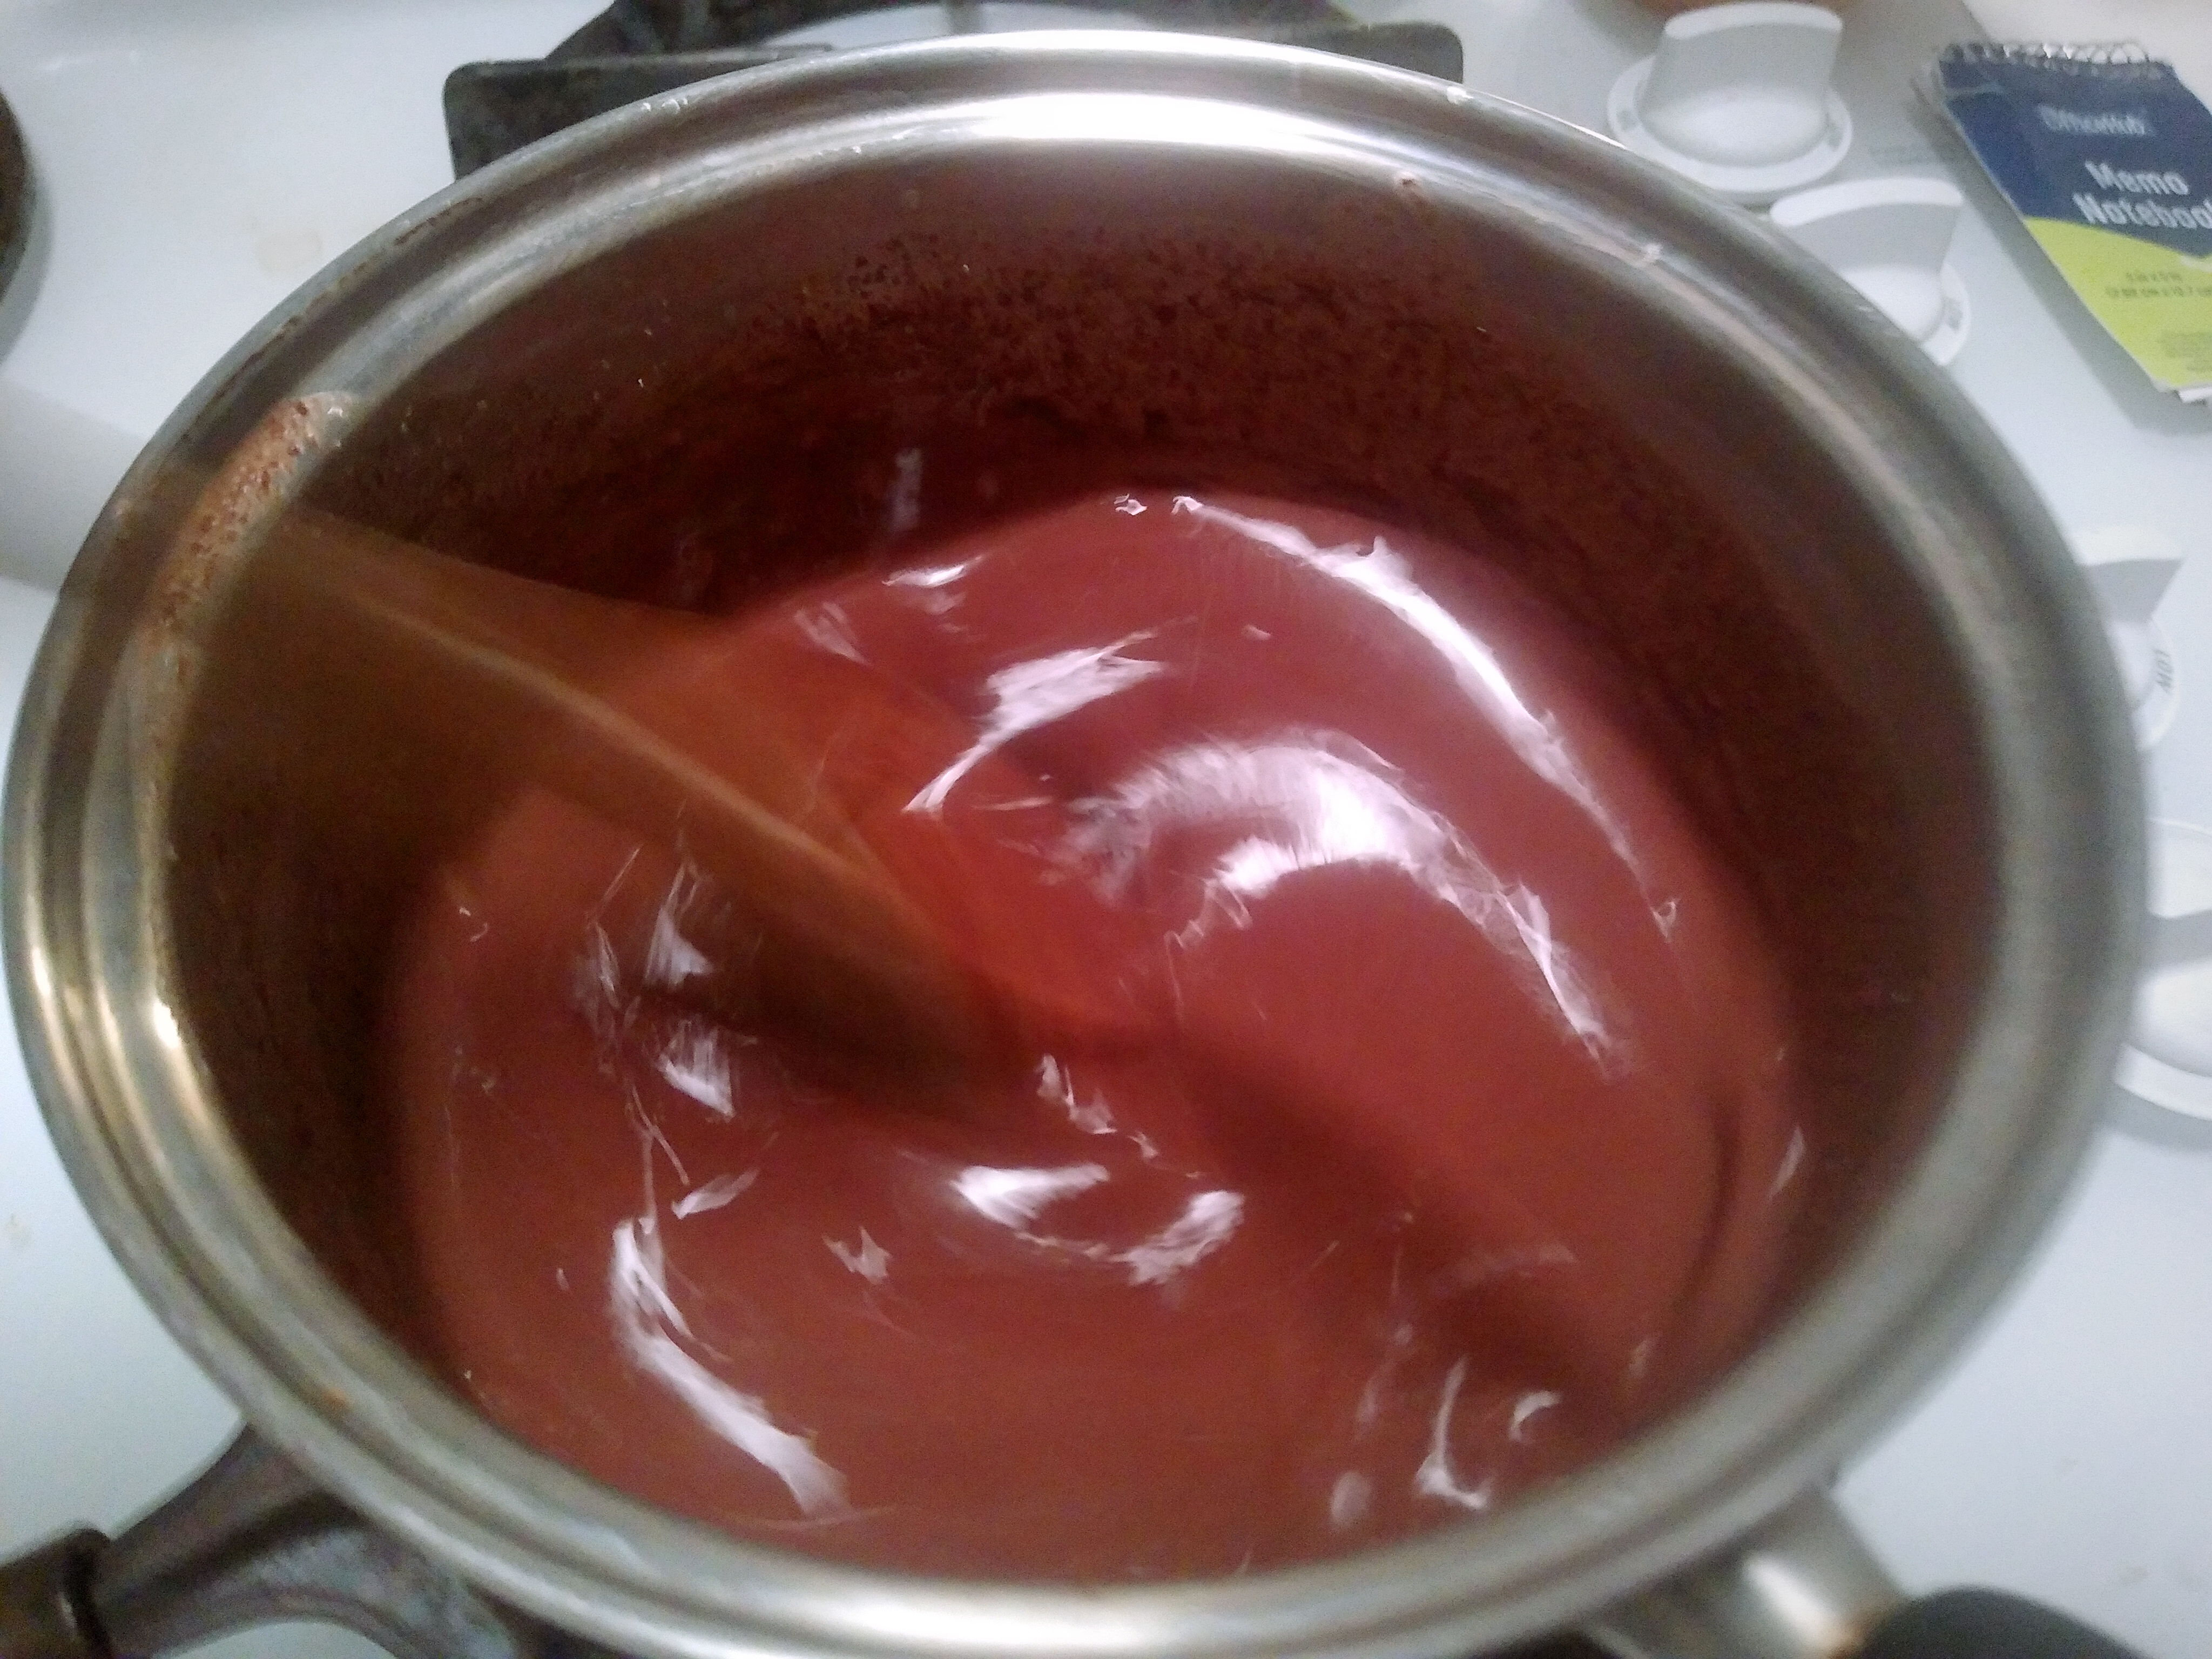
But fortunately, with a lot of patience (and while turning the burner as low as it gets) we got the chocolate to melt. This yielded us a big pot of something about halfway between a really rich hot chocolate and hot fudge sauce.


Sometimes I read recipes like this and realize that perhaps I don't have the kitchen that the recipe writer thought I would. The book tells us to put the pot of chocolate into ice water. We do not have an ice maker in this house (it seems that wherever I go, the water line that's supposed to go to the refrigerator has problems that would involve tearing out the kitchen floor to fix), and I did not want to purchase ice just to deliberately melt it. The best I could come up was a basin of tap water. Had I planned ahead, I could have set the basin in the refrigerator a few hours before beginning the recipe. Unfortunately for my iced or chilled water needs, I had only given the recipe a quick skim when I was writing out this week's grocery list. 


As we set the filling aside to cool, we proceed to the beating of the cream and the egg whites. At this point, I have to point out a delightfully blunt turn of phrase on the cream carton. In English, it says "heavy whipping cream." In Spanish, it says "extra-fat whipping cream."

I spent a bit too long trying to get the egg whites to beat up into at least semi-peaks. I know the recipe says you want them to barely stand up at all, but these were barely thicker than gravy. An extended beating changed nothing. On the bright side, we discovered that the stand mixer at top speed is so loud you can't talk over it. In other words, if someone else is in the kitchen being inconvenient, you can turn the mixer up to its fastest speed and drown them out.


The recipe confused me at this point, mostly because I thought the whipped cream was supposed to go on top of the pie rather than in it. I had to reread it several times before I figured out where this was going. During that time, the gelatin in the chocolate had turned transformed it from a rich pudding to a slithery chocolate Jello mold.


Apparently one should neither dilly nor dally after getting the chocolate off of the stove. I didn't think we had enough gelatin in this to set it at room temperature, but I already knew how to fix it. As we have discovered when making all our lovely fruit "salads," you can microwave the gelatin for ten seconds at a time, stirring well every time. Eventually, it will be un-set but not melted, and your chocolate chiffon pie can proceed. Just don't tell anyone that you had to use the microwave to undo your gelatin failures. Or, if you're like me, proudly tell everyone how you averted disaster with the same machine you used to reheat last night's spaghetti. Every good dish benefits from an unsolicited speech about how you nearly ruined it.


Anyway, I hope everyone has all their bowls of mixtures at the same consistency because it's time to mix everything together! First, we dump about a third of our re-melted chocolate stuff into the bowl with the egg whites and try not to swoon over the chocolate stripes that swirl artistically about it.


Second, we put another third the chocolate into the whipped  cream and try not to deflate it too much while folding. Remember, we are not stirring, we are folding. Stirring would deflate the whipped cream. At this point, the intended recipient of the pie came in and tried some of the chocolate that remained in the main bowl. His eyes widened a bit and he simply said ".....whoa." We gave him a heavily loaded spoon to wander off with.


As we got this pie together, we once again faced something that Maida Heatter recipes do a lot: use every bowl in the kitchen. She must have had a commercial dishwasher in her kitchen, perhaps even two of them. As much as I've loved every single one of her recipes that I've tried, the sink fills up quickly when you're cooking from Maida Heatter's Book of Great Chocolate Desserts. Therefore, I suggest you pick a recipe very carefully unless you either have a dishwasher or someone who volunteered to do the dishes for you.


If you follow Maida Heatter's instructions to have the chocolate and both bowls of fluff at the same consistency, you can indeed achieve great heights. The pie filling threatened to overtop the crust, and we still had a smidge extra.

So that we could sample the pie without waiting for the entire massive pie-load of chocolate to firm up, we poured the little bit of extra pie filling into the nearest convenient cup and put it in the refrigerator alongside the main attraction.

And... this pie is exactly as beautiful and important as Maida Heatter promised. It is delicious, chocolatey, and magnificently rich. If you're just making this for the house, you might cut the recipe back and make a smaller pie though. I tried to delicately hint that we should give some away, because this is a lot of chocolate. However, my gentle suggestions to get at least part of this pie out of the house were met with a possessive glare while someone grabbed the pie pan in one hand and a fork in the other.