Wednesday, November 15, 2023

Pumpkin Pie (Made With Carrots): or, Autumn-flavored deception

Today on A Book of Cookrye, we are warping unsuspecting housemates' minds!

These taste just like pumpkin.
Carrot Tarts

      Filling:
⅔ cup cooked and cooled carrots (firmly press and squish them into the measuring cup to measure)*
⅔ cup milk
1 egg
⅓ cup white sugar
2 tsp dark brown sugar
¾ tsp cinnamon
½ tsp cloves
¼ tsp salt
¼ tsp ginger

      Pie crusts:
1 cup flour
⅓ cup butter
pinch salt
Water to form a dough

      To make the crusts:
Make the pie crust dough and form into 1½-inch balls. Let rest in the refrigerator for at least thirty minutes. Then roll each one out and press into a cupcake pan. (You should have at least ten.) Refrigerate the empty tart shells for at least thirty minutes. Then bake at 350° until the just barely start to turn golden.
Allow to cool. Then gently loosen and remove each one, and set it back into the pan. (This ensures that the crusts don't stick to the pan).
      To make the filling:
Heat oven to 375°.
Place the carrots and the milk into a blender, and thoroughly liquefy. Add the egg, and blenderize until completely mixed.
In a medium bowl, mix the sugar, salt, and spices. Be sure to break up any spice-clumps. Then pour in the blenderized carrots, and mix thoroughly. (If you have a large enough blender, you can simply add the sugar and spices and then blenderize everything some more.)
Pour into the pie shells, filling them almost to the top. Bake for 10 minutes. Then reduce the oven temperature to 325° and bake 25 more minutes.
Serve with whipped cream or nuts.

*You can boil or steam the carrots, but I suggest you microwave them instead. Cut them small enough that they fit inside a small bowl, add a spoonful of water, and cover with a wet paper towel. Microwave until fork-tender. Two carrots ended up being exactly the right amount for me, though results will vary depending on carrot size.

Adapted from "Helping the Homemaker" by Louise Bennett Weaver, Fort Worth (Texas) Star-Telegram, October 28 1933 morning edition, p. 5

We at A Book of Cookrye are big fans of Betty Feezor, who had a cooking and housekeeping show in Charlotte, North Carolina from the fifties to the seventies. All of her ideas, recipes, and projects seem so feasible. 

There's not a whole lot of surviving episodes (or at least, very few have been taken out of the television station's archives and put online), but a fair number of short clips are floating around. In choosing her craft projects and recipes, she seemed to always keep in mind that her audience didn't have a lot of time to spend hand-embroidering anything. 

I really like how she doesn't pretend her creations always come out perfect. It's a refreshing change from the TV presenters who cheerfully make it look like you can effortlessly whip up a wedding dress with built-in corset and then hand-paint an impressionist mural on the accent wall in your living room. In the only complete episode of her show currently on YouTube, she brings out a dress she made that turned out too small, and shows how she fixed it.  She ends by saying "So don't despair, there's always a way that you can correct your mistake."

Apparently her show remains fondly remembered decades after it ended. In a recent video montage put up by her TV station, there's a short clip where she introduces her pumpkin pie recipe, saying "When we were first married, my husband and I tried to peel a pumpkin and cook it in little squares- and that's what lots of recipe books tell you to do. But they're so hard to cut. He had to do most of the peeling, and I tried to do some of the cutting and of course cut my hand as well as the pumpkin." She then suggests that you cut the pumpkin in half and bake it cut-side down in a pan of water. That way you only have to make a single cut through the raw pumpkin instead of spending forever hacking it into small pieces.

After telling us how to cook a pumpkin without the need for a husband or a first-aid kit, she goes on to give the advice that inspires today's recipe: "Now, you can use pumpkin, carrots, and squash interchangeably. And unless you tell the people that you're feeding what it is, they probably won't even know."

We unfortunately have a surplus of carrots in the refrigerator. and I was more than willing to turn them into a pie. Instead of getting out a potato masher, I decided to do this the modern way. (As a side note, you can tell I've gotten blissfully used to having a dishwasher because I fearlessly use the blender, food processor, spice grinder, and other appliances that would be a real pain in the pumpkin to wash by hand.)


Of course, substituting carrots for pumpkin is a very old cooking tip. I see it mentioned in cookbooks and household hints from practically every decade, but I have always been a bit skeptical. After all, carrots taste nothing like pumpkin. But this time we saw the the idea from Betty Feezor, who surely wouldn't go on live TV and lie to the greater Charlotte metropolitan statistical area.

And so, I used Louise Bennett Weaver's pumpkin tart recipe (which you may recall that I digitally clipped from the newspaper before the free trial ended) because it turned out so good last time. Because the little pie crusts came out half-cooked when we last saw the recipe, I baked them until they barely started to change color before putting any pie filling in them. This worked just as well as I hoped. Our tarts had crisp, fully-baked crusts.

The pie filling made with carrots was a lot thicker than the same recipe made with pumpkin. Those who saw the previous pumpkin tarts may remember that the pie filling was so watery that I could stir it into iced coffee (Which, assuming you have no reason to be leery of raw eggs, I highly recommend).


Aside from having to first cook and then blenderize the carrots, these were just as easy as the pumpkin tarts that contained actual pumpkin. One merely needs to dump everything into a bowl, stir it for a few seconds, then pour the resulting I-can't-believe-it's-not-pumpkin into the pie shells.


As they baked, our carrot tarts smelled just like pumpkin tarts. They also looked just like pumpkin tarts. And when they were done, they puffed up just like pumpkin tarts.

As the not-pumpkin tarts cooled, they fell back to their previous height. Most of them looked suspiciously perfect, though in full disclosure one or two of them cracked as they slowly deflated. But such aesthetic failures are why we have canned whipped cream.


But the real question, of course, is how did they taste? I served these without telling anyone of my surreptitious use of carrots, and no one suspected a thing. In fact, a few people came back for seconds without suspecting anything fishy about the, ahem, "pumpkin" tarts.

However, great consternation ensued when I told everyone the secret ingredient. Disbelief came first. "You mean these are carrots?" Unexpected dramatics immediately followed. "My entire perception of reality is bending! What even is pumpkin?" But at least if reality was bending, we had whipped cream to put on top.


In conclusion, and I barely believe it despite tasting the evidence, you really can substitute carrots for pumpkin in your pies. No one will know unless you serve the pumpkin and "pumpkin" pies side-by-side--- and even then, they may remain in pumpkin-spice ignorance. The carrots will help you see better, but you will never see that you were deceived.


Monday, October 9, 2023

Tiny Timmies: or, Surprisingly subtle use of pineapple

Today on A Book of Cookrye, we are once again trusting recipes from readers! This one comes from Freezy, who has previously given us the delicious Wacky Cake and the disastrous banana "pancakes."

Tiny Timmies
1 small can (8-9 oz) crushed pineapple (preferably canned in syrup, but juice also works)
½ cup butter
1 cup packed light brown sugar (dark works too)
1 egg
2 tsp baking powder
¼ teaspoon salt
2 cups flour
6 oz (1 cup) butterscotch chips
3 oz (¾ cup) walnuts or pecans, crushed
Optional candied cherries for a garnish (and if you really wanna make 'em look pineapple upside-downy)

Heat oven to 375°. Have greased or lined cookie sheets ready.
Drain the pineapple, saving 3 tablespoons of the juice. Mix flour and baking powder, set aside. Cream the butter and sugar. Add the egg, beat well. After beating the egg into the butter, add the juice (same way you'd add vanilla in another recipe). Then add the flour, beating just until blended. Mix in the chips, pineapple, and nuts last.
Drop by the spoonful onto a greased or lined baking sheet. If desired, lightly spritz them with cooking spray and pat them flat. (The cooking spray prevents the dough from sticking to your fingers.)
Bake for 10-12 minutes.
When they're done, if you're using cherries, top each with a candied cherry when they're hot right from the oven before letting them cool.

Source: The Cookie Book by Eva Moore, 1973, via Freezy

To begin with, we start with a small can of crushed pineapple. To my great dismay (and I do mean my great dismay), we found precisely zero store-brand cans of crushed pineapple. I had a serious argument with myself in the canned fruit aisle, asking whether I could morally justify purchasing name-brand pineapple or if I should send the recipe on to someone else.


Freezy wrote to "prepare in the usual fashion," which these days involves using high-wattage motors! (As a bonus, the bowl is microwave-safe, so it doesn't matter that I never remember to soften the butter.)


The recipe begins with the always-delicious union of brown sugar and butter- with the addition of pineapple juice. Upon taste-testing it with an unnecessarily large spoon, The pineapple juice and brown sugar in the resulting mixture tasted a lot like the top of a pineapple upside-down cake. It was a bit saltier than I would have liked, but I figured the rest of the ingredients would dilute the salt until all was happily balanced.


At this point, things take a sharp turn towards Hawaiian! (As a reminder: in the world of processed foods, "Hawaiian" means "contains canned pineapple.") Our cookie dough looked like we went to one of those priced-by-the-pound frozen yogurt places that have topping buffets. You know, the ones where you can cover your (not-quite) ice cream in a mountain of gummy bears, chocolate chips, and crushed M&Ms. 

I should note that while the recipe calls for "walnuts or pecans," I don't believe in walnuts. They always taste rancid, and ruin everything you put them in. (I've heard that they're very good right off the tree, but I don't have one around here to find out.) We used pecans instead. They're more expensive, but which costs more: higher-priced nuts, or throwing out an entire batch of cookies because they taste like walnuts? (Don't forget the cost of running the oven, and also the energy required for the house's air conditioning to counteract the oven heat.)


The dough tasted, of course, absolutely fantastic. I think butterscotch chips are to cookies what cream cheese icing is to cakes. They can fix anything that went wrong. Butterscotch chips will magically solve your failures, up to and possibly including using plaster of Paris instead of flour.

But even if you ignore how butterscotch chips can get you out of all your baking failures, all the things in the cookie dough harmonized very well with each other. I argue that the trick to this recipe's success avoiding walnuts. All this time I thought I hated nuts in cookies, but it turns out I simply hate walnuts. And so, we dropped the walnut-free cookies onto the pan and popped them into the oven.


Although cookies spread a little bit, they mostly stayed in the same plop-like shapes in which they landed on the pan. I expected them to flatten a lot since the dough was so sticky, but you just never know how cookies will behave under fire. I decided to flatten remaining ones a little bit before baking them. A quick spritz of cooking spray on top of the cookies made finger-patting them a quick task. The dough didn't stick to my hands at all.

After the first batch of Tiny Timmies was (barely) cool enough to eat, we sampled them. "It's.... a bit salty." someone politely managed. And contrary to my hopes, the recipe's overgenerous allotment of salt had not been diluted by the flour or the nuts. They're not salty enough to be salted-caramel, but they're definitely saltier than they need to be. (I have adjusted for that in the recipe at the top.)

But the saltiness is a small critique. And if you think I am saying the cookies were ruinously brined, this is how much remained of the first batch before the second one was out of the oven.


These cookies were fantastically good. They were just firm enough to be satisfying, but still soft instead of crunchy. The pecans got lightly toasted as the cookies baked, and somehow radiated their flavor throughout the dough. However, I should note that you need to put these into well-sealed containers. Some cookies stay good if you leave them out on a plate for a day or two, but Tiny Timmies do not. Also, you will have a lot of Tiny Timmies.


As an amusing postscript, one person who had already eaten more than a good-sized handful of these looked down with surprise at the cookie in his hand and said "Wait, is that pineapple?" So, this is the second time we can use the phrase "subtle use of pineapple" when describing a recipe. 


Thursday, October 5, 2023

Burger-Onion Shortcake: or, A delicious greasy time capsule

Let's go back to the days when beef was cheap.

'Burger-Onion Shortcake
1 pound lean ground beef*
1 can (1¼ cup) condensed onion soup (undiluted)
Seasonings to taste
1 or 2 tbsp mustard
2 sandwich-sized slices of cheese
1 tbsp flour (optional)

Heat oven to 350°. Grease an ovenproof skillet.
Mix beef with seasonings and a quarter-cup of onion soup.
Shape half the meat into a patty. Place in the pan. Spread a very thin layer of mustard on it. (It's easier to fingerpaint the mustard on than to use a spatula or knife.) Lay a slice of cheese on top. Then spread with a half cup of soup. Make a patty out of the remaining meat, and lay it on top of the first one. Repeat the layers: Spread the meat with mustard, top with cheese, then spread the remaining soup on top.
Bake for 45 minutes. Upon removing it from the oven, cover the pan with foil and allow to rest for 10 minutes.
For onion gravy, remove the meat and then warm the drippings over medium heat. Spoon this on top of servings. If desired, thicken the gravy with flour.

*You want the leanest beef you can get. There's no point in the recipe where you drain off the fat.

Note: Even though stacking the meat like a shortcake is the whole gimmick of the recipe, we do not recommend it. The top layer will slide off anyway. We recommend either making one big patty, or baking the two of them side-by-side.

Source: Mid-Century Menu

This comes to us from Mid-Century Menu, and is more of a time capsule today than it was before anyone outside of medical science had ever heard the word "coronavirus." In those ever-farther-away times, ground beef was (if not exactly cheap) priced more like a weekend treat than a premeditated splurge. Sometimes I can't believe that I once did hamburgers like this.

Amusing before the pandemic, a heart-stopping extravagance today.

Unless prices drastically change in the grocery store, people in the future will be astonished that ordinary people used to spontaneously buy large quantities of ground beef. The idea of casually grilling hamburgers in the park will be as mythical as the days when servants in New England would threaten to quit if their cheapskate employers served lobster more than twice a week.

Anyway, let's look at the recipe. It's called a "burger-onion shortcake." We have previously discussed how America can turn any food into a dessert- such as transforming a traditional Italian pasta dish into "chocolate lasagna." It looks like we have found the rare reverse of that process today.

Here is the surprisingly sparse allotment of ingredients. The canned onion soup was tricky to find. It seems very few people buy any, because it was hidden in the corner of the lowest shelf. I needed a few minutes to spot it. What's worse, there was no store-brand onion soup. I don't know what made me wince harder: purchasing name-brand canned soup, or buying extra-lean ground beef to dump the canned soup into.


I tried and failed to make myself feel better about paying name-brand prices for gelatinous glop. Upon cautiously dipping in a spoon, we found that canned onion soup is actually not too bad. It was very reminiscent of canned cream of celery soup, which I argue is far superior to cream of mushroom for gluing casseroles together.

I paid full price for this.

To repeat, I don't know which extravagance hit me harder, the name-brand soup or the log of extra-lean beef. Either way, this is one of the most expensive mixing bowls we've done in a long time.


As often happens with meatloaf, the mixing spoon was useless. You have to get in there with your hands. The canned soup turned our beef into sticky mess.


Reading ahead in the recipe, we see that after baking we are meant to thicken the pan drippings with flour. So, to economize on dishes, I chose to bake this lovely beefy shortcake in a pan that is equally at home in the oven and on the stovetop. 

As an incidental note, this skillet was part of a pair that I bought so I could give the bigger one away as a wedding present. I should have waited for the fifth anniversary to shop for gifts, because they didn't have one.


Well, having gotten our first sticky slab of beef into the pan, it was time to start making delicious layers of, um, cake! It begins with a big squirt of delicious mustard. Anyone with sense would say this is ridiculous. But for those trying this at home, you should know that it's easier to fingerpaint the mustard onto the shortcake than spoon-spread it. 

Also, this was too much mustard. Use less. You want to barely coat the top, not generously paint it.


And now we get to the only part of this recipe that bears a glancing resemblance to shortcake: putting dairy in the middle. But instead of whipped cream, it's cheese! I probably should have gotten cheddar for period-correctness, but pepper jack was in the fridge. 

Having briefly flirted with normality and cheese, we bring out this recipe's reason for existence: a big mound of name-brand cream-of-onion ooze. We don't have a source for this recipe, but I am willing to bet my beefcake that it was an advertisement for canned soup.


The canned soup was unexpectedly tricky to spread. It kept uprooting my carefully-placed cheese.


Well, that finishes the first layer. We carefully shaped a second beef patty to match the first, or at least tried to. It landed with a THWAP.


The recipe didn't say to put mustard on both beeves, but I did anyway because we already had the mustard measured out and I refuse to donate condiments to the city dump. (We squirted the mustard into a tiny bowl before beginning to avoid getting germy raw-meat hands all over the bottle. Having a dishwasher makes culinary hygiene a breeze.)


And here it is, ready to bake! You'd think we'd be directed to complete our beef shortcake with cheese on top, but the recipe says to crown this with canned soup.


Our kitchen smelled like fast food as the shortcake baked. Unless you noticed the dirty dishes in the sink, you'd have thought I went out for drive-thru instead of baking at the house. The hot cheese, the onions in synthetic soup, and the beef somehow united to smell like the the interior of a car when you've decided that you don't have it in you to cook dinner tonight.

After the baking time elapsed, we opened the oven to find that our beef shortcake had turned into a brown-black pustule floating in canned onion ooze. To my surprise, the soup on top had turned a decent golden brown. But that didn't make our shortcake look any better. 

You will also note that our two layers of meat slid off of each other as they baked.

Again, I bought name-brand soup and extra-lean beef for this.

You might think we are finished, but the recipe ends with "For onion gravy thicken drippings with two tablespoons flour." Before we could do that, I had to get the meat out of the pan. The burger-onion shortcake fell apart. I thought I would lift it out with a wide spatula, but ended up scooping out fragments of beef with a slotted spoon. 

I understand that for many people, their first attempts at grilling hamburgers end up falling apart while they helplessly try to keep the meat from falling through the rack onto the flames below. I did not expect a similar experience with meatloaf.


Moving back to what remained in the pan, this is the first time I have ever tried the old-fashioned practice of making gravy out of pan drippings. I didn't understand why I was supposed to thicken this at all because it looked just fine already. (Or at least, it looked as good as you can expect for canned soup with beef runoff.)


Because I prefer to make recipes as written so that I can blame the writers, I followed the instructions. Our gravy, made as directed, was a brown paste. If we must have gravy with our hamburger shortcake, I think you'd be better off just spooning the drippings out of the pan without modifying them with flour.

See those mounds of brownish ooze on either side of our serving of shortcake? That's supposed to be the gravy. I would have simply served it right out of the pan, but apparently it was too runny for the test kitchen full of professional home economists. Because I followed the recipe's directions, our gravy looks like unfortunate plops of slime.


Our burger-onion shortcake tasted near-exactly like a hamburger from a drive-thru. It seemed like it should have come out of a brown paper bag that had gone translucent with grease.  I think I overdid it with the mustard, but in my defense the recipe didn't give a measurement. I would make this again (if ground beef was like 50% off), but with less cheese and less mustard. Rather than completely covering the layers, one cheese slice on each is enough.

I did not feel compelled to save the gravy.

Wednesday, October 4, 2023

Gumdrop Cookies: or, Little drops of whimsy

I liked the recipe, but not enough to buy the knickknack.

Gumdrop Cookies
2 cups oatmeal
1 cup gumdrops, chopped small
1 cup shredded coconut
1 cup shortening
1 cup brown sugar
1 cup white sugar
1 tsp baking powder
¼ tsp baking soda
½ tsp salt
2 eggs
1 tsp vanilla
2 cups sifted flour

Heat oven to 325°. Have greased cookie sheets ready.
Mix the chopped gumdrops and oatmeal, breaking up all clumps of candy that stick together. Add the coconut (there's no need to mix it in) and set aside.
Cream the shortening, sugars, baking powder, soda, and salt. Beat well. Add eggs one at a time, beating each in well before adding the next. Add the vanilla with one of the eggs. Then beat until light. Mix in the flour. When the dough is mixed, add oatmeal, gumdrops, and coconut.
Roll into small balls, pressing them firmly into shape. Place onto the cookie sheet about 3 or 4 inches apart. Flatten each with a fork.
Bake 10 minutes, or until lightly browned on the edges.

Source: anonymous recipe card

I was recently in a junk store (that's not derisive, they put the word JUNK in huge letters on the roof) because I love looking at the castoffs of consumerism. 

I find it oddly fascinating to see outdated collectibles removed from their display cases and thrown into a bin with an insulting price tag. Sometimes one finds entire binders of baseball cards, carefully tucked into those plastic sleeves by various preteen boys in bygone days, now available for the price of a candy bar. Other times it's limited-edition Bicentennial china, removed from someone's glass-front display case and stacked like unwanted dinner plates at a thrift store. Recently, we saw Beanie Babies for $3.50 each, and thought the price was a bit steep.

Note the perfectly intact, crease-free heart tags (some of which retain their aftermarket hard-plastic tag protectors). Keeping the tags intact was supposed to be crucial to preserving the Beanie Babies' value.

Junk stores are routinely full of "the plates that no one is allowed to use," which is the natural progression after people's long-grown children don't want the china that they were swatted away from all their young lives.

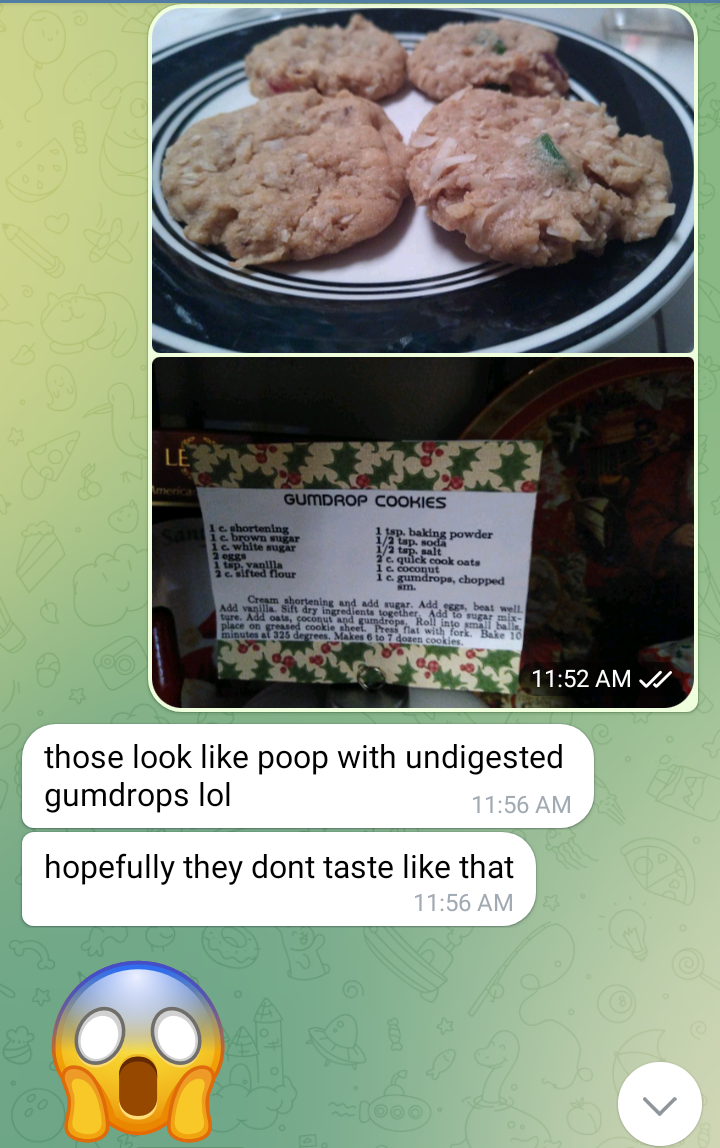
Christmas things inevitably take up a lot of shelf space in junk stores. It's hard to re-home one's surplus Christmas knickknacks. All of the would-be recipients already have several boxes of festive dust-collectors crammed into every spare corner of the house. All of this to say, I didn't want to pay for the novelty Christmas ornament cookie jar, but I thought the recipe that came with it looked neat.

I've seen that big Santa Claus tray (rear right) in many people's houses.

I was getting some annoyed looks from the store owners, who were mildly irked that I was photographing a lot of merchandise that I clearly had no intention of buying. However, I did get legible(ish) photograph of today's recipe.


Gumdrops in cookies! It's hard for me to talk about gumdrop cookies without using the word "whimsical" in every sentence. Anyway, since I don't do Christmas unless strictly forced, I saw no point in waiting for the holiday to make these.

I've only ever gotten gumdrops while trick-or-treating. It never occurred to me that they exist in stores where I can buy them any time of year. I wasn't prepared for a better-than-fun-size box of them to be so cheap.

That's not to say I don't like them. Gumdrops are one of my favorite Halloween candies, and I know I'm not alone. The last time some friends and I had a Halloween post-trick-or-treat candy trade, Dots were the most prized of treats. No one would part with their Dots for anything.

I had to cut up the gumdrops in secret (or at least try to). But gumdrops are surprisingly fragrant when you cut them up, which betrayed my covert candy snipping. When word got out that gumdrops were in the kitchen, everyone wanted some.  No amount of menacingly waving the scissors could keep all of the gumdrops for recipe use.

Gumdrops are also very sticky. I thought I could just jam the scissors in there and have at them as if I was snipping fresh basil, but they glued themselves to the blades. I ended up having to cut each gumdrop one at a time, unsticking each individual piece of snipped candy as I went. The gumdrops also left a surprisingly stubborn residue on the scissors that would not come off until I swirled the blades in boiling water.


The whole time I was cutting up candies, I felt like I was borrowing someone else's family's Christmas tradition. I could imagine Ma (or Grandma) having all the wee ones cut up the gumdrops for the cookies (having plenty of extras on hand so the kids can eat a "few"). It's the high-fructose corn syrup equivalent of those rustic family afternoons where everyone chats in the shade while shelling nuts for peanut brittle.

After we cut apart the gumdrops, all the pieces stuck to each other to make one big multicolored mass. I mixed them with the oats so that the oatmeal dust would coat them and make them come apart. Like breaking up a Christmas argument, this took longer than I thought.


Having gotten the title ingredient ready to bake, we could make the rest of the recipe. At this point, it briefly looks like normal, candy-free cookie dough.


We haven't seen shortening, oatmeal and coconut in a single cookie since the Bonnie Doon Oaties. For those who forgot how that recipe went, I substituted butter for shortening and the cookies turned into a hopeless runny mess. Therefore, I risked no such ingredient swaps today.

If you ignore the gumdrops, this is essentially a recipe for oatmeal cookies. And like all recipes for oatmeal cookies, the dough looked like a hopelessly small amount until we added the oatmeal. And then (as always happens with oatmeal cookies) after all was mixed, it looked like we would spend the whole night slowly getting batches in and out of the oven.


I didn't know what to expect of the gumdrops as they baked. Would they melt? Soften a bit in the oven but regain their firmness after cooling off? Would the gelatin (or whatever gum was used in these) be permanently deactivated in the heat, turning the gumdrops into multicolored spots of syrup? 

It turns out that gumdrops are as oven-resistant as the pan the cookies sat on. They refused to slump in the heat. As the cookies spread, some of the gumdrops stayed up at a jaunty angle.


As the first batch cooled and the second batch baked, we ran into one line of instruction that whoever wrote this omitted. When you're shaping your cookies into balls, you need to firmly press the dough instead of lightly rolling it. I was a lot gentler with the cookie dough for batch #2, and they were not nearly as nice-looking as the first ones.


I should note that as charming as I thought these looked (well, the first batch anyway), others were less than impressed.

Looks like someone just crossed himself off the Christmas cookie list.

I have to admit while I was excited to make the gumdrop cookies, I didn't have high hopes for eating them. I was expecting this to be one of those times when the title ingredient ruins the recipe (lest we forget the black pepper cake). However, the gumdrops were really good in these cookies. 

If you ignore the gumdrops, this is a very good oatmeal cookie recipe. However, when I proposed omitting the multicolored candies next time, I was immediately shouted down. "No! You don't get it! You HAVE to add the gumdrops! The recipe won't work without them!"

I realize this is a culturally loaded comparison, but the cookies tasted like a good fruitcake. Or at least, they taste like what I imagine a good fruitcake to be. (I would wager that gumdrops are better than the cheap candied fruit that appears in most grocery stores during fruitcake season.) And the cookies are small enough to be satisfying but not overwhelming.


One person eyed the plate with annoyance that a box of gumdrops got scissored and ruined. He also had a lot of skepticism at the whole premise of the recipe. However, after a bit of badgering, he tried one. Then without realizing it, he ate half a dozen more and did an adorably inept job of pretending he hadn't.

I tried to give some of the gumdrop cookies away. One person was going out visiting the next day, and I told him to take a heavily-loaded bag of cookies with him. However, the next day there were no cookies left for him to take. 

I also promised we would make the cookies again.